Go Back
Easy Graveyard Cookie Recipe
Ash Tyrrell

Easy Graveyard Cookie Recipe

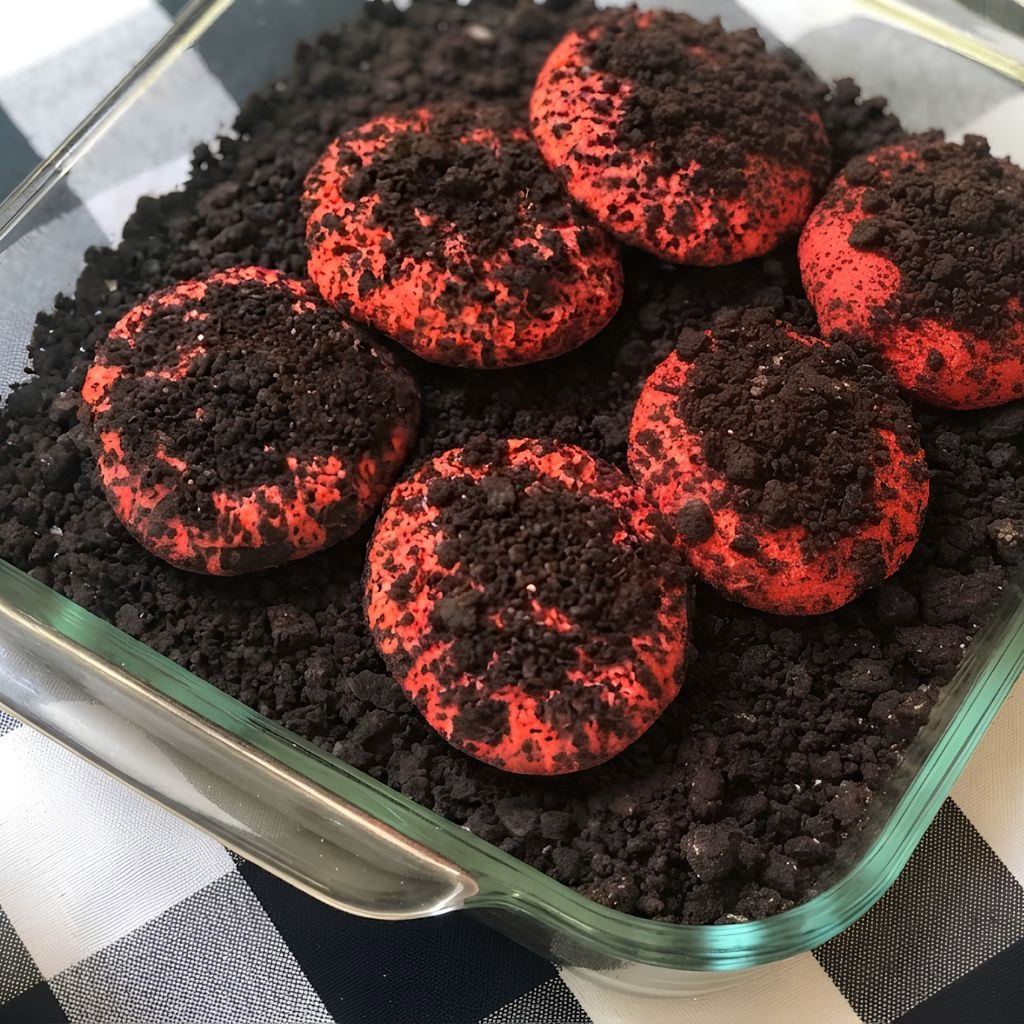
I still remember the first time I pulled a tray of these graveyard cookies out of the oven and my kitchen instantly smelled like a bakery on Halloween night. The blood-red cocoa centers hiding under a crumbly "dirt" coating always get a reaction, whether it's from my kids or from guests at a spooky-season party.
Total Time 55 minutes

Ingredients
  

  • 1 package chocolate sandwich cookie crumbs or crushed Oreos – this is your "graveyard dirt" coating, so don't skip it
  • 1 1/2 cups all-purpose flour – gives the cookie its sturdy chewy base
  • 2 tablespoons unsweetened cocoa powder – adds that deep chocolate note under the red color
  • 1 teaspoon baking powder – helps the cookies puff up slightly instead of baking flat
  • 1/2 teaspoon kosher salt – balances the sweetness and sharpens the chocolate flavor
  • 1/2 teaspoon cinnamon – a subtle warm spice that makes the cookie taste more complex
  • 1 1/4 cups granulated sugar – sweetens the dough and helps with that soft chewy texture
  • 4 tablespoons 1/2 stick unsalted butter, melted – keep it melted, not softened, for the right dough consistency
  • 1/2 teaspoon red gel food coloring – gel works better than liquid for a true "blood red" shade
  • 1 teaspoon vanilla extract – rounds out the flavor and takes the edge off the cocoa
  • 2 large eggs – bind everything together and add richness

Method
 

  1. I start by sifting the flour, cocoa powder, baking powder, salt, and cinnamon into a medium bowl. Sifting matters here because cocoa powder tends to clump, and you don't want cocoa pockets in your finished cookie. This only takes a minute, but it makes the dough much smoother later.
  2. In a separate large bowl, I whisk together the sugar, melted butter, red gel food coloring, vanilla extract, and eggs until the mixture looks fully blended and evenly red. I make sure the butter isn't hot, since warm butter can start cooking the eggs slightly, which throws off the texture.
  3. Next, I fold the dry mixture into the wet mixture just until no streaks of flour remain. I cover the bowl with plastic wrap and refrigerate it for at least 30 minutes. This chilling step firms up the butter again, which keeps the cookies from spreading too thin in the oven.
  4. While the dough chills, I preheat my oven to 375°F and line two baking sheets with parchment paper. Getting the oven fully preheated before the dough goes in helps the cookies set their shape quickly instead of melting out flat on a lukewarm pan.
  5. Once the dough is chilled, I scoop tablespoon-sized portions, roll them into balls, and roll each ball completely in the cookie crumbs. I space them about 3 inches apart on the prepared sheets, since they do spread a little as they bake.
  6. I bake the cookies for 12 to 14 minutes, until they feel just slightly firm when I touch the top. I let them rest on the pan for 5 minutes before moving them to a wire rack to finish cooling completely.
Notes

  • I always use gel food coloring instead of liquid, because liquid coloring can water down the dough and mute the red shade.
  • I never skip the chilling step, even when I'm short on time, since it's the difference between a thick cookie and a flat, greasy one.
  • I like to weigh my dough portions with a small cookie scoop so every cookie bakes evenly and finishes at the same time.
  • I press a few extra crumbs into the tops of the cookies right before baking, since some crumbs fall off during rolling.
  • I keep a close eye on the last batch, since ovens run slightly hot toward the back and cookies can overbake fast in the final minute.