Go Back
Halloween Charcuterie Board Recipe
Ash Tyrrell

Halloween Charcuterie Board Recipe

I put together my first Halloween charcuterie board almost on a whim, and now it's the one thing I'm asked to bring to every party in October. I love that there's zero cooking involved, just cheese, meat, fruit, and a handful of creepy little extras arranged into something that looks way fancier than the effort it actually took.
Prep Time 20 minutes
Servings: 10

Ingredients
  

  • 16 oz sharp cheddar cheese — the bright orange color does most of the Halloween theming for you
  • 8 oz creamy brie cheese round — keep it well chilled if you plan to cut shapes out of it with cutters
  • 8 oz jalapeño pepper jack cheese — adds a spicy contrast next to all the sweeter items on the board
  • 8 oz fresh mozzarella balls — these become spooky "eyeballs" once you add candy eyes on top
  • 4 oz prosciutto — thin slices roll up easily and fill gaps or a skeleton's ribcage beautifully
  • 4 oz Genoa salami — fold or stack the slices to add height and texture around the cheeses
  • 1 cup blackberries — their deep almost-black color instantly reads as spooky on the board
  • 1 cup green grapes — a fresh juicy bite that balances out all the salty cured meat
  • 1 green apple sliced — brush with a little lemon juice so the slices don't brown before serving
  • ½ cup dried apricots — the orange color ties right back into your Halloween palette
  • 1 box everything bagel crackers — sturdy enough to hold up under a slice of cheese
  • 1 box fig and olive crisps — a slightly sweeter cracker option that pairs nicely with brie
  • ½ cup walnuts — toast them lightly beforehand for extra crunch and flavor
  • ½ cup pimento-stuffed green olives — the little red pimento centers add another pop of color
  • ½ cup chocolate covered peanuts — a sweet salty bite that works as a stand-in for candy
  • Halloween decorations like plastic spiders candy eyeballs, and skeleton hands — purely for looks, so add them last

Method
 

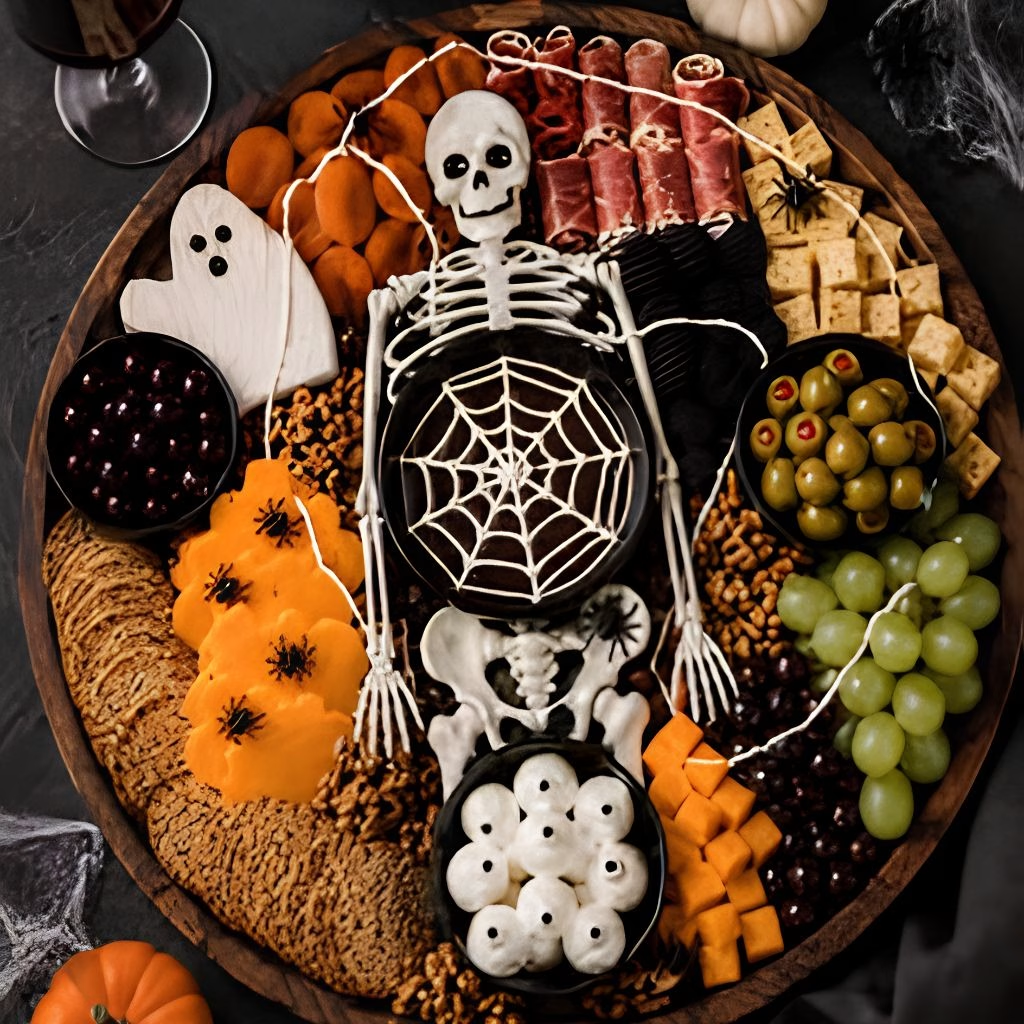
  1. Start by cutting your cheddar and brie into fun shapes using small cookie cutters, saving the scraps to cube up later. Slice your pepper jack into cubes for texture, and top your mozzarella balls with candy eyeballs. Doing this step first keeps everything organized before the board gets crowded.
  2. Set any bowls you're using for olives or nuts down onto your board, along with a skeleton centerpiece if you're using one. Add your cheeses next, spacing them out evenly so you have anchor points to build the rest of the board around.
  3. Roll your prosciutto slices and tuck them into any open sections, then fold or stack your salami nearby to add height. Scatter the blackberries, grapes, apple slices, and dried apricots around the cheeses to bring in color and freshness.
  4. Fan your crackers out in clusters near the cheeses so they're easy to grab, then use nuts, olives, and chocolate covered peanuts to fill in any remaining gaps. This is also the step where I like to tuck in a few smaller bowls for variety.
  5. Finish the board off with plastic spiders, cobwebs, or skeleton hands tucked around the edges for effect. Step back, take a look at the color balance, and adjust anything that looks a little too empty before serving.
Notes

  • I always chill my brie completely before using cookie cutters, otherwise the cheese gets too soft and the shapes fall apart.
  • I like to work from largest to smallest items, since placing bowls and cheeses first makes filling in gaps so much easier.
  • I always slice my cheeses in a mix of ways, cubed, sliced, and crumbled, because the varied texture makes the board look far more abundant.
  • I set my board out about 30 minutes before guests arrive so the cheese can come closer to room temperature, which makes a real difference in flavor.
  • I keep a few extra crackers and napkins nearby, since this board disappears faster than I expect every single time.