Go Back
Halloween Fruit Centerpiece Recipe
Ash Tyrrell

Halloween Fruit Centerpiece Recipe

I make this Halloween fruit centerpiece every single year, and it has become one of my favorite parts of hosting a fall party. I love that it looks like it took hours of work when really it comes together with a little cutting and some playful arranging.
Total Time 30 minutes
Servings: 10

Ingredients
  

  • 4 navel oranges these become your jack-o'-lantern faces so pick ones with flat bottoms so they stand up straight
  • 2 green apples slice right before serving so they don't brown on the table
  • 2 red apples a mix of red and green gives the whole platter better color contrast
  • 1 bunch green grapes perfect for a caterpillar or a cluster of "witch eyes"
  • 2 bananas these work best for ghost shapes but should be sliced last since they brown the fastest
  • 1 pint blueberries great for filling in gaps and adding a deep, spooky color
  • 1 pint strawberries hull them so they sit flat and look tidy on the tray
  • 1 small bag candy eyeballs the easiest way to turn plain fruit into something spooky
  • 2 tablespoons lemon juice toss cut apples and bananas in this to slow down browning
  • 1/4 cup peanut butter or yogurt use this as edible glue to stick the candy eyes on
  • 1 small bunch celery cut into short pieces to use as pumpkin "stems" on the oranges

Method
 

  1. I start by washing every piece of fruit thoroughly and patting it dry with a clean towel. Then I slice the apples and bananas and toss them right away in a bowl with lemon juice and a splash of water. This simple step keeps everything looking fresh instead of turning brown while I'm still arranging the rest of the platter.
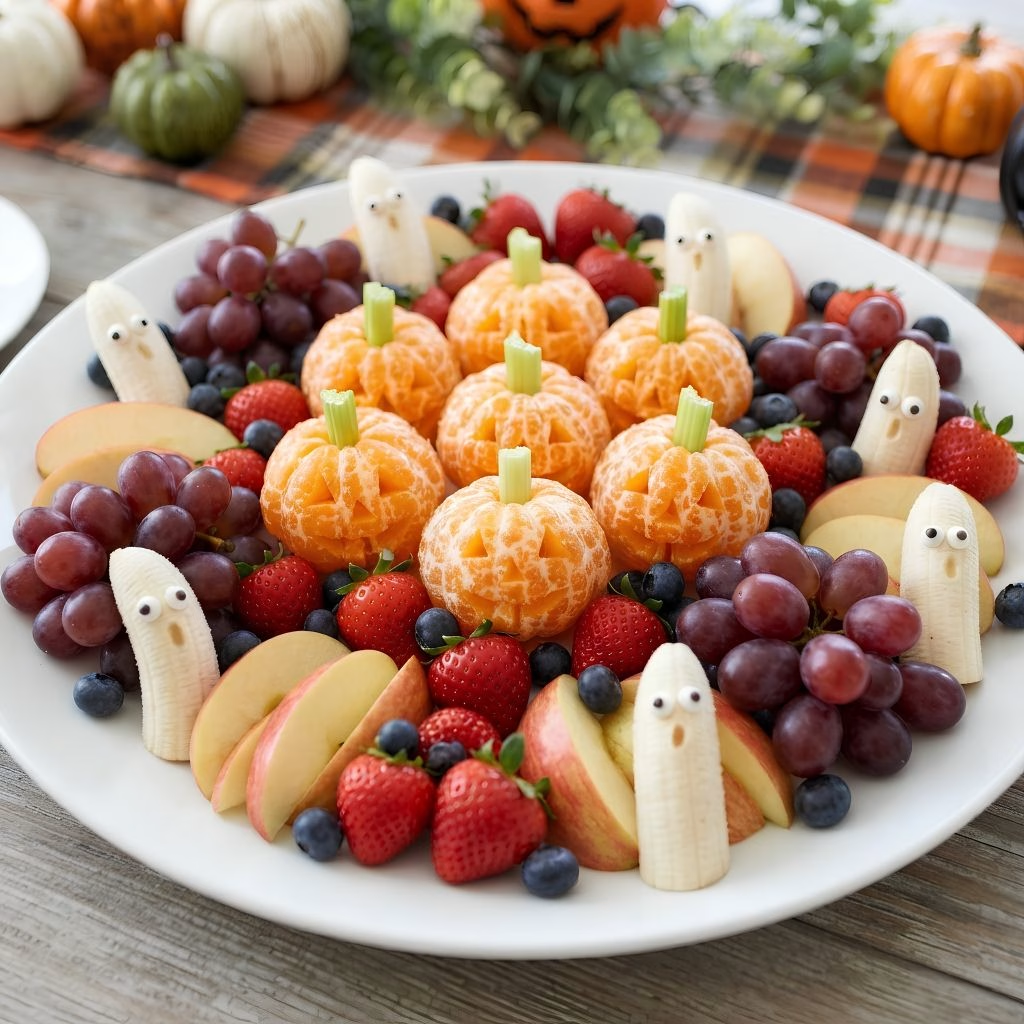
  2. Next, I peel the oranges carefully, keeping them whole so they look like little pumpkins. I use a small paring knife to cut simple jack-o'-lantern faces into one side of each orange, then I tuck a short piece of celery into the top to act as a stem. It's a small detail, but it instantly makes the platter feel festive.
  3. I cut each banana in half lengthwise, then again to make four ghost-shaped quarters. Using a dab of peanut butter or yogurt, I stick two candy eyes onto each piece before setting them aside on wax paper. This step is quick, but I always do it last so the bananas don't sit out too long before serving.
  4. Once every piece is ready, I start building the centerpiece on my largest tray, placing the orange pumpkins toward the center as the focal point. I fill in around them with grapes, strawberries, blueberries, and the sliced apples, grouping colors together so the orange, red, and deep purple pop against each other. I finish by tucking the banana ghosts and any extra candy-eyed fruit into open spots.
  5. I like to pop the finished tray into the fridge for about ten minutes before serving, just long enough for everything to firm up slightly and look its best. This also gives me a moment to step back, check the arrangement, and add any last pieces of fruit where the tray looks a little bare.
Notes

  • I always cut my bananas last, right before guests arrive, since they brown faster than anything else on the tray.
  • I like to chill my grapes and berries ahead of time so the whole platter feels cold and refreshing when it's served.
  • I've found that laying down a bed of lettuce or kale under the fruit gives the tray more height and makes cleanup so much easier.
  • I try to keep a color pattern in mind as I go, alternating orange, purple, and green so the tray doesn't look clumped together.
  • I keep a damp paper towel nearby while arranging, since sticky fingers from the fruit juice can slow me down otherwise.