Go Back
Halloween Peanut Butter Cookies Recipe
Ash Tyrrell

Halloween Peanut Butter Cookies Recipe

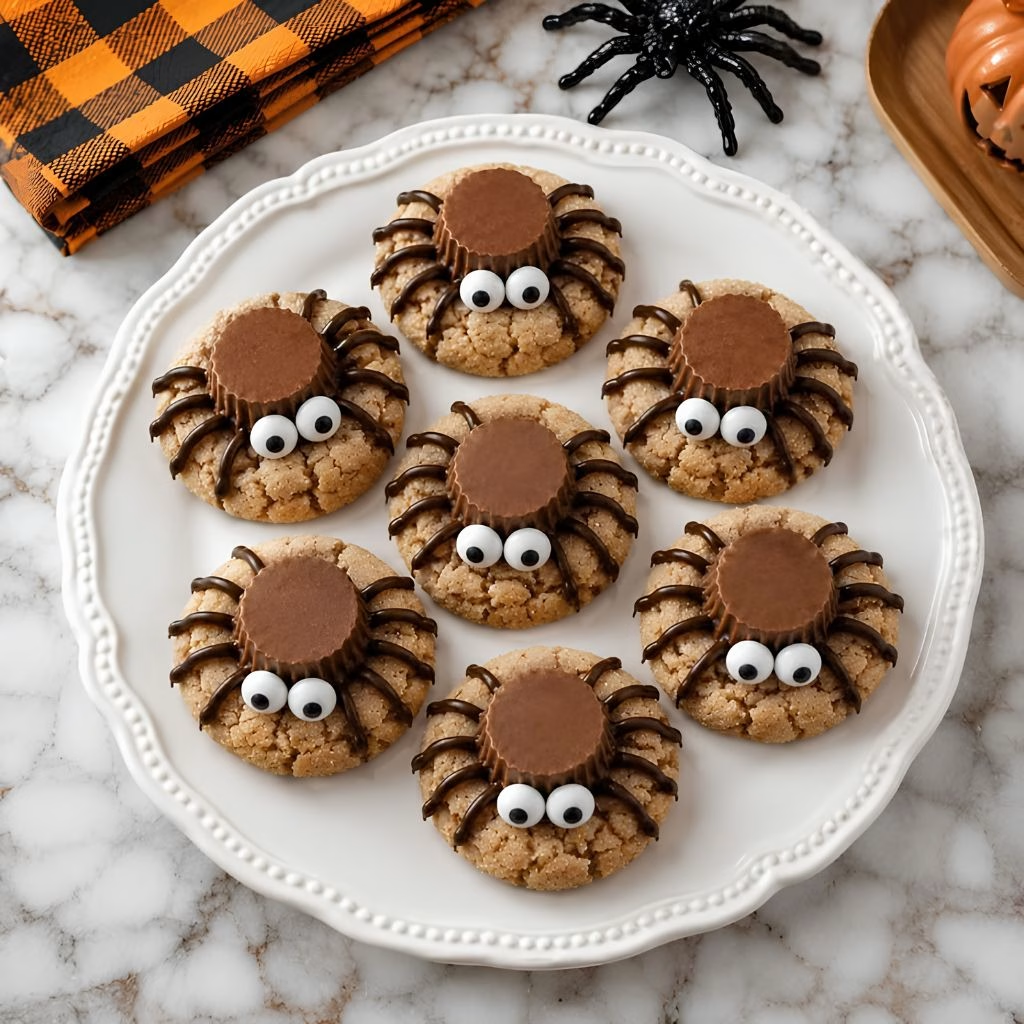
I make these Halloween peanut butter spider cookies every single October, and they disappear faster than any other treat on my dessert table. They start with a soft, chewy peanut butter cookie base, and I finish each one with a mini peanut butter cup, spindly chocolate legs, and a pair of googly candy eyes.
Prep Time 15 minutes
Cook Time 10 minutes

Ingredients
  

  • Unsalted butter softened – this creams up smoothly and gives the cookies a rich, buttery base.
  • Brown sugar – adds moisture and a subtle molasses flavor that keeps the cookies chewy.
  • Granulated sugar – balances the brown sugar and helps the edges turn a light golden color.
  • Creamy peanut butter – I stick to a regular processed peanut butter since natural varieties can make the dough oily.
  • Large egg – binds everything together and helps the cookies hold their shape.
  • Vanilla extract – rounds out the flavor with a warm sweet background note.
  • All-purpose flour – gives the dough enough structure to hold up under the toppings.
  • Baking soda – helps the cookies puff up slightly as they bake.
  • Baking powder – works alongside the baking soda for a soft even rise.
  • Salt – sharpens all the other flavors so the cookie doesn't taste flat.
  • Granulated sugar for rolling – coats the outside of each dough ball for a light, sparkly crunch.
  • Mini peanut butter cups – these sit in the center of each warm cookie and act as the spider's body.
  • Semi-sweet chocolate chips melted – piped into thin legs around each cookie for that spider look.
  • Neutral oil – a small splash thins out the melted chocolate so it pipes smoothly.
  • Candy eyeballs – the finishing touch that gives every spider its personality.

Method
 

  1. I unwrap about two dozen mini peanut butter cups and pop them into the freezer while I preheat my oven to 350°F. Freezing them firms them up so they hold their shape once pressed into a warm cookie. This little trick makes a noticeable difference in how neat the finished spiders look.
  2. In a large bowl, I beat the softened butter with both sugars using an electric mixer until the mixture turns pale, smooth, and fluffy. This usually takes about a minute. Creaming properly here traps air in the dough, which keeps the cookies tender instead of dense.
  3. Next, I mix in the peanut butter, egg, and vanilla extract, beating just until everything is fully incorporated. The dough will look glossy and slightly thick at this point. I always scrape down the sides of the bowl so nothing gets left unmixed.
  4. I add the flour, baking soda, baking powder, and salt directly into the wet mixture, stirring on low speed or by hand with a spatula. I stop as soon as no dry streaks remain, since overmixing can make the cookies tough instead of soft.
  5. Using a small cookie scoop, I portion out tablespoon-sized balls of dough, roll them smooth between my palms, and coat each one in granulated sugar. I space them two to three inches apart on a lined baking sheet and bake for eight to eleven minutes, until the edges just begin to crack.
  6. As soon as the cookies come out of the oven, I press a frozen mini peanut butter cup right into the center of each one. I let them rest on the baking sheet for fifteen to twenty minutes before moving them, since disturbing them too early can cause the candy to sink.
  7. Once the cookies are fully cool, I melt the chocolate chips with a touch of neutral oil in the microwave, stirring every thirty seconds until smooth. I transfer the melted chocolate into a squeeze bottle and pipe four thin legs on each side of every cookie.
  8. Finally, I dab a small amount of melted chocolate onto the back of two candy eyeballs and press them onto each peanut butter cup while the chocolate is still soft. I let everything set completely before serving or stacking the cookies.
Notes

  • I always weigh or scoop my dough balls to the same size, since uneven cookies bake unevenly and some end up over- or under-done.
  • I keep my peanut butter cups in the freezer until the very last second, because a cold candy holds its shape far better on a hot cookie.
  • I pull the cookies out slightly before I think they're done, since they keep cooking on the hot baking sheet for a few extra minutes.
  • I never rush the cooling step, because moving a warm cookie can cause the peanut butter cup to slide right off center.
  • I work with the melted chocolate while it's still warm and glossy, since it firms up fast and gets harder to pipe the longer it sits.