Go Back
Pumpkin Shaped Pancakes Recipe
Ash Tyrrell

Pumpkin Shaped Pancakes Recipe

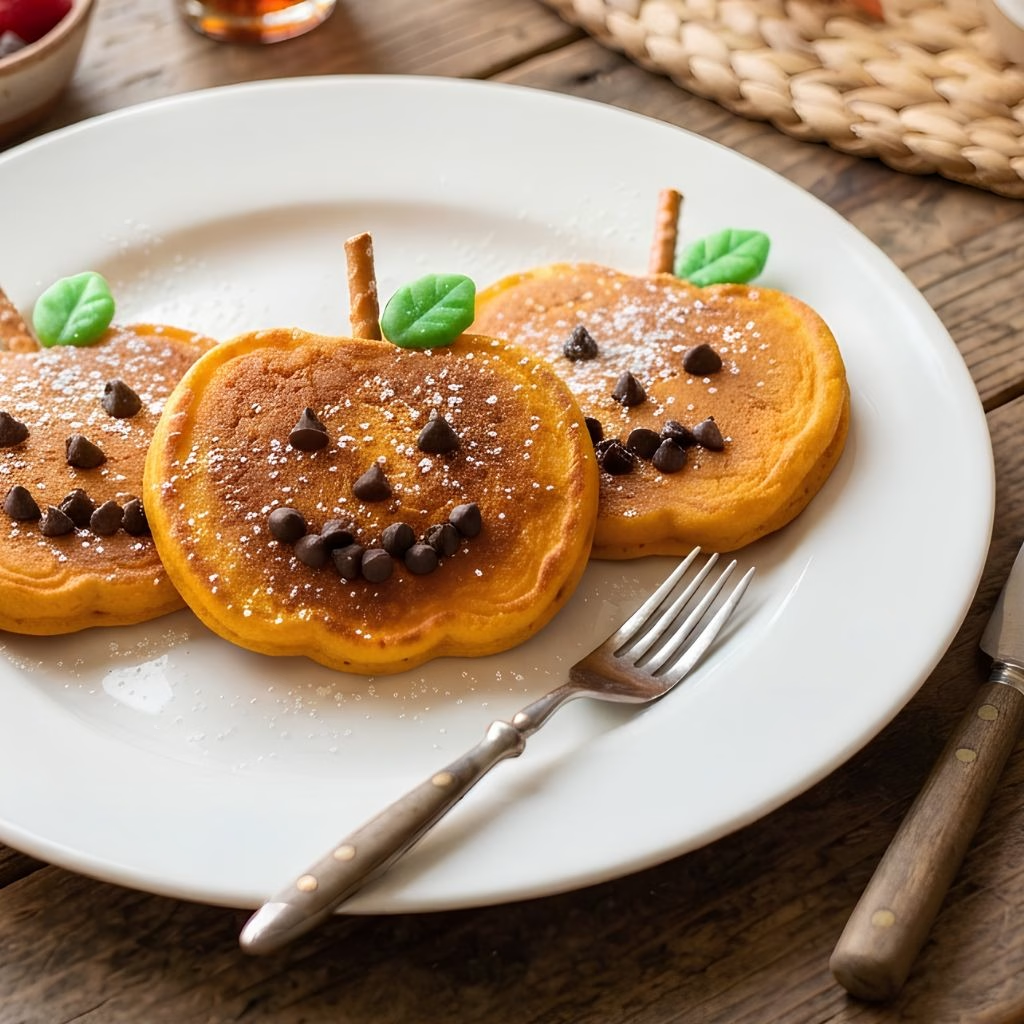
I started making these pumpkin shaped pancakes a few Halloweens ago when my kids begged for something more exciting than plain syrup-drenched rounds. I honestly didn't expect it to become a tradition, but here we are, making a batch every October morning leading up to the big day
Prep Time 15 minutes
Cook Time 15 minutes
Servings: 4

Ingredients
  

  • 1 ½ cups all-purpose flour — gives the pancakes enough structure to hold their pumpkin shape without spreading too thin
  • 3 ½ teaspoons baking powder — helps the batter puff up so each pancake stays soft and fluffy
  • 1 tablespoon granulated sugar — adds just enough sweetness without overpowering the toppings
  • ¼ teaspoon salt — balances the sweetness and rounds out the overall flavor
  • 1 ¼ cups milk — thins the batter to the right pourable consistency for piping shapes
  • 1 large egg — binds everything together and adds a bit of richness
  • 3 tablespoons melted butter — keeps the pancakes tender instead of dry or tough
  • Orange gel food coloring — a few drops give you that classic jack-o-lantern shade without watering down the batter
  • Mini chocolate chips or black icing — used for the eyes nose, and mouth, so save these for the very last step
  • Green food coloring optional — for a small pancake stem on top if you want that extra festive touch

Method
 

  1. In a large bowl, whisk together the flour, baking powder, sugar, and salt until they're evenly combined. Getting this step right matters, since clumped baking powder can leave uneven bubbles in your batter later.
  2. Pour in the milk, egg, and melted butter, then whisk everything together until the batter turns smooth. Stop as soon as the lumps disappear, since overmixing will make your pancakes dense instead of fluffy.
  3. Add a few drops of orange gel food coloring directly into the batter and stir until the color is even throughout. Gel coloring works better than liquid drops here because it won't thin out your batter's consistency.
  4. Transfer your colored batter into a squeeze bottle, then pipe a rounded pumpkin outline directly onto your heated, greased griddle. Fill in the outline with a bit more batter so the shape cooks as one solid pancake.
  5. Let the pancake cook undisturbed until small bubbles start forming across the surface and the edges look set. This usually takes about two minutes, though your exact timing depends on your stovetop's heat.
  6. Carefully flip the pancake using a wide spatula, then cook the other side for another minute or two until it's golden throughout. Move it to a plate right away so it doesn't overcook on the hot griddle.
  7. Once your pancakes have cooled slightly, use mini chocolate chips or black icing to create a simple jack-o-lantern face on each one. This is the part my kids love doing themselves, so feel free to let little hands help.
Notes

  • I always use a squeeze bottle instead of a spoon, since it gives me way more control over the pumpkin outline.
  • I keep my heat on medium-low, because pancakes with color additions tend to brown faster than plain ones.
  • I let my batter rest for five minutes before piping, which helps the bubbles settle and gives a smoother shape.
  • I prep my chocolate chips and icing ahead of time so I'm not scrambling once the pancakes are hot off the griddle.
  • I double the batch on weekends, since these disappear fast once everyone smells them cooking.