Go Back
Wafer Magnolia Bakery Banana Pudding Recipe
Ash Tyrrell

Wafer Magnolia Bakery Banana Pudding Recipe

I still remember the first time I made this Wafer Magnolia Bakery Banana Pudding Recipe in my kitchen. The creamy pudding, soft vanilla wafers, and fresh bananas created the perfect comfort dessert that tasted just like a bakery treat. I honestly couldn’t stop sneaking spoonfuls straight from the bowl while it chilled in the fridge. What I love most is how simple the recipe is, even though it tastes incredibly rich and luxurious
Total Time 6 hours 20 minutes
Servings: 12

Ingredients
  

  • 1 can sweetened condensed milk 14 ounces – Adds sweetness and gives the pudding its rich and silky texture.
  • 1 ½ cups ice-cold water – Helps blend the pudding mixture smoothly and keeps it light.
  • 1 box instant vanilla pudding mix 3.4 ounces – Instant pudding works best because it thickens quickly and creates the classic Magnolia-style texture.
  • 3 cups heavy whipping cream – Fresh heavy cream makes the pudding fluffy and airy. Avoid whipped topping for the best taste.
  • 1 box vanilla wafers 11–12 ounces – These soften beautifully after chilling and create the signature layered texture.
  • 4 ripe bananas sliced – Use bananas that are ripe but still firm so they don’t become mushy.
  • 1 teaspoon vanilla extract optional – Adds extra warmth and depth of flavor.
  • Crushed vanilla wafers for garnish – Gives the dessert a bakery-style presentation.

Method
 

  1. In a large bowl, whisk together the sweetened condensed milk and ice-cold water until smooth and fully combined. Add the instant vanilla pudding mix and continue whisking for about two minutes until thickened slightly.
  2. Place the pudding mixture in the refrigerator for at least one hour. Chilling helps the pudding set properly and creates the rich texture this dessert is known for.
  3. Pour the heavy whipping cream into a chilled mixing bowl and beat with an electric mixer until stiff peaks form. Be careful not to overmix because the cream can become grainy very quickly.
  4. The whipped cream gives the pudding its fluffy and airy texture. Freshly whipped cream always tastes better than store-bought whipped topping.
  5. Remove the chilled pudding from the refrigerator and gently fold in the whipped cream using a spatula. Mix slowly to keep the texture light and smooth.
  6. Continue folding until no streaks remain. The final mixture should look creamy, thick, and cloud-like.
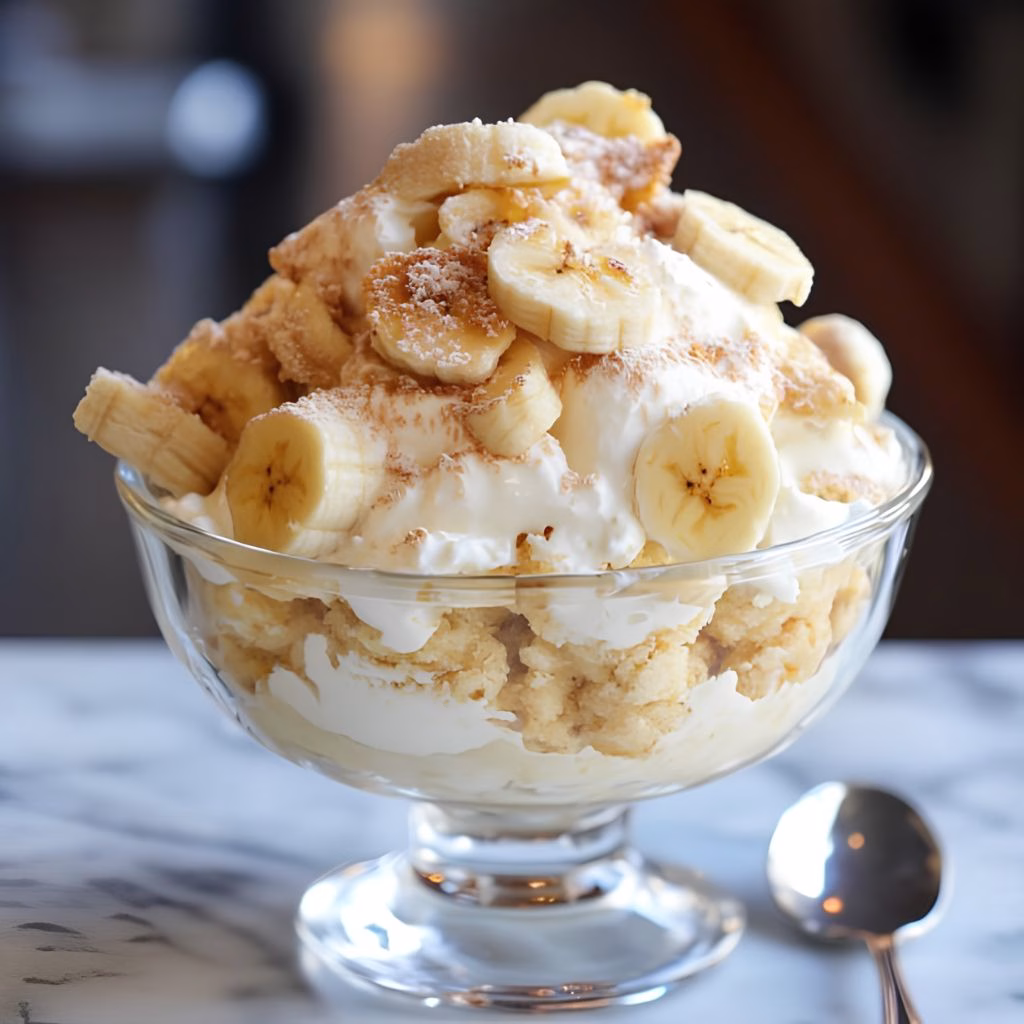
  7. Peel and slice the bananas into even rounds. Try to use bananas that are ripe but still slightly firm for the best texture.
  8. Fresh bananas balance the sweetness of the pudding and add natural flavor to every layer.
  9. Spread a layer of pudding mixture at the bottom of your serving dish. Add a layer of vanilla wafers followed by banana slices.
  10. Repeat the layers until all ingredients are used, finishing with pudding on top. Sprinkle crushed wafers over the surface for decoration.
  11. Cover the dish tightly with plastic wrap and refrigerate for at least four to six hours. This step softens the wafers and blends all the flavors together beautifully.
  12. The pudding tastes even better after resting overnight because the texture becomes extra creamy and delicious.

Notes

  • I always chill my mixing bowl before whipping the cream because it helps the cream whip faster and fluffier.
  • I like using slightly underripe bananas since they stay firm longer and don’t turn mushy quickly.
  • I usually make the pudding the night before because the flavor becomes richer overnight.
  • I gently crush a few extra wafers on top right before serving for added crunch.
  • I avoid overmixing the whipped cream into the pudding so the dessert stays light and airy.
  • I sometimes add a tiny splash of banana extract when I want stronger banana flavor.