Go Back
Witch Finger Pretzels Recipe
Ash Tyrrell

Witch Finger Pretzels Recipe

I still remember the first time I made witch finger pretzels for my daughter's class party. I had melted candy melts all over my counter and green fingerprints on my apron, but the kids went wild for them. Ever since that sticky afternoon, this has become my go-to no-bake Halloween treat whenever I need something quick, spooky, and guaranteed to disappear off the tray.
Prep Time 15 minutes
Cook Time 5 minutes

Ingredients
  

  • 12 large pretzel rods about 7 to 8 inches long — long rods give you that realistic finger length, so skip the short pretzel sticks
  • 6 ounces green candy melts — melts thicker than white chocolate which helps create that bumpy witch-skin texture
  • 2 ounces black candy melts — for dipping the almond nails; dark or semi-sweet chocolate works too
  • 12 slivered almonds — flat almonds shape the nail perfectly; whole almonds work if that's what you have on hand
  • Green food coloring or gel color optional — a drop or two brightens up dull green candy melts nicely

Method
 

  1. I start with the almonds because they need time to dry before going anywhere near the pretzels. Melt the black candy melts in 20-second microwave bursts, stirring between each round until smooth. Using a fork, dip each almond completely, then set it on your lined baking sheet to harden for about 15-20 minutes.
  2. While the almonds dry, I melt the green candy melts the same way, in short microwave bursts, stirring often so nothing scorches. If the color looks dull, I stir in a drop of green food coloring to brighten it. A spoon works great here for scooping and pouring the coating over each pretzel rod.
  3. Using your spoon, cover about half to two-thirds of each pretzel rod with the green coating, then gently shake off any excess so it doesn't pool at the bottom. Lay the coated rod flat on the baking sheet right away, since you need to work quickly before the coating starts to set.
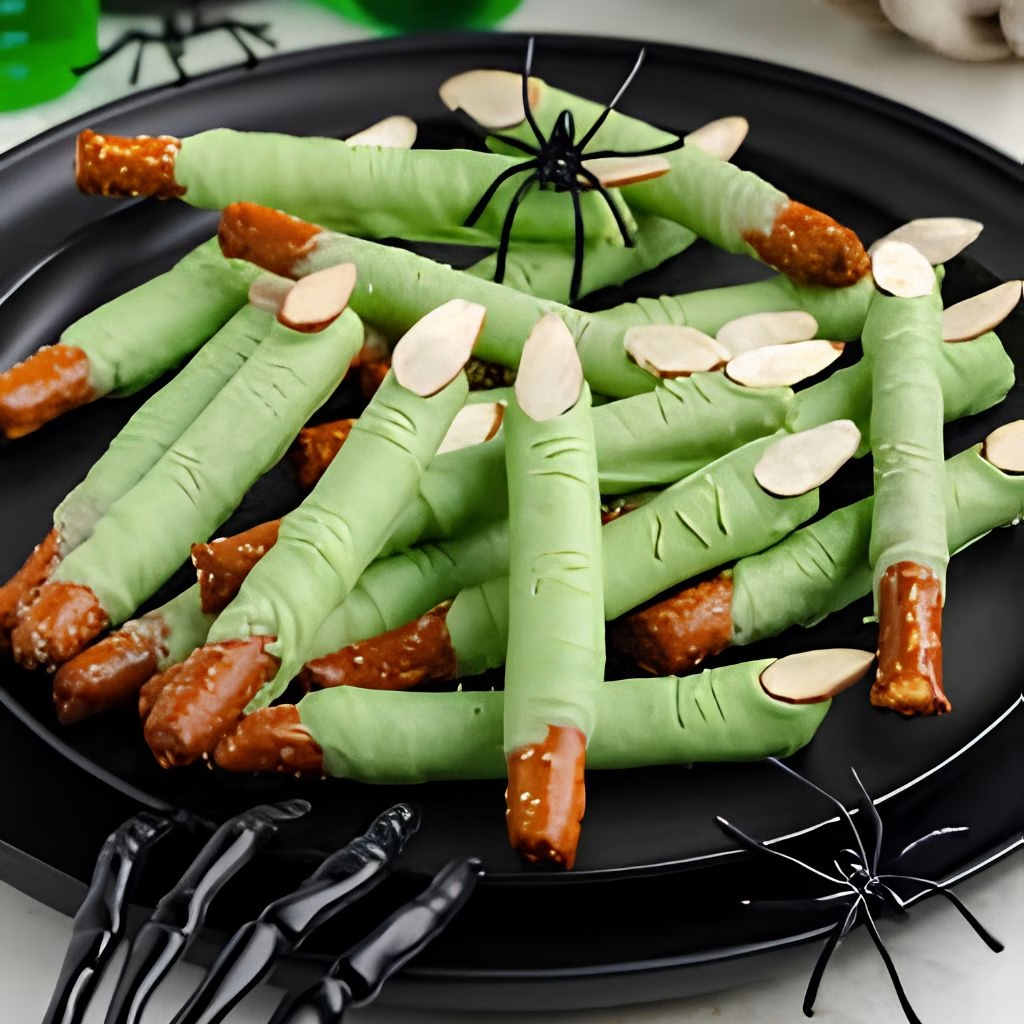
  4. As soon as each pretzel rod is coated and lying flat, press a dried black almond onto the tip where a fingernail would sit. I press gently but firmly enough that it holds in place as the green coating firms up underneath it.
  5. Once the coating looks set but is still slightly soft, I use a toothpick to draw a few small wrinkle lines near the nail and a couple of larger arcs further down the finger. This step is optional, but honestly, it's what makes these witch finger pretzels look genuinely creepy and realistic.
  6. Give your witch fingers about 15-20 minutes at room temperature to firm up completely before you touch, serve, or store them. Rushing this step is the easiest way to smudge your careful knuckle lines, so I always find something else to do while I wait.
Notes

  • I always microwave my candy melts in short bursts and stir constantly, because they burn and seize up much faster than regular chocolate.
  • I keep a bowl of warm water nearby to dip my spoon in between coats, which keeps the green coating from hardening on the utensil.
  • I like adding a drop of coconut oil or shortening to my candy melts if they feel too thick to coat smoothly.
  • I always dip and dry my almonds first, since trying to rush that step means the nails slide right off the wet pretzel.
  • I work in small batches of three or four pretzels at a time so the coating doesn't set before I can add the nail and knuckle lines.