Go Back
Ground Beef Bibimbap Bowl Recipe
Ash Tyrrell

Ground Beef Bibimbap Bowl Recipe

I first fell for bibimbap on a lunch break years ago, and I've been chasing that flavor ever since. This ground beef bibimbap bowl recipe is the version I make when I want that same sizzling, saucy comfort without ordering takeout
Prep Time 20 minutes
Cook Time 25 minutes
Servings: 4

Ingredients
  

  • 1 pound lean ground beef 90/10 - keeps the bowl hearty without leaving a pool of grease in the pan
  • 2 tablespoons low-sodium soy sauce - lets me control the salt instead of the dish tasting too salty
  • 1 tablespoon brown sugar - balances the savory beef with a touch of sweetness
  • 2 teaspoons sesame oil divided - adds that nutty, unmistakable Korean flavor
  • 2 cloves garlic minced - fresh garlic makes a noticeable difference over the jarred kind
  • 1 teaspoon grated fresh ginger - brightens the beef without overpowering it
  • 1 cup shiitake mushrooms sliced - soak up the sauce and add a meaty texture
  • 1 cup carrots julienned or grated - adds color and a little natural sweetness
  • 2 cups baby spinach chopped - use fresh spinach, since frozen turns mushy and watery
  • 1 cup bean sprouts - gives the bowl its classic bibimbap crunch
  • 2 tablespoons avocado oil divided - has a high smoke point, so it won't burn while frying eggs
  • 4 large eggs - a soft runny yolk is what makes the bowl feel special
  • 3 cups cooked short-grain rice - short-grain rice holds together better than long-grain when you mix everything
  • 3 tablespoons gochujang - the traditional Korean chili paste that gives bibimbap its signature kick
  • 1 tablespoon rice vinegar - cuts through the richness of the beef and sauce
  • Sesame seeds and sliced green onions for garnish - a small finishing touch that makes the bowl look restaurant-worthy

Method
 

  1. Rinse the short-grain rice until the water runs mostly clear, then cook it according to the package directions or in a rice cooker. I like to start this step first since it takes the longest and can sit warm while I prepare everything else. Fluff it gently with a fork once it's done so it stays light instead of clumpy.
  2. Whisk together the gochujang, soy sauce, brown sugar, rice vinegar, and a teaspoon of sesame oil in a small bowl until smooth. I always taste it here and adjust, adding a little more gochujang if I want extra heat or a touch more sugar if it tastes too sharp. Set the sauce aside so the flavors have time to meld while you cook.
  3. Heat a tablespoon of avocado oil in your skillet over medium-high heat, then add the garlic and ginger for about thirty seconds until fragrant. Add the ground beef and break it apart with a spoon, cooking until it's fully browned. Stir in half of the sauce mixture and let it simmer for a couple of minutes so the beef soaks up the flavor.
  4. In the same skillet, sauté the mushrooms and carrots for a few minutes until they soften slightly, then remove them and set aside. Quickly wilt the spinach in the residual heat, and toss the bean sprouts with a small drizzle of sesame oil separately. I keep each vegetable in its own little pile so the bowl looks colorful once it's assembled.
  5. Heat the remaining avocado oil in a nonstick pan over medium heat and crack in the eggs one at a time. I fry mine sunny-side up so the yolk stays runny, cooking just until the whites are set but the center is still soft. This is the topping that makes the whole bowl come together when you mix it in.
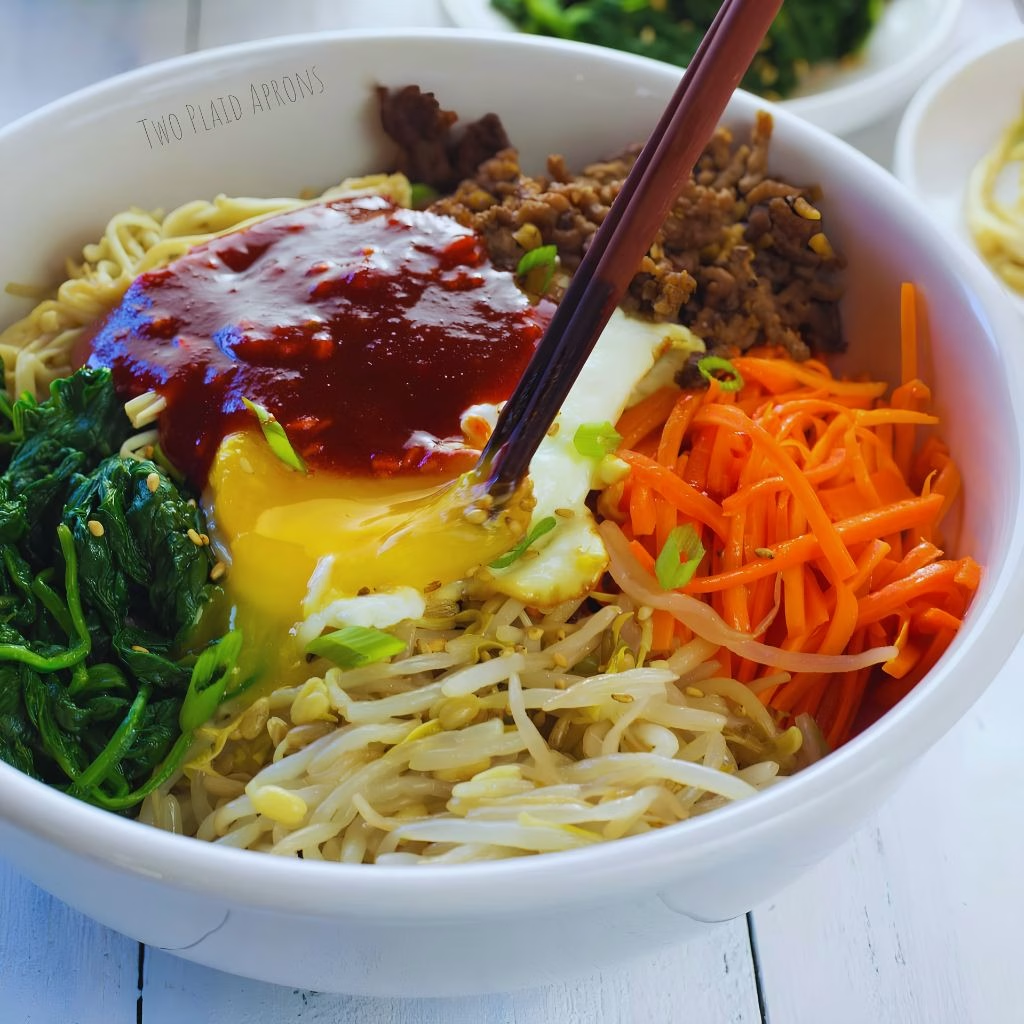
  6. Divide the warm rice between bowls, then arrange the beef, mushrooms, carrots, spinach, and bean sprouts in separate sections on top. Place a fried egg in the center of each bowl and drizzle with the remaining sauce. Serve immediately so the egg is still warm and everyone can mix their own bowl at the table.
Notes

  • I always keep my vegetables separate while cooking so their flavors stay distinct instead of blending into mush.
  • I taste my sauce before adding it to the beef, since gochujang brands vary a lot in spice level.
  • I use a nonstick pan just for the eggs because I want that yolk to stay perfectly intact when I plate it.
  • I let the rice sit uncovered for a minute after cooking so it doesn't turn soggy once the toppings go on.
  • I prep all my vegetables before I even turn on the stove, since this recipe moves fast once cooking starts.