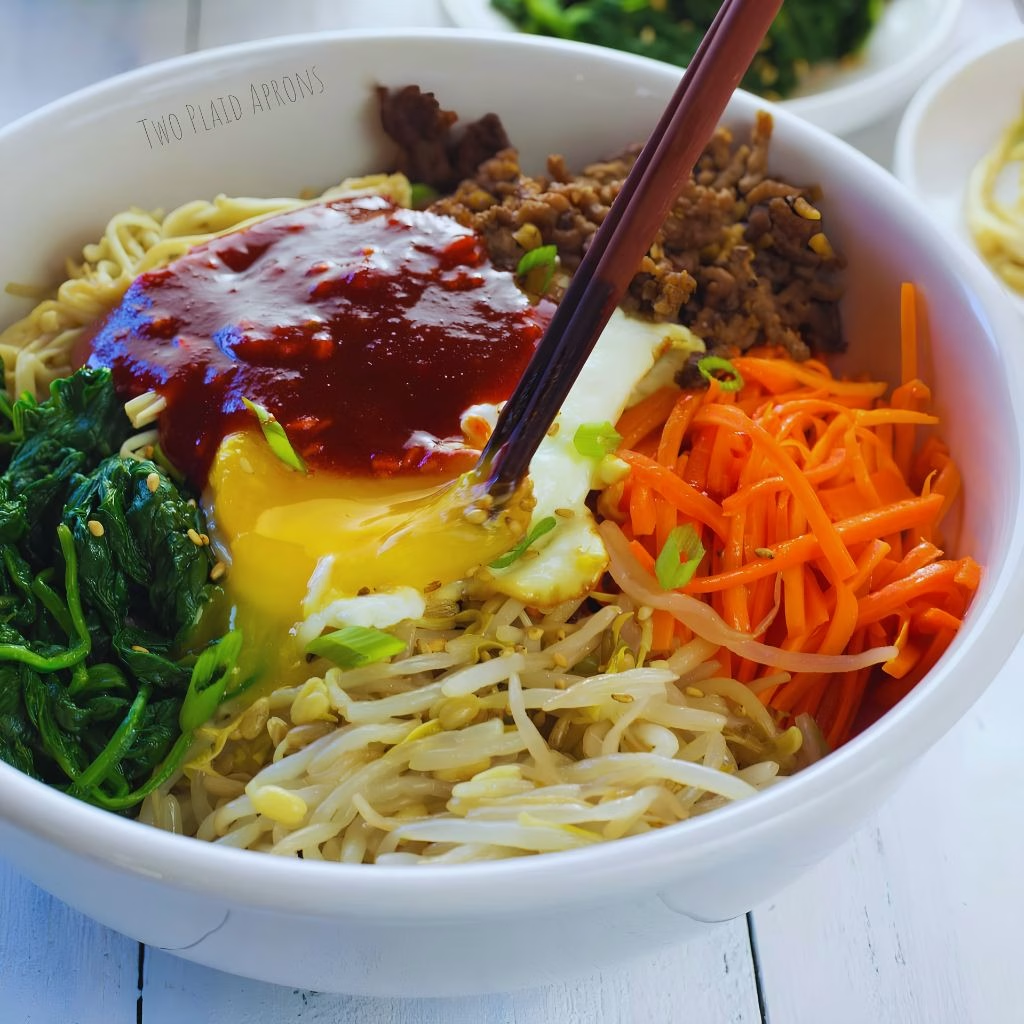
I first fell for bibimbap on a lunch break years ago, and I’ve been chasing that flavor ever since. This ground beef bibimbap bowl recipe is the version I make when I want that same sizzling, saucy comfort without ordering takeout.
It’s quick, it uses one skillet for the meat, and it lets me pile on whatever veggies I have in the fridge. Once I mix everything together with a runny egg and a spoonful of sauce, I genuinely can’t stop eating it.
If you’ve never made bibimbap at home, this recipe is the easiest place to start. If you enjoy comforting beef-based dinners, Chicken Taco Casserole Recipe is another satisfying meal worth trying.
Cooking Time
- Prep Time: 20 minutes
- Cooking Time: 25 minutes
- Total Time: 45 minutes
Ingredients
- 1 pound lean ground beef (90/10) – keeps the bowl hearty without leaving a pool of grease in the pan
- 2 tablespoons low-sodium soy sauce – lets me control the salt instead of the dish tasting too salty
- 1 tablespoon brown sugar – balances the savory beef with a touch of sweetness
- 2 teaspoons sesame oil, divided – adds that nutty, unmistakable Korean flavor
- 2 cloves garlic, minced – fresh garlic makes a noticeable difference over the jarred kind
- 1 teaspoon grated fresh ginger – brightens the beef without overpowering it
- 1 cup shiitake mushrooms, sliced – soak up the sauce and add a meaty texture
- 1 cup carrots, julienned or grated – adds color and a little natural sweetness
- 2 cups baby spinach, chopped – use fresh spinach, since frozen turns mushy and watery
- 1 cup bean sprouts – gives the bowl its classic bibimbap crunch
- 2 tablespoons avocado oil, divided – has a high smoke point, so it won’t burn while frying eggs
- 4 large eggs – a soft, runny yolk is what makes the bowl feel special
- 3 cups cooked short-grain rice – short-grain rice holds together better than long-grain when you mix everything
- 3 tablespoons gochujang – the traditional Korean chili paste that gives bibimbap its signature kick
- 1 tablespoon rice vinegar – cuts through the richness of the beef and sauce
- Sesame seeds and sliced green onions, for garnish – a small finishing touch that makes the bowl look restaurant-worthy
Note: this recipe makes about 4 generous bowls.
Equipment You Need
- Large skillet or wok – for browning the beef and sautéing the vegetables
- Small mixing bowl – for whisking together the bibimbap sauce
- Nonstick pan – for frying the eggs so the yolks stay intact
- Box grater – for grating carrots and fresh ginger
- Rice cooker or medium pot – for cooking the short-grain rice
- Tongs or a wooden spoon – for tossing vegetables and breaking up the beef
How to Make Ground Beef Bibimbap Bowl Recipe?
Making this bibimbap bowl really comes down to three simple stages: cook the rice, prepare the toppings, and bring it all together. None of the steps are complicated, and most of the cooking happens while other components are resting. I like to prep my vegetables first so the actual cooking goes fast.
Cook the Rice
Rinse the short-grain rice until the water runs mostly clear, then cook it according to the package directions or in a rice cooker. I like to start this step first since it takes the longest and can sit warm while I prepare everything else. Fluff it gently with a fork once it’s done so it stays light instead of clumpy.
Make the Bibimbap Sauce
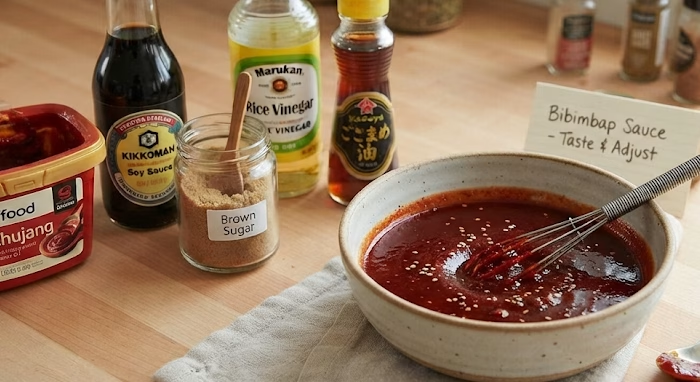
Whisk together the gochujang, soy sauce, brown sugar, rice vinegar, and a teaspoon of sesame oil in a small bowl until smooth. I always taste it here and adjust, adding a little more gochujang if I want extra heat or a touch more sugar if it tastes too sharp. Set the sauce aside so the flavors have time to meld while you cook.
Cook the Ground Beef
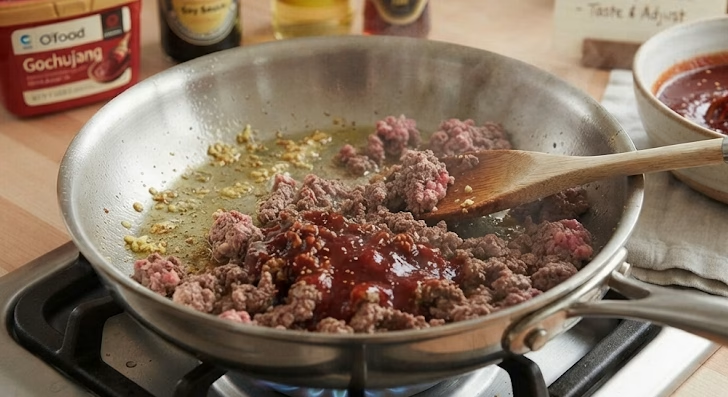
Heat a tablespoon of avocado oil in your skillet over medium-high heat, then add the garlic and ginger for about thirty seconds until fragrant. Add the ground beef and break it apart with a spoon, cooking until it’s fully browned. Stir in half of the sauce mixture and let it simmer for a couple of minutes so the beef soaks up the flavor.
Sauté the Vegetables
In the same skillet, sauté the mushrooms and carrots for a few minutes until they soften slightly, then remove them and set aside. Quickly wilt the spinach in the residual heat, and toss the bean sprouts with a small drizzle of sesame oil separately. I keep each vegetable in its own little pile so the bowl looks colorful once it’s assembled.
Fry the Eggs
Heat the remaining avocado oil in a nonstick pan over medium heat and crack in the eggs one at a time. I fry mine sunny-side up so the yolk stays runny, cooking just until the whites are set but the center is still soft. This is the topping that makes the whole bowl come together when you mix it in.
Assemble and Serve
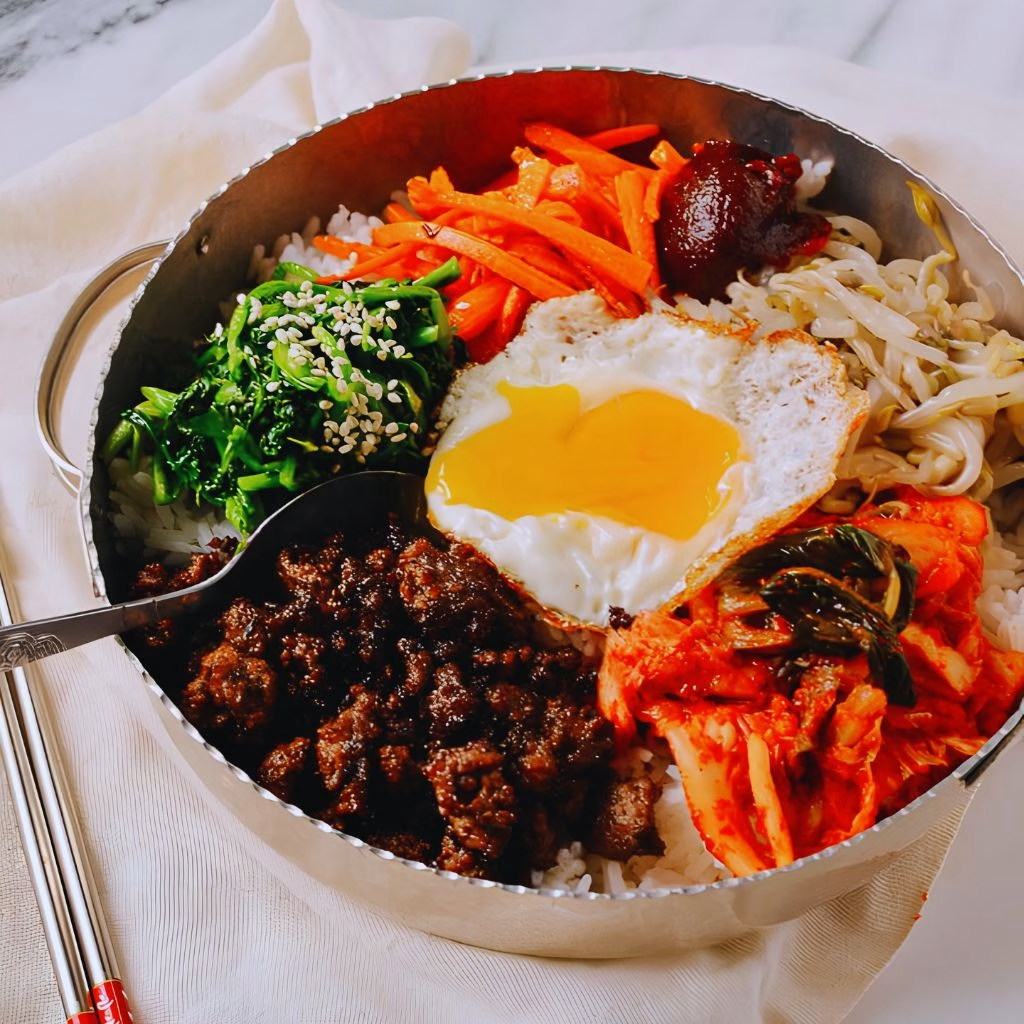
Divide the warm rice between bowls, then arrange the beef, mushrooms, carrots, spinach, and bean sprouts in separate sections on top. Place a fried egg in the center of each bowl and drizzle with the remaining sauce. Serve immediately so the egg is still warm and everyone can mix their own bowl at the table.
Additional Tips for Making This Recipe Better
I’ve made this bibimbap bowl more times than I can count, and a few small habits have made it consistently better for me.
- I always keep my vegetables separate while cooking so their flavors stay distinct instead of blending into mush.
- I taste my sauce before adding it to the beef, since gochujang brands vary a lot in spice level.
- I use a nonstick pan just for the eggs because I want that yolk to stay perfectly intact when I plate it.
- I let the rice sit uncovered for a minute after cooking so it doesn’t turn soggy once the toppings go on.
- I prep all my vegetables before I even turn on the stove, since this recipe moves fast once cooking starts.
Common Mistakes to Avoid
I’ve made a few of these mistakes myself, so I like sharing them so you can skip the trial and error.
- I once used frozen spinach and it released so much water into the bowl, so I only use fresh now.
- I overcooked my egg yolks the first few times, which took away that classic silky bibimbap texture.
- I didn’t drain the beef properly once, and the extra grease made the sauce taste diluted.
- I crowded my skillet with all the vegetables at once, which steamed them instead of giving them a slight char.
- I skipped tasting the sauce and ended up with a bowl that was too sweet for my taste.
How to Serve Ground Beef Bibimbap Bowl?
I like serving this bowl in a wide, shallow dish so every topping gets its own visible section around the rice. Arranging the beef, vegetables, and egg in separate little piles instead of tossing them together first makes the bowl look far more appetizing before you dig in.
A sprinkle of sesame seeds and sliced green onions right before serving adds color and a little crunch. If I’m feeling fancy, I’ll add a few thin slices of cucumber or a swirl of extra gochujang sauce on top for a pop of red against the green and orange vegetables. For another layered comfort-food favorite that’s perfect for family dinners, Taco Lasagna Recipe is also a delicious option.
Variations
- Swap the ground beef for ground turkey or chicken if you want a leaner bowl.
- Use tofu or a plant-based crumble instead of meat for a vegetarian version.
- Add sliced cucumber, radish, or zucchini for extra crunch and color.
- Try brown rice or cauliflower rice if you want a lower-carb base.
- Skip the sugar in the sauce and use a sugar-free sweetener if you’re watching added sugar.
- Add a poached egg instead of fried if you prefer a softer, more delicate yolk.
Nutritional Information
Here’s a general idea of what one serving of this beef bibimbap bowl looks like, though exact numbers will vary based on your exact ingredients.
- Calories: approximately 520 per bowl
- Protein: approximately 30 grams
- Carbohydrates: approximately 55 grams
- Fat: approximately 18 grams
Make Ahead and Storage
You can prep the rice, beef, and vegetables up to three days ahead and store them separately in airtight containers in the fridge, which makes weeknight assembly much faster.
For reheating, warm the rice and beef in the microwave or a skillet until heated through, then fry a fresh egg right before serving so the yolk stays runny.
The cooked beef and vegetables freeze well for up to two months, though I recommend freezing them without the rice or egg, since both are best made fresh.
Why You’ll Love This Recipe?
This bibimbap bowl has become one of my go-to weeknight dinners for a handful of reasons.
- It’s budget-friendly. Ground beef costs far less than sliced steak, so this bowl is easy on the grocery bill without skimping on flavor.
- It’s endlessly customizable. I swap in whatever vegetables I have on hand, so it rarely tastes the same way twice.
- It comes together fast. Between the one-skillet beef and quick-cooking vegetables, this whole meal is ready in under an hour.
- It’s easy to make it your own spice level. I can dial the gochujang up or down depending on who I’m cooking for that night.
- It feels special without much effort. The colorful toppings and runny egg make it look far fancier than the actual work involved.
FAQs
What is bibimbap sauce made of?
Bibimbap sauce is typically a mix of gochujang, soy sauce, sesame oil, a touch of sugar, and rice vinegar. It’s what gives the bowl its sweet, spicy, savory flavor.
What are the essential bibimbap ingredients?
At its core, bibimbap needs warm rice, a protein like beef, an assortment of sautéed or blanched vegetables, a fried or raw egg, and gochujang sauce to tie it together.
Do I need a bibimbap stone bowl to make this at home?
No, a stone bowl isn’t necessary for this recipe. A regular serving bowl works fine, though a hot stone bowl does add a crispy rice layer if you happen to have one.
How does homemade bibimbap compare to restaurant bibimbap?
Restaurant bibimbap often uses more elaborate banchan-style toppings, but a homemade beef bibimbap recipe like this one delivers the same core flavors with far less effort and cost.
What rice works best for a bibimbap rice bowl?
Short-grain white rice is the classic choice because it’s slightly sticky and holds together well once mixed with the sauce and toppings.
How many calories are in a beef bibimbap bowl?
A typical serving of this ground beef bibimbap bowl has around 500 to 550 calories, depending on portion size and how much sauce and oil you use.

Ground Beef Bibimbap Bowl Recipe
Ingredients
Method
- Rinse the short-grain rice until the water runs mostly clear, then cook it according to the package directions or in a rice cooker. I like to start this step first since it takes the longest and can sit warm while I prepare everything else. Fluff it gently with a fork once it’s done so it stays light instead of clumpy.
- Whisk together the gochujang, soy sauce, brown sugar, rice vinegar, and a teaspoon of sesame oil in a small bowl until smooth. I always taste it here and adjust, adding a little more gochujang if I want extra heat or a touch more sugar if it tastes too sharp. Set the sauce aside so the flavors have time to meld while you cook.
- Heat a tablespoon of avocado oil in your skillet over medium-high heat, then add the garlic and ginger for about thirty seconds until fragrant. Add the ground beef and break it apart with a spoon, cooking until it’s fully browned. Stir in half of the sauce mixture and let it simmer for a couple of minutes so the beef soaks up the flavor.
- In the same skillet, sauté the mushrooms and carrots for a few minutes until they soften slightly, then remove them and set aside. Quickly wilt the spinach in the residual heat, and toss the bean sprouts with a small drizzle of sesame oil separately. I keep each vegetable in its own little pile so the bowl looks colorful once it’s assembled.
- Heat the remaining avocado oil in a nonstick pan over medium heat and crack in the eggs one at a time. I fry mine sunny-side up so the yolk stays runny, cooking just until the whites are set but the center is still soft. This is the topping that makes the whole bowl come together when you mix it in.
- Divide the warm rice between bowls, then arrange the beef, mushrooms, carrots, spinach, and bean sprouts in separate sections on top. Place a fried egg in the center of each bowl and drizzle with the remaining sauce. Serve immediately so the egg is still warm and everyone can mix their own bowl at the table.
Notes
- I always keep my vegetables separate while cooking so their flavors stay distinct instead of blending into mush.
- I taste my sauce before adding it to the beef, since gochujang brands vary a lot in spice level.
- I use a nonstick pan just for the eggs because I want that yolk to stay perfectly intact when I plate it.
- I let the rice sit uncovered for a minute after cooking so it doesn’t turn soggy once the toppings go on.
- I prep all my vegetables before I even turn on the stove, since this recipe moves fast once cooking starts.