Go Back
Halloween Chocolate Covered Pretzel Recipe
Ash Tyrrell

Halloween Chocolate Covered Pretzel Recipe

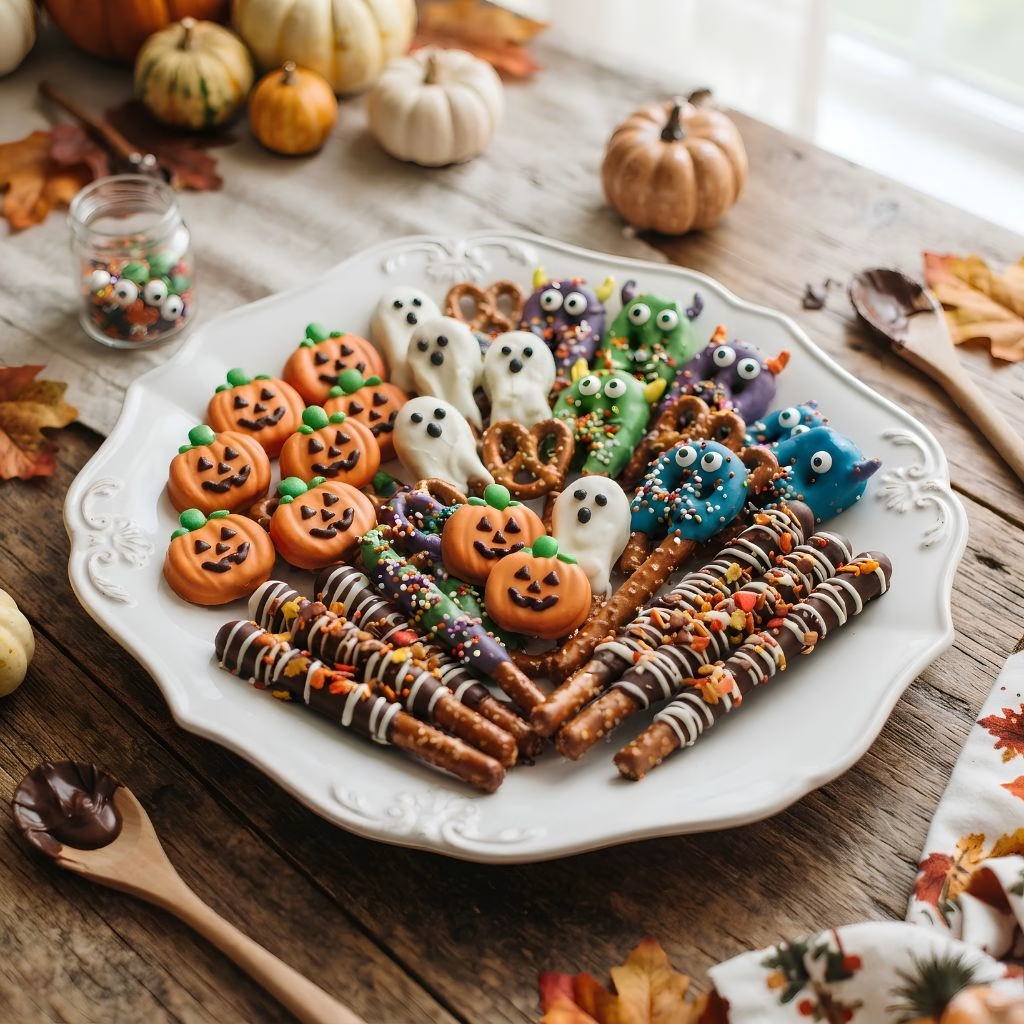
I made these Halloween chocolate covered pretzels with my kids last October, and honestly, they disappeared faster than any candy bowl on my counter. I love this recipe because it's ridiculously simple, yet it looks like I spent hours in the kitchen.
Total Time 45 minutes
Servings: 10

Ingredients
  

  • pretzel rods or pretzel twists about 20-24 – I like using pretzel rods for a cleaner, dip-and-decorate shape
  • semi-sweet chocolate chips 1 cup – melts smoothly and gives that classic chocolate-covered pretzel base
  • white chocolate chips 1 cup – perfect for mummies, ghosts, and tinting with food coloring
  • orange candy melts 1/2 cup – gives you that classic pumpkin look without extra mixing
  • coconut oil or shortening 1 tablespoon (divided) – thins the chocolate so it coats evenly and sets with a nice shine
  • candy eyes 1 package – the easiest way to turn any pretzel into a "creature" instantly
  • rainbow or Halloween-themed sprinkles – add crunch and color and they stick best while chocolate is still wet
  • orange and green food coloring gel, not liquid – gel coloring won't thin out your melted chocolate
  • mini pretzel sticks or candy stems a small handful – great for pumpkin "stems" if you want extra detail

Method
 

  1. Before I even open the chocolate bag, I line my baking sheet with parchment paper so I'm not scrambling once the chocolate starts setting. I lay out all my sprinkles, candy eyes, and food coloring within reach.
  2. I melt each type of chocolate separately in microwave-safe bowls, in 20-30 second bursts, stirring between each one. Adding a teaspoon of coconut oil to each bowl keeps the chocolate glossy and easy to work with.
  3. For pumpkins or monsters, I stir in a small drop of gel food coloring right after melting. I go slow here since a little color goes a long way in melted chocolate.
  4. I hold each pretzel by one end and dip it into the melted chocolate, turning it to coat evenly. I let the excess drip off for a few seconds before laying it down.
  5. While the chocolate is still wet, I press on candy eyes, sprinkles, or a pretzel stem. If the chocolate sets before I decorate, nothing sticks, so I try to work fast in small batches.
  6. I place the tray in the fridge for about 15-20 minutes, or leave them at room temperature for closer to 30-40 minutes if my kitchen isn't too warm.
  7. Once they're fully set and no longer sticky to the touch, I stack them in an airtight container or arrange them straight onto a serving platter for the party.
Notes

  • I always work in small batches of 4-5 pretzels at a time so the chocolate doesn't harden before I finish decorating.
  • I keep a bowl of warm water nearby to dip my hands in if things get sticky saves me from ruining a pretzel mid-dip.
  • I never skip the coconut oil; it's the difference between a dull, clumpy coating and a smooth, glossy shell.
  • I use gel food coloring instead of liquid every single time, since liquid drops can seize the chocolate.
  • I let my chocolate cool for a minute or two before dipping, otherwise it slides right off the pretzel.