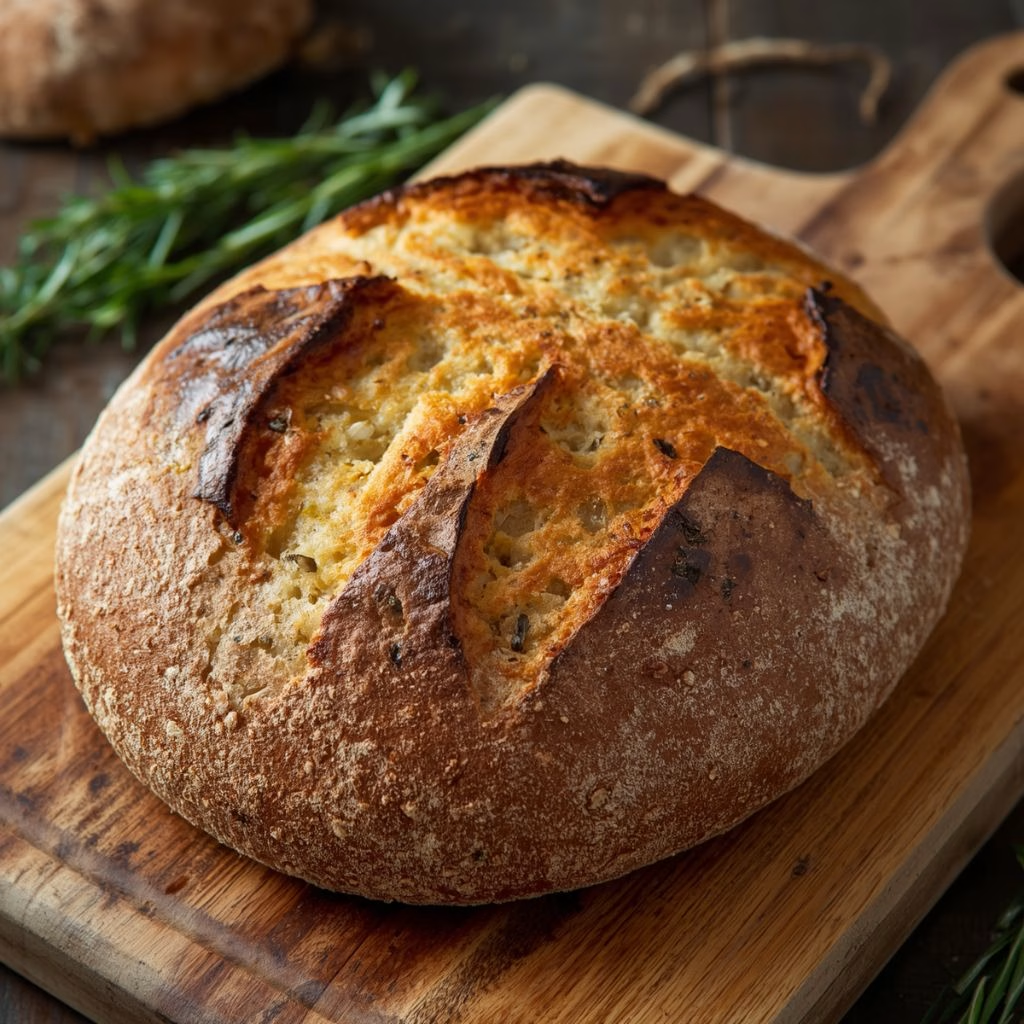
I still remember pulling my first Garlic Rosemary Sourdough out of the oven and hearing that loud crackle as the crust cooled. The smell of roasted garlic and fresh rosemary filled my whole kitchen, and I honestly couldn’t wait to slice into it.
I’ve made this loaf so many times now that I’ve got the process down to a rhythm, and I love sharing it with anyone who’s a little intimidated by sourdough. Trust me, once you taste that first warm slice with a little butter melting into it, you’ll understand why this has become one of my go-to bakes. It takes some patience, but every single step is worth it.
Ingredients
- Ripe sourdough starter – 35 grams, about 2 tablespoons; make sure it’s active and bubbly, not sluggish, or your levain won’t build properly
- Bread flour for the levain – 35 grams, about 1/4 cup; the protein content here helps build strength early on
- Water for the levain – 35 grams, about 2 tablespoons; use room temperature water unless your kitchen runs cold
- Garlic bulbs – 3 whole bulbs; roasting mellows the sharp bite and turns the cloves soft and sweet
- Olive oil – a light drizzle for roasting; this keeps the garlic from drying out in the oven
- Salt for roasting – a small pinch; it draws out moisture and deepens the caramelized flavor
- Ripe levain – 100 grams from the batch above; it should be doubled, bubbly, and just past its peak
- Bread flour for the dough – 450 grams, about 3 1/4 cups; a higher protein flour gives the crumb its chewy structure
- Whole wheat flour – 50 grams, about 1/3 cup; this adds a nutty depth and helps fermentation move along
- Water for the dough – 375 grams total, divided, about 1 1/2 cups plus a little extra; part is held back and added after resting
- Salt for the dough – 10 grams, about 1.5 teaspoons; never skip this, it controls fermentation and rounds out the flavor
- Roasted garlic, mashed – all of it from the 3 roasted bulbs, cooled completely before adding to the dough
- Fresh rosemary – 1 to 2 sprigs, chopped fine; fresh rosemary gives a much brighter aroma than dried

Note: These amounts make one full loaf that yields about 16 slices, so double the ingredients if you want two loaves.
Variations
- Swap fresh rosemary for 1 to 2 teaspoons of dried rosemary if that’s what you have in the pantry
- Use whole roasted garlic cloves instead of mashing them for little bursts of garlic in every bite
- Replace whole wheat flour entirely with more bread flour for a lighter, softer crumb
- Add grated parmesan or asiago into the dough for a savory, cheesy twist
- Mix in caramelized onions alongside the garlic for extra sweetness and complexity
- Sprinkle flaky sea salt on top before baking for a little extra crunch and flavor pop
Cooking Time
- Prep Time: 1 hour
- Cooking Time: 45 minutes
- Total Time: about 1 day, 2 hours, and 45 minutes (includes fermentation)
Equipment You Need
- Kitchen scale – for accurate measuring, which really matters with sourdough
- Mixing bowl – for combining the levain and later the full dough
- Banneton or a regular bowl – to hold the dough’s shape during its final rise
- Dutch oven – to trap steam and give the loaf that crackly, golden crust
- Bench scraper – to handle the sticky dough without a mess
- Bread lame or sharp knife – for scoring the top before baking
How to Make Garlic Rosemary Sourdough Recipe?
This recipe comes together in stages over about a day and a half, so a little planning goes a long way. I like to start early in the morning so the timing lines up nicely with my day. Here’s exactly how I walk through each part of the process.
Mix the Levain
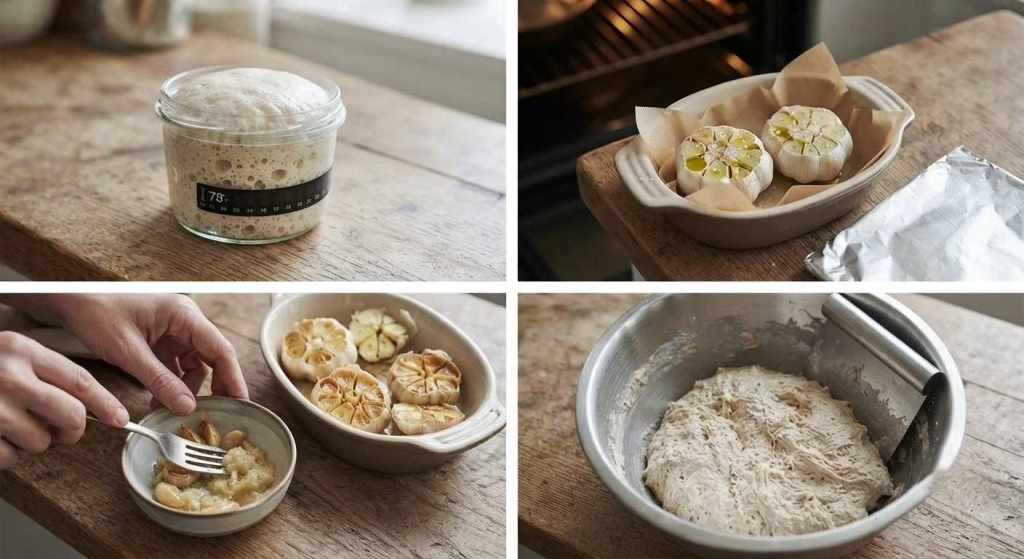
I start by combining my ripe starter with bread flour and water in a small jar. I let this sit at a warm spot, around 78°F, for three to four hours. By the end, it should look doubled, bubbly, and smell pleasantly sour.
Roast the Garlic
While the levain builds, I get my garlic bulbs ready by slicing off the tops to expose the cloves. I drizzle them with olive oil, add a pinch of salt, then wrap them tightly in foil. I bake them at 400°F for 30 to 40 minutes until they’re soft and golden.
Cool and Mash the Garlic
Once the garlic comes out of the oven, I let it cool completely before touching it. I press the cloves out of their skins into a small bowl, then mash them with a fork until smooth. I set this aside until the dough is ready for it.
Mix the Main Dough
When my levain is ready, I combine it with the bread flour, whole wheat flour, and most of the water. I let this rest for about 30 minutes so the flour fully hydrates. This step makes the dough much easier to work with later.
Add Salt and Finish Mixing
After the rest, I add my reserved salt and the last bit of water, then work it into the dough with wet hands. I pinch and fold until everything feels smooth and evenly combined. This usually takes just a few minutes of gentle effort.
Stretch and Fold the Dough
Over the next two hours, I perform three to four rounds of stretch and folds, spaced about 30 minutes apart. Each round strengthens the dough’s structure a little more. I can really feel it transform from shaggy to smooth and elastic.
Add the Garlic and Rosemary
During the second round of folding, I add my mashed garlic and chopped rosemary right on top of the dough. As I fold, these mix throughout naturally. If you enjoy savory dishes featuring garlic and fresh vegetables, the Garlic Butter Chicken with Zucchini and Corn Recipe offers another delicious way to use these flavors. I repeat one more fold afterward to make sure everything is evenly distributed.
Let the Dough Rise
Once folding is done, I let the dough rest uncovered in a warm spot for another one and a half to two hours. I’m watching for it to look puffy and jiggly with a few bubbles on top. This tells me it’s ready to shape.

Shape the Loaf
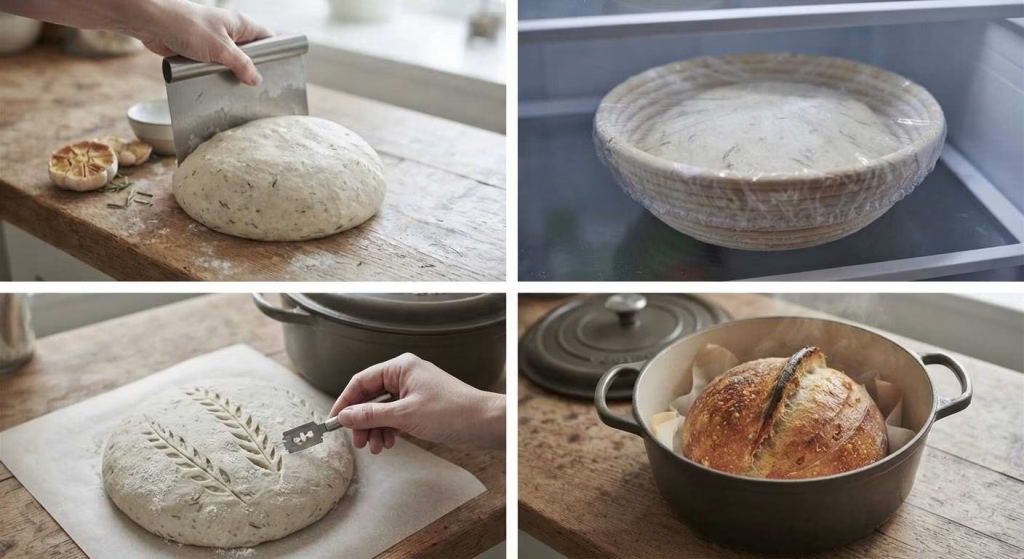
I gently turn the dough out onto my counter and shape it into a tight round using a bench scraper. I place it seam-side up into a floured banneton or bowl. Any garlic that pops out gets tucked back underneath so it doesn’t burn later.
Cold Ferment Overnight
I cover the shaped dough and place it in the refrigerator for 12 to 18 hours. This slow, cold rise really develops the flavor. It also makes the dough much easier to score right before baking.
Bake the Bread
I preheat my Dutch oven at 500°F for about 30 minutes before baking. I score the chilled dough, then bake it covered at 450°F for 25 minutes. I remove the lid and continue baking another 20 minutes until the crust turns deep golden brown.
Additional Tips for Making This Recipe Better
I’ve made this loaf enough times to pick up a few small tricks that make a real difference.
- I always let my garlic cool completely before mixing it in, otherwise it can slow down fermentation
- I keep my dough around 78°F throughout the process since it really does affect timing
- I’ve found scoring straight from the fridge gives me a much cleaner, more controlled cut
- I try not to skip the cold ferment because it’s where so much of the flavor develops
- I like tucking any exposed garlic back into the dough before baking so it doesn’t scorch
How to Serve Garlic Rosemary Sourdough?
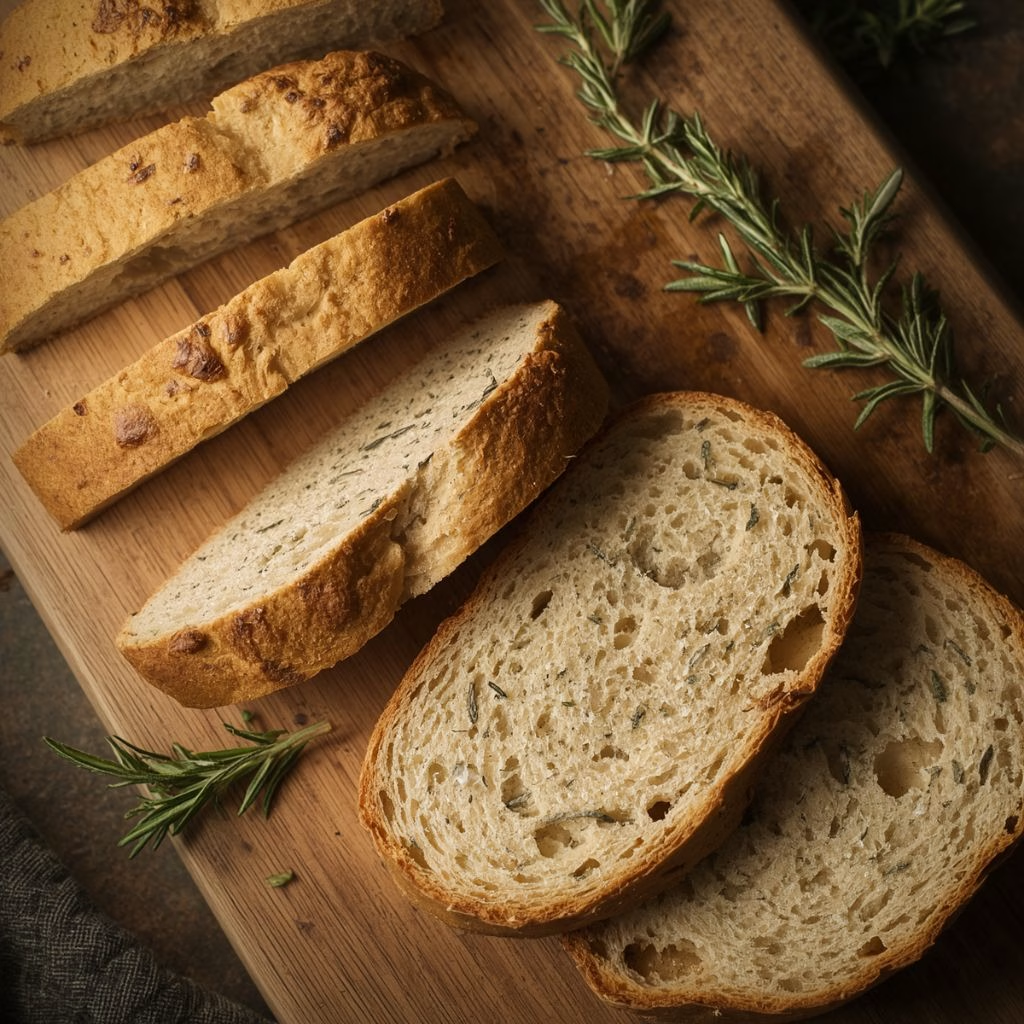
I love slicing this bread thick and serving it warm with a small dish of good olive oil and balsamic vinegar for dipping. It also makes a fantastic base for a simple sandwich, especially with sharp cheese or roasted vegetables piled on top.
For a pretty presentation, I set the whole loaf on a wooden board with a few extra rosemary sprigs scattered around it. Toasting slices and rubbing them with a fresh garlic clove is another favorite way I like to serve it alongside soup, and finishing the meal with Salted Caramel Chocolate Chip Cookie Bars Recipe makes a perfect sweet pairing.
Nutritional Information
Here’s roughly what you can expect per slice, based on 16 slices per loaf.
- Calories: about 118
- Protein: about 4 grams
- Carbohydrates: about 24 grams
- Fat: about 1 gram
Make Ahead and Storage
Storing: I let the baked loaf cool completely before slicing or storing it. Kept in a paper bag or loosely wrapped at room temperature, it stays fresh for about two to three days.
Freezing: Once fully cooled, I slice the loaf and place it in an airtight freezer bag. It keeps well in the freezer for up to three months without losing much quality.
Reheating: I usually warm slices in a toaster or a hot oven for a few minutes to bring back that crisp crust. Frozen slices can go straight into the toaster without needing to thaw first.
Why You’ll Love This Recipe?
This loaf has earned a permanent spot in my regular baking rotation, and here’s why.
- It’s incredibly flavorful, with roasted garlic adding sweetness and rosemary adding a fragrant, earthy note in every bite
- It’s easy to customize, since you can adjust the garlic amount or swap in cheese, onions, or dried herbs
- It works for so many occasions, from a simple weeknight dinner to a special gathering with friends
- It stores and freezes beautifully, so you can always have a slice ready without extra effort
- It gives that classic sourdough experience, with a crackly crust and soft, chewy interior that never disappoints

Garlic Rosemary Sourdough Recipe
Ingredients
Method
- I start by combining my ripe starter with bread flour and water in a small jar. I let this sit at a warm spot, around 78°F, for three to four hours.
- While the levain builds, I get my garlic bulbs ready by slicing off the tops to expose the cloves. I drizzle them with olive oil, add a pinch of salt, then wrap them tightly in foil. I bake them at 400°F for 30 to 40 minutes until they’re soft and golden.
- Once the garlic comes out of the oven, I let it cool completely before touching it. I press the cloves out of their skins into a small bowl, then mash them with a fork until smooth. I set this aside until the dough is ready for it.
- When my levain is ready, I combine it with the bread flour, whole wheat flour, and most of the water. I let this rest for about 30 minutes so the flour fully hydrates. This step makes the dough much easier to work with later.
- After the rest, I add my reserved salt and the last bit of water, then work it into the dough with wet hands. I pinch and fold until everything feels smooth and evenly combined. This usually takes just a few minutes of gentle effort.
- Over the next two hours, I perform three to four rounds of stretch and folds, spaced about 30 minutes apart. Each round strengthens the dough’s structure a little more. I can really feel it transform from shaggy to smooth and elastic.
- During the second round of folding, I add my mashed garlic and chopped rosemary right on top of the dough. As I fold, these mix throughout naturally. I repeat one more fold afterward to make sure everything is evenly distributed.
- Once folding is done, I let the dough rest uncovered in a warm spot for another one and a half to two hours. I’m watching for it to look puffy and jiggly with a few bubbles on top. This tells me it’s ready to shape.
- I gently turn the dough out onto my counter and shape it into a tight round using a bench scraper. I place it seam-side up into a floured banneton or bowl. Any garlic that pops out gets tucked back underneath so it doesn’t burn later.
- I cover the shaped dough and place it in the refrigerator for 12 to 18 hours. This slow, cold rise really develops the flavor. It also makes the dough much easier to score right before baking.
- I preheat my Dutch oven at 500°F for about 30 minutes before baking. I score the chilled dough, then bake it covered at 450°F for 25 minutes. I remove the lid and continue baking another 20 minutes until the crust turns deep golden brown.
Notes
- I always let my garlic cool completely before mixing it in, otherwise it can slow down fermentation
- I keep my dough around 78°F throughout the process since it really does affect timing
- I’ve found scoring straight from the fridge gives me a much cleaner, more controlled cut
- I try not to skip the cold ferment because it’s where so much of the flavor develops
- I like tucking any exposed garlic back into the dough before baking so it doesn’t scorch