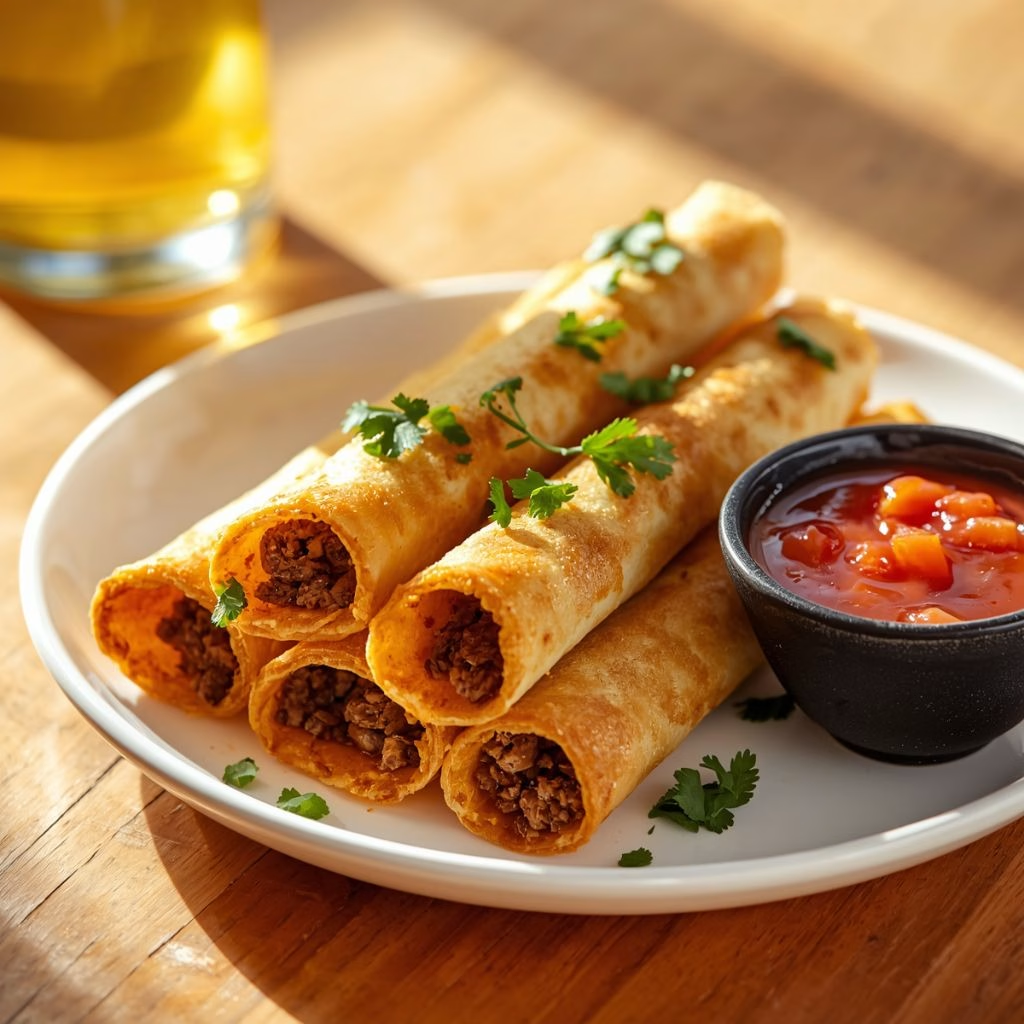
I made this Crispy Beef and Cheese Taquitos Recipe on a random Tuesday when I had leftover taco meat and a stack of tortillas sitting in my fridge, and honestly, they disappeared faster than anything else I’ve cooked this month.
I love how the tortilla shatters into a crisp, golden shell the second you bite in, while the melty cheese and savory beef filling stays warm and gooey inside. Every time I make a batch, I end up doubling it because my family sneaks them off the tray before I even get the dipping sauce ready.
They’re quick enough for a weeknight but impressive enough that I’ll happily serve them when friends come over. If you’ve never rolled your own taquitos at home, I promise this recipe will turn you into a regular.

Ingredients
- 1 pound ground beef (I like a 90/10 blend so the filling isn’t greasy and holds together nicely inside the tortilla)
- ½ cup onion, finely chopped (yellow or white both work, just dice it small so it cooks quickly and blends into the filling)
- 1 tablespoon cooking oil, plus extra for frying (use a neutral oil with a high smoke point, like vegetable or canola, since you’ll need it hot)
- 2 tablespoons taco seasoning (store-bought is easy, but homemade lets you control the salt and spice level)
- 2 tablespoons tomato paste (this adds depth and a slightly tangy richness that plain tomato sauce can’t quite match)
- ¼ cup water or beef broth, as needed (broth adds more flavor, but water works fine if that’s what you have on hand)
- salt, to taste
- 3 to 4 cups mozzarella cheese, shredded (grate your own block of cheese instead of using bagged shreds — it melts smoother and doesn’t have that anti-caking coating that keeps it from getting gooey)
- 14 taco-sized flour tortillas (let them sit at room temperature or warm them slightly so they roll without cracking)
Note: These measurements make about 14 taquitos, which is roughly enough to serve 6 to 7 people as a main dish, or more if you’re serving them as an appetizer alongside other snacks.
Variations
- Swap the ground beef for shredded chicken, ground turkey, or even seasoned black beans for a vegetarian version.
- Use a dairy-free shredded cheese if you need this to be lactose-free; it melts differently but still gets nicely gooey.
- Add a small can of diced green chiles or a spoonful of diced jalapeños to the beef filling for extra heat.
- Try pepper jack or a Mexican cheese blend instead of mozzarella for a sharper, spicier flavor.
- Stir in a tablespoon of chipotle peppers in adobo for a smoky kick that pairs beautifully with the melted cheese.
- Use corn tortillas instead of flour if you want a more traditional, slightly earthier taquito (just warm them first so they don’t tear).
Cooking Time
- Prep Time: 25 minutes
- Cook Time: 15 minutes
- Total Time: 40 minutes
Equipment You Need
- Large skillet or frying pan – for cooking the beef filling and frying the taquitos
- Cutting board and knife – for chopping the onions
- Mixing spoon or spatula – for breaking up the ground beef as it cooks
- Kitchen tongs – for rotating the taquitos while frying so every side crisps evenly
- Wire rack and baking sheet – for draining excess oil after frying so the taquitos stay crisp instead of soggy
- Paper towels – lined under the wire rack to catch drips
How to Make Crispy Beef and Cheese Taquitos?
Making these taquitos really comes down to three simple stages: cooking a flavorful beef filling, rolling everything up tightly, and frying until golden. None of the steps are complicated, but a little attention to detail at each stage makes a big difference in the final crunch. If you enjoy creamy pasta dishes alongside crispy comfort food, Creamy Spaghetti Carbonara Recipe is another satisfying meal to add to your dinner rotation..
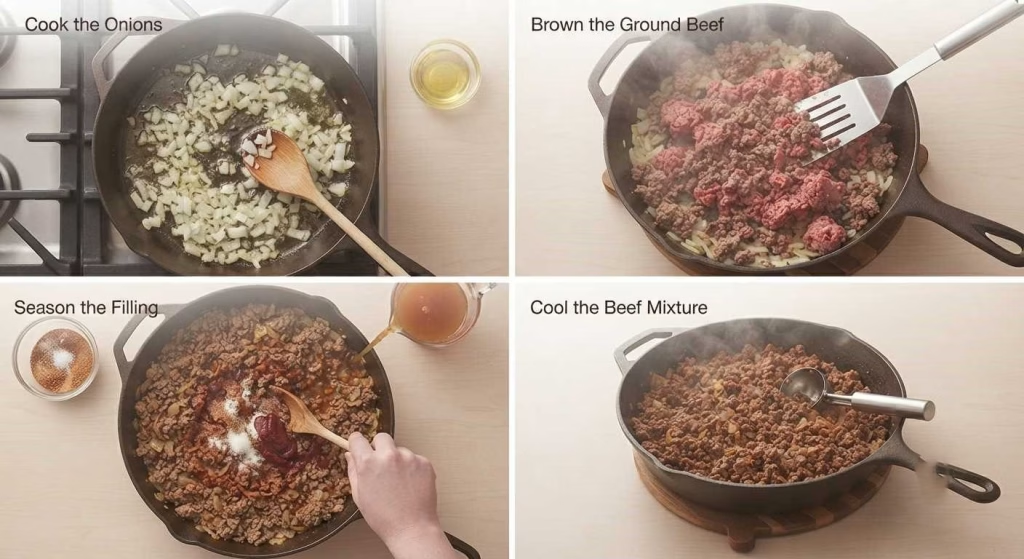
Cook the Onions
I start by heating a tablespoon of oil in a large pan over medium heat. Once it’s shimmering, I toss in the chopped onions and let them cook, stirring occasionally, until they turn soft and slightly translucent. This usually takes about three to four minutes and builds a nice flavor base for the beef.
Brown the Ground Beef
Next, I add the ground beef right into the pan with the softened onions. Using a large spoon, I break the meat up into small crumbles as it cooks. This step takes a little patience, but smaller pieces of beef roll into the tortillas much more evenly.
Season the Filling
Once the beef is mostly cooked, I stir in the taco seasoning, salt, and tomato paste until everything is evenly coated. If the mixture looks dry, I splash in a little water or beef broth to loosen it up. I keep cooking until the beef is completely done, usually another six to eight minutes.
Cool the Beef Mixture
This step is easy to skip, but I never do. I pull the pan off the heat and let the filling cool for several minutes before assembling the taquitos. Warm filling makes the tortillas soggy and much harder to roll tightly.
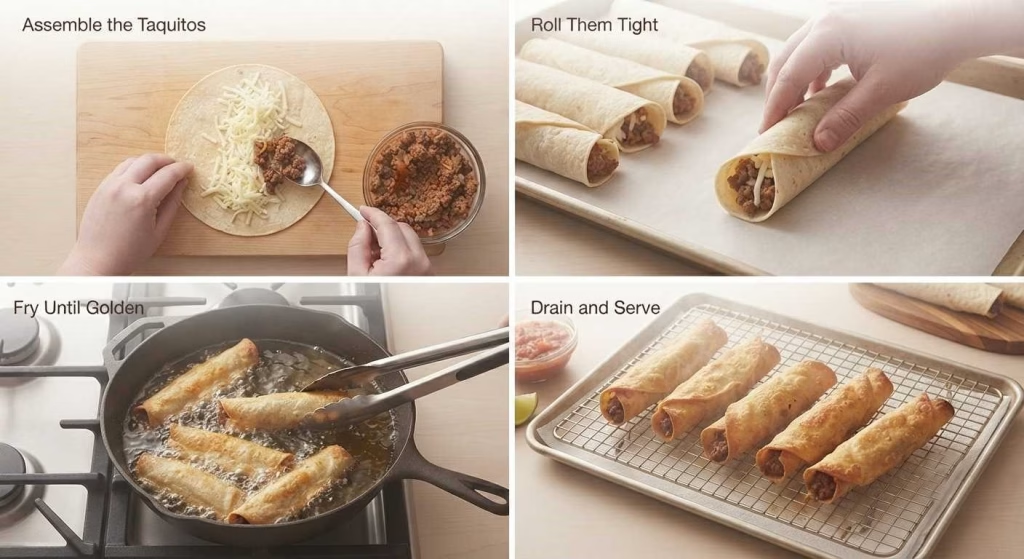
Assemble the Taquitos
On a clean surface, I lay out a tortilla and sprinkle three to four tablespoons of shredded mozzarella down the center. Then I spoon about two tablespoons of the cooled beef filling right on top of the cheese, keeping it centered so nothing spills out the sides.
Roll Them Tight
Starting from the edge closest to me, I roll the tortilla into a tight log, tucking as I go so the filling stays locked inside. I place each rolled taquito seam-side down on a baking sheet and repeat until I’ve used up all the tortillas, cheese, and beef.
Fry Until Golden
I heat about half a cup of oil in a frying pan over medium heat, then fry the taquitos in small batches, seam-side down first. Using tongs, I rotate them every minute or so until every side turns golden brown and crispy, which takes about one to two minutes total per batch.
Drain and Serve
As each batch finishes frying, I transfer the taquitos to a wire rack set over a paper-towel-lined baking sheet. This lets any extra oil drip away instead of soaking back into the crispy shell, so they stay perfectly crunchy until serving.
Additional Tips for Making This Recipe Better
I’ve made this recipe enough times now to have picked up a few tricks that genuinely make a difference.
- I always let the beef filling cool completely before rolling, otherwise the tortillas turn soft and tear apart in the hot oil.
- I never overstuff the tortillas, since too much filling makes them pop open while frying.
- I fry in small batches so the oil temperature stays steady and every taquito gets that even, golden crunch.
- I roll the taquitos seam-side down on the tray before frying so they hold their shape and don’t unravel.
- I grate my own cheese from a block instead of using pre-shredded bags, because it melts so much smoother inside the tortilla.
How to Serve Crispy Beef and Cheese Taquitos?
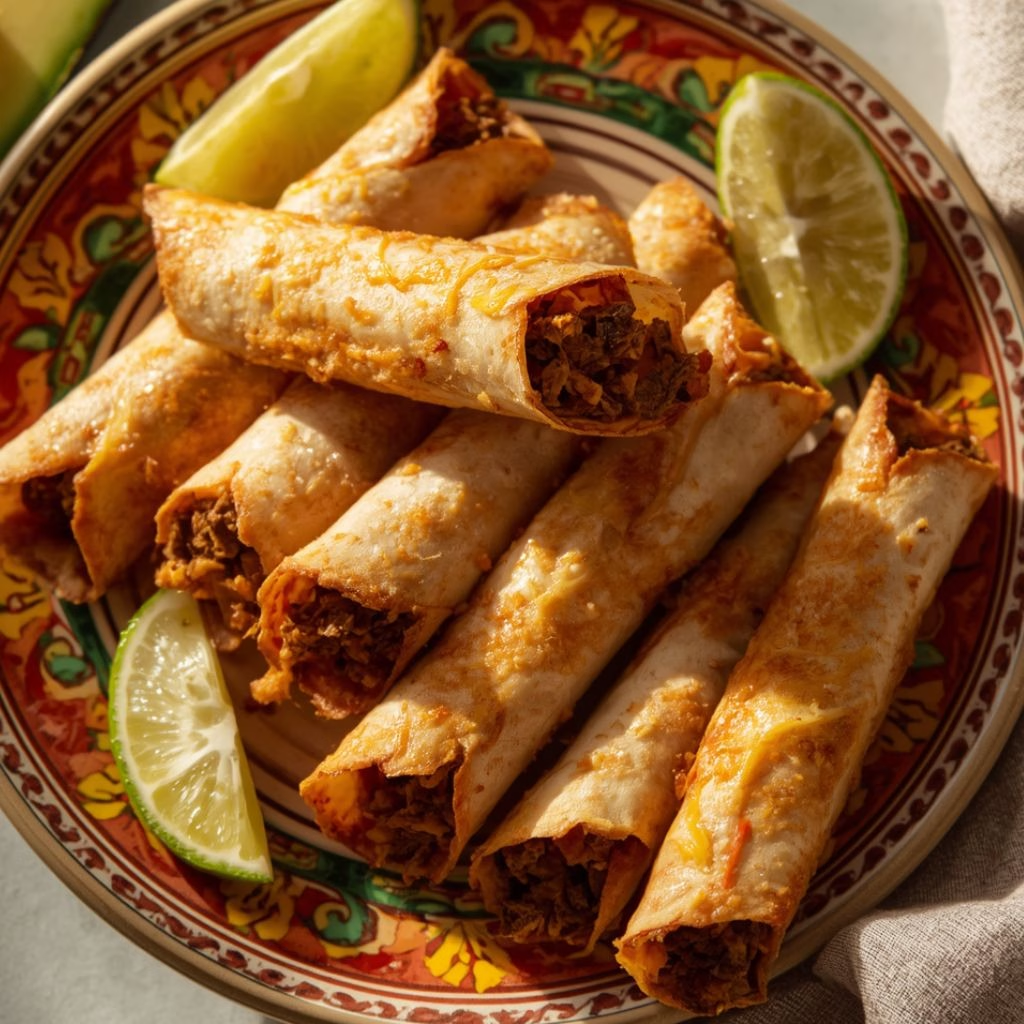
I like piling these taquitos onto a large platter, seam-side down, right after they’ve drained on the wire rack so they keep their crunch. A generous drizzle of crema or a scoop of guacamole on the side always makes the plate look more inviting. I’ll often scatter some chopped cilantro and a few lime wedges around the platter for a fresh pop of color.
For dipping, I set out small bowls of salsa, sour cream, and guacamole so everyone can customize each bite. They’re just as great cut in half on an appetizer board as they are served whole alongside rice and beans for dinner.
Nutritional Information
Here’s a general idea of what you’re working with per serving, though exact numbers will vary based on your specific ingredients and portion sizes.
- Calories: approximately 320 to 380 per serving
- Protein: approximately 18 to 22 grams per serving
- Carbohydrates: approximately 22 to 26 grams per serving
- Fat: approximately 16 to 20 grams per serving
Make Ahead and Storage
Make Ahead: I often prepare the beef filling a day in advance and store it in the fridge, then assemble and fry the taquitos right before serving. This saves time without sacrificing any of that fresh, crispy texture.
Refrigerating: Leftover cooked taquitos keep well in an airtight container in the fridge for up to three days. I reheat them in the oven or air fryer rather than the microwave to bring back some of the crunch.
Freezing: You can freeze assembled, unfried taquitos on a baking sheet until solid, then transfer them to a freezer bag for up to two months. Fry them straight from frozen, just adding a minute or two to the cooking time.
Reheating: For the best texture, I reheat leftovers in an air fryer or oven at 375°F until they’re hot and crispy again, usually about eight to ten minutes. Avoid the microwave if you can, since it tends to make the tortilla go soft and chewy instead of crisp.
Why You’ll Love This Recipe?
These taquitos check every box I look for in a weeknight recipe, and I think you’ll find the same.
- They come together fast, since the filling only takes about fifteen minutes to cook and the rolling process is simple enough for anyone to master.
- They’re endlessly customizable, so you can swap the protein, cheese, or spice level to match whatever you’re craving that day.
- They work for almost any occasion, whether you’re serving them as a quick dinner, a game-day appetizer, or a fun dish for a party spread.
- The crispy shell and melty cheese combination is genuinely hard to stop eating, which is exactly why I always make extra.
- They reheat and freeze well, so you can enjoy that same crispy, cheesy bite even on a night you don’t feel like cooking from scratch.

Crispy Beef and Cheese Taquitos Recipe
Ingredients
Method
- I start by heating a tablespoon of oil in a large pan over medium heat. Once it’s shimmering, I toss in the chopped onions and let them cook, stirring occasionally, until they turn soft and slightly translucent. This usually takes about three to four minutes and builds a nice flavor base for the beef.
- Next, I add the ground beef right into the pan with the softened onions. Using a large spoon, I break the meat up into small crumbles as it cooks. This step takes a little patience, but smaller pieces of beef roll into the tortillas much more evenly.
- Once the beef is mostly cooked, I stir in the taco seasoning, salt, and tomato paste until everything is evenly coated. If the mixture looks dry, I splash in a little water or beef broth to loosen it up. I keep cooking until the beef is completely done, usually another six to eight minutes.
- This step is easy to skip, but I never do. I pull the pan off the heat and let the filling cool for several minutes before assembling the taquitos. Warm filling makes the tortillas soggy and much harder to roll tightly.
- On a clean surface, I lay out a tortilla and sprinkle three to four tablespoons of shredded mozzarella down the center. Then I spoon about two tablespoons of the cooled beef filling right on top of the cheese, keeping it centered so nothing spills out the sides.
- Starting from the edge closest to me, I roll the tortilla into a tight log, tucking as I go so the filling stays locked inside. I place each rolled taquito seam-side down on a baking sheet and repeat until I’ve used up all the tortillas, cheese, and beef.
- I heat about half a cup of oil in a frying pan over medium heat, then fry the taquitos in small batches, seam-side down first. Using tongs, I rotate them every minute or so until every side turns golden brown and crispy, which takes about one to two minutes total per batch.
- As each batch finishes frying, I transfer the taquitos to a wire rack set over a paper-towel-lined baking sheet. This lets any extra oil drip away instead of soaking back into the crispy shell, so they stay perfectly crunchy until serving.
Notes
- I always let the beef filling cool completely before rolling, otherwise the tortillas turn soft and tear apart in the hot oil.
- I never overstuff the tortillas, since too much filling makes them pop open while frying.
- I fry in small batches so the oil temperature stays steady and every taquito gets that even, golden crunch.
- I roll the taquitos seam-side down on the tray before frying so they hold their shape and don’t unravel.
- I grate my own cheese from a block instead of using pre-shredded bags, because it melts so much smoother inside the tortilla.