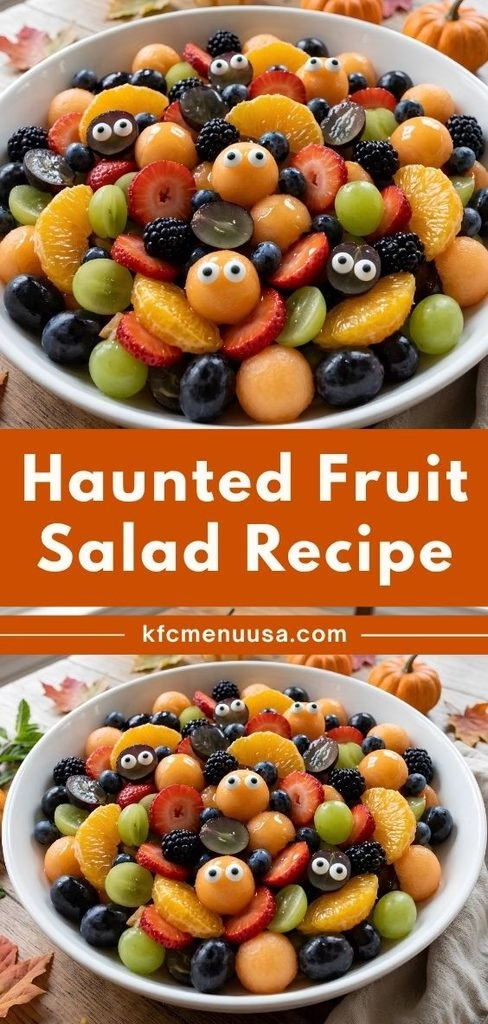
I still remember the first time I made this Haunted Fruit Salad Recipe for a school Halloween party, and I was honestly shocked at how fast the bowl emptied out. I wanted something that looked creepy but still felt like a genuinely healthy snack I could serve without any guilt.
So I grabbed a mix of black and orange fruit, a few “eyeball” grapes, and turned my kitchen counter into a mini graveyard for an hour. By the time I was done, I had a dish that looked like it belonged in a haunted mansion but tasted like pure sunshine.
If you’re searching for halloween fruit ideas for school, a spooky centerpiece for a party, or just a fun halloween salad idea for your own table, this one checks every box. If you love fruity, no-cook dishes like this, you’ll probably also enjoy my watermelon fruit salad recipe for another refreshing, crowd-pleasing option.
Cooking Time
- Prep Time: 20 minutes
- Cooking Time: 0 minutes (no cooking required)
- Total Time: 20 minutes (plus 30 minutes chilling, optional)
Ingredients
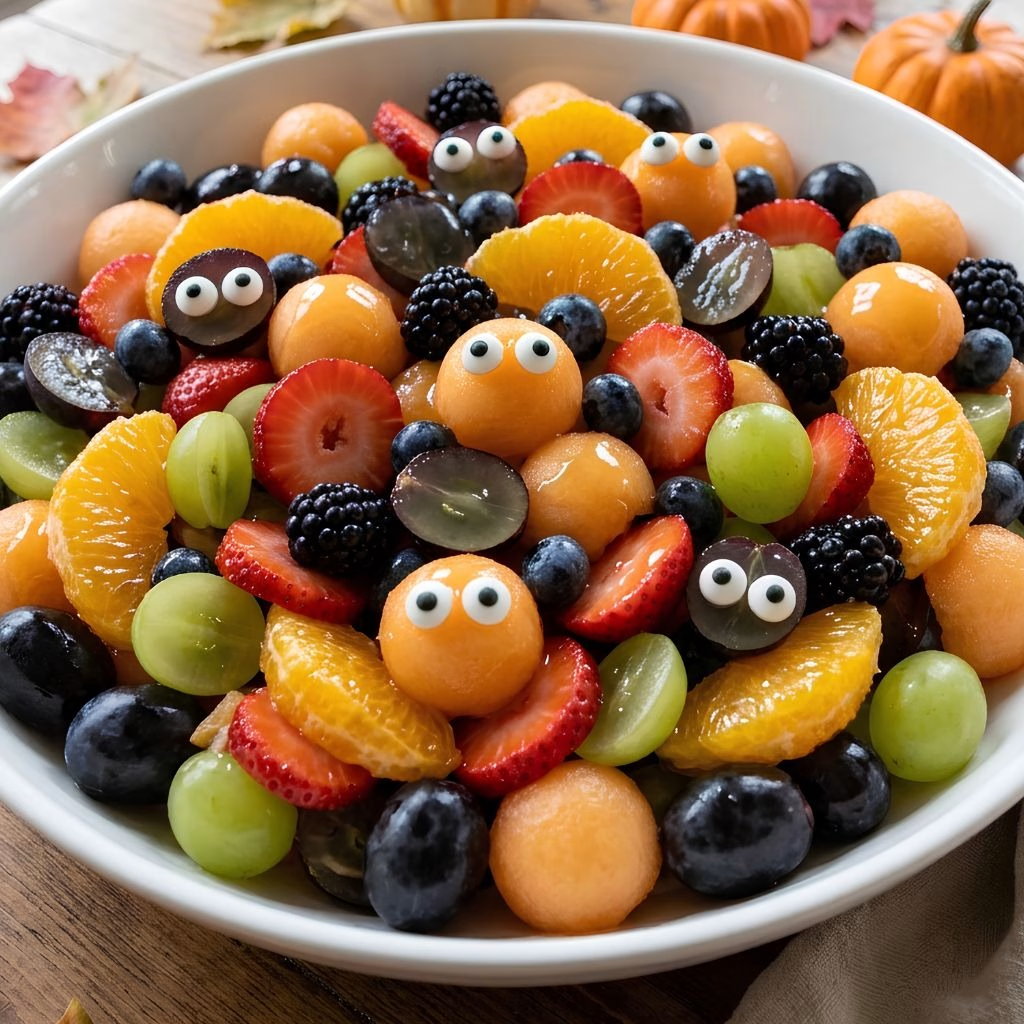
- 2 cups black grapes, halved — these become the “eyeballs” and “spider eggs,” so pick firm, unblemished ones
- 1 cup green grapes, halved — I like the color contrast against the black grapes and oranges
- 2 cups fresh strawberries, hulled and sliced — fresh berries hold their shape better than frozen ones, which turn mushy
- 1 cup blackberries — these add a deep, almost “bat wing” color that makes the bowl look eerie
- 2 navel oranges, peeled and segmented — the bright orange keeps the classic Halloween palette going
- 1 cup cantaloupe, cut into small balls or cubes — a melon baller gives you perfectly round “pumpkins” or “eyeballs”
- 1 cup dark cherries, pitted — pick ripe, deep-colored cherries for the spookiest look
- 1 cup blueberries — small and dark, they work great scattered in as “spider eggs” or filler
- 2 tablespoons fresh orange juice — this keeps the cut fruit from browning too fast
- 1 tablespoon honey — just enough to add a light natural sweetness without overpowering the fruit
- Edible candy eyes (optional) — press a few onto grapes or melon balls for that extra haunted effect
Note: This recipe serves 6 to 8 people as a party side dish.
Equipment You Need
- Large mixing bowl — for tossing all the fruit together without crushing it
- Cutting board — gives you a stable surface for slicing and segmenting fruit
- Sharp paring knife — makes clean cuts through strawberries, oranges, and cherries
- Melon baller — creates the round “eyeball” shapes from cantaloupe
- Measuring cups and spoons — keeps your juice and honey ratios accurate
- Serving platter or deep bowl — black or dark-colored dishes make the fruit colors pop
How to Make a Haunted Fruit Salad Recipe?
I promise this recipe is far less intimidating than it looks on a party table. Once your fruit is washed and prepped, the whole thing comes together in minutes with almost no real cooking skill required. Here’s exactly how I put mine together every single time.
Wash and Dry the Fruit
Start by rinsing every piece of fruit under cool water, then pat it completely dry with a clean towel. Wet fruit dilutes the orange juice glaze later and makes the salad watery. I always set mine on paper towels for a few extra minutes before I start cutting anything.
Slice the Grapes and Berries
Halve the black and green grapes so they resemble tiny eyeballs or spider eggs once mixed in. Slice the strawberries into thin rounds or halves, keeping the pieces roughly the same size. I like uneven cuts here and there since it makes the bowl look more “organic” and less store-bought.
Prepare the Melon and Citrus
Use your melon baller to scoop the cantaloupe into round shapes, or simply cube it if you don’t own one. Peel the oranges and carefully separate the segments, removing any white pith. This step takes me the longest, but it’s worth it for the clean, bright color.
Combine Everything in the Bowl
Add all the prepped fruit into your large mixing bowl at once rather than in stages. Gently fold everything together with a spatula so the delicate berries don’t get crushed. I always fold from the bottom up instead of stirring in circles.
Make the Light Honey-Orange Glaze
Whisk together the fresh orange juice and honey in a small bowl until fully combined. Drizzle this mixture evenly over the fruit, then toss very gently to coat every piece. This glaze is what keeps the salad glossy and prevents browning for hours.
Add the Spooky Finishing Touches
Press a few edible candy eyes onto grapes or melon balls right before serving for the “haunted” effect. Scatter the blueberries and extra blackberries on top so they peek out unevenly. I find this final step is what actually sells the Halloween theme.
Chill Before Serving
Cover the bowl and refrigerate for at least 30 minutes so the flavors can mingle and the fruit turns nicely cold. This resting time also lets the honey-orange glaze soak in a little deeper. I rarely skip this step, even when I’m short on time.
Additional Tips for Making This Recipe Better
I’ve made this salad more times than I can count, and these are the small details that actually made a difference for me.
- I always pick fruit that’s ripe but still firm, since overripe pieces turn mushy within an hour.
- I cut my fruit close to serving time instead of hours ahead, which keeps everything looking fresh.
- I toss in a pinch of lemon juice along with the orange juice when I want extra brightness.
- I keep a few fruit pieces whole or chunkier for texture instead of dicing everything uniformly.
- I serve this in a dark or black bowl because it genuinely makes the colors pop more than a white one.
Common Mistakes to Avoid
I’ve made a few of these mistakes myself, so I’m sharing them here so you don’t have to repeat them.
- I once used frozen berries straight from the freezer, and they turned the whole bowl watery and mushy.
- I overmixed the salad one time and ended up crushing half the strawberries into mush.
- I skipped the citrus juice once and the cut fruit browned within an hour, which looked unappetizing.
- I added the candy eyes too early, and they went soggy and started sliding off the fruit.
- I cut all the fruit the night before, and by party time it had lost most of its fresh texture.
How to Serve Haunted Fruit Salad
I like to serve this straight from a shallow black or dark gray bowl so the orange, black, and deep red fruit really stand out. A few spiderweb-style drizzles of white chocolate across the top always get comments at parties.
For a themed table, I’ll place it next to other spooky dishes and a chilled punch bowl. This halloween fruit salad also pairs nicely with a creepy veggie tray if you want to balance sweet and savory options for guests.
Small clear cups work great too if you’re setting this up for a halloween fruit tray ideas style buffet where kids can grab individual portions without needing a serving spoon. For an easy sweet finish to the spread, my pumpkin spice dessert recipe is another seasonal favorite that fits right in next to this fruit salad.
Variations
- Swap the honey for a sugar-free syrup if you’re keeping this recipe lower in added sugar.
- Use coconut yogurt instead of plain glaze for a creamy, dairy-free twist on the classic version.
- Add pomegranate seeds for extra crunch and an even deeper, bloodier red color.
- Mix in mini marshmallow “ghosts” for a kid-friendly version that leans sweeter.
- Try black grapes alone with white fruit like banana or pear for a simple two-tone Halloween fruit name theme.
- Toss in chopped kiwi for a pop of green that balances the orange and black palette.
Nutritional Information
This fruit salad is naturally light, so here’s roughly what one serving offers.
- Calories: approximately 110 per serving
- Protein: approximately 1.5 grams per serving
- Carbohydrates: approximately 27 grams per serving
- Fat: approximately 0.5 grams per serving
Make Ahead and Storage
You can prep the washed and cut fruit up to a day ahead, but I recommend waiting to add the orange juice glaze until right before serving. This keeps every piece looking fresh instead of sitting in liquid overnight.
Store leftovers in an airtight container in the refrigerator, where the salad stays good for about 2 to 3 days. After that, the texture starts to soften and the colors begin to fade.
I don’t recommend freezing this salad, since thawed fruit turns mushy and loses its shape completely. If you do have extra, it’s better blended into a smoothie than frozen whole.
Why You’ll Love This Recipe
This haunted fruit salad has become one of my go-to dishes every October, and here’s why it keeps earning a spot on my table.
- It’s genuinely easy to make. There’s no cooking involved, so even a beginner can pull this together in about 20 minutes.
- It’s a healthier option at parties full of candy. Guests always appreciate having something fresh and light next to the sugary treats.
- It’s endlessly customizable. You can swap fruits based on what’s in season or what your family already loves.
- It works for every dietary need. It’s naturally gluten-free, dairy-free, and vegan without any extra substitutions.
- It looks genuinely spooky without much effort. A few candy eyes and dark fruit choices do most of the visual work for you.
FAQs
Can I use frozen fruit instead of fresh?
I don’t recommend it, since frozen fruit releases extra water once thawed and makes the salad soggy instead of crisp.
How far in advance can I make this salad?
I suggest cutting the fruit up to a day ahead, but waiting to add the glaze and toppings until right before serving.
What can I use instead of honey?
Maple syrup or a sugar-free syrup both work well if you want to adjust the sweetness or avoid honey specifically.
Will this fruit salad turn brown if I make it early?
A little citrus juice tossed through the fruit slows browning significantly, but it’s still best enjoyed within a few hours.
Is this recipe kid-friendly?
Yes, I’ve served this at school parties, and the “spooky” theme combined with naturally sweet fruit makes it a hit with kids.

Haunted Fruit Salad Recipe
Ingredients
Method
- Start by rinsing every piece of fruit under cool water, then pat it completely dry with a clean towel. Wet fruit dilutes the orange juice glaze later and makes the salad watery. I always set mine on paper towels for a few extra minutes before I start cutting anything.
- Halve the black and green grapes so they resemble tiny eyeballs or spider eggs once mixed in. Slice the strawberries into thin rounds or halves, keeping the pieces roughly the same size. I like uneven cuts here and there since it makes the bowl look more “organic” and less store-bought.
- Use your melon baller to scoop the cantaloupe into round shapes, or simply cube it if you don’t own one. Peel the oranges and carefully separate the segments, removing any white pith. This step takes me the longest, but it’s worth it for the clean, bright color.
- Add all the prepped fruit into your large mixing bowl at once rather than in stages. Gently fold everything together with a spatula so the delicate berries don’t get crushed. I always fold from the bottom up instead of stirring in circles.
- Whisk together the fresh orange juice and honey in a small bowl until fully combined. Drizzle this mixture evenly over the fruit, then toss very gently to coat every piece. This glaze is what keeps the salad glossy and prevents browning for hours.
- Press a few edible candy eyes onto grapes or melon balls right before serving for the “haunted” effect. Scatter the blueberries and extra blackberries on top so they peek out unevenly. I find this final step is what actually sells the Halloween theme.
- Cover the bowl and refrigerate for at least 30 minutes so the flavors can mingle and the fruit turns nicely cold. This resting time also lets the honey-orange glaze soak in a little deeper. I rarely skip this step, even when I’m short on time.
Notes
- I always pick fruit that’s ripe but still firm, since overripe pieces turn mushy within an hour.
- I cut my fruit close to serving time instead of hours ahead, which keeps everything looking fresh.
- I toss in a pinch of lemon juice along with the orange juice when I want extra brightness.
- I keep a few fruit pieces whole or chunkier for texture instead of dicing everything uniformly.
- I serve this in a dark or black bowl because it genuinely makes the colors pop more than a white one.