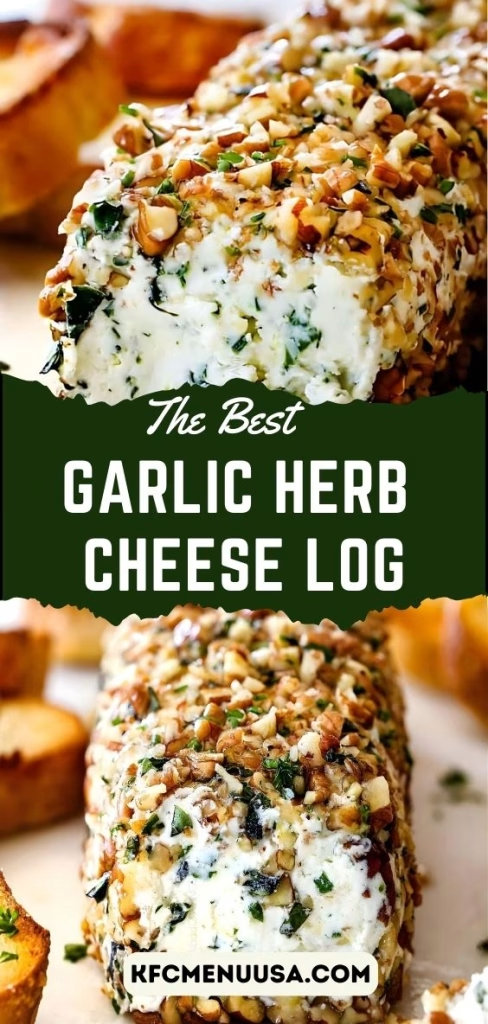
I still remember the first time I made this Garlic Herb Cheese Log Recipe—it was one of those recipes that looked fancy but turned out to be surprisingly easy. I mixed everything up, rolled it, chilled it, and suddenly I had a party-worthy appetizer sitting in my fridge. When I sliced into it, the flavors were bold, creamy, and perfectly herby.
For me, this recipe quickly became a go-to for gatherings and even lazy weekends. If you love make-ahead snacks that feel special without extra stress, this one is a winner. You can also enjoy similar treats like Date Snickers Bars Recipe for a sweet complement to your savory appetizers.
Ingredients
Here’s a quick intro before we dive in: the magic of a garlic herb cheese log is all about balance. Each ingredient plays a role, so quality really matters here. If you’re interested in dessert ideas while prepping your cheese log, try incorporating the Greek Yogurt Brownies Recipe into your menu—they’re rich yet lighter than traditional brownies.
- Cream cheese – 16 oz (full-fat, softened): Softened cream cheese blends smoothly and creates a rich, creamy base, so always let it sit at room temperature before mixing.
- Sharp cheddar cheese – 1 cup, freshly grated: Freshly grated cheddar melts better into the mixture and delivers a bolder, tangier flavor than pre-shredded cheese.
- Garlic – 2 cloves, minced: Fresh garlic adds strong, savory depth and works much better than garlic powder for this recipe.
- Fresh parsley – 2 tablespoons, finely chopped: Parsley adds a fresh, clean taste and gives the cheese log a vibrant color.
- Fresh chives – 2 tablespoons, finely chopped: Chives provide a mild onion flavor that complements the garlic without overpowering the cheese.
- Fresh dill – 1 tablespoon, chopped: Dill adds a subtle herbaceous brightness that balances the richness of the cream cheese.
- Salt – ¼ teaspoon: A small amount enhances all the flavors without making the cheese taste salty.
- Black pepper – ¼ teaspoon: Freshly ground black pepper adds gentle heat and depth to the overall flavor.
- Crushed nuts (pecans or walnuts) – ½ cup: Nuts create a crunchy outer coating and add a delicious contrast to the creamy center.
Note: This recipe makes approximately 8–10 servings, depending on portion size.
Variations
This recipe is flexible, which is one reason I love it so much.
- For a dairy-free version, use plant-based cream cheese and dairy-free shredded cheese. The texture stays surprisingly creamy.
- If you want extra flavor, mix in sun-dried tomatoes, roasted red peppers, or finely chopped olives.
- For a spicy kick, add crushed red pepper flakes or finely diced jalapeños.
- Herb lovers can swap dill for rosemary, thyme, or basil depending on the season.
- For a nut-free option, coat the log in extra chopped herbs or cracked pepper instead of nuts.

Cooking Time
This is a no-bake recipe, which makes it even better.
- Prep Time: 15 minutes
- Cooking Time: 0 minutes
- Total Time: 15 minutes plus chilling
Equipment You Need
Mixing bowl – for combining all the ingredients evenly
Hand mixer or sturdy spatula – helps achieve a smooth, creamy texture
Plastic wrap – essential for shaping the cheese log
Cutting board – for chopping herbs and nuts
Knife – for clean slicing when serving
How to Make Garlic Herb Cheese Log Recipe?
This section starts simply. Once everything is prepped, the recipe comes together fast and feels almost effortless.
Prepare the Cheese Base
In a large bowl, I combine the softened cream cheese and grated cheddar. Mixing until smooth is key, so I take my time here. A creamy base ensures every bite tastes balanced.
Add Garlic and Seasonings
Next, I stir in the minced garlic, salt, and black pepper. This step builds the savory backbone of the recipe. I always taste at this stage to adjust seasoning if needed.
Mix in Fresh Herbs
I fold in the parsley, chives, and dill gently. Mixing lightly keeps the herbs vibrant and evenly distributed. The aroma at this point is already amazing.
Shape the Cheese Log
I transfer the mixture onto plastic wrap and shape it into a log. Rolling tightly helps it hold its form later. Don’t worry about perfection—the coating hides small flaws.
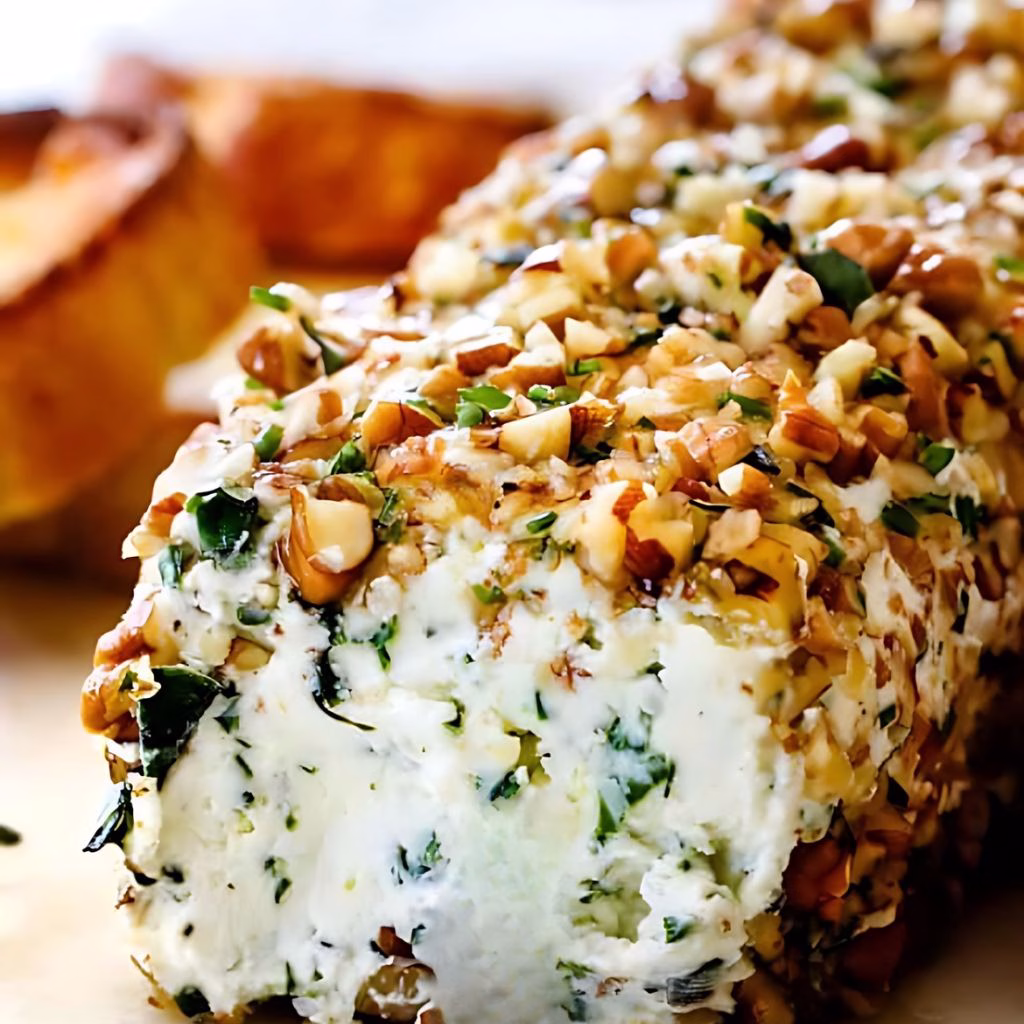
Coat with Nuts
I spread the chopped nuts on a cutting board and roll the log over them. Pressing lightly helps the nuts stick evenly. This step adds texture and visual appeal.
Chill Before Serving
Finally, I wrap the log tightly and refrigerate it for at least two hours. Chilling firms it up and allows the flavors to meld beautifully.
Additional Tips for Making This Recipe Better
After making this recipe many times, I’ve picked up a few tricks that really help.
- I always use room-temperature cream cheese for the smoothest texture.
- I let the log chill overnight when I have time—it tastes even better the next day.
- I toast the nuts lightly for extra flavor and crunch.
- I taste and adjust seasoning before shaping, so I’m not guessing later.
- I keep the log tightly wrapped to prevent it from absorbing fridge odors.
How to Serve Garlic Herb Cheese Log Recipe?
This cheese log looks stunning on a serving board. I like placing it in the center with crackers, toasted baguette slices, and fresh veggies around it. Garnishing with extra chopped herbs makes it pop visually. It also pairs beautifully with grapes, apple slices, or dried fruit for a sweet contrast. For holidays, I sometimes shape it into a shorter log or even a ball for a festive look.
Nutritional Information
Here’s a quick snapshot to give you an idea of what you’re enjoying.
- Calories: Rich and satisfying per serving
- Protein: A good source thanks to the cheese
- Carbohydrates: Low, making it keto-friendly
- Fat: High, contributing to its creamy texture
Make Ahead and Storage
This recipe is perfect for planning ahead, which I truly appreciate.
Make Ahead:
I usually prepare the cheese log up to two days in advance. It actually tastes better after resting, as the flavors blend together nicely.
Storage:
Stored tightly wrapped in plastic wrap, it stays fresh in the refrigerator for up to 5 days. I keep it away from strong-smelling foods.
Freezing:
You can freeze the uncoated cheese log for up to one month. I thaw it overnight in the fridge and coat it with nuts before serving.
Why You’ll Love This Recipe?
There are so many reasons this garlic herb cheese log deserves a spot in your recipe collection.
- It’s incredibly easy to make, even for beginners, and needs no cooking at all.
- The recipe is versatile and works for parties, holidays, or casual snacking.
- You can customize flavors to suit different diets and preferences.
- It looks impressive while requiring minimal effort, which I always appreciate.
- The creamy, garlicky, herby flavor combination never fails to please a crowd.
If you’re looking for a reliable, flavorful appetizer that feels homemade and special, this garlic herb cheese log is one I genuinely love making again and again.
Garlic Herb Cheese Log Recipe
Ingredients
Method
- In a large bowl, I combine the softened cream cheese and grated cheddar. Mixing until smooth is key, so I take my time here. A creamy base ensures every bite tastes balanced.
- Next, I stir in the minced garlic, salt, and black pepper. This step builds the savory backbone of the recipe. I always taste at this stage to adjust seasoning if needed.
- I fold in the parsley, chives, and dill gently. Mixing lightly keeps the herbs vibrant and evenly distributed. The aroma at this point is already amazing.
- I transfer the mixture onto plastic wrap and shape it into a log. Rolling tightly helps it hold its form later. Don’t worry about perfection—the coating hides small flaws.
- I spread the chopped nuts on a cutting board and roll the log over them. Pressing lightly helps the nuts stick evenly. This step adds texture and visual appeal.
- Finally, I wrap the log tightly and refrigerate it for at least two hours. Chilling firms it up and allows the flavors to meld beautifully.
Notes
- I always use room-temperature cream cheese for the smoothest texture.
- I let the log chill overnight when I have time—it tastes even better the next day.
- I toast the nuts lightly for extra flavor and crunch.
- I taste and adjust seasoning before shaping, so I’m not guessing later.
- I keep the log tightly wrapped to prevent it from absorbing fridge odors.