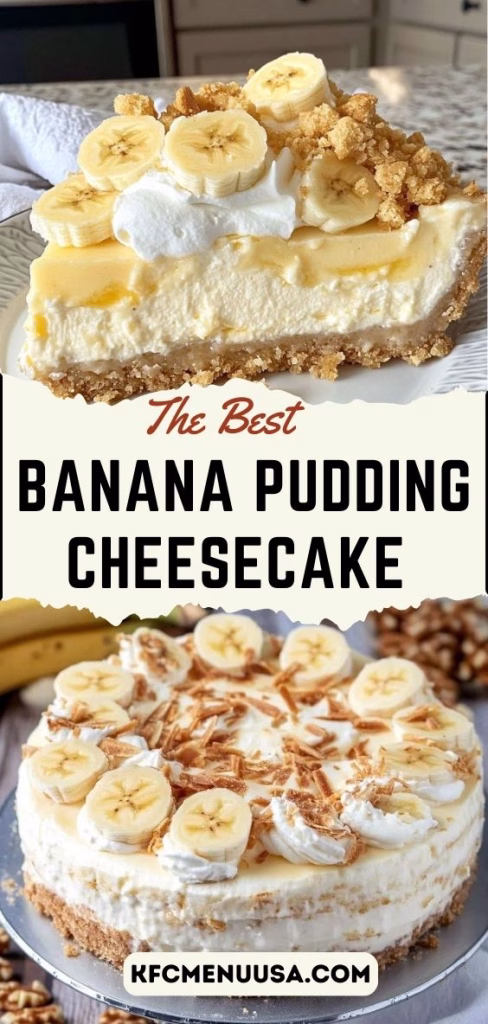
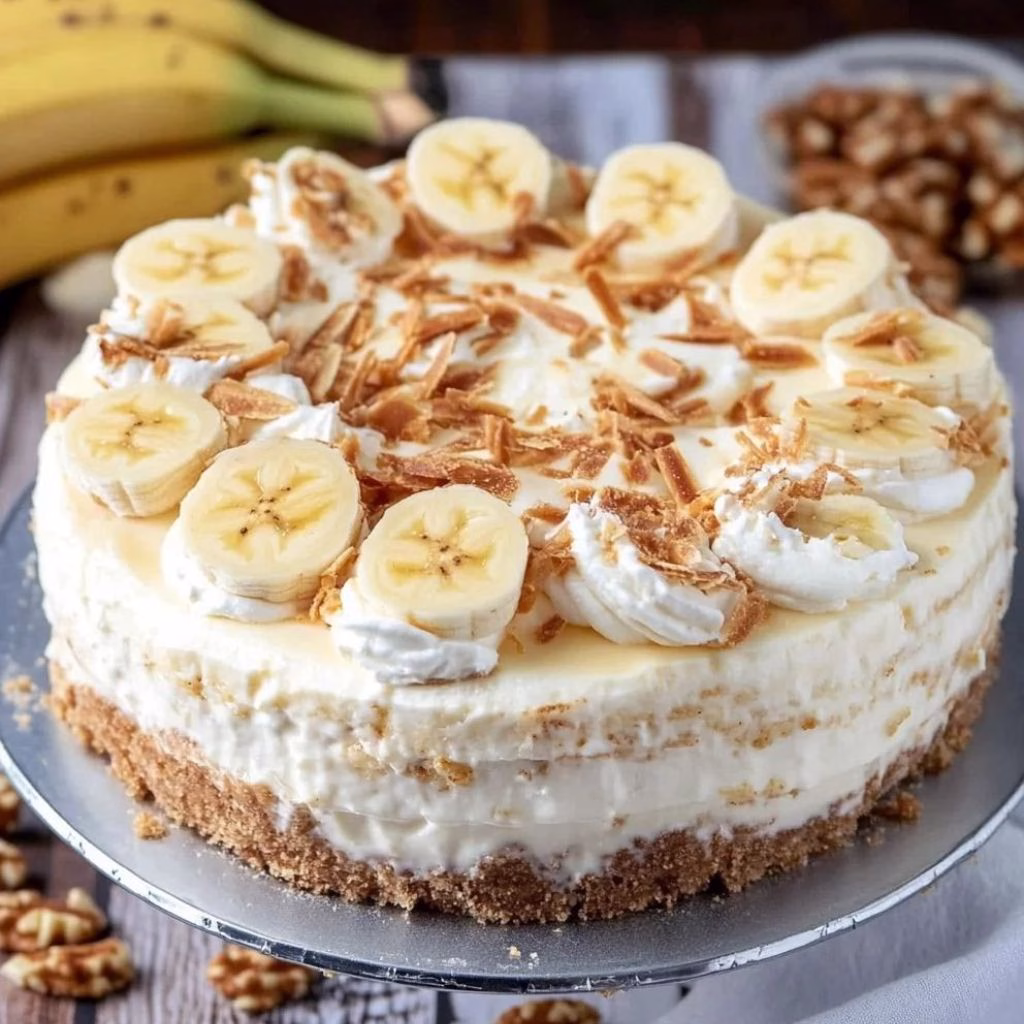
After making this Banana Pudding Cheesecake Recipe a couple of times, I can honestly say it’s one of those desserts that feels nostalgic and luxurious at the same time. I love how it combines classic Southern banana pudding flavors with the rich, creamy texture of cheesecake.
The first time I sliced into it, I knew it was going to be a showstopper. Every bite gives me smooth cheesecake, real banana flavor, and that familiar vanilla wafer crunch. If you enjoy experimenting with similar desserts, you might also like the Snickerdoodle Blondies Recipe for another sweet treat.
Ingredients Section
Each ingredient here plays a specific role in achieving the perfect texture and flavor balance.
- Vanilla wafer crumbs – 2 cups (Finely crushed wafers create a sweet, sturdy crust that complements the banana filling perfectly.)
- Granulated sugar – 2 tablespoons, for crust (Adds light sweetness and helps bind the crust without overpowering the flavor.)
- Unsalted butter, melted – 1/2 cup (Melted butter holds the crumbs together; unsalted butter gives better control over sweetness.)
- Cream cheese, softened – 24 oz / three 8-oz blocks (Full-fat cream cheese gives the cheesecake a rich, smooth, and creamy texture; always soften fully.)
- Granulated sugar – 1 cup, for filling (Sweetens the cheesecake while allowing the banana flavor to shine through.)
- Sour cream – 1 cup (Adds creaminess and a subtle tang that balances the sweetness of the filling.)
- Mashed ripe bananas – 1 cup (Use very ripe bananas with brown spots for the strongest natural banana flavor.)
- Pure vanilla extract – 2 teaspoons (Enhances the overall flavor and pairs beautifully with bananas and vanilla wafers.)
- Large eggs – 3, room temperature (Eggs provide structure and help the cheesecake set properly without becoming dense.)
- Heavy whipping cream – 1/2 cup (Adds richness and contributes to a smooth, velvety cheesecake texture.)
- Vanilla wafers – for topping (Used as garnish for extra crunch and a classic banana pudding look.)
- Whipped cream – for topping (Lightens the dessert visually and balances the dense cheesecake texture.)
Note: This recipe yields approximately 10–12 servings, depending on slice size.
Variations
This banana pudding cheesecake is flexible, which I really appreciate.
- For a dairy-free version, you can use dairy-free cream cheese and coconut cream in place of sour cream and heavy cream.
- To reduce sugar, a granulated sugar substitute that measures cup-for-cup works well in the filling.
- If you want extra flavor, try adding a thin layer of sliced bananas between the crust and filling, but lightly coat them in lemon juice to prevent browning.
- You can also add a drizzle of caramel sauce on top for a banana foster–style twist.
Cooking Time
Here’s a quick breakdown so you can plan ahead.
- Prep Time: 30 minutes
- Cooking Time: 70–80 minutes
- Total Time: About 6 hours including cooling and chilling
Equipment You Need
- Springform pan – allows easy removal without damaging the cheesecake
- Mixing bowls – for separating crust and filling preparation
- Electric mixer – ensures a smooth, lump-free filling
- Rubber spatula – helps scrape the bowl and avoid waste
- Baking pan – used for the water bath to prevent cracking
How to Make Banana Pudding Cheesecake?
A quick note before starting: patience is key here. Cheesecake rewards slow mixing and gentle baking.
Prepare the Vanilla Wafer Crust
I start by mixing the vanilla wafer crumbs, sugar, and melted butter until everything looks like wet sand. The mixture is pressed firmly into the bottom of a springform pan to create an even layer. Baking it briefly helps set the crust so it doesn’t crumble later.
Make the Cheesecake Filling
I beat the softened cream cheese until smooth before adding sugar. This step is crucial for avoiding lumps. Sour cream, mashed bananas, vanilla, and cream are mixed in slowly so the filling stays silky.
Add the Eggs Carefully
Eggs are added one at a time on low speed. I stop mixing as soon as they’re incorporated. Overmixing at this stage can add air, which often causes cracks.
Assemble and Bake
The filling is poured over the cooled crust and smoothed on top. The pan goes into a water bath, which keeps the temperature gentle and even. Baking continues until the center is slightly jiggly but set around the edges.
Cool and Chill
Once baked, I turn off the oven and crack the door open. This slow cooling helps prevent cracks. After reaching room temperature, the cheesecake chills in the fridge for several hours to fully set.
Additional Tips for Making This Recipe Better
These are things I’ve learned after making this cheesecake more than once.
- I always use very ripe bananas because they give stronger banana flavor without extra sweetness.
- I wrap the springform pan tightly with foil to keep water from leaking in during the water bath.
- I let the cheesecake chill overnight when possible; the texture is noticeably better the next day.
- I slice it with a warm knife for clean, professional-looking slices.
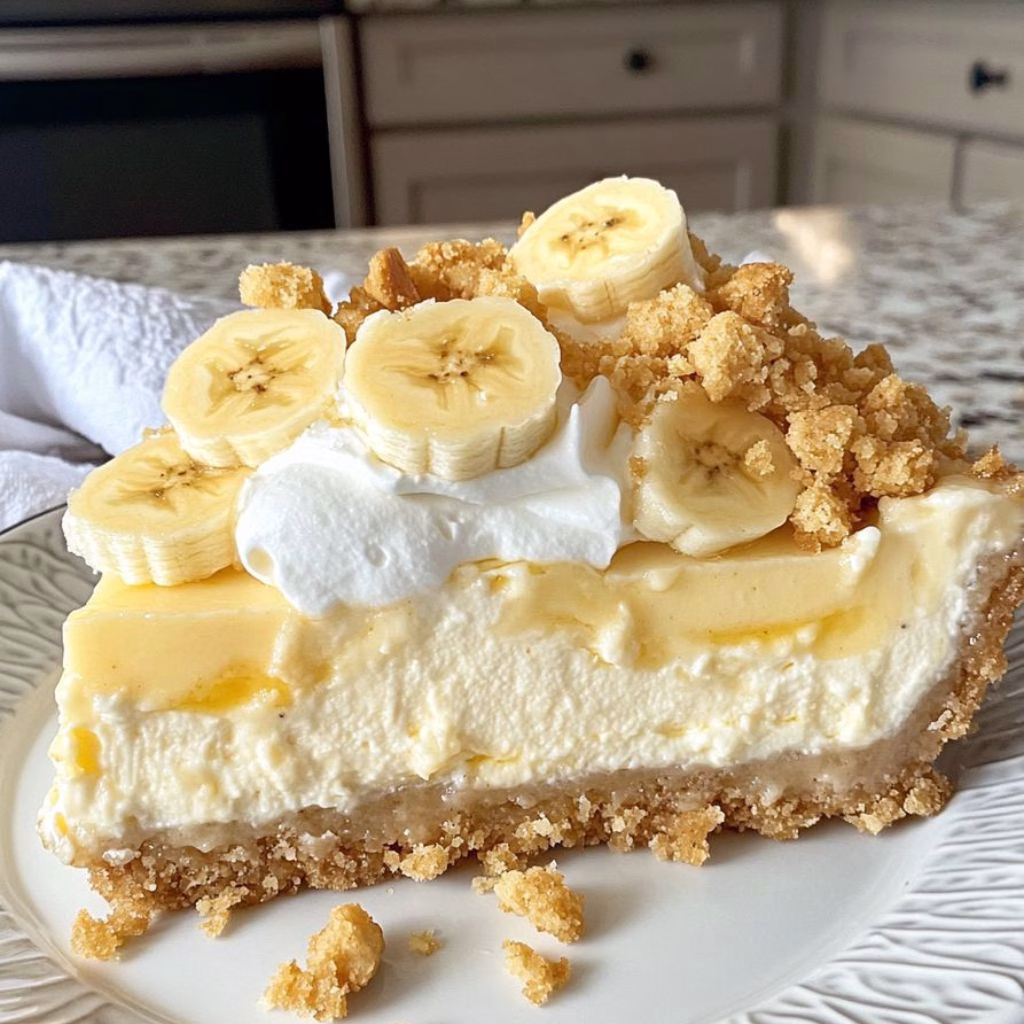
How to Serve Banana Pudding Cheesecake?
This cheesecake looks best served cold straight from the fridge. I like topping it with whipped cream swirls and vanilla wafers right before serving. You can also add fresh banana slices for presentation, but only at the last minute to keep them from browning. A light dusting of wafer crumbs on top adds texture and makes it visually appealing.
Nutritional Information
Here’s a general nutritional overview per slice.
- Calories: approximately 420 per serving
- Protein: about 7 grams
- Carbohydrates: around 38 grams
- Fat: roughly 28 grams
Values may vary depending on portion size and ingredient brands.
Make Ahead and Storage
Make Ahead
I often make this cheesecake a day in advance. It actually tastes better after chilling overnight, making it perfect for parties and holidays.
Storing
Store the cheesecake covered in the refrigerator. It stays fresh for up to 4–5 days without losing texture or flavor.
Freezing
You can freeze the cheesecake without toppings for up to 2 months. Wrap it tightly in plastic wrap and foil. Thaw overnight in the fridge before serving.
Why You’ll Love This Recipe?
This recipe checks all the right boxes for a memorable dessert.
- It combines two classic desserts into one rich, creamy treat that feels special every time.
- The instructions are straightforward, even if you’re new to baking cheesecakes.
- It’s versatile enough to adapt for dietary preferences or flavor add-ins.
- The texture is smooth, creamy, and perfectly balanced with banana flavor.
- It’s a guaranteed crowd-pleaser that always earns compliments.
Banana Pudding Cheesecake Recipe
Ingredients
Method
- I start by mixing the vanilla wafer crumbs, sugar, and melted butter until everything looks like wet sand. The mixture is pressed firmly into the bottom of a springform pan to create an even layer. Baking it briefly helps set the crust so it doesn’t crumble later.
- I beat the softened cream cheese until smooth before adding sugar. This step is crucial for avoiding lumps. Sour cream, mashed bananas, vanilla, and cream are mixed in slowly so the filling stays silky.
- Eggs are added one at a time on low speed. I stop mixing as soon as they’re incorporated. Overmixing at this stage can add air, which often causes cracks.
- The filling is poured over the cooled crust and smoothed on top. The pan goes into a water bath, which keeps the temperature gentle and even. Baking continues until the center is slightly jiggly but set around the edges.
- Once baked, I turn off the oven and crack the door open. This slow cooling helps prevent cracks. After reaching room temperature, the cheesecake chills in the fridge for several hours to fully set.
Notes
- I always use very ripe bananas because they give stronger banana flavor without extra sweetness.
- I wrap the springform pan tightly with foil to keep water from leaking in during the water bath.
- I let the cheesecake chill overnight when possible; the texture is noticeably better the next day.
- I slice it with a warm knife for clean, professional-looking slices.