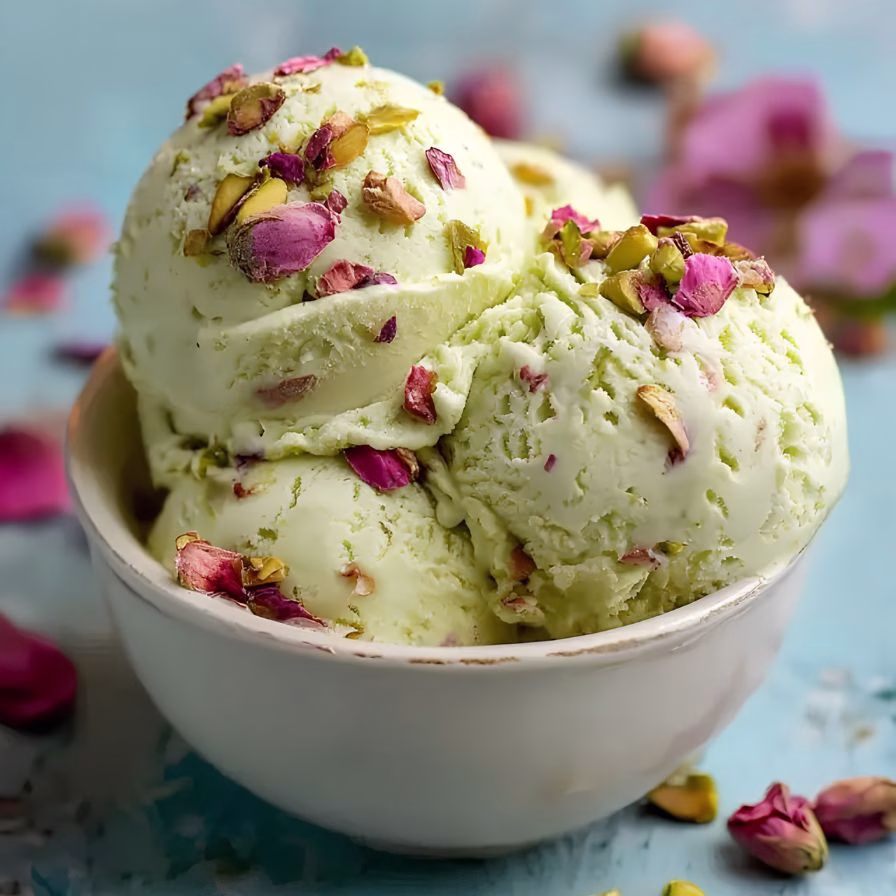
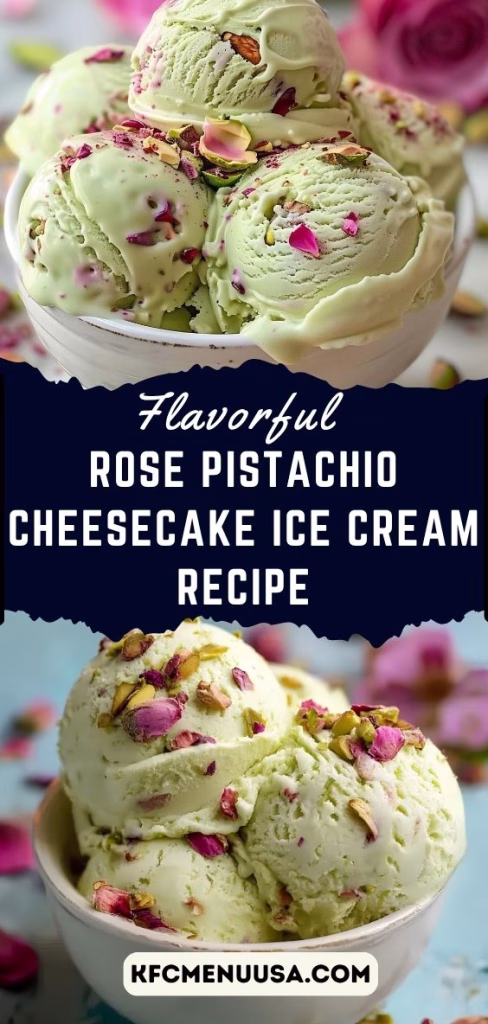
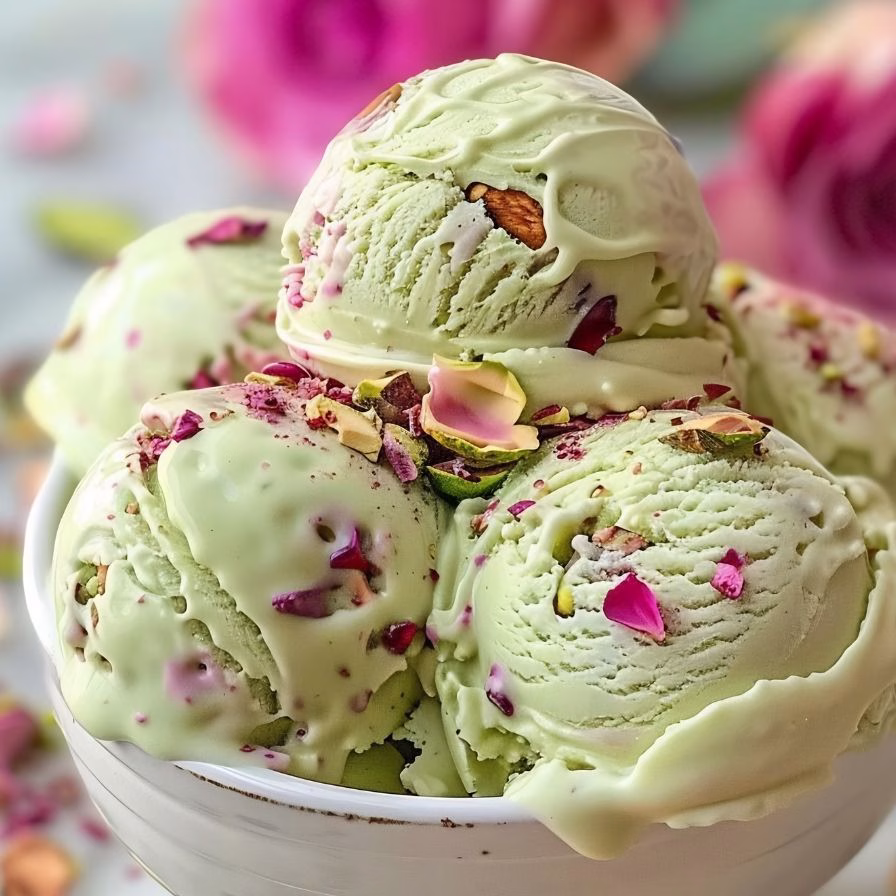
I recently tried making this Rose Pistachio Cheesecake Ice Cream Recipe, and honestly, it turned out better than I expected. The floral hint of rose combined with creamy cheesecake and crunchy pistachios felt like a gourmet dessert right at home.
I loved how each bite had a balance of richness and freshness. It’s one of those recipes that feels fancy but is surprisingly simple. If you enjoy unique flavors, this one is definitely worth trying.
Ingredients
Here’s everything you’ll need to create this luxurious dessert:
- cream cheese (200g) – Use full-fat for a rich and creamy texture; avoid low-fat versions as they can make the ice cream icy.
- heavy cream (2 cups) – Whips beautifully and gives the ice cream its smooth consistency.
- whole milk (1 cup) – Adds balance and prevents the mixture from becoming too dense.
- granulated sugar (¾ cup) – Sweetens the base; adjust slightly depending on your taste.
- rose syrup (3 tablespoons) – Adds floral flavor; choose a high-quality syrup for the best aroma.
- crushed pistachios (½ cup) – Use fresh, unsalted pistachios for a natural nutty crunch.
- vanilla extract (1 teaspoon) – Enhances overall flavor and balances the rose essence.
- lemon juice (1 teaspoon) – Adds a slight tang that complements the cheesecake base.
- graham cracker crumbs (½ cup) – Mimics the cheesecake crust and adds texture.
- salt (a pinch) – Helps balance sweetness and elevate flavors.
Note: This recipe yields about 6 servings, perfect for a small gathering or family treat.
Variations
You can easily customize this recipe to suit your preferences:
- dairy-free option – Use coconut cream and dairy-free cream cheese for a vegan-friendly version.
- sugar-free version – Replace sugar with a natural sweetener like stevia or monk fruit.
- chocolate twist – Add white chocolate chips for extra indulgence.
- extra floral flavor – Mix in a few drops of rose water along with the syrup.
- fruity addition – Fold in raspberries or strawberries for a fresh contrast.
- I sometimes explore savory dishes like Steak Spinach Cheese Recipe when balancing rich desserts.
Cooking Time
Here’s how long the process will take:
- Prep Time: 20 minutes
- Chilling Time: 4–6 hours
- Total Time: Approximately 6 hours 20 minutes
Equipment You Need
- mixing bowl – For combining and whipping the ingredients smoothly.
- hand mixer or stand mixer – Helps achieve a creamy, lump-free texture.
- spatula – Useful for folding ingredients gently.
- airtight container – For freezing and storing the ice cream.
- measuring cups and spoons – Ensures accurate ingredient quantities.
How to Make Rose Pistachio Cheesecake Ice Cream Recipe?
This recipe is simple and rewarding, even if you’re new to homemade ice cream. Just follow each step carefully, and you’ll get a creamy, flavorful dessert. The key is balancing the cheesecake base with rose flavor and pistachio crunch.
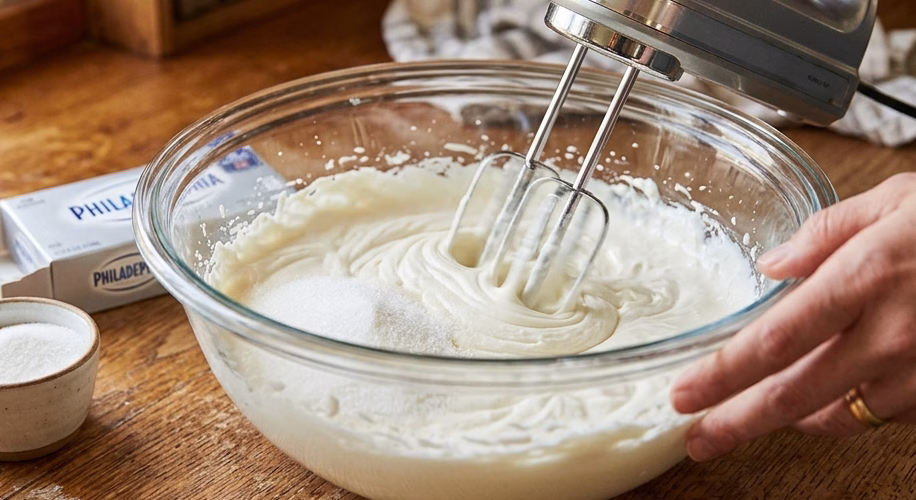
Prepare the Cheesecake Base
Start by beating the cream cheese in a bowl until it becomes smooth and fluffy. This step is important to avoid lumps in your ice cream. Add sugar and mix again until well combined and creamy.
Add Liquid Ingredients
Pour in the heavy cream, milk, vanilla extract, and lemon juice. Blend everything until the mixture is silky and uniform. Make sure the sugar is fully dissolved for a smooth texture.
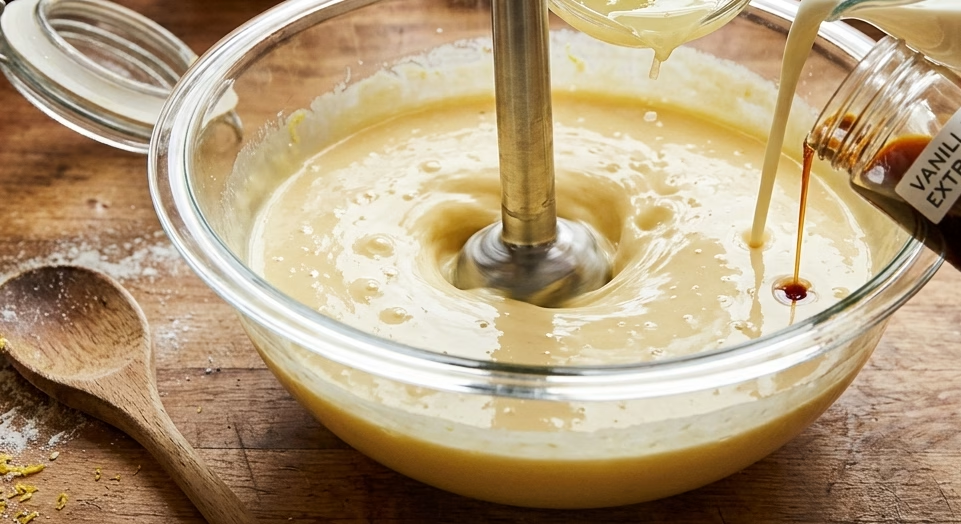
Incorporate Rose Flavor
Add the rose syrup gradually while mixing. Taste as you go to avoid overpowering the mixture. The floral flavor should be subtle and pleasant, not too strong.
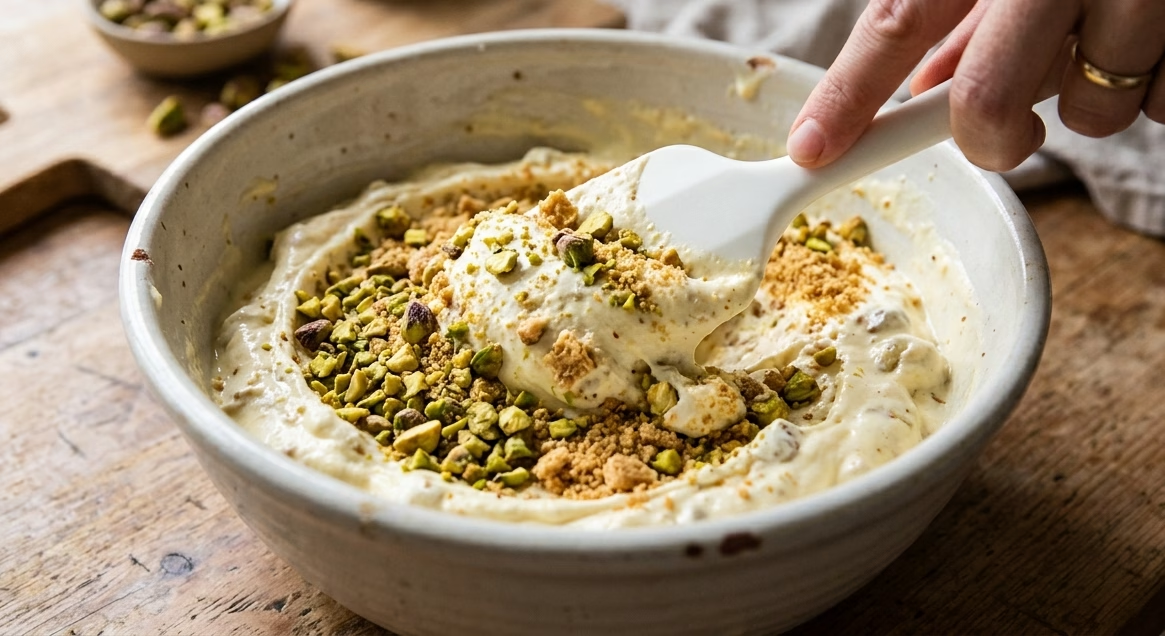
Fold in Pistachios and Crust
Gently fold in crushed pistachios and graham cracker crumbs using a spatula. This step gives the ice cream its signature texture and cheesecake feel. Be careful not to overmix.
Freeze the Mixture
Transfer the mixture into an airtight container and smooth the top. Cover it tightly and place it in the freezer. Let it chill for at least 4–6 hours until firm.
Serve and Enjoy
Once frozen, scoop the ice cream into bowls or cones. Let it sit for a couple of minutes before serving for easier scooping. Enjoy the creamy, nutty, and floral flavors together.
In contrast to this sweet dessert, hearty dishes such as Gospel Shank with Smoked Gouda Grits Recipe can complete a full meal experience.
Additional Tips for Making This Recipe Better
From my experience, these small tweaks make a big difference:
- I always use fresh pistachios instead of pre-packaged ones for better flavor.
- Letting the cream cheese soften before mixing helps avoid lumps.
- I prefer adding rose syrup slowly to control the intensity.
- Chilling the mixture before freezing improves the final texture.
- I sometimes toast the graham crumbs lightly for extra crunch and flavor.
How to Serve Rose Pistachio Cheesecake Ice Cream Recipe?
Serving this ice cream can be as fun as making it. Scoop it into elegant dessert bowls and sprinkle extra crushed pistachios on top for a refined look. You can also drizzle a little rose syrup for added color and flavor. For special occasions, serve it in waffle cones or alongside fresh berries to elevate presentation.
Nutritional Information
Here’s a quick overview of what you get per serving:
- Calories: حوالي 320 kcal – A rich dessert, best enjoyed in moderation.
- Protein: 5g – Comes mainly from cream cheese and milk.
- Carbohydrates: 28g – Includes sugar and graham crackers.
- Fat: 22g – Provides the creamy texture and richness.
Make Ahead and Storage
Storing
Store the ice cream in an airtight container in the freezer. This prevents ice crystals from forming and keeps it fresh. It can last up to one week with proper storage.
Freezing
Always freeze the mixture immediately after preparation. Keep it at a consistent temperature to maintain its creamy texture. Avoid frequent thawing and refreezing.
Reheating (Softening for Serving)
Take the ice cream out of the freezer 5 minutes before serving. This allows it to soften slightly for easier scooping. Avoid microwaving, as it can ruin the texture.
Why You’ll Love This Recipe?
This recipe is a delightful blend of flavors and textures that stands out from regular ice cream. Here’s why it’s worth trying:
- unique flavor combination – The mix of rose, pistachio, and cheesecake creates a gourmet dessert experience. It’s different from typical ice cream flavors.
- easy to make – You don’t need an ice cream machine, making it beginner-friendly. The steps are simple and straightforward.
- customizable options – You can easily adjust sweetness, add fruits, or make it dairy-free. It suits different dietary needs.
- perfect for occasions – Its elegant taste and look make it ideal for parties or special dinners. It always impresses guests.
- rich and creamy texture – Thanks to the cheesecake base, every bite feels smooth and indulgent. It’s truly satisfying.
This rose pistachio cheesecake ice cream is a treat that combines elegance with comfort. Once you try it, you might find yourself making it again and again!
Rose Pistachio Cheesecake Ice Cream Recipe
Ingredients
Method
- Start by beating the cream cheese in a bowl until it becomes smooth and fluffy. This step is important to avoid lumps in your ice cream. Add sugar and mix again until well combined and creamy.
- Pour in the heavy cream, milk, vanilla extract, and lemon juice. Blend everything until the mixture is silky and uniform. Make sure the sugar is fully dissolved for a smooth texture.
- Add the rose syrup gradually while mixing. Taste as you go to avoid overpowering the mixture. The floral flavor should be subtle and pleasant, not too strong.
- Gently fold in crushed pistachios and graham cracker crumbs using a spatula. This step gives the ice cream its signature texture and cheesecake feel. Be careful not to overmix.
- Transfer the mixture into an airtight container and smooth the top. Cover it tightly and place it in the freezer. Let it chill for at least 4–6 hours until firm.
- Once frozen, scoop the ice cream into bowls or cones. Let it sit for a couple of minutes before serving for easier scooping. Enjoy the creamy, nutty, and floral flavors together.
Notes
- I always use fresh pistachios instead of pre-packaged ones for better flavor.
- Letting the cream cheese soften before mixing helps avoid lumps.
- I prefer adding rose syrup slowly to control the intensity.
- Chilling the mixture before freezing improves the final texture.
- I sometimes toast the graham crumbs lightly for extra crunch and flavor.