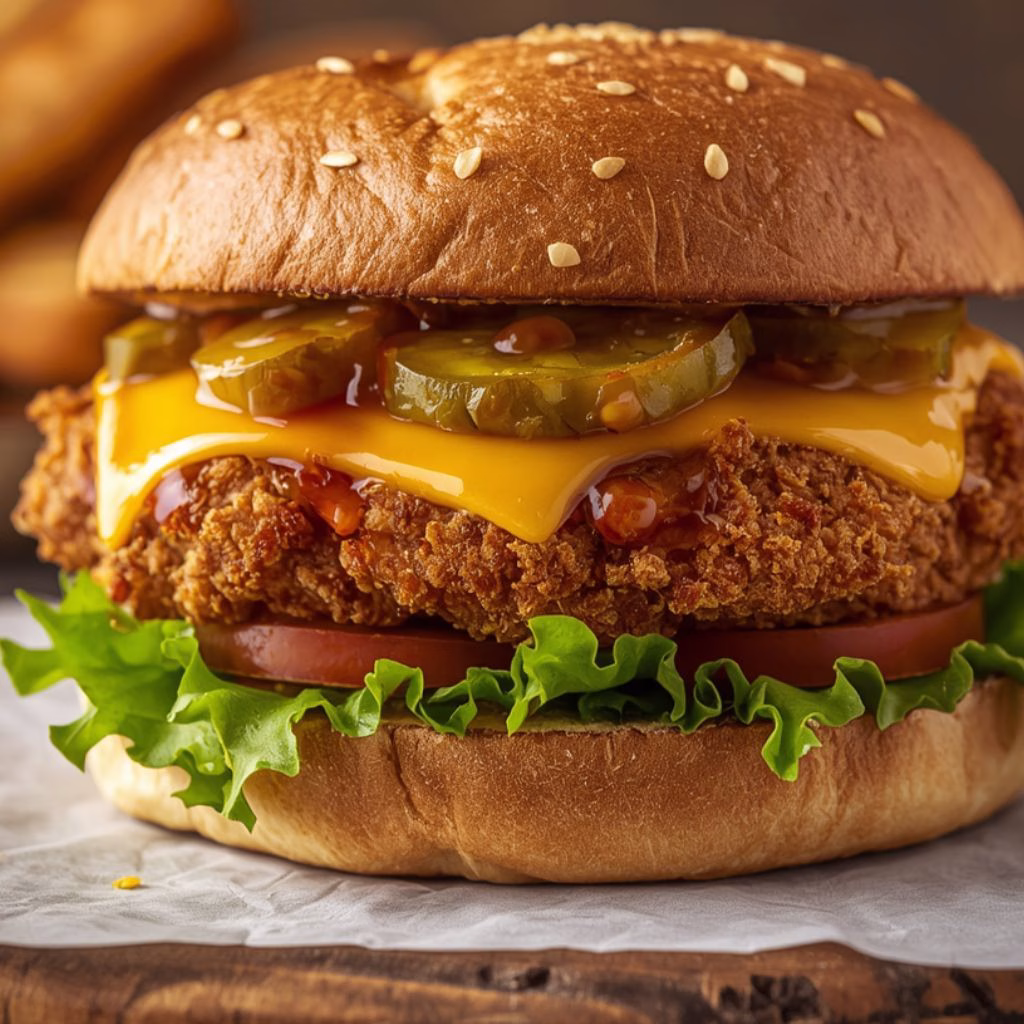
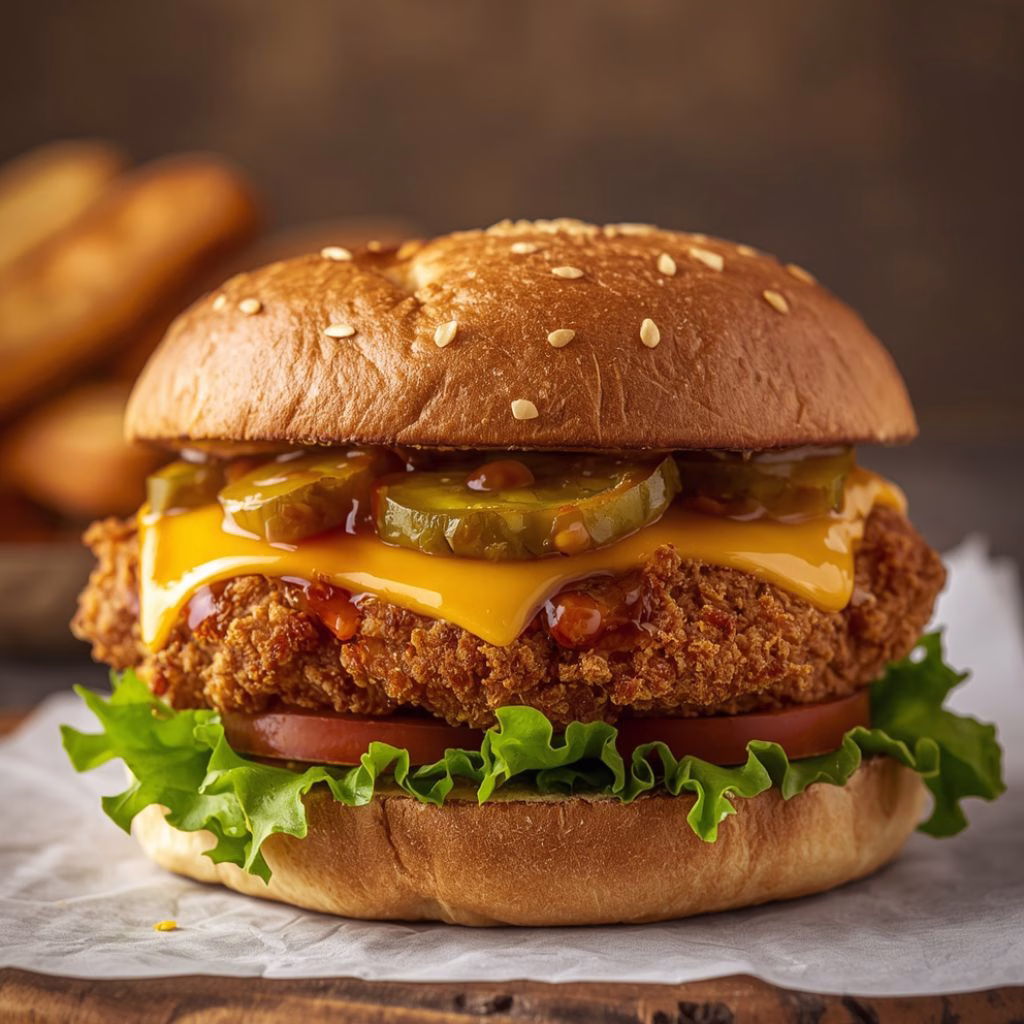
I never thought I’d say this, but I actually stopped ordering my favorite fast-food Crispy Chicken Sandwich Recipe after I made this one at home. I spent a few weekends testing buttermilk ratios, breading tricks, and frying temps until I landed on a version that’s shatter-crisp on the outside and juicy in the middle.
My pickiest eater gave it two thumbs up, and honestly, that’s the highest compliment in my house. If you’ve been wanting to recreate that iconic crispy chicken sandwich in your own kitchen, this is the recipe I’d hand you. Let me walk you through exactly how I make it.
Ingredients You’ll Need
- 1 pound chicken breast (about 2 small breasts) – sliced and pounded thin so it cooks evenly and fits the bun perfectly
- 3/4 cup buttermilk – this is what makes the chicken tender and adds a subtle tang; don’t swap it for regular milk
- 1 large egg – helps bind the buttermilk marinade so the breading has something to cling to
- 2 teaspoons salt (for the marinade) – seasons the chicken from the inside out, not just the surface
- 3/4 cup all-purpose flour – the base of your crispy coating
- 4 tablespoons cornstarch – the real secret to that shatter-crisp crunch; flour alone gets soft too fast
- 1 teaspoon garlic powder – adds savory depth without any harsh raw-garlic bite
- 1/2 teaspoon onion powder – rounds out the flavor of the breading
- 1 teaspoon paprika – brings color and a mild smoky warmth
- 1/4 teaspoon mustard powder (optional) – a small flavor booster that mimics that classic tangy fast-food taste
- 3/4 teaspoon salt (for breading) – don’t skip seasoning the coating itself, or it’ll taste flat
- 1 teaspoon black pepper – for a little bite in every crunch
- 1/8 to 1/4 teaspoon cayenne pepper (optional) – use this if you want a spicy kick
- 4 cups vegetable oil – a neutral, high smoke point oil fries the chicken evenly without burning
- 4 brioche buns, plus softened butter – buttery and toasted, these add richness you can’t get from a plain bun
- 4 lettuce leaves – fresh, crisp lettuce for crunch and color
- 1 large tomato, thinly sliced – adds juiciness; slice it right before assembling so it stays firm
- 4 slices sharp cheddar cheese – melts beautifully over hot chicken straight out of the fryer
- Pickles, to taste – the tangy contrast every good chicken sandwich needs
- 1 batch homemade or store-bought chicken sandwich sauce – ties every bite together
Note: These amounts make 4 generous sandwiches, so if you’re feeding a crowd or meal-prepping, simply double or triple every ingredient listed above.
Variations to Try
- Dairy-free option: swap buttermilk for a mix of unsweetened plant milk and a splash of lemon juice, and skip the cheese or use a dairy-free slice
- Spicy version: add extra cayenne to the breading and drizzle finished sandwiches with hot honey or hot sauce
- Lighter option: skip the deep fry and use the air fryer or oven method instead for a leaner sandwich
- Cheese swap: try pepper jack, Swiss, or provolone instead of cheddar for a different flavor profile
- Extra toppings: pile on coleslaw, avocado slices, crispy bacon, or a fried egg for a heartier build. For a lighter appetizer alongside your meal, Grilled Zucchini Rolls with Ricotta make a fresh and flavorful addition.
- Gluten-free option: use a 1:1 gluten-free flour blend in place of all-purpose flour in the breading
Cooking Time
- Prep Time: 40 minutes
- Cook Time: 4 minutes
- Total Time: 44 minutes
Equipment You’ll Need
- Large heavy pot – for frying the chicken evenly in hot oil
- Instant-read or clip-on thermometer – to keep your oil at a steady, consistent temperature
- Two mixing bowls – one for the buttermilk marinade and one for the breading mixture
- Tongs – for safely lowering and lifting chicken from hot oil
- Wire cooling rack – lets excess oil drip away so the coating stays crisp
- Meat mallet or rolling pin – for pounding chicken breasts to an even thickness
- Skillet – for toasting the buttered buns until golden
How to Make Crispy Chicken Sandwiches?
Making this sandwich comes down to three simple stages: marinating, breading, and frying. None of it is complicated, but a few small details make a big difference in the final crunch. Here’s exactly how I do it, step by step.
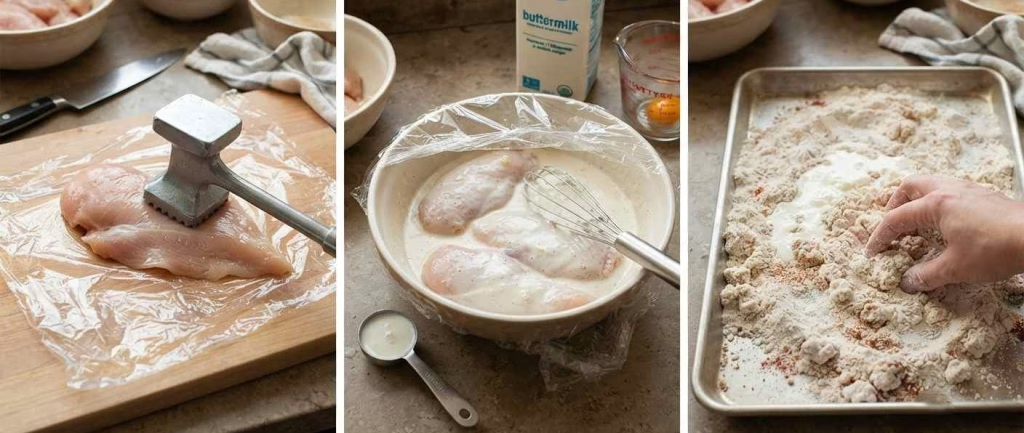
Prep and Pound the Chicken
Place your chicken breasts between two sheets of plastic wrap and pound them to an even half-inch thickness. This helps the chicken cook through quickly and evenly instead of drying out on the edges. Slice each piece a bit larger than your bun so it doesn’t shrink too small once fried.
Marinate in Buttermilk
Whisk together the buttermilk, egg, and salt in a large bowl, then set aside two tablespoons of that mixture for later. Add the chicken, coat it well, cover, and refrigerate for at least an hour, or up to a full day. The longer soak really does make the chicken more tender.
Mix the Crispy Breading
In a separate bowl, whisk the flour, cornstarch, and all the seasonings together. Then add the reserved two tablespoons of marinade right into the dry mix and rub it in with your fingers. This creates little craggy clumps that fry up extra crunchy instead of smooth and flat.
Heat the Oil Properly
Pour the oil into a large, heavy pot and heat it over medium-high heat to 350°F, using a thermometer if you have one. Keeping the temperature steady is the difference between crispy chicken and greasy chicken, so try not to let it swing too high or too low.
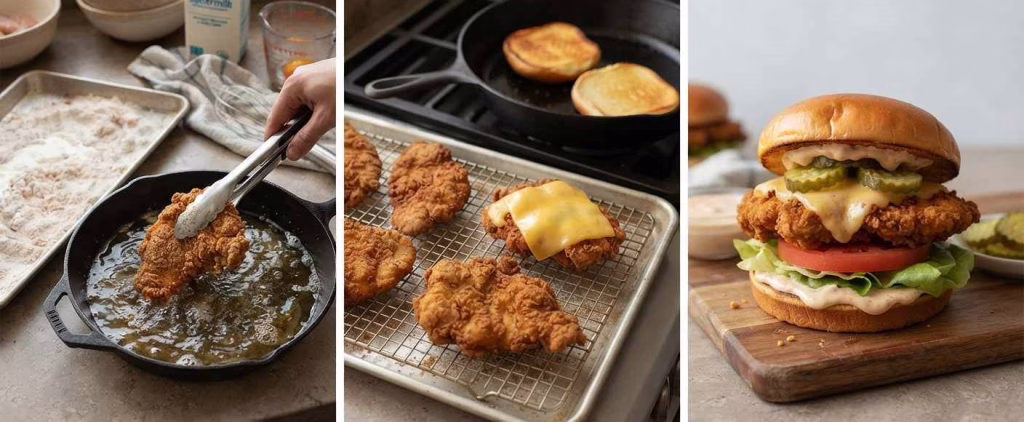
Bread and Fry the Chicken
Lift the marinated chicken with tongs, letting the excess drip off, then press it firmly into the breading on both sides. Shake off any loose bits, then lower it carefully into the hot oil. Fry for about two minutes per side, flipping once, until deeply golden and cooked through.
Rest, Top, and Toast
Move the fried chicken to a wire rack right away so it doesn’t sit in its own grease. If you’re adding cheese, place it on top now so it melts from the residual heat. While that happens, butter your buns and toast them in a dry skillet until golden brown.
Assemble and Serve
Spread your sauce generously on both halves of the toasted bun. Layer on lettuce, tomato, the crispy chicken, and pickles if you’re using them. Close up the sandwich and serve it immediately while everything is still warm and crunchy.
Additional Tips for Making This Recipe Better
- I always pat the chicken dry before slicing it thinner, since too much extra moisture can make the breading slide off in the fryer.
- I never crowd the pot with more than two pieces at a time, because it drops the oil temperature and makes the coating soggy instead of crisp.
- I like pressing the breading onto the chicken twice, once lightly and once firmly, for the thickest, craggiest crust possible.
- I always toast my buns in butter, not just plain, because that little extra richness makes a real difference in every bite.
- I keep my sauce on the side until right before serving so the bread never gets soggy while it’s waiting.
How to Serve Crispy Chicken Sandwich?
I love serving these sandwiches open-faced on a wooden board so everyone can see the golden, crispy chicken before it disappears into the bun. A few dill pickle spears and a small ramekin of extra sauce on the side make it look like it came straight from a restaurant.
air it with crinkle-cut fries, a scoop of coleslaw, or a simple side salad to round out the plate. You can also serve Grilled Calamari with Lemon as a light seafood appetizer before the sandwiches. For a fun presentation, skewer the sandwich with a decorative pick through the top bun to hold everything together for photos.
Nutritional Information
Here’s roughly what you can expect per sandwich, though this will vary slightly based on your exact toppings and portion sizes.
- Calories: about 630 kcal
- Protein: about 40 grams
- Carbohydrates: about 54 grams
- Fat: about 22 grams
Make Ahead and Storage
Make Ahead: You can marinate the chicken up to 24 hours in advance, which actually makes it more tender and flavorful by the time you’re ready to fry. Just keep it covered in the fridge until you’re ready to bread and cook it.
Storage: Store any leftover fried chicken in an airtight container in the refrigerator for up to three days. Keep the sauce in its own separate container so nothing gets soggy while it sits.
Reheating: Warm leftover chicken in the oven or air fryer rather than the microwave, since dry heat helps bring back some of that original crunch. It won’t be quite as crisp as fresh, but it’ll still taste great. Always assemble the full sandwich right before eating rather than storing it fully built.
Why You’ll Love This Recipe
This sandwich checks every box for a satisfying homemade dinner, and here’s exactly why it’s worth making again and again.
- It’s easier than you’d expect: with just two bowls and a pot of oil, you can pull off restaurant-quality crispy chicken without any fancy equipment.
- It’s endlessly customizable: swap the cheese, add spice, or pile on extra toppings to make it exactly the way your family likes it.
- It reheats better than takeout: leftovers stay tasty for days, so you can enjoy this sandwich again without starting from scratch.
- It fits real life: the marinade can be made ahead, so busy weeknights just mean breading, frying, and assembling.
- It genuinely tastes better than fast food: the buttermilk brine and craggy breading give you a level of crunch and flavor you just can’t get from a drive-thru window.
Crispy Chicken Sandwich Recipe
Ingredients
Method
- Place your chicken breasts between two sheets of plastic wrap and pound them to an even half-inch thickness. This helps the chicken cook through quickly and evenly instead of drying out on the edges. Slice each piece a bit larger than your bun so it doesn’t shrink too small once fried.
- Whisk together the buttermilk, egg, and salt in a large bowl, then set aside two tablespoons of that mixture for later. Add the chicken, coat it well, cover, and refrigerate for at least an hour, or up to a full day. The longer soak really does make the chicken more tender.
- In a separate bowl, whisk the flour, cornstarch, and all the seasonings together. Then add the reserved two tablespoons of marinade right into the dry mix and rub it in with your fingers. This creates little craggy clumps that fry up extra crunchy instead of smooth and flat.
- Pour the oil into a large, heavy pot and heat it over medium-high heat to 350°F, using a thermometer if you have one. Keeping the temperature steady is the difference between crispy chicken and greasy chicken, so try not to let it swing too high or too low.
- Lift the marinated chicken with tongs, letting the excess drip off, then press it firmly into the breading on both sides. Shake off any loose bits, then lower it carefully into the hot oil. Fry for about two minutes per side, flipping once, until deeply golden and cooked through.
- Move the fried chicken to a wire rack right away so it doesn’t sit in its own grease. If you’re adding cheese, place it on top now so it melts from the residual heat. While that happens, butter your buns and toast them in a dry skillet until golden brown.
- Spread your sauce generously on both halves of the toasted bun. Layer on lettuce, tomato, the crispy chicken, and pickles if you’re using them. Close up the sandwich and serve it immediately while everything is still warm and crunchy.
Notes
- I always pat the chicken dry before slicing it thinner, since too much extra moisture can make the breading slide off in the fryer.
- I never crowd the pot with more than two pieces at a time, because it drops the oil temperature and makes the coating soggy instead of crisp.
- I like pressing the breading onto the chicken twice, once lightly and once firmly, for the thickest, craggiest crust possible.
- I always toast my buns in butter, not just plain, because that little extra richness makes a real difference in every bite.
- I keep my sauce on the side until right before serving so the bread never gets soggy while it’s waiting.