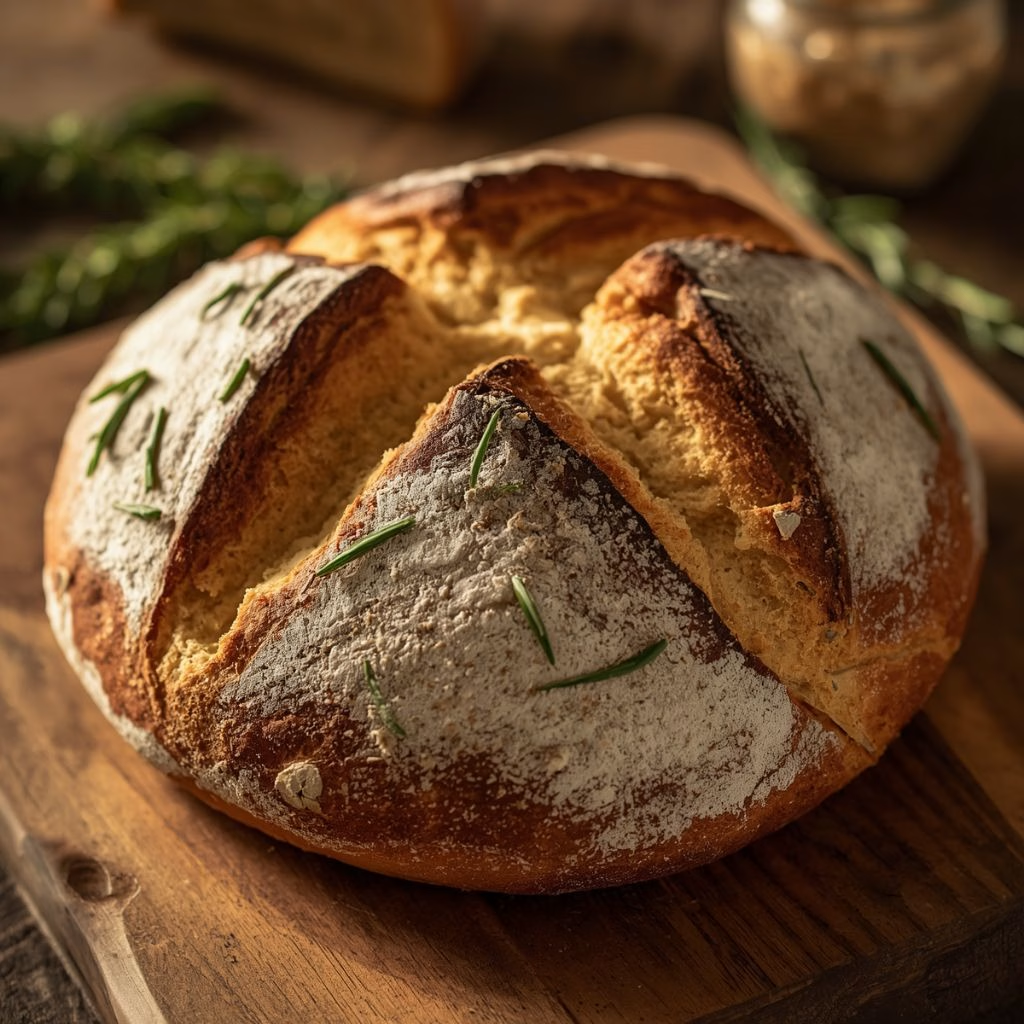
I still remember pulling my first Rosemary Sourdough Bread Recipe out of the oven and hearing that crackle as it cooled on the counter. That sound alone told me I had done something right. The smell of warm rosemary filling my kitchen made it feel like a holiday morning, even on an ordinary Tuesday.
Ever since then, this has been one of my go-to breads whenever I want something that looks impressive but doesn’t actually ask much of me. If you’ve been wanting to bake a beautiful sourdough boule without a stand mixer, I promise this one is worth your time.

Ingredients
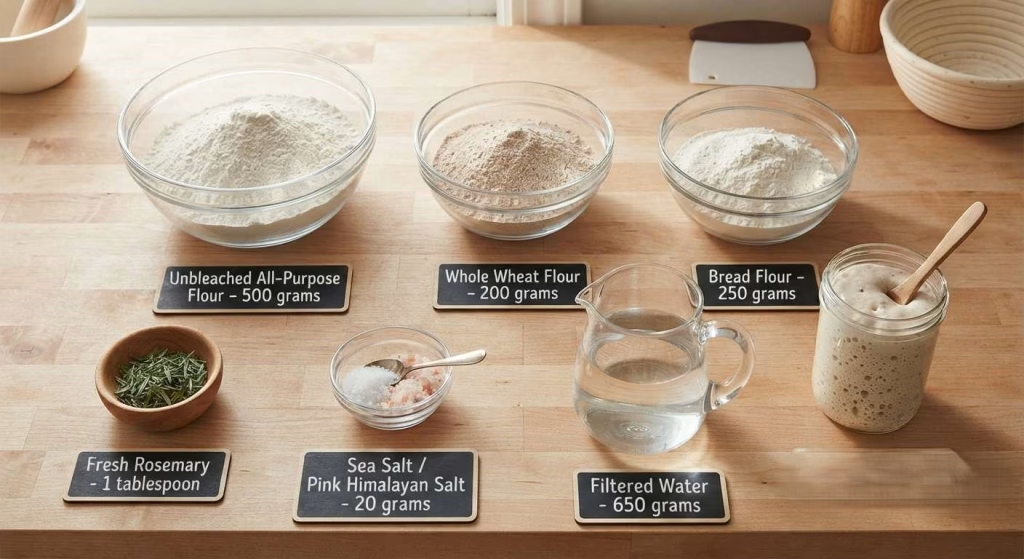
- Unbleached all-purpose flour, about 500 grams, forms the base structure of the dough
- Whole wheat flour, roughly 200 grams, freshly milled if you can manage it, adds a nutty depth you just can’t get from store-bought bags that have been sitting on a shelf for months
- Bread flour, around 250 grams, boosts the protein content for a chewier crumb, though you can skip it and use more all-purpose instead
- Active sourdough starter, about 200 grams, bubbly and freshly fed so it has the strength to lift the dough
- Filtered water, close to 650 grams, since chlorinated tap water can slow down fermentation
- Sea salt or pink Himalayan salt, about 20 grams, for flavor and to help control the rise
- Fresh rosemary, a tablespoon or so, finely chopped, though dried rosemary works in a pinch if that’s what I have on hand
Note: These amounts make one large loaf that slices into roughly 24 servings, so this is a great one to double if you’re baking for a crowd or want a spare loaf for the freezer.
Variations
- Swap in einkorn or spelt flour for part of the whole wheat if I want a more heirloom, nuttier flavor
- Add a handful of shredded parmesan or asiago along with the rosemary for a savory, cheesy twist
- Mix in roasted garlic cloves for a garlic-rosemary combination that pairs beautifully with soup
- Use dried herbs like thyme or oregano alongside the rosemary for a more Mediterranean flavor profile
- Skip the bread flour entirely and use all whole wheat for a denser, more rustic, fiber-rich loaf
Cooking Time
- Prep Time: 45 minutes
- Cooking Time: 45 minutes
- Total Time: about 13 hours 30 minutes, including bulk fermentation and the overnight proof in the fridge
Equipment You Need
- Large mixing bowl, for combining and folding the dough
- Kitchen scale, for accurate ingredient measurements every time
- Banneton or a bowl lined with a tea towel, to hold the dough’s shape during its final rise
- Dutch oven, to trap steam and give the loaf that crackly, bakery-style crust
- Bench scraper, to help divide and handle the sticky dough
- Lame, razor blade, or sharp knife, for scoring the top before baking
How to Make Rosemary Sourdough Bread?
Making this bread doesn’t require any fancy equipment or kneading skills. It’s built around gentle stretch and folds instead of hard kneading, which keeps the process approachable even for first-time bakers. Here’s how I break it down from start to finish.
Feed Your Starter
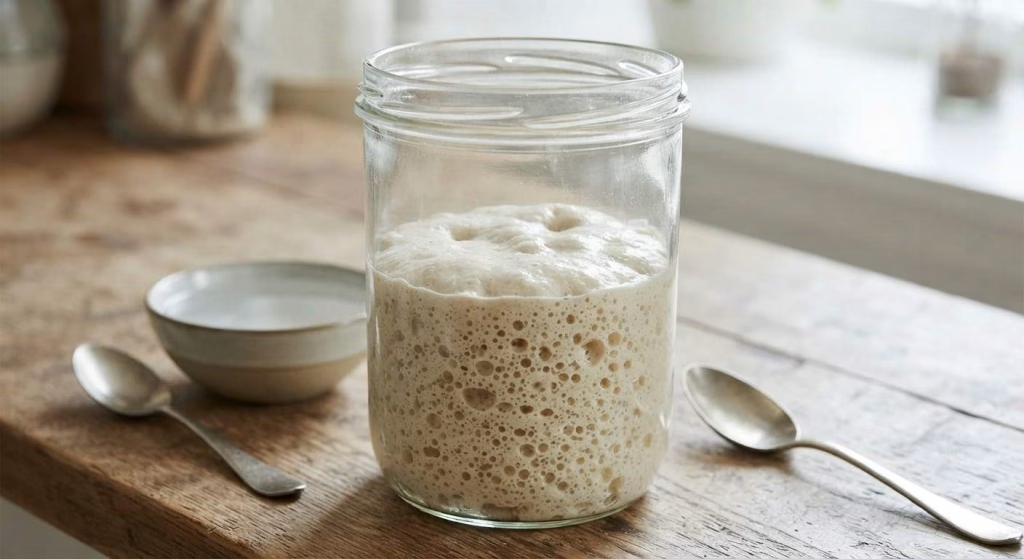
I feed my sourdough starter about 4 to 12 hours before I plan to mix the dough. It needs to look active and bubbly, almost doubled in size. A quick float test, dropping a small spoonful into water, confirms it’s ready to work.
Mix and Autolyse
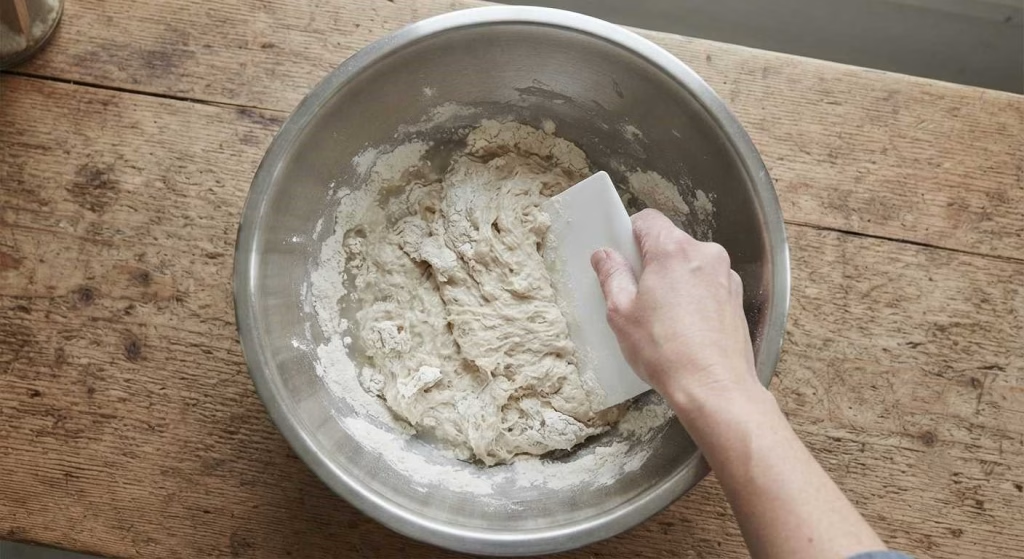
In a large bowl, I combine the water, all three flours, starter, and salt using my hands or a wooden spoon. I let this mixture rest for about 30 minutes so the flour fully hydrates. This resting stage is called autolyse, and it makes the dough easier to handle later.
Add the Rosemary
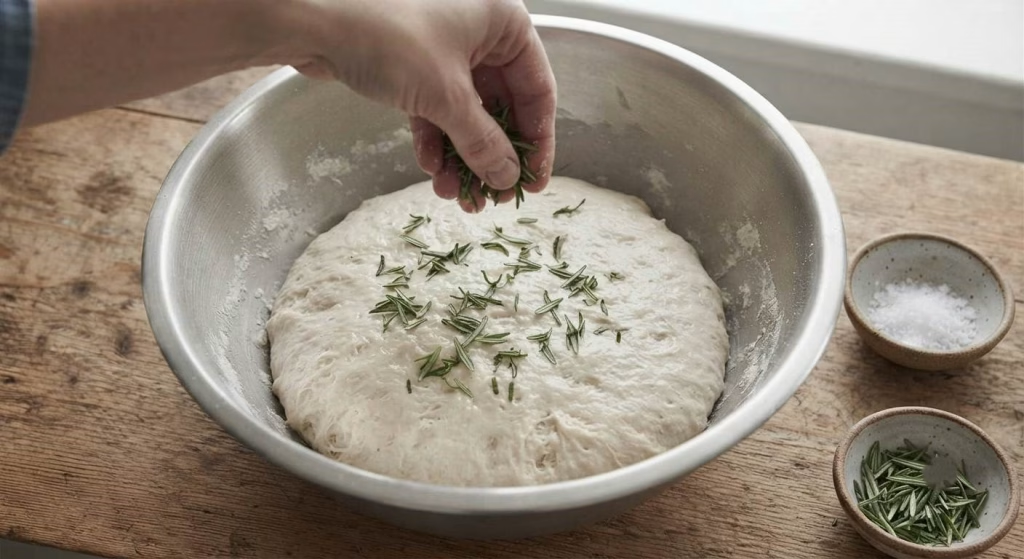
Once the rest is done, I sprinkle in the chopped rosemary before starting the stretch and fold process. Working it in at this stage distributes the flavor evenly throughout the dough instead of clumping in one spot.
Stretch and Fold
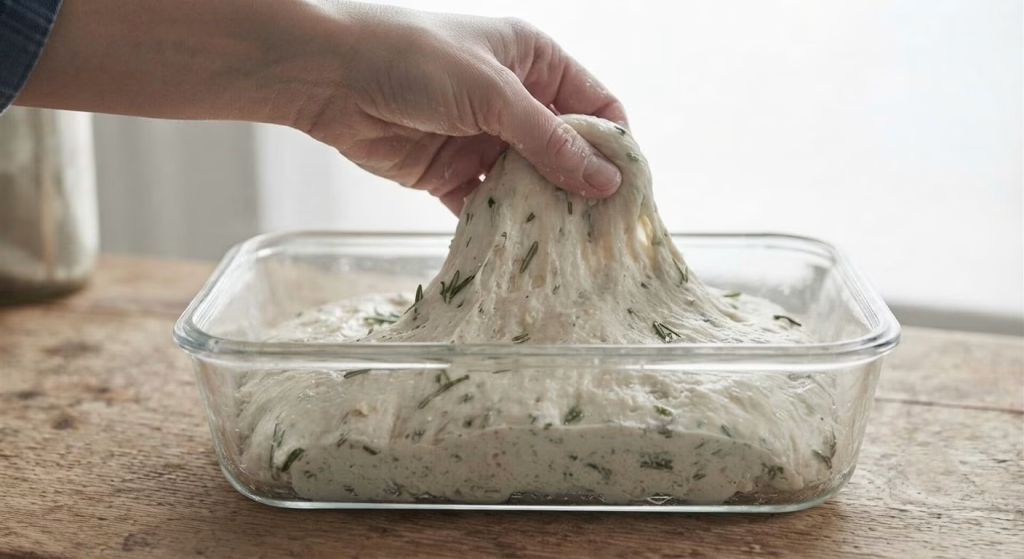
Instead of kneading, I grab one edge of the dough, stretch it upward, then fold it back over the center. I turn the bowl a quarter turn and repeat this three to four times, which counts as one round. I do six rounds total, spacing the first three every 15 minutes and the last three every 30 minutes.
Bulk Ferment
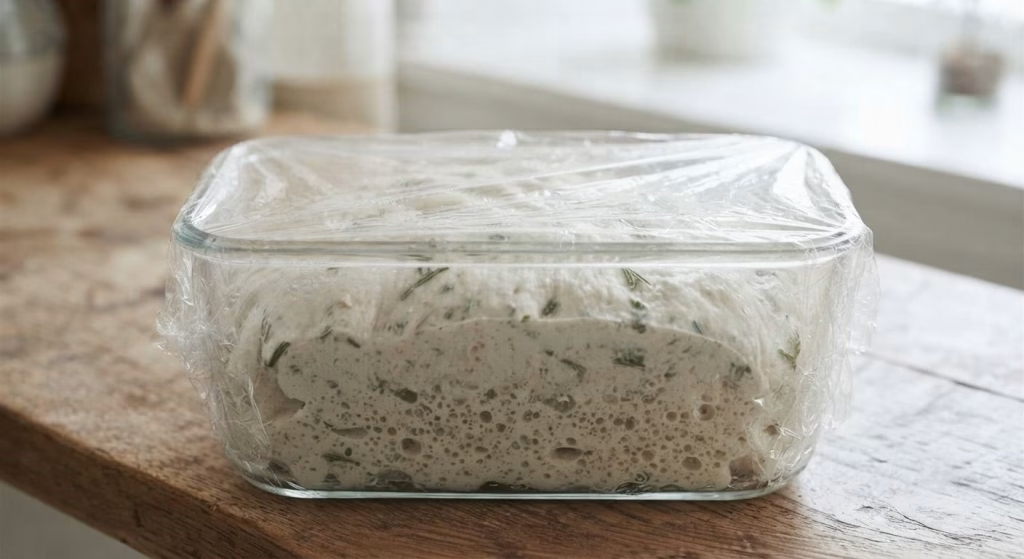
After the final fold, I cover the bowl and let the dough rise until it roughly doubles in size. Depending on my kitchen’s temperature and how active my starter is, this can take anywhere from 4 to 8 hours or longer.
Shape the Dough
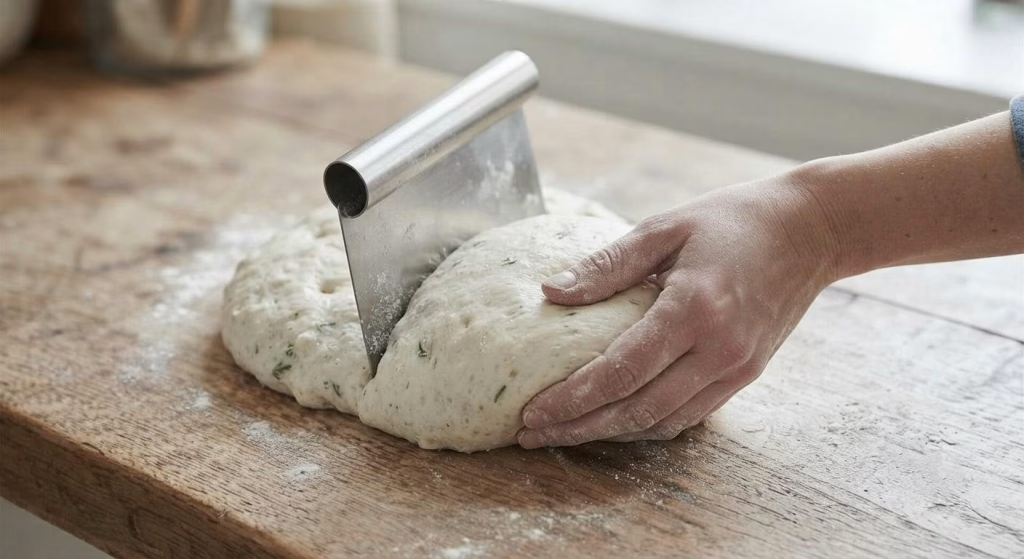
I turn the dough onto a lightly floured surface and use a bench scraper to divide it if I’m making two smaller loaves, or leave it whole for one large boule. I shape it into a tight ball using a gentle circular motion, which builds tension for a better rise in the oven.
Bench Rest and Final Shape
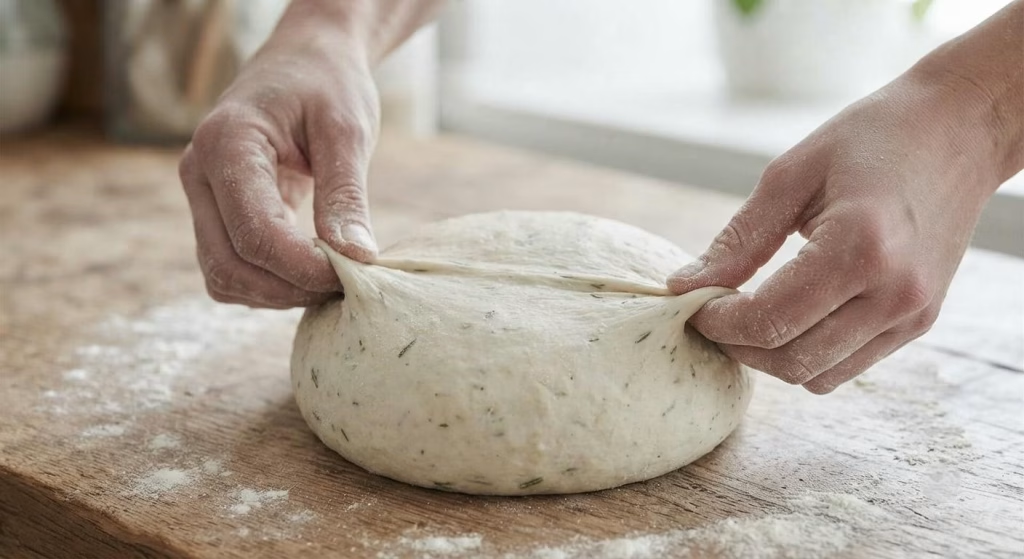
I let the shaped dough sit uncovered for 15 to 20 minutes so a thin skin forms on the surface. Then I flip it over and reshape it one more time before moving it into its proofing container.
Cold Proof Overnight
I transfer the dough into a floured banneton or a bowl lined with a tea towel, cover it with plastic wrap, and place it in the refrigerator for 12 to 15 hours. This slow, cold rise develops flavor and makes the dough easier to score in the morning.

Preheat and Score
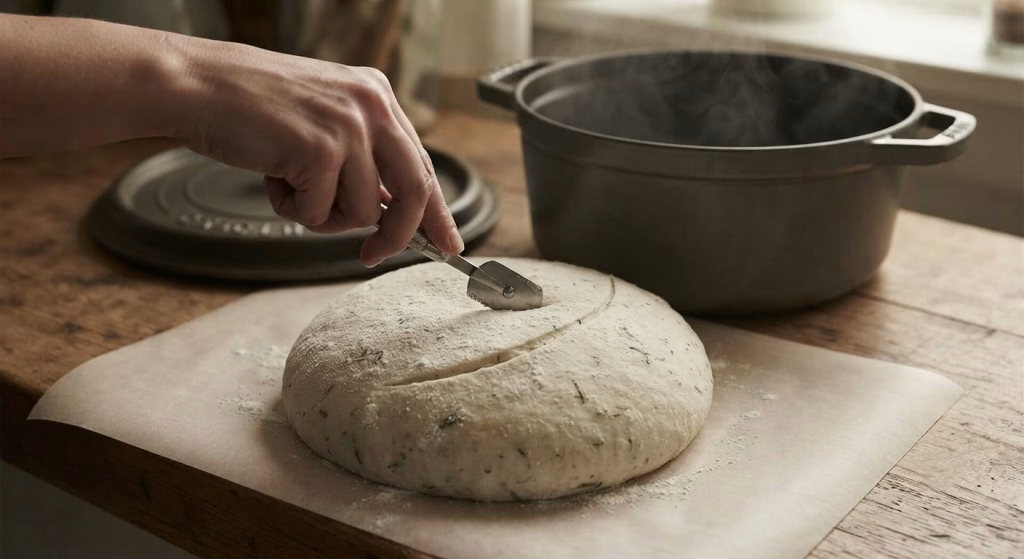
The next morning, I preheat my Dutch oven at 500 degrees for a full hour before baking. I take the dough straight from the fridge, dust the top with flour, and score it with a lame or sharp knife so it has room to expand.
Bake the Loaf
I bake the loaf covered for 20 minutes at 500 degrees, then lower the temperature to 475 and remove the lid for another 25 minutes, until the crust turns deep golden brown. For another comforting homemade dinner idea that pairs well with fresh bread, try this Jalapeno Buffalo Chicken Casserole Recipe.
Additional Tips for Making This Recipe Better
- I always weigh my ingredients on a kitchen scale rather than using cups, since even small measuring differences can throw off the dough’s hydration
- I keep my dough covered with a damp towel or plastic wrap during bulk fermentation so it doesn’t dry out and form a hard skin too early
- I’ve learned that a mature, well-fed starter matters more than following the clock exactly, so I watch for bubbles and rise instead of rushing the timeline
- I like using rice flour to dust my banneton because it resists sticking better than regular flour
- I never skip the parchment paper trick when transferring dough into the hot Dutch oven, since it saves me from burnt fingers and a misshapen loaf
How to Serve Rosemary Sourdough Bread?
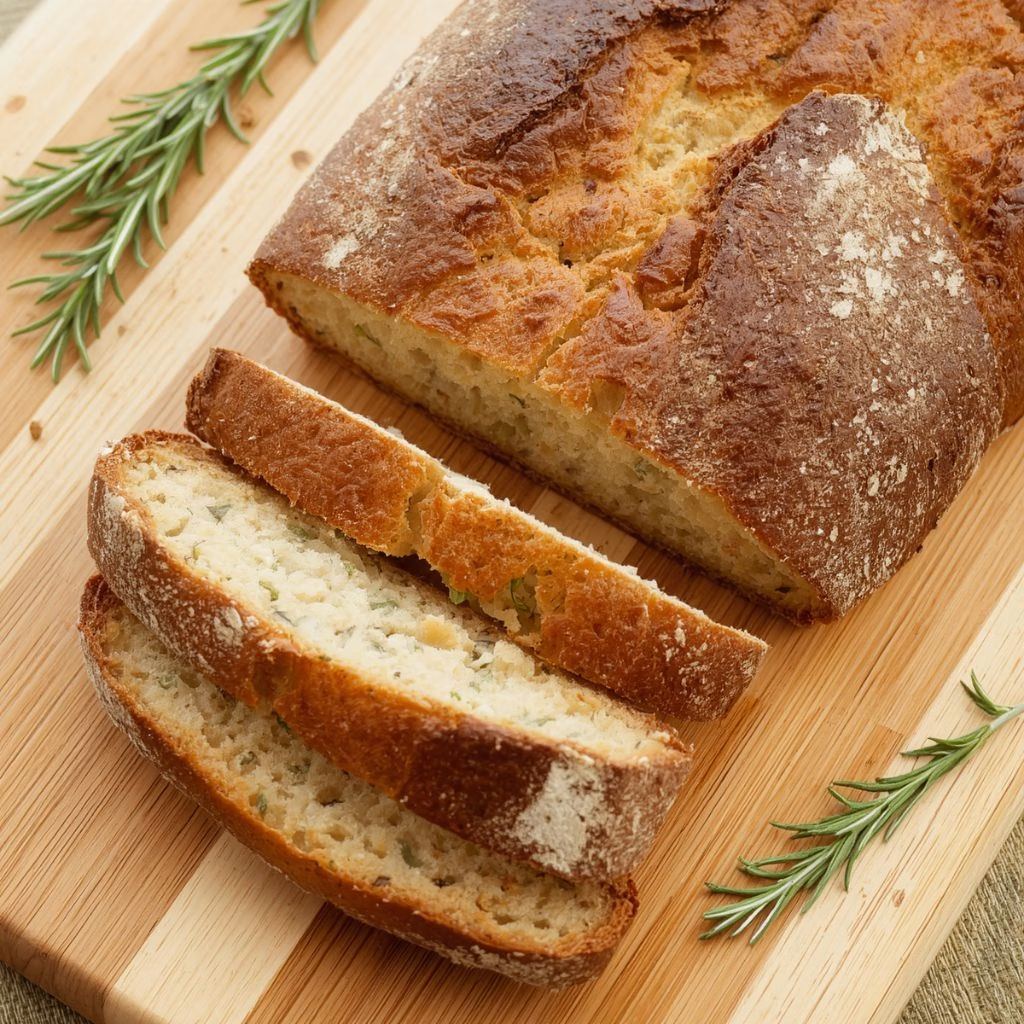
I love slicing this bread while it’s still slightly warm and setting out a small dish of softened butter alongside fresh rosemary sprigs for a rustic, inviting presentation.
It’s fantastic served next to a bowl of soup, torn apart for dipping into olive oil and balsamic, or turned into open-faced sandwiches topped with cheese and roasted vegetables.
It also makes a wonderful side for flavorful dishes like Honey Pepper Chicken Recipe. For gatherings, I’ll place the whole boule on a wooden board with a bread knife so guests can slice their own pieces, which always makes for a beautiful centerpiece.
Nutritional Information
Each slice offers a light, wholesome addition to any meal without weighing you down.
- Calories: about 149 per slice
- Protein: around 5 grams
- Carbohydrates: roughly 31 grams
- Fat: close to 1 gram
Make Ahead and Storage
I store any fresh, uncut loaf in a paper bag or wrapped in a thin tea towel at room temperature, where it stays good for about 2 to 3 days before the crust starts to soften.
Once I’ve sliced into the loaf, I keep the remaining pieces in an airtight container or bag, which helps the bread stay fresh for a few more days without drying out.
For longer storage, I slice the whole loaf and freeze the pieces in a freezer bag, where they’ll keep well for up to 3 months. I just pop slices straight into the toaster whenever I want a quick piece.
Why You’ll Love This Recipe
This loaf checks every box for flavor, ease, and versatility, which is exactly why it’s stayed in my regular baking rotation.
- No-knead method: I never touch a stand mixer for this recipe, since simple stretch and folds do all the work of building structure and gluten
- Big herb flavor: The rosemary infuses every bite with a warm, woodsy aroma that makes even simple buttered toast feel special
- Beautiful texture: The crust turns wonderfully crackly while the inside stays soft and full of those classic sourdough air pockets
- Easy to customize: I can swap in different herbs, cheeses, or flours depending on what I’m in the mood for that week
- Great make-ahead option: Since it proofs overnight in the fridge, I can prep the dough one evening and bake fresh bread the very next morning

Rosemary Sourdough Bread Recipe
Ingredients
Method
- I feed my sourdough starter about 4 to 12 hours before I plan to mix the dough. It needs to look active and bubbly, almost doubled in size. A quick float test, dropping a small spoonful into water, confirms it’s ready to work.
- In a large bowl, I combine the water, all three flours, starter, and salt using my hands or a wooden spoon. I let this mixture rest for about 30 minutes so the flour fully hydrates. This resting stage is called autolyse, and it makes the dough easier to handle later.
- Once the rest is done, I sprinkle in the chopped rosemary before starting the stretch and fold process. Working it in at this stage distributes the flavor evenly throughout the dough instead of clumping in one spot.
- Instead of kneading, I grab one edge of the dough, stretch it upward, then fold it back over the center. I turn the bowl a quarter turn and repeat this three to four times, which counts as one round. I do six rounds total, spacing the first three every 15 minutes and the last three every 30 minutes.
- After the final fold, I cover the bowl and let the dough rise until it roughly doubles in size. Depending on my kitchen’s temperature and how active my starter is, this can take anywhere from 4 to 8 hours or longer.
- I turn the dough onto a lightly floured surface and use a bench scraper to divide it if I’m making two smaller loaves, or leave it whole for one large boule. I shape it into a tight ball using a gentle circular motion, which builds tension for a better rise in the oven.
- I let the shaped dough sit uncovered for 15 to 20 minutes so a thin skin forms on the surface. Then I flip it over and reshape it one more time before moving it into its proofing container.
- I transfer the dough into a floured banneton or a bowl lined with a tea towel, cover it with plastic wrap, and place it in the refrigerator for 12 to 15 hours. This slow, cold rise develops flavor and makes the dough easier to score in the morning.
- The next morning, I preheat my Dutch oven at 500 degrees for a full hour before baking. I take the dough straight from the fridge, dust the top with flour, and score it with a lame or sharp knife so it has room to expand.
- I bake the loaf covered for 20 minutes at 500 degrees, then lower the temperature to 475 and remove the lid for another 25 minutes, until the crust turns deep golden brown.
Notes
- I always weigh my ingredients on a kitchen scale rather than using cups, since even small measuring differences can throw off the dough’s hydration
- I keep my dough covered with a damp towel or plastic wrap during bulk fermentation so it doesn’t dry out and form a hard skin too early
- I’ve learned that a mature, well-fed starter matters more than following the clock exactly, so I watch for bubbles and rise instead of rushing the timeline
- I like using rice flour to dust my banneton because it resists sticking better than regular flour
- I never skip the parchment paper trick when transferring dough into the hot Dutch oven, since it saves me from burnt fingers and a misshapen loaf