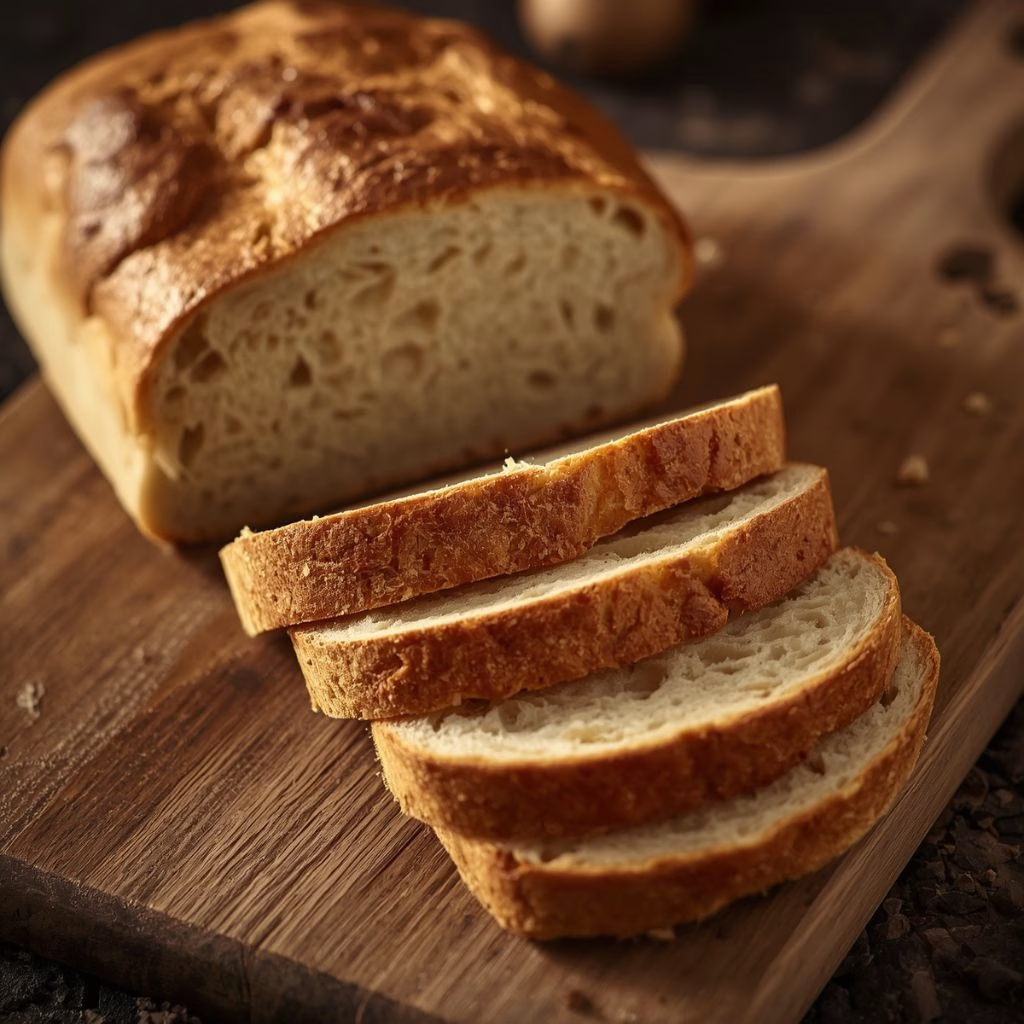
I started baking this Sourdough Sandwich Bread Recipe on a random Tuesday night, mostly because I was tired of store-bought bread turning stale after two days. I mixed the dough before bed, and by morning it had puffed up into something that actually looked like real bakery bread. One bake later, I was hooked.
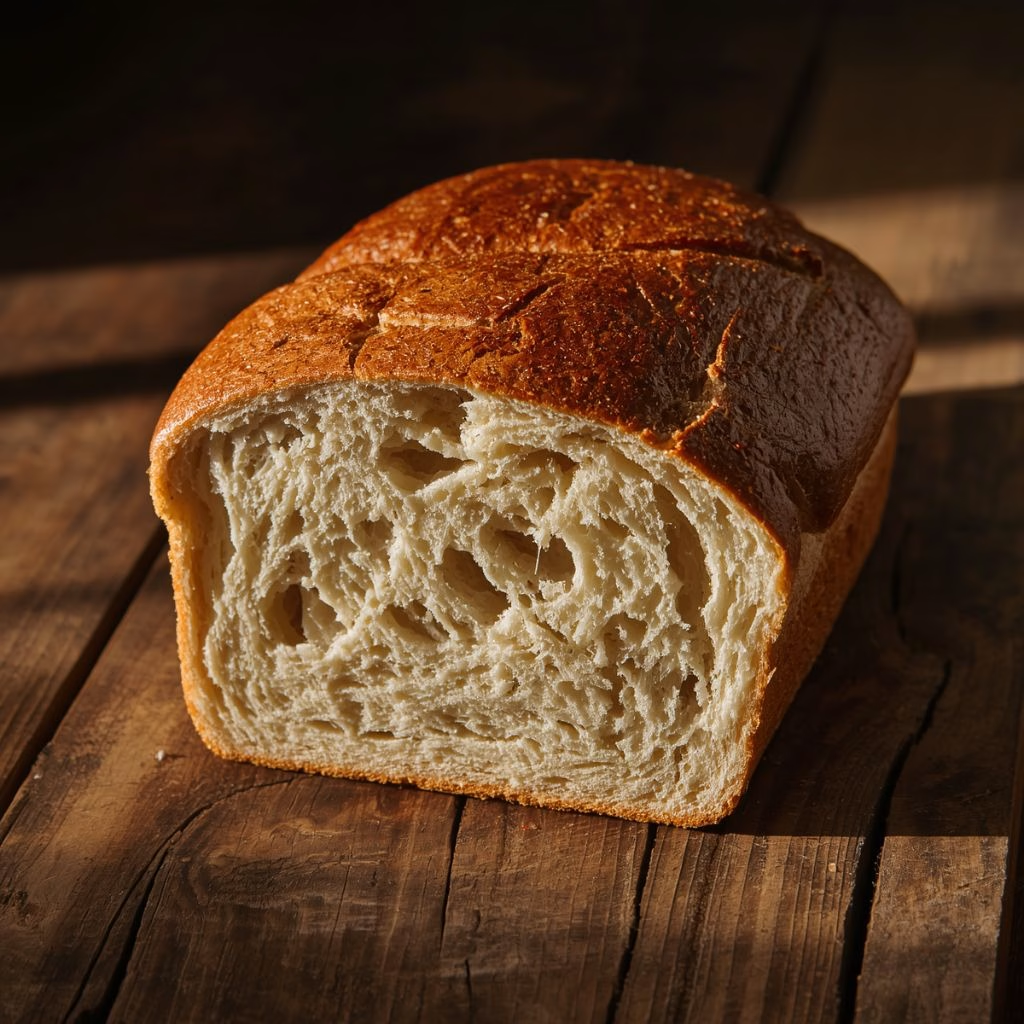
This sourdough sandwich bread is soft, a little buttery, and slices clean for toast, grilled cheese, or a simple PB&J. If you’ve got an active starter sitting on your counter, this is exactly what it wants to become.
Ingredients
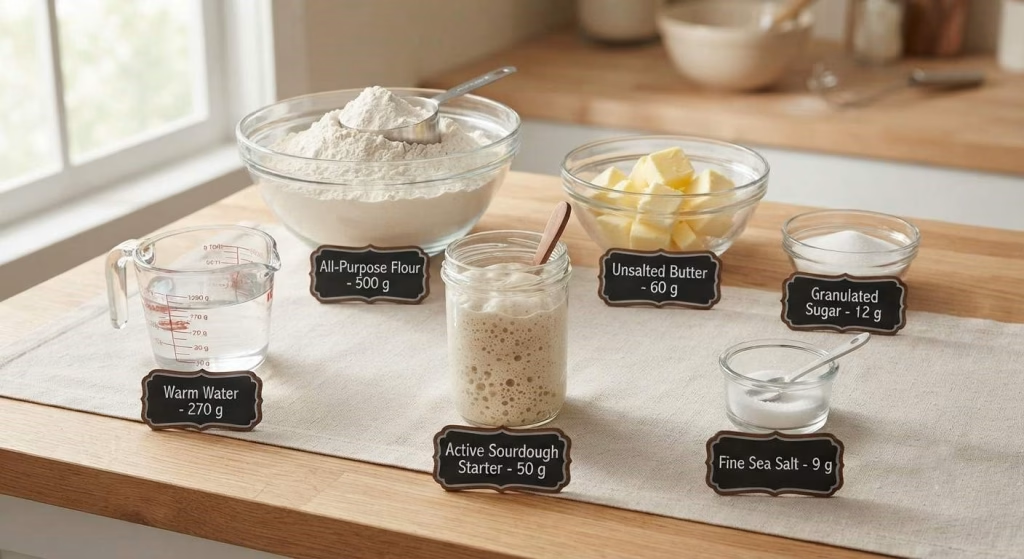
- 4 cups (500 g) all-purpose flour – gives the loaf its soft, tender crumb without too much chew
- 4 tablespoons (60 g) unsalted butter, softened and cubed – softened butter blends smoothly into the flour; cold butter just clumps and won’t mix in evenly
- 1 tablespoon (12 g) granulated sugar – helps the crust brown and rounds out the tangy sourdough flavor
- 9 g fine sea salt – measure this carefully, since too much can slow down fermentation
- 1/4 cup (50 g) bubbly, active sourdough starter (100% hydration) – make sure it’s freshly fed and doubled in size before you use it, or the dough will struggle to rise
- 1 cup + 2 tablespoons (270 g) warm water – warm (not hot) water helps wake up the starter without killing it
Note: These quantities make one standard loaf. If you’re feeding a big family or love having extra bread on hand, this recipe doubles easily — just bake the two loaves side by side.
Variations
- Whole wheat swap: Replace about 20% of the all-purpose flour with whole wheat flour for a heartier, slightly nuttier loaf. You may need a touch more water since whole wheat soaks up more liquid.
- Bread flour version: Swap the all-purpose flour for bread flour in equal amounts for a chewier bite. Some bread flour brands are thirstier than others, so add extra water a little at a time if the dough feels dry.
- Dairy-free option: Use a plant-based butter instead of regular butter. Check the label first, since some dairy-free butters are saltier than others.
- Naturally sweetened: Swap the sugar for a small amount of honey if you prefer to skip refined sugar.
- Flavor add-ins: Fold in cinnamon and soaked raisins after the bulk rise for a sweet twist, or mix in a handful of shredded cheese for a savory version. If you enjoy savory homemade breads, the Cheesy Baked Mushroom Chicken Recipe also pairs wonderfully with freshly baked bread.
Cooking Time
- Prep Time: 12 hours (includes the overnight rise)
- Cooking Time: 45-50 minutes
- Total Time: About 12 hours 50 minutes
Equipment You Need
- Stand mixer with paddle and dough hook attachments – makes mixing and kneading this slightly sticky dough far easier
- Mixing bowl – for combining ingredients and letting the dough bulk rise
- 9×5 inch or 8.5×4 inch loaf pan – the smaller pan gives you a taller, prettier loaf
- Plastic wrap – covers the dough during both rises to keep it from drying out
- Kitchen scale – weighing ingredients gives far more accurate, consistent results than scooping with cups
- Serrated bread knife – needed for clean, even slices once the loaf has cooled
- Wire cooling rack – lets air circulate around the bread so the bottom doesn’t turn soggy
How to Make Sourdough Sandwich Bread?
This recipe comes together in five main stages, starting the night before you plan to bake. Each step is simple, but the timing matters, especially during the rises. Here’s exactly how I do it at home.
Step 1: Mix the Dough
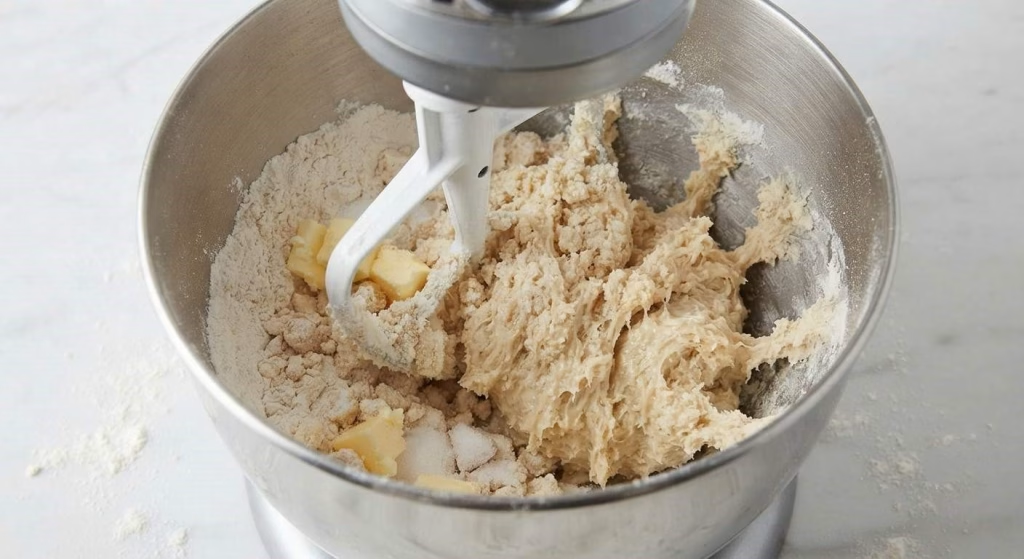
Add the flour, softened butter, sugar, and salt to your mixer bowl fitted with the paddle attachment. Mix on low until the butter breaks down into small crumbs throughout the flour. This only takes a minute or two.
Pour in your active starter and warm water, then mix until everything comes together into a shaggy, slightly sticky dough. Cover the bowl and let it rest for 30 minutes before kneading.
Step 2: Knead the Dough
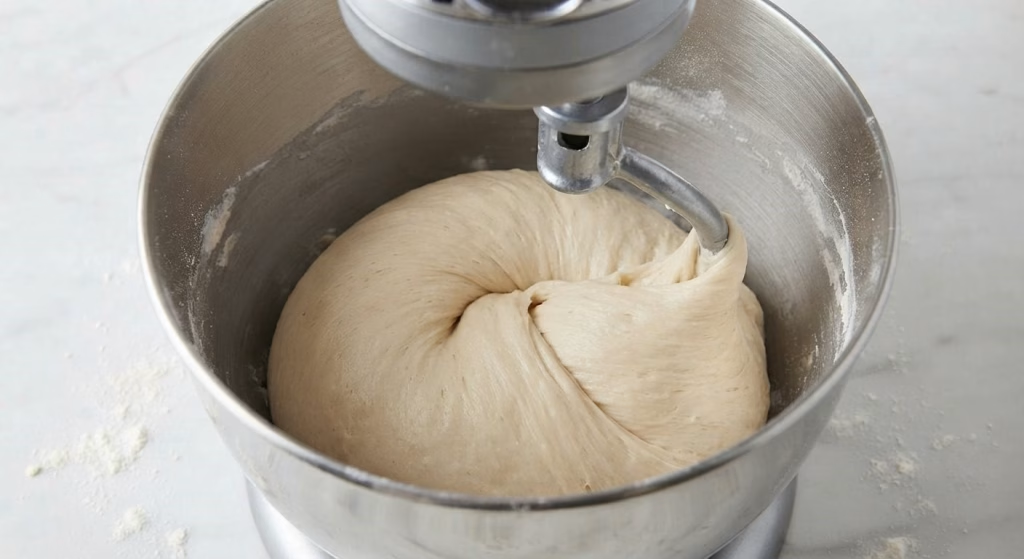
Switch to the dough hook and knead on medium-low speed for 6 to 8 minutes, until the dough turns soft and smooth. It shouldn’t stick to your hands anymore; if it does, add just a light dusting of flour.
No stand mixer? Knead by hand on a floured surface for about 8 to 10 minutes. Focus on how the dough feels rather than counting minutes exactly.
Step 3: Bulk Rise Overnight
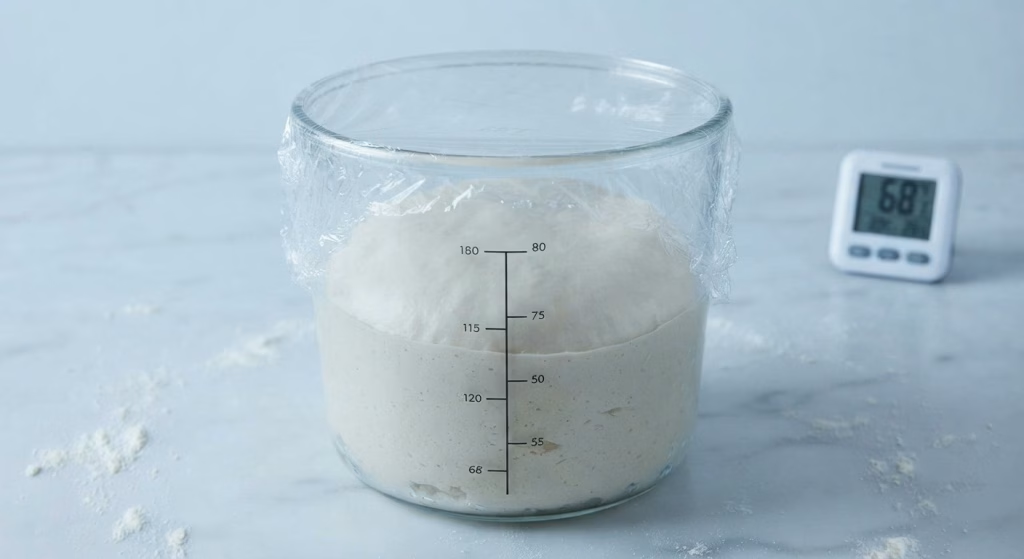
Cover the bowl tightly with plastic wrap and leave it at room temperature, ideally around 68°F, for 10 to 12 hours. The dough is ready once it looks puffy and has roughly doubled in size.
Warmer kitchens speed this up, while cooler ones slow it down, so watch the dough itself rather than the clock.
Step 4: Shape the Loaf
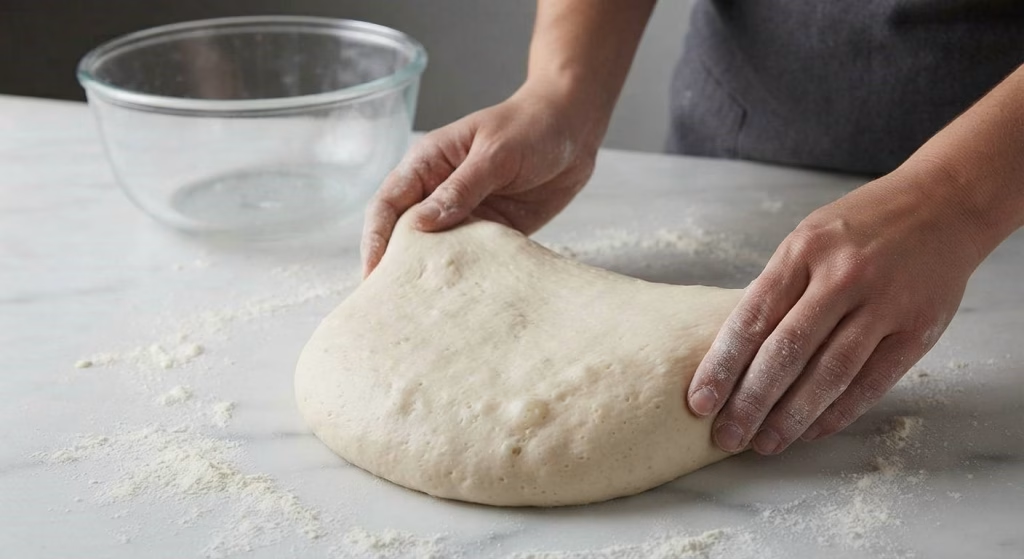
Turn the risen dough onto a lightly floured surface and gently press it flat to release the larger air bubbles. Roll it into a tight log, tucking the ends underneath as you go.
With floured hands, pull the dough toward you a few times to build surface tension, then place it seam-side down into a buttered loaf pan.
Step 5: Second Rise and Bake
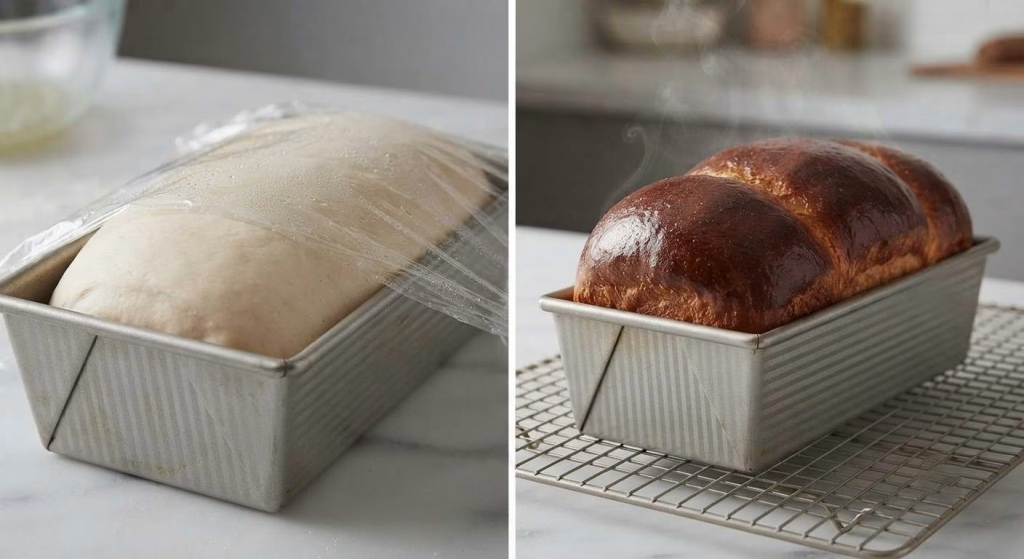
Cover the pan loosely with oiled plastic wrap and let the dough rise until the center domes about an inch above the rim, which usually takes 1.5 to 2 hours or longer in a cooler kitchen. You’re not aiming for double in size here.
Preheat your oven to 375°F (or 500°F, then lower it once the bread goes in for extra oven spring). Bake for 45 to 50 minutes until deeply golden, then cool in the pan briefly before moving the loaf to a wire rack. Let it rest for about an hour before slicing.
Additional Tips for Making This Recipe Better
I’ve made this loaf more times than I can count, so here are a few things I’ve picked up along the way:
- I always weigh my ingredients on a kitchen scale instead of using cups. It’s made my results so much more consistent, especially with the starter and flour.
- If my kitchen runs cold, I give the second rise extra time instead of rushing it into the oven early. A dense loaf almost always means it needed more time, not less.
- I like using softened, not melted, butter. Melted butter changes the texture of the dough and makes it harder to knead properly.
- Waiting the full hour before slicing was hard for me at first, but it really does keep the inside from turning gummy.
- When I want a taller loaf, I bake it in a slightly smaller pan. It gives the dough a nice upward push instead of spreading out.
How to Serve Sourdough Sandwich Bread?
This loaf is endlessly versatile, but a few of my favorite ways to serve it: sliced thick and toasted with butter and jam for breakfast, layered into a classic grilled cheese with sharp cheddar, or used for a hearty turkey and avocado sandwich at lunch.
It also makes an excellent base alongside dishes like the Chicken Pesto Ciabatta Recipe when you’re planning a homemade café-style meal. For a pretty presentation, slice the loaf on a wooden board with a few slices fanned out, and add a small dish of soft butter or honey alongside for dipping. A sprinkle of flaky salt over buttered toast also makes it look (and taste) a little more special.
Nutritional Information
Here’s a general idea of what one slice of this bread offers, though exact values will vary depending on your ingredients and slice thickness:
- Calories: Approximately 140-160 per slice
- Protein: Around 4-5 grams per slice
- Carbohydrates: Roughly 27-30 grams per slice
- Fat: About 2-3 grams per slice
Make Ahead and Storage
Storing: Once fully cooled, keep the loaf in a plastic bag or airtight container at room temperature. It stays fresh and soft for up to 3 days this way.
Freezing: This bread freezes beautifully, either whole or pre-sliced. Wrap it tightly in plastic wrap, then a layer of foil or a freezer bag, and it will keep well for up to 3 months.
Reheating: For frozen slices, just pop them straight into the toaster. For a whole thawed loaf, let it come to room temperature, then warm it in a low oven for a few minutes to freshen up the crust before slicing.
Why You’ll Love This Recipe
This loaf has earned a permanent spot in my regular baking rotation, and I think it’ll do the same for you:
- It’s genuinely beginner-friendly. Even if you’ve only fed a sourdough starter a handful of times, the steps here are simple and forgiving.
- The overnight rise fits real life. You mix it before bed and bake fresh bread the next morning without babysitting the dough all day.
- It’s endlessly customizable. Whether you want whole wheat, cinnamon raisin, or a dairy-free version, this dough adapts easily.
- The texture beats anything from the store. Soft, fluffy, and sturdy enough for sandwiches, toast, or grilled cheese without falling apart.
- It freezes well, so a single baking session can stock your kitchen with homemade bread for weeks.

Sourdough Sandwich Bread Recipe
Ingredients
Method
- Add the flour, softened butter, sugar, and salt to your mixer bowl fitted with the paddle attachment. Mix on low until the butter breaks down into small crumbs throughout the flour. This only takes a minute or two.
- Pour in your active starter and warm water, then mix until everything comes together into a shaggy, slightly sticky dough. Cover the bowl and let it rest for 30 minutes before kneading.
- Switch to the dough hook and knead on medium-low speed for 6 to 8 minutes, until the dough turns soft and smooth. It shouldn’t stick to your hands anymore; if it does, add just a light dusting of flour.
- No stand mixer? Knead by hand on a floured surface for about 8 to 10 minutes. Focus on how the dough feels rather than counting minutes exactly.
- Cover the bowl tightly with plastic wrap and leave it at room temperature, ideally around 68°F, for 10 to 12 hours. The dough is ready once it looks puffy and has roughly doubled in size.
- Warmer kitchens speed this up, while cooler ones slow it down, so watch the dough itself rather than the clock.
- Turn the risen dough onto a lightly floured surface and gently press it flat to release the larger air bubbles. Roll it into a tight log, tucking the ends underneath as you go.
- With floured hands, pull the dough toward you a few times to build surface tension, then place it seam-side down into a buttered loaf pan.
- Cover the pan loosely with oiled plastic wrap and let the dough rise until the center domes about an inch above the rim, which usually takes 1.5 to 2 hours or longer in a cooler kitchen. You’re not aiming for double in size here.
- Preheat your oven to 375°F (or 500°F, then lower it once the bread goes in for extra oven spring). Bake for 45 to 50 minutes until deeply golden, then cool in the pan briefly before moving the loaf to a wire rack. Let it rest for about an hour before slicing.
Notes
- I always weigh my ingredients on a kitchen scale instead of using cups. It’s made my results so much more consistent, especially with the starter and flour.
- If my kitchen runs cold, I give the second rise extra time instead of rushing it into the oven early. A dense loaf almost always means it needed more time, not less.
- I like using softened, not melted, butter. Melted butter changes the texture of the dough and makes it harder to knead properly.
- Waiting the full hour before slicing was hard for me at first, but it really does keep the inside from turning gummy.
- When I want a taller loaf, I bake it in a slightly smaller pan. It gives the dough a nice upward push instead of spreading out.