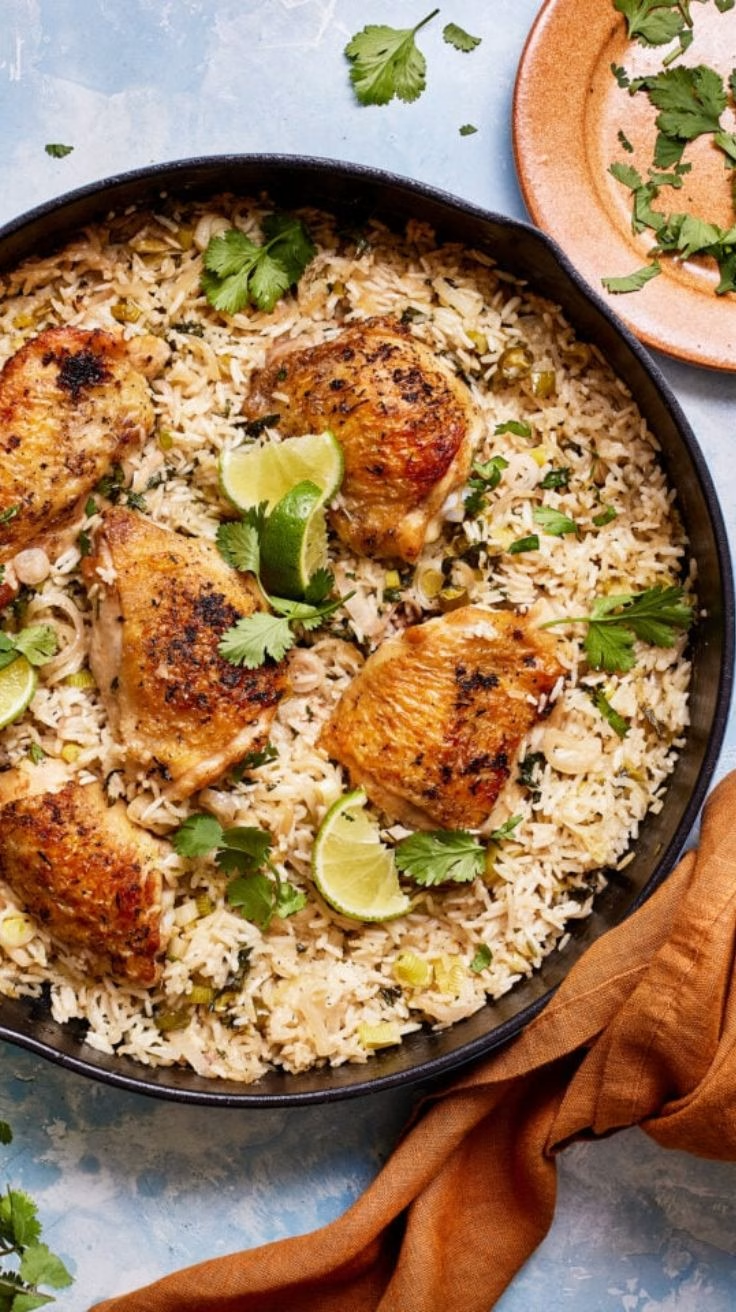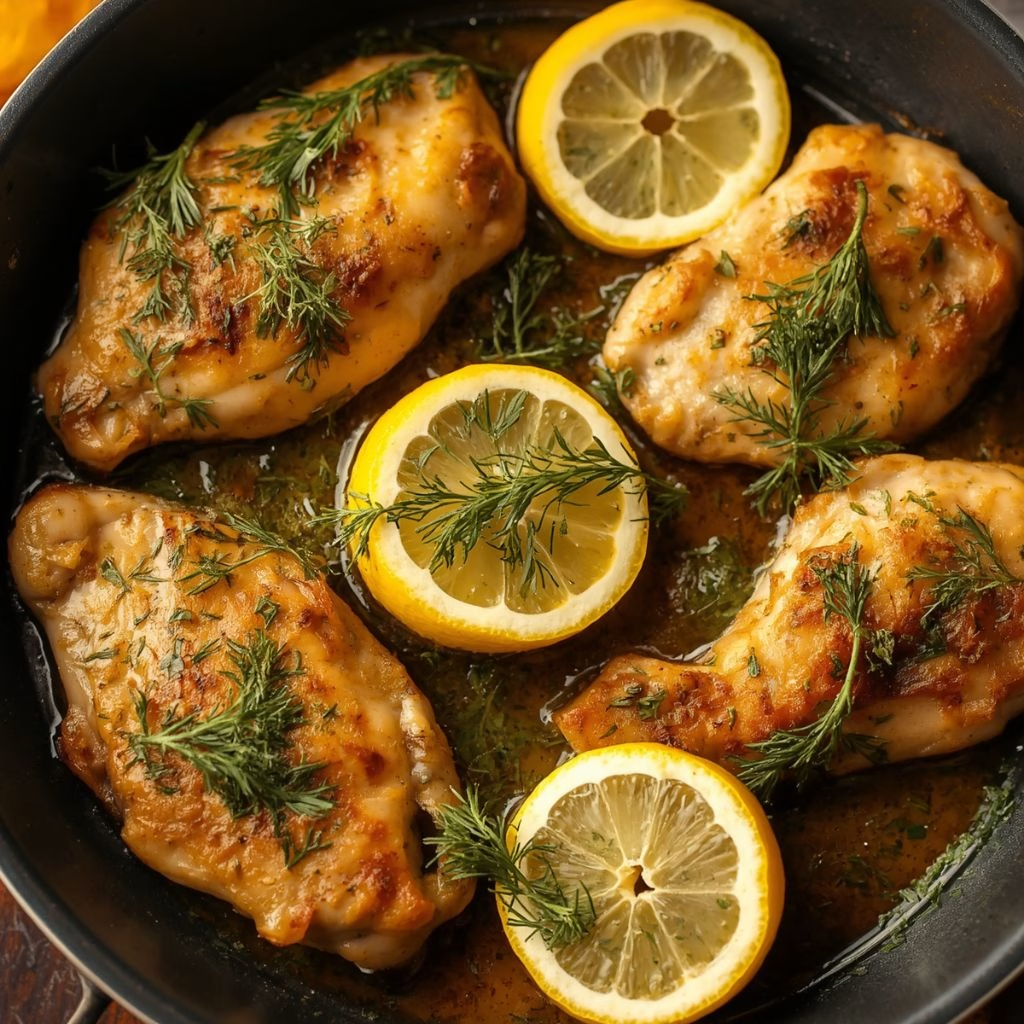
I still remember the first time I made this Lemon Dill Chicken Recipe. I was scrambling to put dinner on the table with almost nothing in the fridge except chicken thighs, a lonely lemon, and a bunch of dill I’d bought on a whim.
One skillet and thirty minutes later, my family was asking when I’d make it again. Since then, it’s become my go-to for busy weeknights when I want something that tastes like I tried way harder than I actually did.
The sauce alone is worth the price of admission bright, buttery, and just tangy enough to make you want to lick the pan. If you’re looking for a new chicken dinner to fall in love with, this one’s about to become your regular too.

Cooking Time
- Prep Time: 10 minutes
- Cooking Time: 20–25 minutes
- Total Time: 30–35 minutes
Ingredients
- 2 pounds boneless, skinless chicken thighs — thighs stay juicy even if you cook them a minute too long, unlike lean breasts
- 1 ¼ teaspoons kosher salt, divided — seasons both the chicken and the sauce in stages for balanced flavor
- ¼ teaspoon black pepper, freshly ground — freshly cracked pepper adds sharper flavor than pre-ground
- 1 tablespoon olive oil — helps get that deep golden sear on the chicken
- 2 tablespoons unsalted butter — builds the rich base of the sauce
- 2 cloves garlic, minced — go fresh here, jarred garlic just doesn’t bring the same punch
- 1 tablespoon all-purpose flour — thickens the sauce without needing heavy cream
- 1 cup low-sodium chicken broth — the backbone of the sauce; low-sodium lets you control the salt yourself
- 2 tablespoons fresh lemon juice — freshly squeezed only, bottled juice tastes flat and one-note
- 2 tablespoons fresh dill, finely chopped, divided — fresh dill is non-negotiable; dried dill won’t give you that grassy brightness
Note: This recipe serves 4 people generously.
Equipment You Need
- Large skillet (cast iron or stainless steel) — for searing the chicken and building the sauce in one pan
- Tongs — for flipping the chicken without piercing it and losing juices
- Wooden spoon — for scraping up browned bits when building the sauce
- Measuring cups and spoons — for accurate portions, especially the flour and broth
- Cutting board and sharp knife — for mincing garlic and chopping dill
- Meat thermometer — to confirm the chicken hits a safe internal temperature
How to Make Lemon Dill Chicken Recipe?
This recipe comes together in three simple stages: searing, simmering, and finishing. You don’t need any fancy technique, just a hot pan and a little patience. Here’s exactly how I do it every single time.
Season and Sear the Chicken
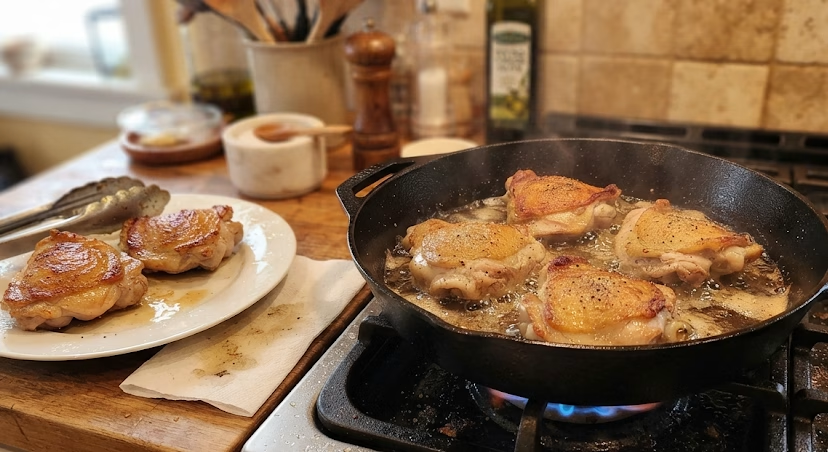
Pat the chicken thighs completely dry with paper towels, then season both sides with salt and pepper. Heat olive oil in your skillet over medium-high heat until it shimmers before adding the chicken.
Sear for 6 to 8 minutes per side until deeply golden, then transfer to a plate that won’t be fully cooked yet, and that’s exactly what you want at this stage.
Build the Garlic-Butter Base
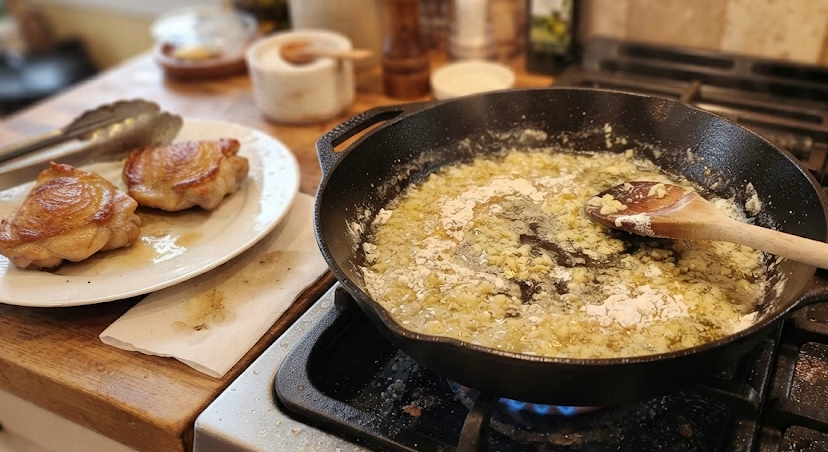
Lower the heat to medium and melt butter in the same skillet you used for the chicken. Toss in the minced garlic and let it cook for about 15 seconds until fragrant but not browned.
Sprinkle the flour over the garlic and stir constantly for around 30 seconds, letting it turn a light golden color to cook out the raw flour taste. If you’re in the mood for another creamy chicken dinner, Costco Chicken Alfredo Copycat Recipe is another comforting option.
Simmer the Lemon Dill Sauce
Pour in the chicken broth, lemon juice, half the chopped dill, and the remaining salt. Use your wooden spoon to scrape up all those browned bits stuck to the pan that’s flavor you don’t want to waste. Bring everything to a lively simmer, stirring often so the sauce thickens evenly without any lumps forming.
Finish Cooking the Chicken in the Sauce
Slide the seared chicken back into the skillet in a single layer, along with any juices that collected on the plate.
Let it cook for 4 to 6 minutes, until the sauce clings nicely to the chicken and the thickest piece reaches a safe internal temperature. This final simmer is where the chicken really soaks up all that lemony flavor.
Rest, Garnish, and Serve
Take the skillet off the heat and stir in the remaining fresh dill for one last burst of freshness. Give the sauce a taste and adjust the salt if needed before serving. Let everything sit for a couple of minutes so the sauce settles and thickens slightly before you plate it up.
Additional Tips for Making This Recipe Better
- I always make sure my pan is properly hot before the chicken goes in, otherwise it sticks and I lose that gorgeous crust.
- I never skip patting the chicken dry a wet surface means steaming instead of searing, and I want that golden color.
- I like tasting my sauce right before serving, since the salt level can shift depending on how salty my broth already is.
- I’ve learned not to rush the flour-and-butter step; giving it those extra seconds helps me avoid a raw, floury taste in the finished sauce.
- When I want extra richness, I stir in a small splash of heavy cream at the very end, off the heat.
Common Mistakes to Avoid
- I used to overcrowd my skillet, which steamed the chicken instead of searing it now I always sear in batches if needed.
- I once used way more lemon juice than the recipe called for, and it made my sauce taste bitter instead of bright.
- I’ve made the mistake of skipping the resting time on the plate, which meant I lost all those flavorful juices that belong in the sauce.
- I learned the hard way that dried dill is a poor substitute here, since it just doesn’t have the same fresh, punchy flavor.
- I’ve rushed the simmering step before, and my sauce ended up thin and watery instead of silky and clinging to the chicken.
How to Serve Lemon Dill Chicken?
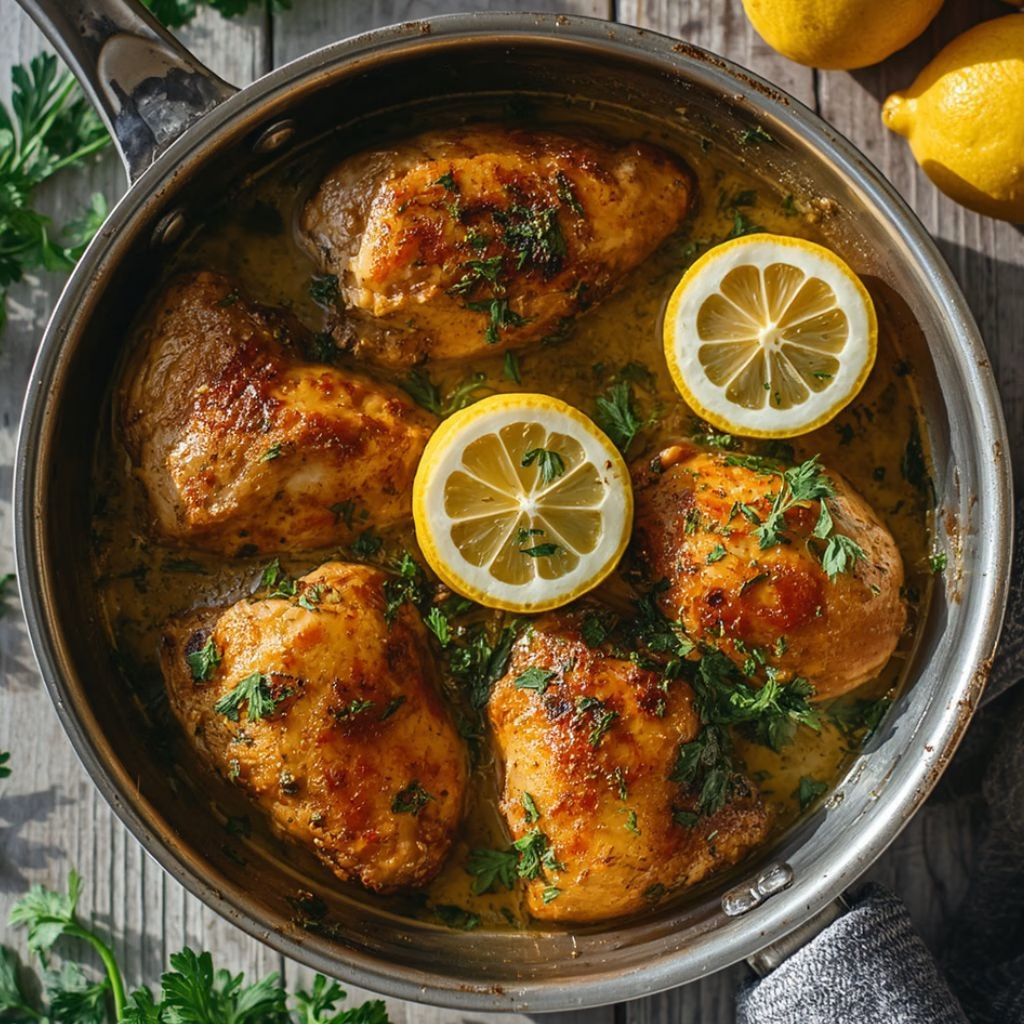
I love spooning this chicken and its sauce over a bed of fluffy steamed rice or creamy mashed potatoes, so nothing goes to waste. Roasted baby potatoes or buttered egg noodles work beautifully too, soaking up every bit of that lemony sauce. For a pop of color, I finish the plate with a few extra sprigs of fresh dill and a thin lemon slice on top.
Pairing it with a simple green vegetable, like sautéed green beans or roasted broccoli, rounds out the plate and balances the richness of the sauce. For a lighter chicken option that works especially well for sandwiches, Costco Chicken Salad Sandwich Recipe is another easy choice.
Variations
- Swap the chicken thighs for boneless, skinless chicken breasts if you prefer leaner meat, just watch your cook time closely.
- Make it dairy-free by using olive oil instead of butter and a plant-based cream alternative if you want extra richness.
- Add a handful of baby spinach or chopped kale to the sauce for a boost of greens.
- Toss in sliced mushrooms with the garlic for an earthy, umami-rich twist.
- Stir in a spoonful of Dijon mustard for a tangier, more complex sauce.
- Add red pepper flakes if you like a subtle kick of heat alongside the lemon brightness.
Nutritional Information
Here’s a general idea of what’s in each serving of this dish, based on four servings total:
- Calories: about 375 per serving
- Protein: about 46 grams per serving
- Carbohydrates: about 3 grams per serving
- Fat: about 19 grams per serving
Make Ahead and Storage
You can season the chicken and chop your garlic and dill up to a day in advance, storing everything separately in the fridge until you’re ready to cook. This cuts your active prep time down significantly on a busy weeknight.
Once cooked, store leftovers in an airtight container in the refrigerator for up to 4 days. The sauce actually tastes even better the next day, once the flavors have had time to meld.
To freeze, let the chicken and sauce cool completely, then transfer to a freezer-safe container for up to 2 months. Thaw overnight in the fridge and reheat gently on the stovetop over low heat, adding a splash of broth if the sauce has thickened too much.
Why You’ll Love This Recipe?
This dish checks all the boxes for an easy, satisfying dinner that doesn’t skimp on flavor. Here’s what makes it a standout in my regular rotation.
- It’s a true one-pan meal. Everything cooks in a single skillet, which means less time scrubbing dishes and more time actually enjoying dinner.
- The sauce steals the show. Bright lemon and fresh dill come together in a way that makes this dish feel special, even on a random Tuesday night.
- It’s endlessly adaptable. Whether I swap the protein, add vegetables, or tweak the sauce, this recipe flexes to whatever I have on hand.
- It’s ready in about 30 minutes. From prep to plate, this is a genuinely fast dinner that doesn’t taste rushed.
- It reheats beautifully. Leftovers taste just as good, if not better, making it a great option for meal prep.
FAQs
Can I make creamy lemon dill chicken instead?
Yes, just stir in a splash of heavy cream or a dairy-free alternative at the very end of cooking. It turns the sauce silkier and richer without changing the core flavors.
Can I bake this instead of cooking it on the stovetop?
Absolutely sear the chicken as directed, then transfer everything to a baking dish and bake at 375°F for about 20 minutes for baked lemon dill chicken. It’s a great hands-off option if you’re multitasking at dinner.
Is there an Indian-style version of dill chicken?
Yes, you can add warming spices like cumin, coriander, and a touch of garam masala to the sauce for a dill chicken Indian recipe twist. It keeps the fresh dill flavor while adding depth and warmth.
Can I make lemon dill chicken and potatoes in one pan?
Definitely add small, halved potatoes to the skillet during the simmering stage so they cook right in the sauce. Just make sure they’re cut small enough to cook through at the same time as the chicken.
Does this work well with chicken breasts or a baked version?
Yes, both dill chicken breast recipe and lemon dill chicken thighs oven versions work fine just adjust your cook time since breasts and oven baking cook a little differently than stovetop thighs.

Lemon Dill Chicken Recipe
Ingredients
Method
- Pat the chicken thighs completely dry with paper towels, then season both sides with salt and pepper. Heat olive oil in your skillet over medium-high heat until it shimmers before adding the chicken. Sear for 6 to 8 minutes per side until deeply golden, then transfer to a plate that won’t be fully cooked yet, and that’s exactly what you want at this stage.
- Lower the heat to medium and melt butter in the same skillet you used for the chicken. Toss in the minced garlic and let it cook for about 15 seconds until fragrant but not browned. Sprinkle the flour over the garlic and stir constantly for around 30 seconds, letting it turn a light golden color to cook out the raw flour taste.
- Pour in the chicken broth, lemon juice, half the chopped dill, and the remaining salt. Use your wooden spoon to scrape up all those browned bits stuck to the pan that’s flavor you don’t want to waste. Bring everything to a lively simmer, stirring often so the sauce thickens evenly without any lumps forming.
- Slide the seared chicken back into the skillet in a single layer, along with any juices that collected on the plate. Let it cook for 4 to 6 minutes, until the sauce clings nicely to the chicken and the thickest piece reaches a safe internal temperature. This final simmer is where the chicken really soaks up all that lemony flavor.
- Take the skillet off the heat and stir in the remaining fresh dill for one last burst of freshness. Give the sauce a taste and adjust the salt if needed before serving. Let everything sit for a couple of minutes so the sauce settles and thickens slightly before you plate it up.
Notes
- I always make sure my pan is properly hot before the chicken goes in, otherwise it sticks and I lose that gorgeous crust.
- I never skip patting the chicken dry a wet surface means steaming instead of searing, and I want that golden color.
- I like tasting my sauce right before serving, since the salt level can shift depending on how salty my broth already is.
- I’ve learned not to rush the flour-and-butter step; giving it those extra seconds helps me avoid a raw, floury taste in the finished sauce.
- When I want extra richness, I stir in a small splash of heavy cream at the very end, off the heat.