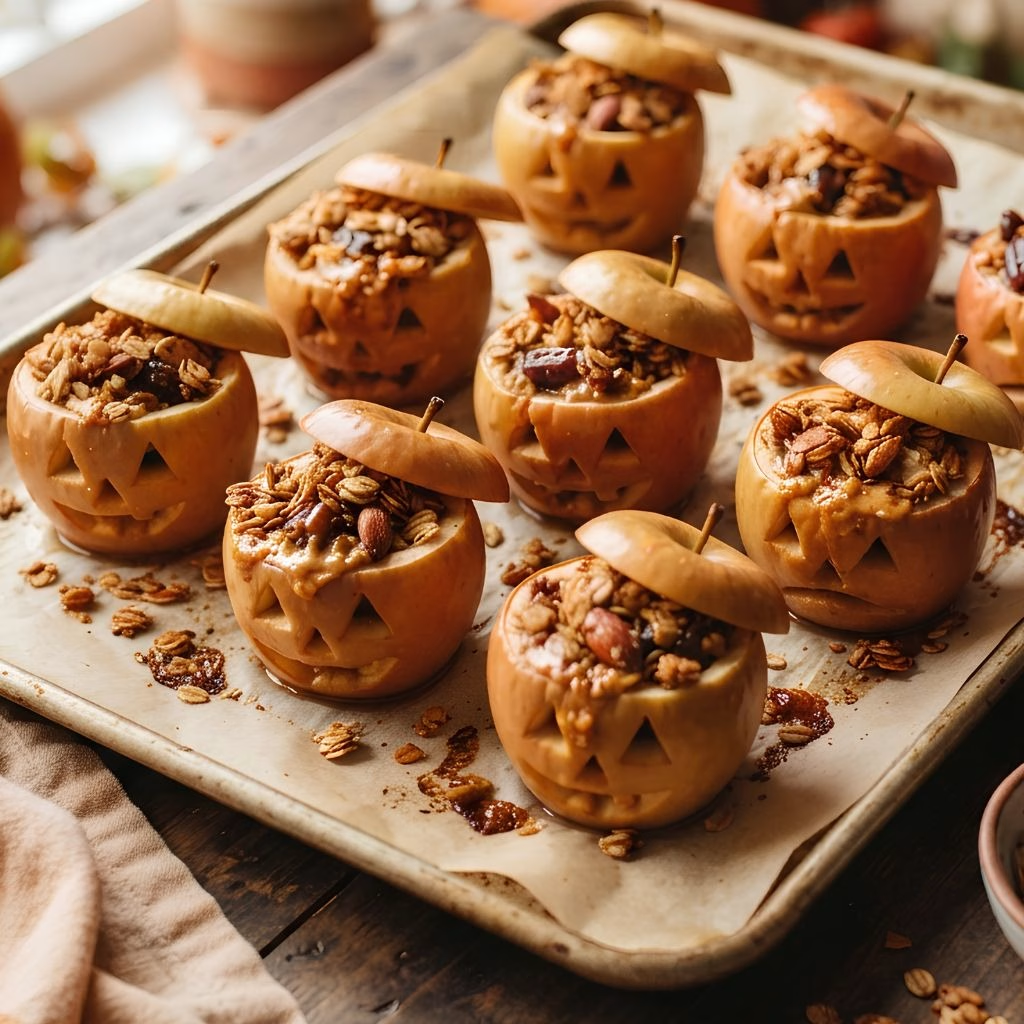
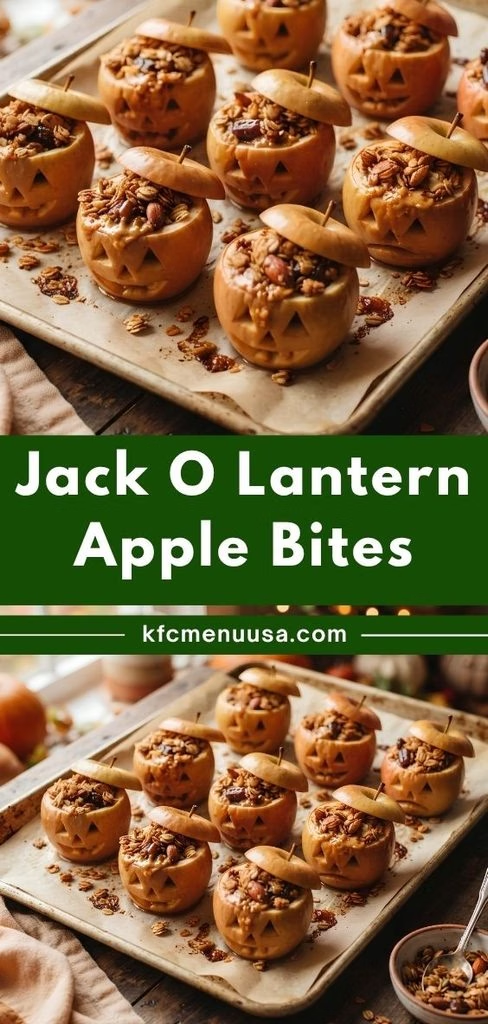
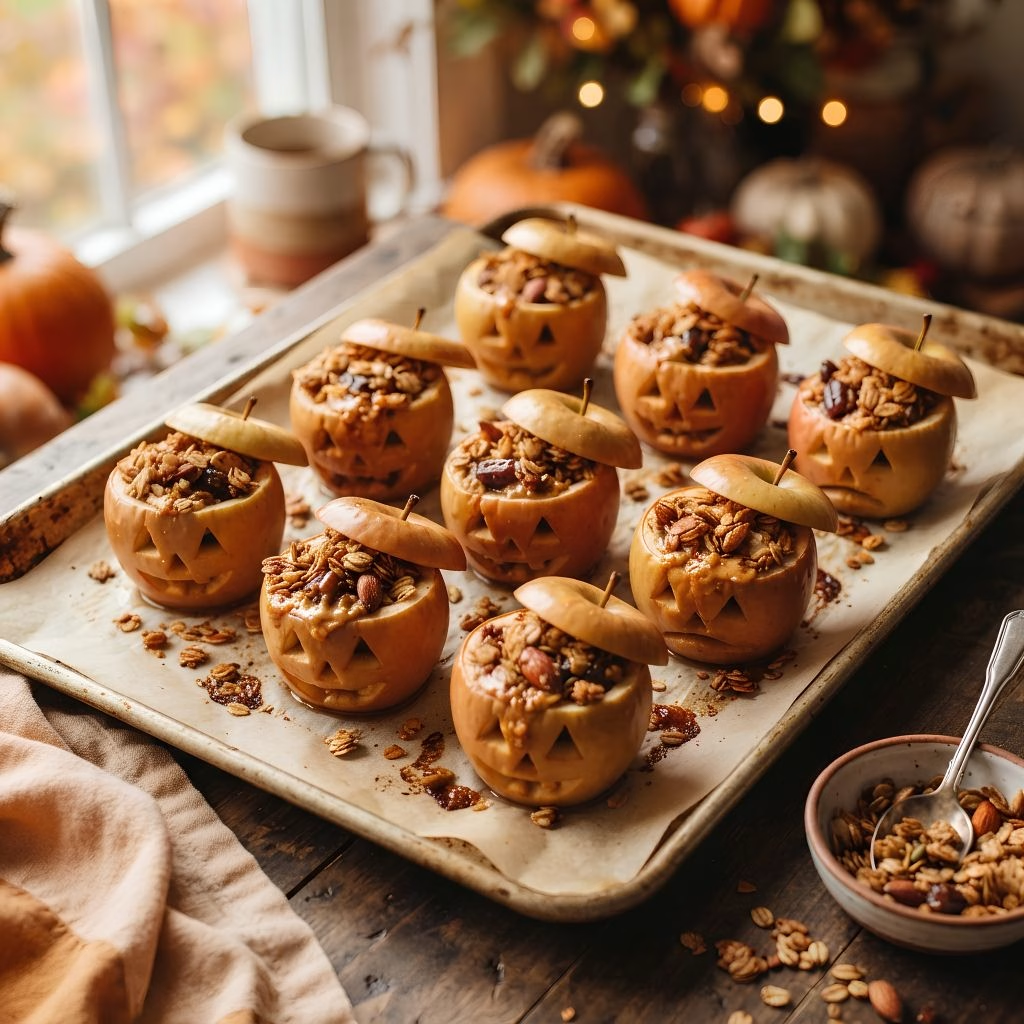
I made these Jack O Lantern Apple Bites Recipe for my kid’s classroom party last October, and I honestly wasn’t ready for how fast they disappeared. They’re basically apples turned into tiny glowing pumpkins, stuffed with a creamy peanut butter filling and topped with crunchy granola.
Every step is simple enough that my seven-year-old carved half the faces himself. If you’re hunting for last minute halloween treats that still look impressive, this one earns its spot on the table. I’ll walk you through everything I learned while making these, mistakes included.
Cooking Time
- Prep Time: 20 minutes
- Cooking Time: 20 minutes
- Total Time: 40 minutes
Ingredients
Here’s everything you’ll need to turn plain apples into little glowing jack-o-lanterns.
- 4 medium apples – honeycrisp or pink lady hold their shape best when hollowed out
- 1/2 cup peanut butter – melt it gently so it spreads smoothly inside the apple
- 1/4 cup date paste – adds natural sweetness without refined sugar
- 1/2 teaspoon pumpkin spice – gives that warm, autumn flavor everyone expects
- 1/2 cup granola – pick a chunky variety so it doesn’t turn soggy after baking
- 1 tablespoon lemon juice – rub it on the carved edges to stop browning
Note: this recipe serves 4.
Equipment You Need
- Small paring knife – for cutting the tops off and carving the faces
- Melon baller or spoon – to scoop out the apple flesh cleanly
- Small saucepan – for gently melting the peanut butter
- Mixing bowl – to combine the peanut butter, date paste, and spice
- Baking sheet – holds the apples upright while they bake
- Parchment paper – keeps the apples from sticking to the tray
How to Make Jack O’Lantern Apple Bites Recipe?
I promise this looks fancier than it actually is to make. Once you get the hang of hollowing out the first apple, the rest go by quickly. Here’s exactly how I put mine together.
Prep the Apples
Slice the top off each apple like you’re prepping a tiny pumpkin, and set the tops aside. Use your melon baller to scoop out the flesh, leaving the walls thick enough to hold their shape. Brush the inside with lemon juice so the flesh doesn’t brown before baking.
Carve the Faces
Grab your paring knife and carve simple triangle eyes and a jagged mouth into each apple, just like you would with a real pumpkin. I like keeping the cuts small and shallow the first time, since you can always widen them later. Kids can help here with a butter knife under supervision.
Make the Filling
Warm the peanut butter in a small saucepan over low heat until it turns smooth and pourable. Stir in the date paste and pumpkin spice until fully combined. The mixture should look glossy and blend easily into the hollowed apple centers.
Fill and Bake
Spoon the warm peanut butter mixture into each carved apple, filling it about halfway. Place the tops back on and set the apples upright on a parchment-lined baking sheet. Bake at 350°F for 10 minutes so the filling softens and the apple edges start to caramelize slightly.
Add the Granola Topping
Pull the tray out, remove the tops again, and spoon granola generously over the warm filling. Slide the tray back into the oven for another 10 minutes so the granola turns golden and slightly crisp. This second bake is what gives the bites their satisfying crunch.
Cool and Serve
Let the apples rest for about 5 minutes once they’re out of the oven, since the filling stays quite hot. Set the carved tops back on at a jaunty angle for that classic jack-o-lantern look. Serve them right away while the granola is still crunchy and the filling is warm.
Additional Tips for Making This Recipe Better
I’ve made these enough times now to know exactly what makes or breaks the final result.
- I always choose apples with a flat bottom so they stand upright without wobbling on the tray.
- I keep my knife cuts shallow at first, because I can always deepen the face later without ruining the apple wall.
- I warm my peanut butter just until pourable, not hot, or it melts the apple flesh too fast.
- I add the granola in the last 10 minutes only, since baking it the whole time burns it.
- I brush lemon juice on every cut surface immediately, or my apples turn brown before I even finish carving.
Common Mistakes to Avoid
I’ve made nearly every one of these mistakes myself, so learn from my kitchen mishaps.
- I once scooped the walls too thin, and my apple collapsed halfway through baking.
- I forgot the lemon juice once, and the carved faces turned an unappetizing brown before they even hit the oven.
- I overfilled an apple with peanut butter mixture, and it bubbled over and burned on my tray.
- I baked the granola from the start once, and it turned bitter and overly dark by the time the apples finished cooking.
- I used soft, mealy apples once, and they turned mushy instead of holding their shape as little lanterns.
How to Serve Jack O’Lantern Apple Bites?
I like arranging these on a dark platter or a bed of shredded coconut to look like little pumpkins glowing in a patch. A drizzle of extra melted peanut butter or a light dusting of cinnamon over the top adds a nice finishing touch right before serving.
If you’re setting up a full spread, these pair really well alongside a gourmet candy apple recipe for guests who want something a little sweeter. Set them out immediately after the final bake, since the granola loses its crunch the longer it sits.
Variations
- Swap peanut butter for SunButter if you’re avoiding nuts for a school-safe version.
- Use powdered peanut butter mixed with a little water to cut down the fat content.
- Try a dairy-free granola blend to keep the whole recipe fully plant-based.
- Skip the date paste and use maple syrup instead for a slightly different sweetness.
- Add mini dark chocolate chips into the filling for a richer, dessert-style bite.
- Mix in a pinch of ginger or clove alongside the pumpkin spice for extra warmth.
Nutritional Information
Here’s a rough breakdown per apple bite, based on standard ingredient measurements.
- Calories: approximately 190 kcal
- Protein: approximately 5g
- Carbohydrates: approximately 24g
- Fat: approximately 9g
Make Ahead and Storage
You can hollow out and carve the apples up to a day ahead if you brush them well with lemon juice and store them wrapped tightly in the fridge. I don’t recommend filling and baking them in advance, since the granola loses its crunch and the apple walls soften unevenly after sitting.
Leftover baked bites keep in an airtight container in the fridge for up to 2 days, though the texture is best within the first few hours. I don’t recommend freezing these, since apples turn watery and mushy once thawed, which ruins the whole presentation.
To reheat, pop them in the oven at 300°F for about 5 minutes just to warm the filling back through. I’d skip the microwave here, since it makes the apple walls go soft and limp rather quickly.
Why You’ll Love This Recipe?
There’s a reason this one keeps making a comeback on my Halloween table every year.
- It’s genuinely easy to pull off. Even with kids helping, the whole thing comes together in under an hour, and there’s very little that can go seriously wrong.
- It’s naturally better for you than most Halloween sweets. Between the fruit, peanut butter, and granola, you’re getting real nutrition alongside the fun.
- It’s easy to customize for different diets. Between nut-free, dairy-free, and lower-sugar swaps, almost anyone at the party can enjoy one.
- It doubles as a fun activity, not just a snack. Carving the faces turns prep time into genuine entertainment for kids.
- It looks far more impressive than the effort it takes. Guests always assume these took way longer than 40 minutes.
FAQs
Can I make these apple bites nut-free?
Yes, just swap the peanut butter for SunButter or another seed butter, and check your granola for cross-contamination if allergies are a concern.
Why did my carved apple turn brown so fast?
That happens when you skip the lemon juice step, so always brush every cut surface right after carving.
Can I prepare these the night before a party?
I’d only hollow and carve them ahead of time, then fill and bake fresh the day you’re serving, since the granola loses its crunch if it sits too long.
What apples work best for this recipe?
Honeycrisp and pink lady apples hold their shape well under heat, while softer varieties tend to collapse or turn mushy.
Can I turn this into a vegan Halloween recipe?
Yes, just use maple syrup instead of any honey-based sweetener and a plant-based granola, and the whole recipe stays fully vegan.

Jack O Lantern Apple Bites Recipe
Ingredients
Method
- Slice the top off each apple like you’re prepping a tiny pumpkin, and set the tops aside. Use your melon baller to scoop out the flesh, leaving the walls thick enough to hold their shape. Brush the inside with lemon juice so the flesh doesn’t brown before baking.
- Grab your paring knife and carve simple triangle eyes and a jagged mouth into each apple, just like you would with a real pumpkin. I like keeping the cuts small and shallow the first time, since you can always widen them later. Kids can help here with a butter knife under supervision.
- Warm the peanut butter in a small saucepan over low heat until it turns smooth and pourable. Stir in the date paste and pumpkin spice until fully combined. The mixture should look glossy and blend easily into the hollowed apple centers.
- Spoon the warm peanut butter mixture into each carved apple, filling it about halfway. Place the tops back on and set the apples upright on a parchment-lined baking sheet. Bake at 350°F for 10 minutes so the filling softens and the apple edges start to caramelize slightly.
- Pull the tray out, remove the tops again, and spoon granola generously over the warm filling. Slide the tray back into the oven for another 10 minutes so the granola turns golden and slightly crisp. This second bake is what gives the bites their satisfying crunch.
- Let the apples rest for about 5 minutes once they’re out of the oven, since the filling stays quite hot. Set the carved tops back on at a jaunty angle for that classic jack-o-lantern look. Serve them right away while the granola is still crunchy and the filling is warm.
Notes
- I always choose apples with a flat bottom so they stand upright without wobbling on the tray.
- I keep my knife cuts shallow at first, because I can always deepen the face later without ruining the apple wall.
- I warm my peanut butter just until pourable, not hot, or it melts the apple flesh too fast.
- I add the granola in the last 10 minutes only, since baking it the whole time burns it.
- I brush lemon juice on every cut surface immediately, or my apples turn brown before I even finish carving.