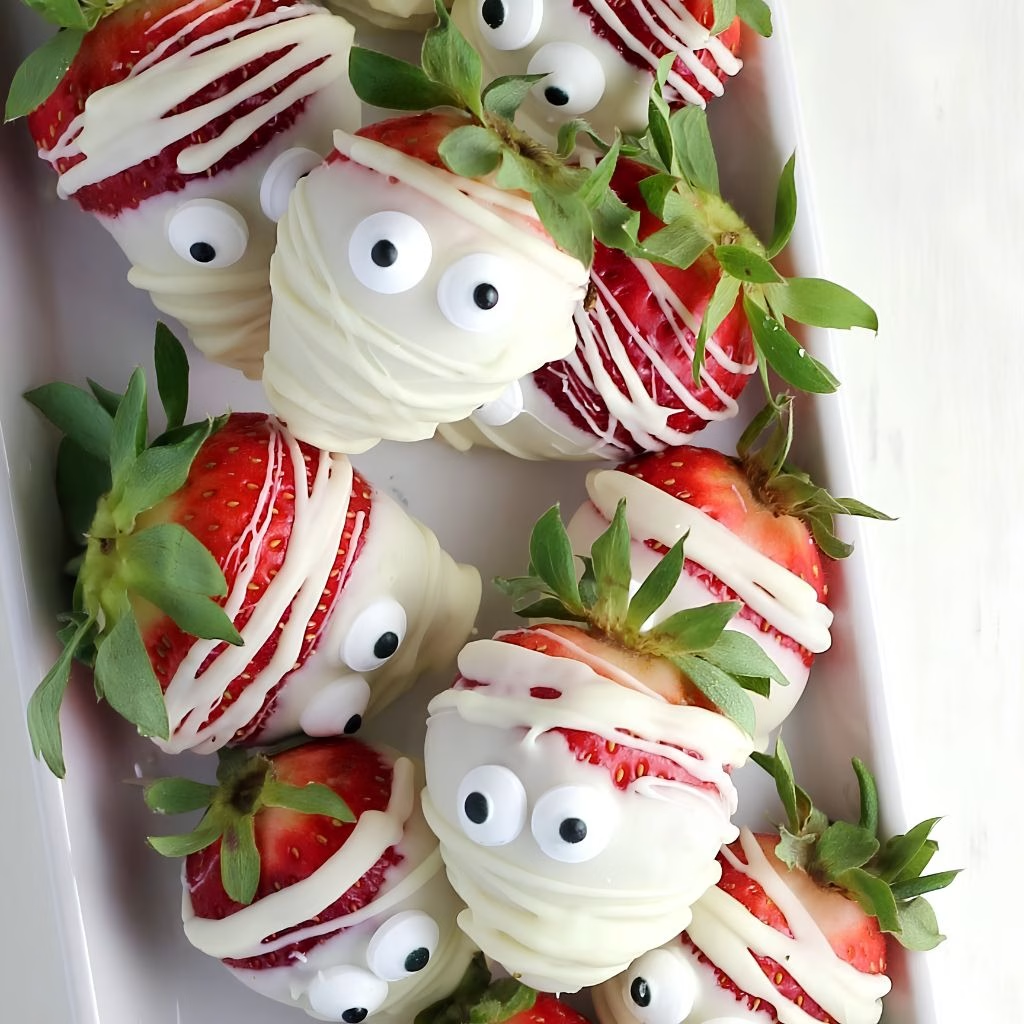
I made these mummy strawberries for the first time when my daughter’s class party was two hours away and I had zero time to bake anything fancy. I grabbed a bag of strawberries, some white chocolate, and a handful of candy eyes, and honestly, I was shocked at how quickly they came together.
My kids were obsessed, the other moms asked for the “recipe,” and now I make a batch every single October. If you want a Halloween treat that looks impressive but takes almost no effort, this one’s for you.

Cooking Time
- Prep Time: 15 minutes
- Cooking Time: 2 minutes (melting the chocolate)
- Total Time: 20 minutes, plus 10 minutes to set
Ingredients
- 1 pound fresh strawberries, washed and completely dried – wet berries make the chocolate slide right off, so pat them dry well
- 12 ounces white chocolate chips or white candy melts – candy melts hold their shape better and set with a nicer shine
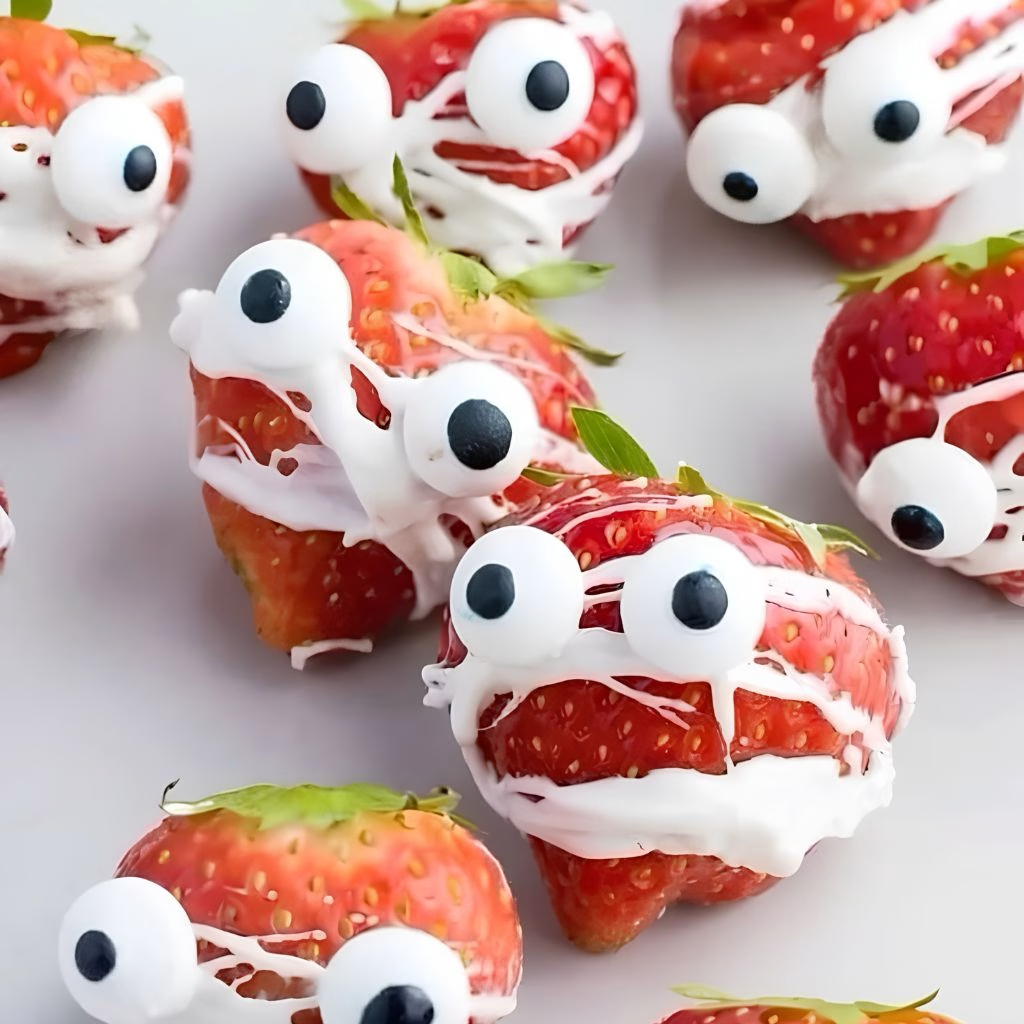
- Candy eyeballs, 2 per strawberry – the tiny detail that turns a plain berry into a mummy face
- 1 teaspoon coconut oil or shortening (optional) – thins the chocolate if it feels too thick to drizzle
Note: this recipe serves about 6 people, based on roughly 2-3 strawberries per person.
Equipment You Need
- Microwave-safe bowl – for melting the white chocolate in short bursts
- Baking sheet – gives you a flat surface to set the strawberries on
- Parchment paper or wax paper – keeps the chocolate from sticking to the tray
- Ziplock bag or piping bag – turns into a makeshift tool for drizzling the “mummy wrap” lines
- Toothpick – helps place the candy eyes precisely and clean up any messy drizzle
How to Make an Easy Mummy Strawberry Recipe?
This part is honestly the easiest step in the whole process, which is exactly why I love this recipe so much. You’re basically melting, dipping, and decorating, no oven or timer required. Here’s exactly how I do it every time.
Prep the Strawberries
I start by rinsing the strawberries under cool water, then laying them out on a paper towel to dry completely. This step matters more than people think, because any leftover moisture will make the melted chocolate seize up and turn clumpy instead of smooth.
Melt the White Chocolate
I pour the white chocolate chips into a microwave-safe bowl and heat them in 20 to 30 second bursts, stirring after each round. Overheating is the biggest mistake here, so I stay patient and stir often until the chocolate is completely smooth and glossy.
Dip Each Strawberry
Holding each berry by the green top, I dip it into the melted chocolate and twist gently so the white coating wraps around most of the fruit. I don’t worry about it looking perfectly smooth, since a slightly uneven coat actually helps the mummy look more authentic.
Add the Candy Eyes
While the chocolate coating is still wet, I press two candy eyeballs onto the upper third of each strawberry using a toothpick to nudge them into place. The melted chocolate acts as glue, so they stick without any extra effort.
Drizzle the Mummy Wrap
I transfer the leftover melted chocolate into a ziplock bag, snip off a tiny corner, and drizzle it back and forth across each strawberry in messy zigzag lines, carefully avoiding the eyes. The imperfect, criss-crossed look is exactly what makes it resemble mummy wrapping.
Let Them Set
I place the finished strawberries on the parchment-lined tray and let them sit at room temperature for about 10 minutes, or pop them in the fridge for 5 minutes if I’m in a rush. Once the chocolate hardens, they’re ready to serve.
Additional Tips for Making This Recipe Better
I’ve made these mummy strawberries more times than I can count, and I’ve picked up a few little tricks along the way that make a real difference.
- I always use candy melts over regular chocolate chips because they melt smoother and set with a nicer finish.
- I stick a toothpick through the stem end of each berry before dipping, which gives me something to hold onto without touching the wet chocolate.
- I never rush the drying step, since even a little moisture ruins the whole coating.
- I keep a small bowl of extra melted chocolate nearby in case any eyes fall off before serving.
- I work in small batches so the chocolate doesn’t harden in the bowl before I finish dipping everything.
Common Mistakes to Avoid
- I once skipped drying my strawberries fully and ended up with clumpy, grainy chocolate that wouldn’t stick properly.
- I overheated the chocolate in one long microwave burst instead of short intervals, and it seized up on me almost instantly.
- I tried using regular chocolate chips without any oil or shortening, and the coating turned out too thick to drizzle smoothly.
- I placed the candy eyes too late, after the chocolate had already started to set, so they just slid right off.
- I stored a finished batch for two days once, and by day two the strawberries had gotten soft and watery underneath the coating.
How to Serve an Easy Mummy Strawberry Recipe?
I like to arrange these on a black or dark orange platter so the white chocolate really pops against the background, which makes the whole tray feel extra festive for Halloween. A few sprigs of fake spiderweb or a scattering of candy corn around the edges takes the presentation up another notch without any real effort.
If you’re hosting a bigger spread, these mummy strawberries sit really well alongside other spooky finger foods, and they pair beautifully with something warm like a mug of spooky hot chocolate for guests to sip while they snack. I also love setting them out next to savory bites, since the sweetness balances out something like mummy hot dog crescent rolls on the same table.
Variations
- Dairy-free option: swap the white chocolate for a dairy-free white chocolate baking bar, which melts and sets the same way.
- Milk or dark chocolate mummies: use milk chocolate as the base coat, then drizzle white chocolate on top for a layered mummy look.
- No candy eyes: use mini chocolate chips, dark chocolate dots, or black sprinkles pressed into the wet chocolate instead.
- Frozen berry shortcut: if fresh strawberries aren’t in season, this works as an easy recipe with frozen strawberries too, as long as you thaw and pat them completely dry first so the chocolate still sticks.
- Flavor twist: stir a drop of vanilla or almond extract into the melted white chocolate for a subtle flavor boost.
- Mousse pairing: for a heartier dessert table, serve these alongside a strawberry mousse recipe with eggs in small cups for guests who want something creamier.
Nutritional Information
Here’s a rough breakdown per strawberry, based on white chocolate coating and one fresh berry.
- Calories: 60-70 kcal
- Protein: 1 gram
- Carbohydrates: 8 grams
- Fat: 3 grams
Make Ahead and Storage
I don’t recommend making these too far in advance, since strawberries release moisture once coated and can get mushy fast. If you need to prep ahead, you can melt and store your chocolate coating separately up to a day early, then dip the berries the same day you plan to serve them.
For storage, keep any leftovers in a single layer in an open container in the fridge, and eat them within 24 hours for the best texture. I don’t recommend freezing these, since the strawberries turn watery and mushy the moment they thaw, which ruins both the look and the bite.
Why You’ll Love This Recipe?
This recipe has earned a permanent spot on my Halloween menu, and here’s why I think you’ll feel the same way once you try it.
- It’s incredibly quick: from start to finish, you’re looking at 20 minutes of actual work, which makes it perfect for last-minute party prep.
- It’s kid-friendly to make: my kids help with dipping and adding the candy eyes every year, and it keeps them entertained without any real mess.
- It’s easy to customize: whether you go dairy-free, swap in milk chocolate, or add extra spooky decorations, the base method stays exactly the same.
- It doesn’t need an oven: there’s zero baking involved, so it’s one less thing to worry about when your oven is already busy with other dishes.
- It looks way more impressive than the effort required: guests always assume these took way longer than they actually did.
FAQs
Can I use milk chocolate instead of white chocolate?
Yes, but the mummy look works best with white chocolate since it mimics bandage wrapping, so milk chocolate will taste great but look less like a mummy.
Do I have to use candy eyeballs?
Not at all, mini chocolate chips, dark chocolate dots, or black sprinkles work just as well as a substitute for eyes.
How do I keep the melted chocolate smooth?
Heat it in short 20 to 30 second bursts, stir often, and add a small amount of coconut oil if it feels too thick to drizzle.
How long do mummy strawberries stay fresh?
They’re best eaten within 24 hours, since the strawberries can turn soft and watery if stored much longer than that.
Can I make these with frozen strawberries?
You can, but make sure they’re fully thawed and completely dried first, otherwise the chocolate coating won’t stick properly.

Easy Mummy Strawberry Recipe
Ingredients
Method
- I start by rinsing the strawberries under cool water, then laying them out on a paper towel to dry completely. This step matters more than people think, because any leftover moisture will make the melted chocolate seize up and turn clumpy instead of smooth.
- I pour the white chocolate chips into a microwave-safe bowl and heat them in 20 to 30 second bursts, stirring after each round. Overheating is the biggest mistake here, so I stay patient and stir often until the chocolate is completely smooth and glossy.
- Holding each berry by the green top, I dip it into the melted chocolate and twist gently so the white coating wraps around most of the fruit. I don’t worry about it looking perfectly smooth, since a slightly uneven coat actually helps the mummy look more authentic.
- While the chocolate coating is still wet, I press two candy eyeballs onto the upper third of each strawberry using a toothpick to nudge them into place. The melted chocolate acts as glue, so they stick without any extra effort.
- I transfer the leftover melted chocolate into a ziplock bag, snip off a tiny corner, and drizzle it back and forth across each strawberry in messy zigzag lines, carefully avoiding the eyes. The imperfect, criss-crossed look is exactly what makes it resemble mummy wrapping.
- I place the finished strawberries on the parchment-lined tray and let them sit at room temperature for about 10 minutes, or pop them in the fridge for 5 minutes if I’m in a rush. Once the chocolate hardens, they’re ready to serve.
Notes
- I always use candy melts over regular chocolate chips because they melt smoother and set with a nicer finish.
- I stick a toothpick through the stem end of each berry before dipping, which gives me something to hold onto without touching the wet chocolate.
- I never rush the drying step, since even a little moisture ruins the whole coating.
- I keep a small bowl of extra melted chocolate nearby in case any eyes fall off before serving.
- I work in small batches so the chocolate doesn’t harden in the bowl before I finish dipping everything.