I bake this Halloween Thumbprint Cookies Recipe every October, and by now my kitchen counter is basically dusted in orange and purple sprinkles for the entire month. I first tried these on a whim with my daughter, thinking they’d be a quick weekend project, and they turned into our favorite tradition.
There’s something so satisfying about pressing your thumb into soft cookie dough and watching it hold a little pool of colorful icing. If you love a buttery, shortbread-style bite with a festive twist, I think you’ll fall for these halloween finger cookies just like we did.

Cooking Time
- Prep Time: 20 minutes
- Cooking Time: 18 minutes
- Total Time: 38 minutes
Ingredients
- 1 cup (2 sticks) unsalted butter, softened — brings that rich, melt-in-your-mouth texture, so let it soften fully before mixing
- 1 cup powdered sugar — keeps the cookies tender instead of crisp, unlike granulated sugar
- 2 teaspoons vanilla extract — adds warmth and rounds out the buttery flavor
- ½ teaspoon salt — balances the sweetness so the cookies don’t taste flat
- 2 ½ cups all-purpose flour — spoon and level it, packed flour makes the dough too dry to work with
- Halloween-colored sprinkles — for rolling the dough balls, choose ones that won’t bleed color into the icing
- ¾ cup powdered sugar (for icing) — creates a smooth, spreadable base for the topping
- 1 tablespoon corn syrup — gives the icing a glossy shine and helps it set nicely
- ⅛ teaspoon vanilla extract (for icing) — a small touch that keeps the icing from tasting too sugary
- 1 teaspoon unsalted butter, melted — adds a little richness to the icing
- 1 ½ tablespoons milk — thins the icing to the right spreadable consistency, add more a little at a time
- Gel food coloring — a few drops go a long way, match it to your sprinkle colors for a cohesive look
Note: this recipe serves several, making about 18 cookies in total.
Equipment You Need
- Stand mixer or hand mixer — creams the butter and sugar until light and fluffy
- Two baking sheets — gives you enough room to bake the cookies in batches
- Parchment paper — keeps the cookies from sticking and browning too much on the bottom
- Measuring cups and spoons — keeps your dough and icing ratios accurate
- Small bowl for sprinkles — makes rolling the dough balls quick and mess-free
- Melon baller or small round tool — deepens the thumbprint indentation after the first bake
- Wire cooling rack — lets the cookies cool evenly before icing
- Toothpicks — perfect for mixing small amounts of gel food coloring into the icing
How to Make Halloween Thumbprint Cookie Recipe?
This cookie dough comes together quickly with just a handful of pantry staples, no chilling required before baking. The dough itself is delicate and a little dry, so a gentle hand really pays off here. Let me walk you through exactly how I make mine every year.
Cream the Butter and Sugar
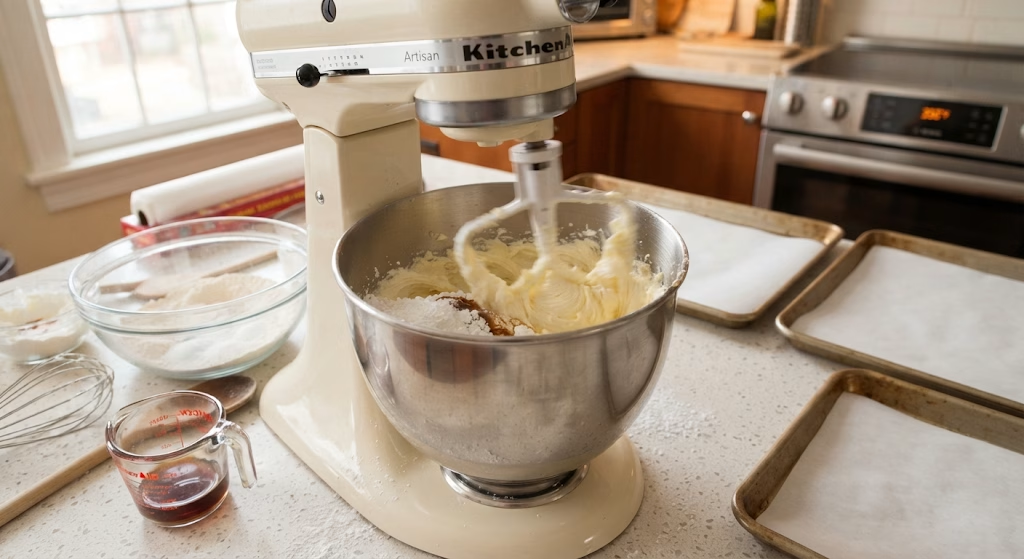
Preheat your oven to 350 degrees and line two baking sheets with parchment paper. In a stand mixer, cream together the softened butter, powdered sugar, and vanilla for two to three minutes until the mixture turns pale and fluffy. This step builds the airy texture that makes these cookies so tender.
Mix in the Dry Ingredients
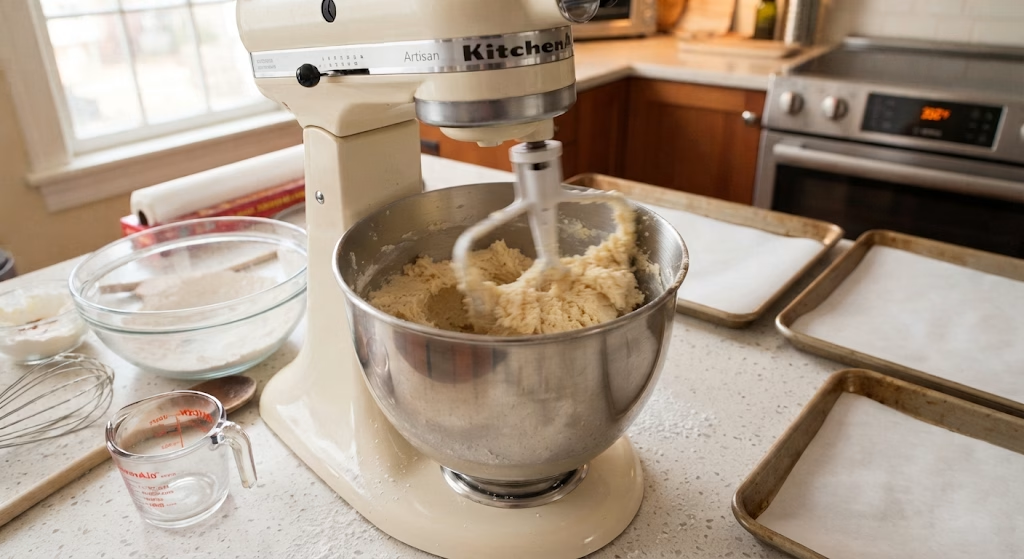
Add the salt and mix until just combined, then gradually add the flour about half a cup at a time. Mix well after each addition until the dough comes together and holds its shape when pressed. Don’t rush this part, or the flour won’t fully incorporate.
Roll and Coat the Dough
Scoop the dough into even tablespoon portions and roll each one into a smooth ball with your hands. Roll every ball in your sprinkles, pressing gently so they stick evenly across the surface. Space the balls about an inch and a half apart on your prepared baking sheets.
Make the First Thumbprint
Using your thumb, press down gently into the center of each dough ball to create a small indentation. Go slowly here, since the dough is tender and can crack easily along the sides if you press too hard or too fast.
Bake in Two Stages
Bake the cookies for 10 minutes, then pull them out and use a melon baller or small round tool to deepen the indentation slightly. Return them to the oven for another 7 to 8 minutes, until the cookies look set but not browned.
Cool Completely
Move the cookies to a wire rack and let them cool all the way through before you even think about icing them. Warm cookies will melt the icing right out of their little wells, so patience really matters at this stage.
Mix and Color the Icing
Whisk together the powdered sugar, corn syrup, vanilla, melted butter, and a tablespoon of milk until smooth, adding a touch more milk if needed. Divide the icing into small bowls and stir in a few drops of gel food coloring to match your sprinkles.
Fill and Set
Spoon a small amount of colored icing into the center of each cooled cookie, filling the indentation without overflowing. Let the icing set at room temperature for about an hour before serving or stacking the cookies.
Additional Tips for Making This Recipe Better
I’ve made more batches of these than I can count, and here’s what actually helps me every time.
- I always let my butter soften fully at room temperature, since cold butter makes the dough way too crumbly to roll.
- I press my thumbprint very gently and rotate the ball slightly as I press, which keeps the sides from cracking.
- I keep a small bowl of warm water nearby to dip my thumb in between presses, since it stops the dough from sticking to my skin.
- I mix my icing colors one at a time using clean toothpicks, so the colors stay bright instead of turning muddy.
- I bake one tray at a time on the center rack, which gives me much more even coloring across the whole batch.
Common Mistakes to Avoid
- I once packed my flour into the measuring cup instead of spooning it in, and my dough turned out too dry and impossible to roll.
- I pressed too hard on my first thumbprint attempt, and the sides of several cookies cracked right open.
- I tried icing the cookies while they were still slightly warm, and the icing melted and ran right off the top.
- I skipped the second, deeper thumbprint after the first bake, and my icing pooled unevenly once the cookies puffed back up.
- I used liquid food coloring instead of gel, and it thinned my icing out until it wouldn’t hold its shape.
How to Serve Halloween Thumbprint Cookies?
I love arranging these on a black or orange platter so the bright icing colors really pop against the background. A light dusting of extra sprinkles around the edges of the plate makes the whole display feel a bit more festive without much extra work.
These cookies are perfect for a school Halloween party, a dessert table alongside other spooky treats, or packed into small treat bags for trick-or-treaters. If you’re already putting together a full Halloween spread, these cookies pair nicely with something savory like a batch of spooky stuffed peppers for a balanced party table.

Variations
- Swap the vanilla extract for almond extract in the dough for a slightly nuttier, more distinct flavor
- Use dairy-free butter and a plant-based milk to make the entire batch dairy-free
- Try a sugar-free powdered sugar substitute in both the dough and icing for a lower-sugar version
- Fill the thumbprint with melted chocolate instead of icing for a richer, fudgier center
- Swap the Halloween sprinkles for orange and black jimmies for a bolder, more classic look
- Add a pinch of cinnamon or nutmeg to the dough for a warm, spiced twist on the classic thumbprint cookie dough recipe
Nutritional Information
Here’s a rough breakdown per cookie, though the exact numbers will shift slightly depending on your icing portions and sprinkle brand.
- Calories: 140 kcal
- Protein: 1 g
- Carbohydrates: 17 g
- Fat: 7 g
Make Ahead and Storage
You can make the cookie dough up to two days ahead of time and keep it tightly wrapped in the refrigerator until you’re ready to roll and bake.
Store the finished, iced cookies in an airtight container at room temperature, where they’ll stay fresh and tender for up to five days.
For longer storage, freeze the unfrosted baked cookies in a sealed container for up to two months, then thaw and ice them once you’re ready to serve.
Why You’ll Love This Recipe?
These halloween thumbprint cookies have become such a staple in our house every fall, and here’s why I think you’ll love baking them too.
- It’s a fun project for kids: Rolling dough balls, pressing thumbprints, and choosing icing colors gives little hands plenty to do and keeps everyone involved.
- It’s endlessly customizable: You can match the sprinkle and icing colors to any holiday or party theme, not just Halloween.
- It has that classic buttery bite: The tender, shortbread-like texture feels a little more special than your average drop cookie.
- It travels and stores well: These cookies hold their shape nicely, which makes them great for gifting, lunchboxes, or party platters.
- It’s simple enough for beginners: With no chilling step and straightforward mixing, this is an approachable recipe even if you’re newer to baking.
FAQs
Why did my thumbprint cookie dough crack?
This usually happens when the dough is a little too dry or you’re pressing too firmly, so try pressing more gently and rotating the ball as you go.
Can I make the icing without corn syrup?
Yes, you can leave it out, though the icing may set with a slightly duller finish instead of that glossy shine.
How far in advance can I bake these for a party?
You can bake the plain cookies up to two days ahead and ice them the same day you plan to serve them for the freshest look.
Can I use a different filling instead of icing?
Absolutely, melted chocolate, jam, or even a simple glaze all work well in place of the classic icing.
Why is my dough too crumbly to roll into balls?
This often means the butter wasn’t softened enough or too much flour was added, so let your butter come fully to room temperature next time.
If you want to round out your whole spooky spread, these cookies make a great finish alongside something like a bowl of black bean witch cauldron soup for a full Halloween dinner night.

Halloween Thumbprint Cookies Recipe
Ingredients
Method
- Preheat your oven to 350 degrees and line two baking sheets with parchment paper. In a stand mixer, cream together the softened butter, powdered sugar, and vanilla for two to three minutes until the mixture turns pale and fluffy. This step builds the airy texture that makes these cookies so tender.
- Add the salt and mix until just combined, then gradually add the flour about half a cup at a time. Mix well after each addition until the dough comes together and holds its shape when pressed. Don’t rush this part, or the flour won’t fully incorporate.
- Scoop the dough into even tablespoon portions and roll each one into a smooth ball with your hands. Roll every ball in your sprinkles, pressing gently so they stick evenly across the surface. Space the balls about an inch and a half apart on your prepared baking sheets.
- Using your thumb, press down gently into the center of each dough ball to create a small indentation. Go slowly here, since the dough is tender and can crack easily along the sides if you press too hard or too fast.
- Bake the cookies for 10 minutes, then pull them out and use a melon baller or small round tool to deepen the indentation slightly. Return them to the oven for another 7 to 8 minutes, until the cookies look set but not browned.
- Move the cookies to a wire rack and let them cool all the way through before you even think about icing them. Warm cookies will melt the icing right out of their little wells, so patience really matters at this stage.
- Whisk together the powdered sugar, corn syrup, vanilla, melted butter, and a tablespoon of milk until smooth, adding a touch more milk if needed. Divide the icing into small bowls and stir in a few drops of gel food coloring to match your sprinkles.
- Spoon a small amount of colored icing into the center of each cooled cookie, filling the indentation without overflowing. Let the icing set at room temperature for about an hour before serving or stacking the cookies.
Notes
- I always let my butter soften fully at room temperature, since cold butter makes the dough way too crumbly to roll.
- I press my thumbprint very gently and rotate the ball slightly as I press, which keeps the sides from cracking.
- I keep a small bowl of warm water nearby to dip my thumb in between presses, since it stops the dough from sticking to my skin.
- I mix my icing colors one at a time using clean toothpicks, so the colors stay bright instead of turning muddy.
- I bake one tray at a time on the center rack, which gives me much more even coloring across the whole batch.