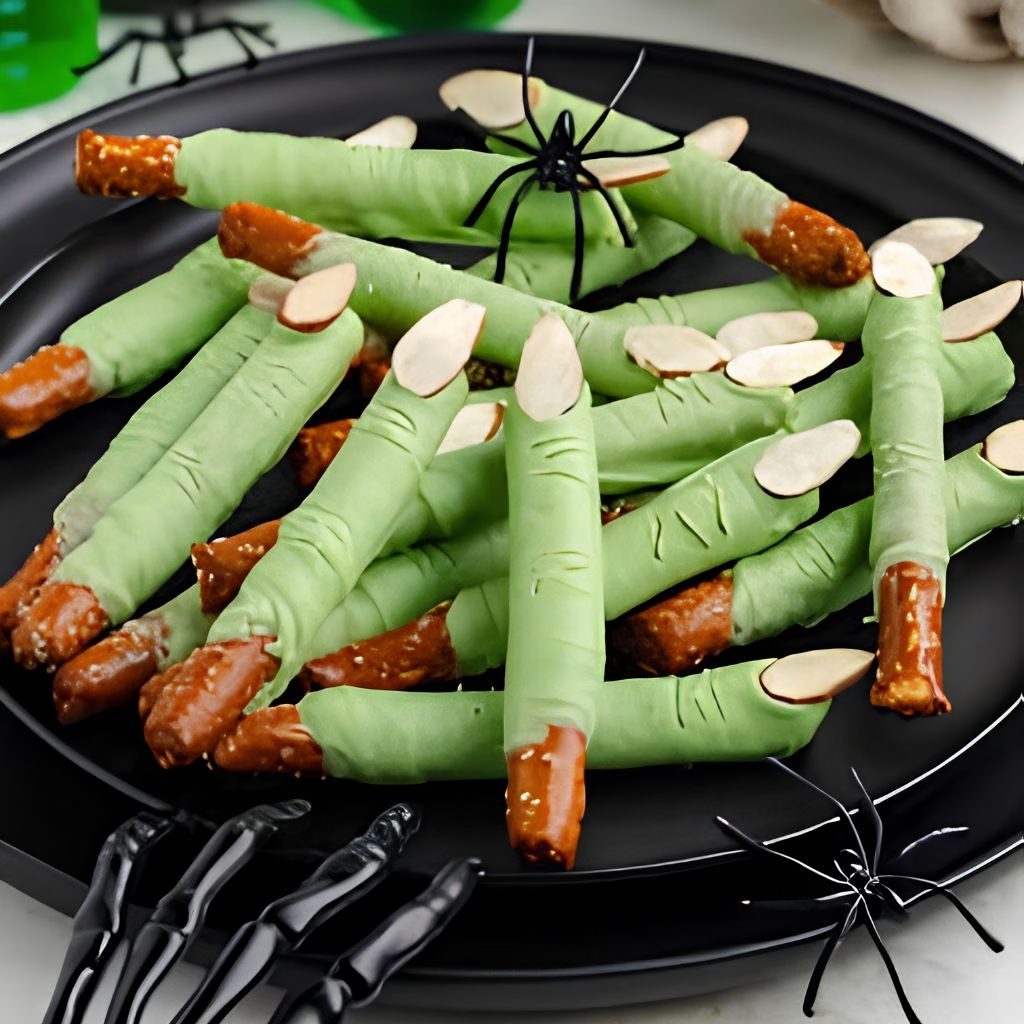
I still remember the first time I made Witch Finger Pretzels Recipe for my daughter’s class party. I had melted candy melts all over my counter and green fingerprints on my apron, but the kids went wild for them.
Ever since that sticky afternoon, this has become my go-to no-bake Halloween treat whenever I need something quick, spooky, and guaranteed to disappear off the tray. If you love easy Halloween pretzel rods ideas that don’t require turning on the oven, you’re going to love how simple these are.
I’ve made more batches than I can count, and I’m sharing every little trick I picked up along the way. Grab your pretzel sticks and let’s get spooky in the kitchen together.
Cooking Time
- Prep Time: 15 minutes
- Cooking Time: 5 minutes (melting the candy coating)
- Total Time: 20 minutes, plus about 15-20 minutes to set
Ingredients
- 12 large pretzel rods (about 7 to 8 inches long) — long rods give you that realistic finger length, so skip the short pretzel sticks
- 6 ounces green candy melts — melts thicker than white chocolate, which helps create that bumpy witch-skin texture
- 2 ounces black candy melts — for dipping the almond nails; dark or semi-sweet chocolate works too
- 12 slivered almonds — flat almonds shape the nail perfectly; whole almonds work if that’s what you have on hand
- Green food coloring or gel color (optional) — a drop or two brightens up dull green candy melts nicely
Note: This recipe makes 12 witch finger pretzels, which comfortably serves a small Halloween party or a class of little trick-or-treaters.
Equipment You Need
- Large baking sheet — gives you a flat surface to lay the fingers while they set
- Parchment paper or silicone baking mat — keeps the candy coating from sticking to the pan
- Microwave-safe bowls — one for the black coating, one for the green coating
- A fork — makes dipping the almonds mess-free
- A spoon — helps you coat the pretzel rods evenly
- A toothpick — for carving those creepy knuckle wrinkles
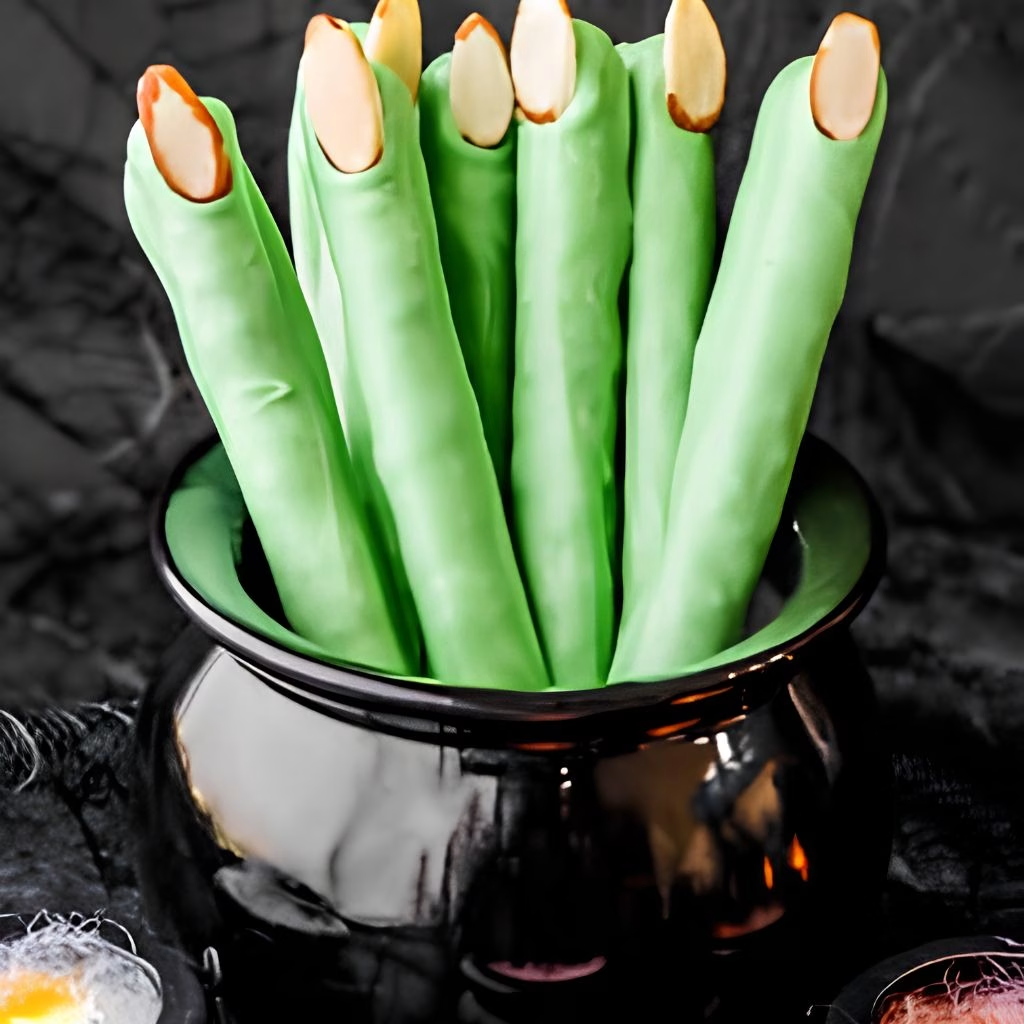
How to Make Witch Finger Pretzels Recipe?
I promise this is one of the easiest Halloween projects you’ll ever tackle, and there’s zero baking involved. You’ll dip, coat, and decorate in three quick stages, and the hardest part is waiting for everything to dry. Here’s exactly how I do it every single time.
Dip the Almond Nails
I start with the almonds because they need time to dry before going anywhere near the pretzels. Melt the black candy melts in 20-second microwave bursts, stirring between each round until smooth. Using a fork, dip each almond completely, then set it on your lined baking sheet to harden for about 15-20 minutes.
Melt the Green Coating
While the almonds dry, I melt the green candy melts the same way, in short microwave bursts, stirring often so nothing scorches. If the color looks dull, I stir in a drop of green food coloring to brighten it. A spoon works great here for scooping and pouring the coating over each pretzel rod.
Dip the Pretzel Rods
Using your spoon, cover about half to two-thirds of each pretzel rod with the green coating, then gently shake off any excess so it doesn’t pool at the bottom. Lay the coated rod flat on the baking sheet right away, since you need to work quickly before the coating starts to set.
Add the Almond Nail
As soon as each pretzel rod is coated and lying flat, press a dried black almond onto the tip where a fingernail would sit. I press gently but firmly enough that it holds in place as the green coating firms up underneath it.
Carve the Knuckle Lines
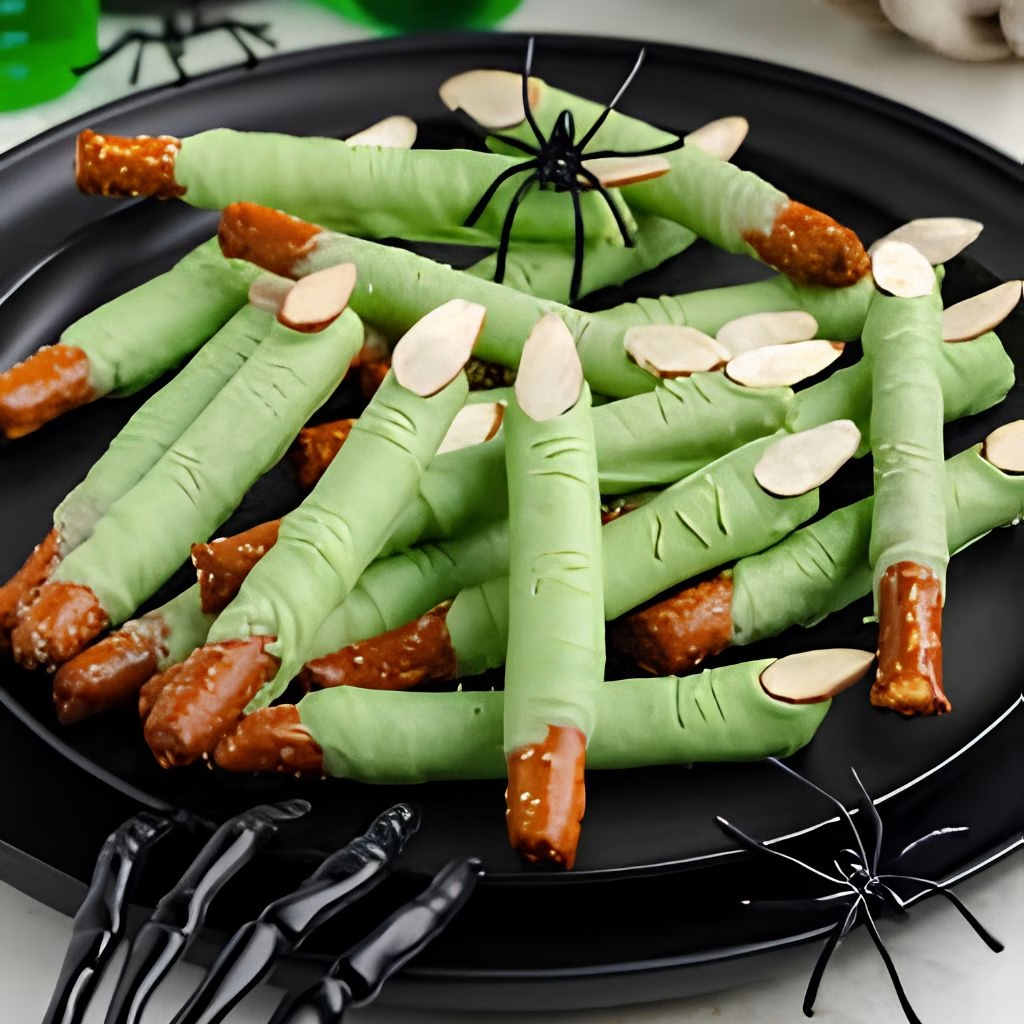
Once the coating looks set but is still slightly soft, I use a toothpick to draw a few small wrinkle lines near the nail and a couple of larger arcs further down the finger. This step is optional, but honestly, it’s what makes these witch finger pretzels look genuinely creepy and realistic.
Let Them Set Completely
Give your witch fingers about 15-20 minutes at room temperature to firm up completely before you touch, serve, or store them. Rushing this step is the easiest way to smudge your careful knuckle lines, so I always find something else to do while I wait.
Additional Tips for Making This Recipe Better
I’ve made these witch finger pretzels more times than I can count, and here’s what actually makes a difference in how they turn out.
- I always microwave my candy melts in short bursts and stir constantly, because they burn and seize up much faster than regular chocolate.
- I keep a bowl of warm water nearby to dip my spoon in between coats, which keeps the green coating from hardening on the utensil.
- I like adding a drop of coconut oil or shortening to my candy melts if they feel too thick to coat smoothly.
- I always dip and dry my almonds first, since trying to rush that step means the nails slide right off the wet pretzel.
- I work in small batches of three or four pretzels at a time so the coating doesn’t set before I can add the nail and knuckle lines.
Common Mistakes to Avoid
- I once used pretzel sticks instead of rods, and the fingers looked stubby and disproportionate always reach for the long 7 to 8 inch rods.
- I learned the hard way that overheating candy melts in one long microwave blast makes them clump, so short bursts really are worth the extra minute.
- I’ve forgotten to dry the almonds fully before handling them, and the black coating smeared right onto my fingers and the green base.
- I tried adding the knuckle lines too early once and the toothpick just dragged wet coating everywhere instead of leaving a clean line.
- I’ve also waited too long to add the lines, and by then the coating had hardened so much that the toothpick wouldn’t leave a mark at all.
How to Serve Witch Finger Pretzels?
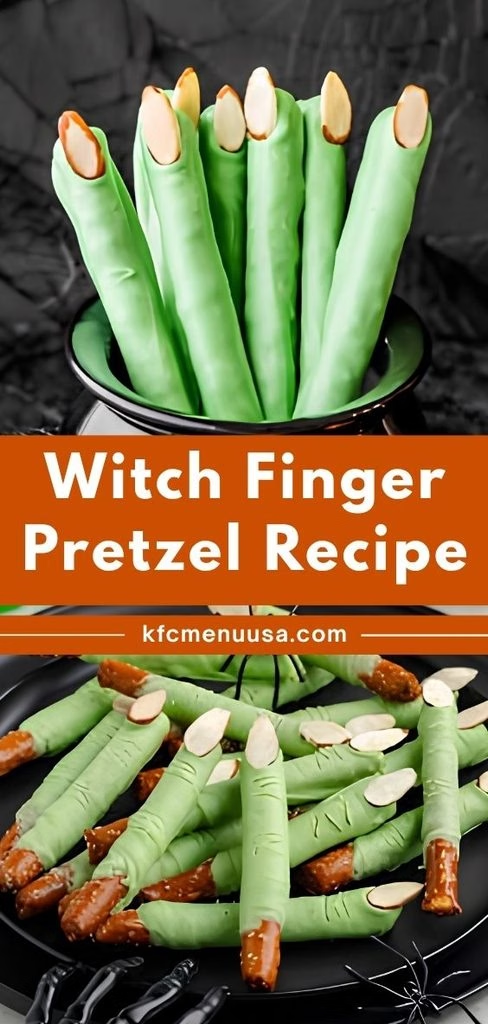
I love setting these out in a way that leans into the creepy factor. Stand a handful upright in a small cauldron, a mason jar, or a carved-out pumpkin so they look like they’re reaching out at guests. A black platter or a plate dusted with cocoa powder “dirt” makes a fun backdrop for photos.
They also pack well into Halloween goodie bags if your school or office allows tree nuts, and they hold up nicely next to other spooky spreads like a graveyard pudding cup display or a bowl of candy corn.
If you’re building out a bigger Halloween dessert table, these pair really well with other bite-sized Halloween treats. My Jack O Lantern Apple Bites add a fun pop of orange next to the green fingers, and they’re just as easy to whip up in one afternoon.
Variations
- Swap the green candy melts for white chocolate or white candy melts tinted with your own food coloring if that’s what you have in the pantry.
- Go dairy-free by using dairy-free white or dark chocolate melting wafers in place of standard candy melts.
- Skip the black candy melts and leave the almond nails plain for a more subtle, craggy witch-finger look.
- Add a drizzle of contrasting chocolate across the fingers once they’ve set for extra texture and detail.
- Use pretzel sticks and a mini version of this project for a bite-sized take that’s easier for little hands to manage.
- Try a sugar-free candy coating alternative if you’re serving guests who are watching their sugar intake.
Nutritional Information
Here’s a rough idea of what one witch finger pretzel brings to the table, though this will shift a bit depending on the exact brand of candy melts you use.
- Calories: about 51 kcal per pretzel
- Protein: about 0.3g
- Carbohydrates: about 6g
- Fat: about 3g
Make Ahead and Storage
You can make these witch finger pretzels up to two weeks ahead of your party, which honestly makes them one of the most stress-free Halloween treats I bake into my prep schedule. Just make sure they’ve set and hardened completely before you store them, or you’ll end up with smudged coating and flattened nails.
Keep them in an airtight container at room temperature, and they’ll stay fresh and crunchy for up to two weeks. I don’t recommend freezing these, since the moisture from thawing tends to make the pretzels go soft and the candy coating turn a bit greasy. There’s also no reheating involved here, so once they’re set, they’re ready to serve straight from the container.
Why You’ll Love This Recipe
I keep coming back to these witch finger pretzels every October, and it’s not just because they look cool on a dessert table.
- No baking required: I can make a whole batch without turning on my oven, which is perfect on a busy fall weekend.
- Kid-friendly fun: My kids love helping dip the almonds and drawing the knuckle lines, making it a genuine family activity.
- Budget-friendly: With just a few ingredients, I can make a dozen spooky treats without spending much at all.
- Easy to customize: I can switch up the coating color, use dairy-free chocolate, or leave the nails plain depending on who I’m serving.
- Great make-ahead option: I love that I can prep these two weeks in advance and cross one thing off my Halloween party checklist early.
FAQs
Can I use pretzel sticks instead of pretzel rods?
I wouldn’t recommend it, since shorter sticks make the nail look disproportionately large compared to the finger. Stick with the long 7 to 8 inch rods for the most realistic shape.
Do I have to add the knuckle wrinkles?
Not at all — I’ve made batches without them, and they still look plenty spooky. The wrinkles just add an extra layer of realism if you have a few extra minutes.
Can I make these nut-free?
Yes, I’ve substituted the slivered almonds with a small piece of white chocolate shaped into a point, or simply left the tip plain, for guests with nut allergies.
How long do witch finger pretzels stay fresh?
Stored in an airtight container at room temperature, mine have stayed crunchy and fresh for up to two weeks, which makes them a great make-ahead treat.
What can I use instead of candy melts?
I’ve substituted white chocolate with food coloring when I ran out of candy melts, though I find candy melts coat a little thicker and dry faster. If you want another simple no-bake option to pair alongside these, my No-Bake Halloween Banana Ghosts use a similar melt-and-dip method and come together just as fast.

Witch Finger Pretzels Recipe
Ingredients
Method
- I start with the almonds because they need time to dry before going anywhere near the pretzels. Melt the black candy melts in 20-second microwave bursts, stirring between each round until smooth. Using a fork, dip each almond completely, then set it on your lined baking sheet to harden for about 15-20 minutes.
- While the almonds dry, I melt the green candy melts the same way, in short microwave bursts, stirring often so nothing scorches. If the color looks dull, I stir in a drop of green food coloring to brighten it. A spoon works great here for scooping and pouring the coating over each pretzel rod.
- Using your spoon, cover about half to two-thirds of each pretzel rod with the green coating, then gently shake off any excess so it doesn’t pool at the bottom. Lay the coated rod flat on the baking sheet right away, since you need to work quickly before the coating starts to set.
- As soon as each pretzel rod is coated and lying flat, press a dried black almond onto the tip where a fingernail would sit. I press gently but firmly enough that it holds in place as the green coating firms up underneath it.
- Once the coating looks set but is still slightly soft, I use a toothpick to draw a few small wrinkle lines near the nail and a couple of larger arcs further down the finger. This step is optional, but honestly, it’s what makes these witch finger pretzels look genuinely creepy and realistic.
- Give your witch fingers about 15-20 minutes at room temperature to firm up completely before you touch, serve, or store them. Rushing this step is the easiest way to smudge your careful knuckle lines, so I always find something else to do while I wait.
Notes
- I always microwave my candy melts in short bursts and stir constantly, because they burn and seize up much faster than regular chocolate.
- I keep a bowl of warm water nearby to dip my spoon in between coats, which keeps the green coating from hardening on the utensil.
- I like adding a drop of coconut oil or shortening to my candy melts if they feel too thick to coat smoothly.
- I always dip and dry my almonds first, since trying to rush that step means the nails slide right off the wet pretzel.
- I work in small batches of three or four pretzels at a time so the coating doesn’t set before I can add the nail and knuckle lines.