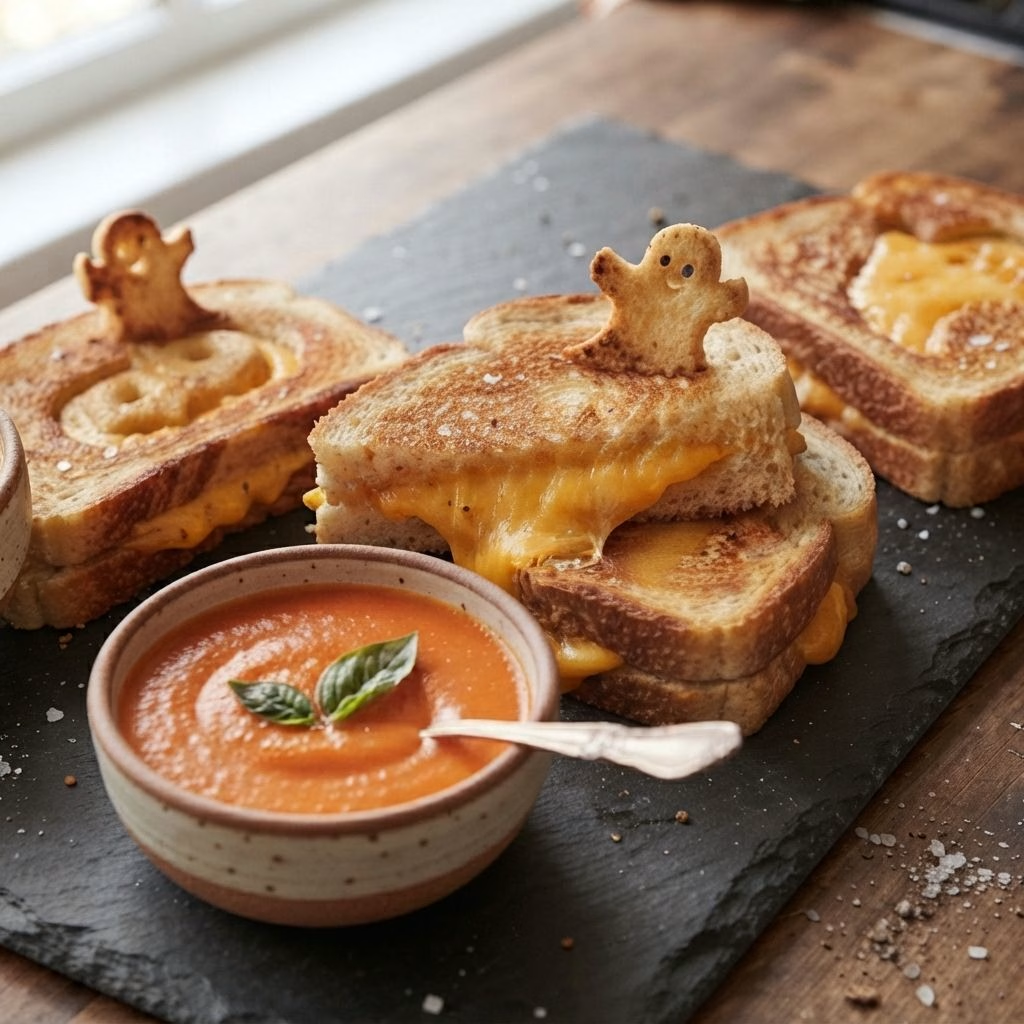
I started making this Spooky Grilled Cheese Recipe a few Halloweens ago when I wanted to jazz up my kid’s lunchbox without spending my whole afternoon on it. Honestly, it takes almost the same amount of time as a regular grilled cheese, just with a cookie cutter involved.
My kids get so excited when they see little ghosts and bat shapes peeking out of the melted cheese. If you’re after a fun, low-effort Halloween lunch idea, I think this one is going to become a yearly tradition for you too.
Cooking Time
- Prep Time: 5 minutes
- Cooking Time: 6 minutes
- Total Time: 11 minutes
Ingredients
- 8 slices pumpernickel or dark rye bread — the deep color gives that eerie, spooky look without any food coloring
- 4 slices cheddar cheese — pick a sharp cheddar for the best melt and flavor, this is one of the best melty cheese for grilled cheese options
- 2 tablespoons butter, softened — spreads easily and gives that classic golden, crispy crust
- 1 tablespoon mayonnaise (optional, my secret ingredient) — swap it in for butter on the outside of the bread for an even crispier, more golden crust
Note: this recipe serves 4.
Equipment You Need
- Halloween-themed cookie cutters — bats, ghosts, or pumpkins work great for cutting out the spooky shapes
- Griddle or nonstick skillet — gives even heat so both sides toast up nicely
- Butter knife or offset spatula — for spreading butter or mayo smoothly on the bread
- Spatula — for flipping the sandwiches without losing the cutout pieces
- Cutting board — a stable surface for cutting your shapes cleanly
How to Make a Spooky Grilled Cheese Recipe?
This one comes together so fast that it barely counts as cooking, which is exactly why I love it for busy school mornings. The only extra step compared to a regular grilled cheese is cutting out the shapes first. Here’s exactly how I do it every time.
Cut Out the Spooky Shapes
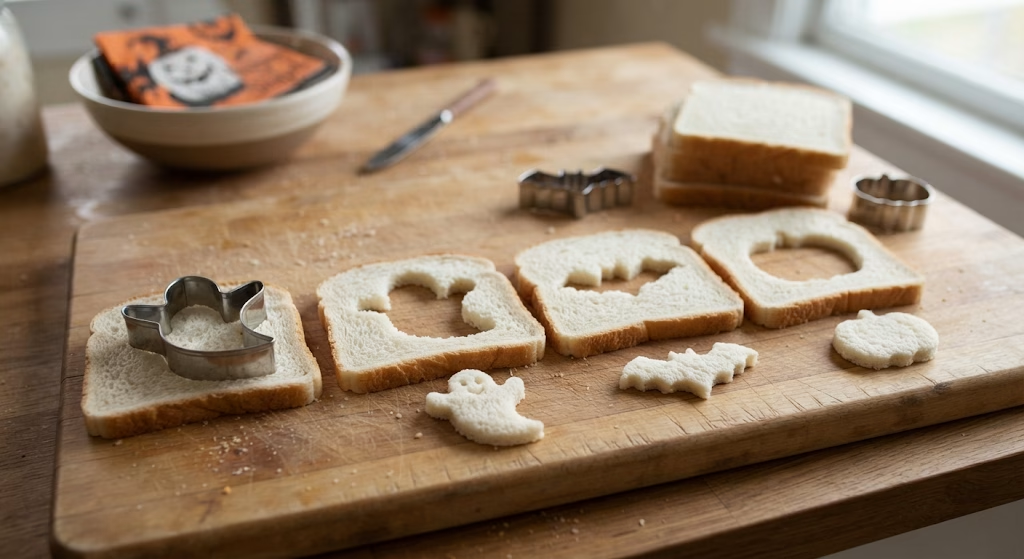
Lay out 4 of your 8 bread slices and press your Halloween cookie cutter into the center of each one. Gently pop out the cutout piece and set both the cutout shape and the bread with the hole aside separately.
Butter the Bread
Spread softened butter evenly across one side of all 8 pieces, including the small cutout shapes. This step is what gives every piece that golden, crisp finish once it hits the pan.
Toast Everything Briefly
Heat your griddle or skillet over medium heat and place the whole slices along with the cutout shapes butter-side down. Let them cook for about 3 minutes, or until lightly golden on that first side.
Assemble the Sandwiches
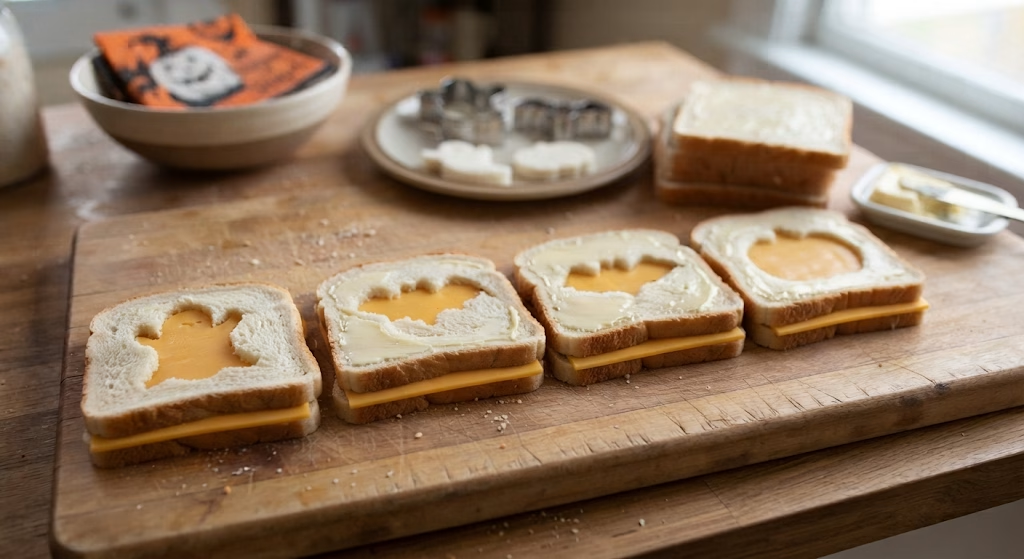
Flip the 4 whole slices of bread and place a slice of cheddar on top of each one. Set the matching cutout-holed slice over the cheese, buttered side facing up, so the spooky shape peeks through.
Finish Cooking and Serve
Cook the assembled sandwiches for another 2 to 3 minutes, until the bottom is golden and the cheese is fully melted. Press the little cutout shapes back into their holes as a fun garnish before serving warm.
Additional Tips for Making This Recipe Better
I’ve made a lot of batches of these for school parties, and here’s what I’ve learned along the way.
- I always shred my own cheese straight off the block for a smoother, more even melt instead of using pre-shredded bags.
- I like using my mayo trick on the outside of the bread instead of butter, since it browns more evenly and stays crispy longer.
- I press down gently with my spatula while the sandwich cooks, which helps the cheese melt faster and stick everything together.
- I keep my heat at medium instead of high, since dark rye and pumpernickel can burn quickly if the pan gets too hot.
- I set out a few different cheese options like smoked gouda so everyone can build their own version, which turns this into a bit of a build-your-own smoked gouda grilled cheese recipe night.
Common Mistakes to Avoid
- I once used a cutter that was too big for my bread slices, and the shape tore the bread apart instead of cutting cleanly.
- I forgot to butter the tiny cutout pieces once, and they turned out pale and soft instead of golden and crisp.
- I cranked the heat too high in a rush, and the bread browned before the cheese even started melting.
- I used pre-shredded cheese thinking it would save time, but it didn’t melt nearly as smoothly as fresh-grated cheese.
- I flipped my sandwich too early once, before the first side had set, and the cutout shape slid right out of place.
How to Serve Spooky Grilled Cheese?
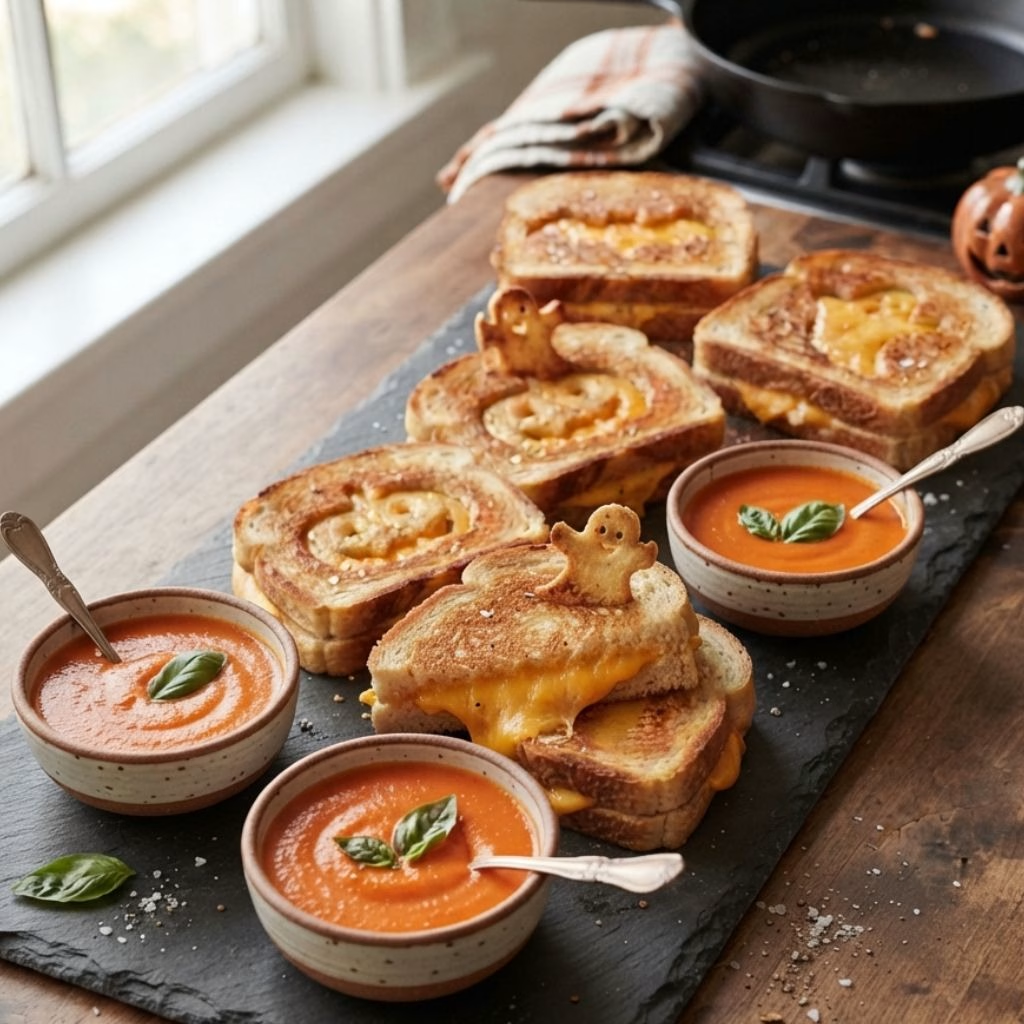
I like cutting each sandwich in half on a diagonal so you can see the melted cheese oozing out from the shape cutout, which makes for a great photo before it disappears. Serve it alongside a small bowl of tomato soup for dunking, which makes the whole plate feel like a cozy fall lunch.
For a party spread, I’ll line up several sandwiches on a dark platter with the cutout shapes propped up on top like little decorations. It also pairs nicely with something crunchy and kid-approved on the side, like a batch of warm panko chicken nuggets, if you want to round out a Halloween lunch that isn’t just sandwiches.
Variations
- Swap cheddar for smoked gouda if you want a deeper, smokier flavor in every bite
- Add a few dashes of hot sauce or a pinch of cayenne for a spicy grilled cheese recipe twist that older kids and adults will love
- Use a dairy-free cheese slice and vegan butter for an easy dairy-free version
- Try a blend of mozzarella and pepper jack for extra pull and a bit of heat
- Add thin apple slices inside for a sweet-savory combination that pairs well with the smoky rye bread
Nutritional Information
Here’s a general breakdown per sandwich, though this will vary slightly depending on your bread and cheese choices.
- Calories: 310 kcal
- Protein: 12 g
- Carbohydrates: 28 g
- Fat: 17 g
Make Ahead and Storage
You can pre-cut your bread shapes a day ahead and store them in an airtight bag at room temperature until you’re ready to cook.
Leftover cooked sandwiches keep well in the fridge for up to 2 days when stored in an airtight container.
To reheat, use a skillet over low heat for a few minutes on each side, which keeps the bread crisp instead of soggy like a microwave would.
Why You’ll Love This Recipe?
This spooky grilled cheese has become one of my favorite Halloween traditions, and here’s why it’s worth adding to yours.
- It’s quick to pull together: With just a handful of ingredients and about 10 minutes total, this fits easily into even the busiest school morning.
- It’s endlessly customizable: From cheese choices to bread type to cutout shapes, you can make this recipe fit your family’s taste and whatever holiday is coming up.
- It’s a hit with kids: The fun shapes make an ordinary lunch feel like something special, and my kids ask for it well beyond just Halloween.
- It works for any crowd: Whether you’re packing lunchboxes or setting up a party platter, this recipe scales up easily for a group.
FAQs
Can I use a different cheese for a smoked gouda grilled cheese recipe version?
Yes, smoked gouda melts beautifully and adds a deeper, smokier flavor that works especially well with the dark rye bread.
What’s the secret ingredient for extra crispy grilled cheese?
Swapping mayonnaise for butter on the outside of the bread is my go-to grilled cheese secret ingredient for a more even, golden crust.
Can I make this without a cookie cutter?
Yes, you can skip the cutout shapes entirely and just make a classic grilled cheese, though the shapes are really what make it feel spooky and fun.
How do I keep the cheese from leaking out while cooking?
Keeping your heat at medium and not overfilling with cheese helps it melt evenly inside the sandwich instead of spilling out the sides.
Can I turn this into a spicy grilled cheese recipe?
Absolutely, just add a few dashes of hot sauce, some pickled jalapeños, or a pinch of cayenne pepper to the cheese layer before assembling.
If you’re planning a whole Halloween spread for the kids, these sandwiches go really well alongside something crunchy and shareable, like a batch of easy kids chicken nuggets for the pickier eaters at the table.

Spooky Grilled Cheese Recipe
Ingredients
Method
- Lay out 4 of your 8 bread slices and press your Halloween cookie cutter into the center of each one. Gently pop out the cutout piece and set both the cutout shape and the bread with the hole aside separately.
- Spread softened butter evenly across one side of all 8 pieces, including the small cutout shapes. This step is what gives every piece that golden, crisp finish once it hits the pan.
- Heat your griddle or skillet over medium heat and place the whole slices along with the cutout shapes butter-side down. Let them cook for about 3 minutes, or until lightly golden on that first side.
- Flip the 4 whole slices of bread and place a slice of cheddar on top of each one. Set the matching cutout-holed slice over the cheese, buttered side facing up, so the spooky shape peeks through.
- Cook the assembled sandwiches for another 2 to 3 minutes, until the bottom is golden and the cheese is fully melted. Press the little cutout shapes back into their holes as a fun garnish before serving warm.
Notes
- I always shred my own cheese straight off the block for a smoother, more even melt instead of using pre-shredded bags.
- I like using my mayo trick on the outside of the bread instead of butter, since it browns more evenly and stays crispy longer.
- I press down gently with my spatula while the sandwich cooks, which helps the cheese melt faster and stick everything together.
- I keep my heat at medium instead of high, since dark rye and pumpernickel can burn quickly if the pan gets too hot.
- I set out a few different cheese options like smoked gouda so everyone can build their own version, which turns this into a bit of a build-your-own smoked gouda grilled cheese recipe night.