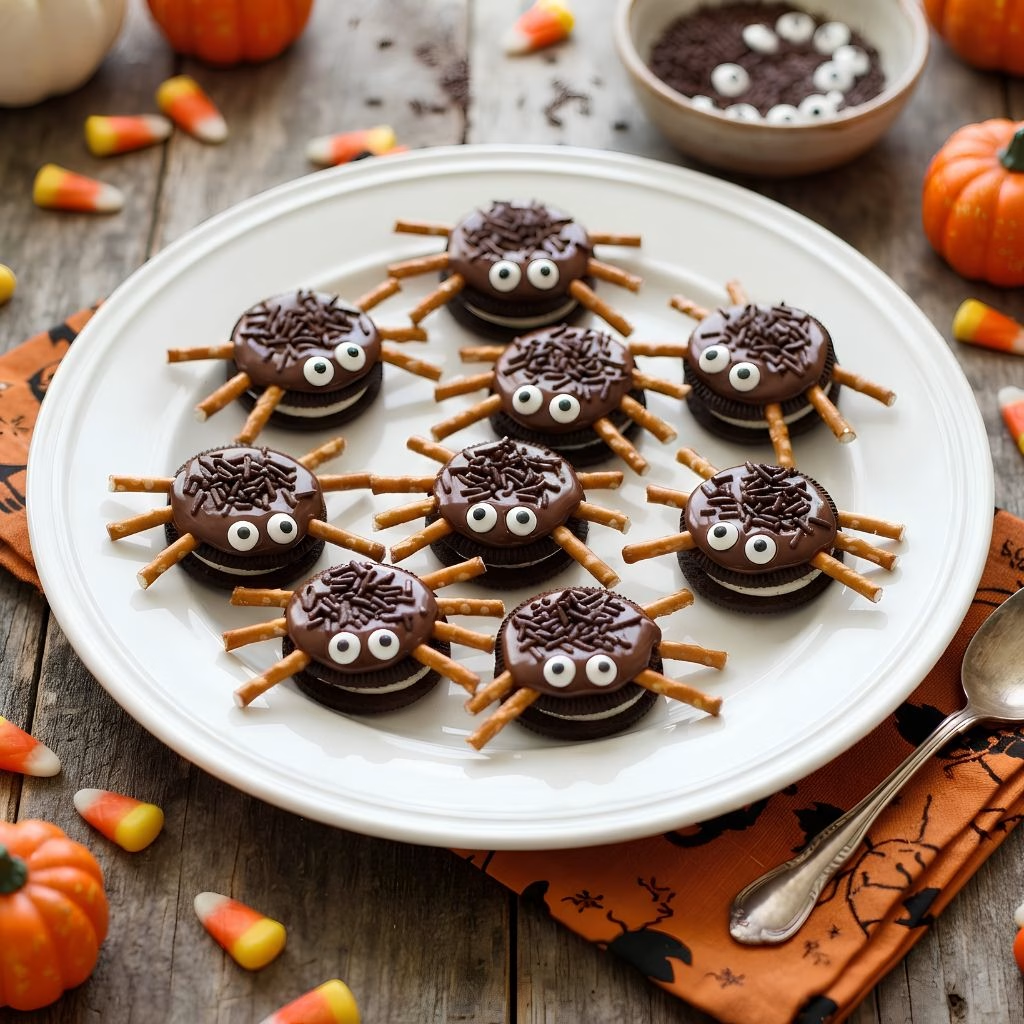
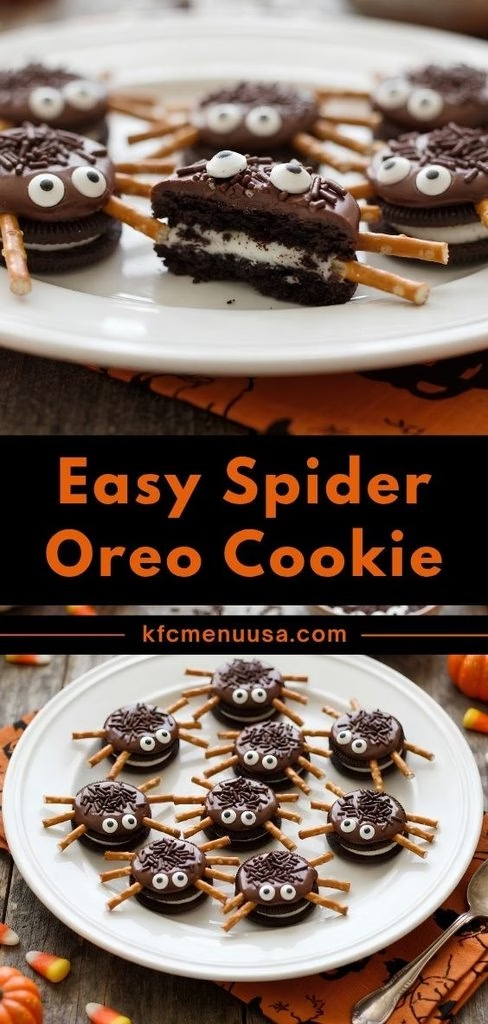
I still remember the first time I made this Easy Spider Oreo Cookie Recipe for my kid’s Halloween class party I was shocked at how fast they came together with zero oven time. Just melted chocolate, a few pretzel sticks, and some candy eyes turned plain Oreos into the cutest little creepy-crawlies on the dessert table.
I love that this is one of those recipes even my niece could help assemble without any real “cooking” skill involved. If you’re looking for a fun, mess-free project to do with kids this Halloween season, I promise this one earns its spot on your list. And trust me, once you make a batch, you’ll want to make these every single October.
Cooking Time
- Prep Time: 20 minutes
- Cooking Time: 5 minutes (just for melting chocolate)
- Total Time: 25 minutes, plus a few minutes to let the chocolate set
Ingredients
- 20 Double Stuf Oreo cookies — the extra cream filling gives the pretzel legs something to grip onto
- 80 thin pretzel sticks — snap them in half for perfectly sized spider legs
- 1 cup semisweet chocolate chips — this acts like edible glue holding every piece together
- 3 tablespoons chocolate sprinkles or jimmies — these mimic the fuzzy texture of a spider’s body
- 40 candy eyeballs — find these in the baking aisle or cake decorating section
- Optional: candy corn pieces for tiny spider “fangs” or a fun colorful accent
Note: this recipe makes about 20 Oreo spiders, perfect for serving a classroom or a small Halloween party.
Equipment You Need
- Baking sheet — gives you a flat surface to line up all your spiders while they set
- Parchment paper — keeps the melted chocolate from sticking to the pan
- Microwave-safe bowl — for melting your chocolate chips quickly and evenly
- Small spoon or butter knife — to spread and dollop melted chocolate precisely
- Toothpick — handy for nudging candy eyes into exact position
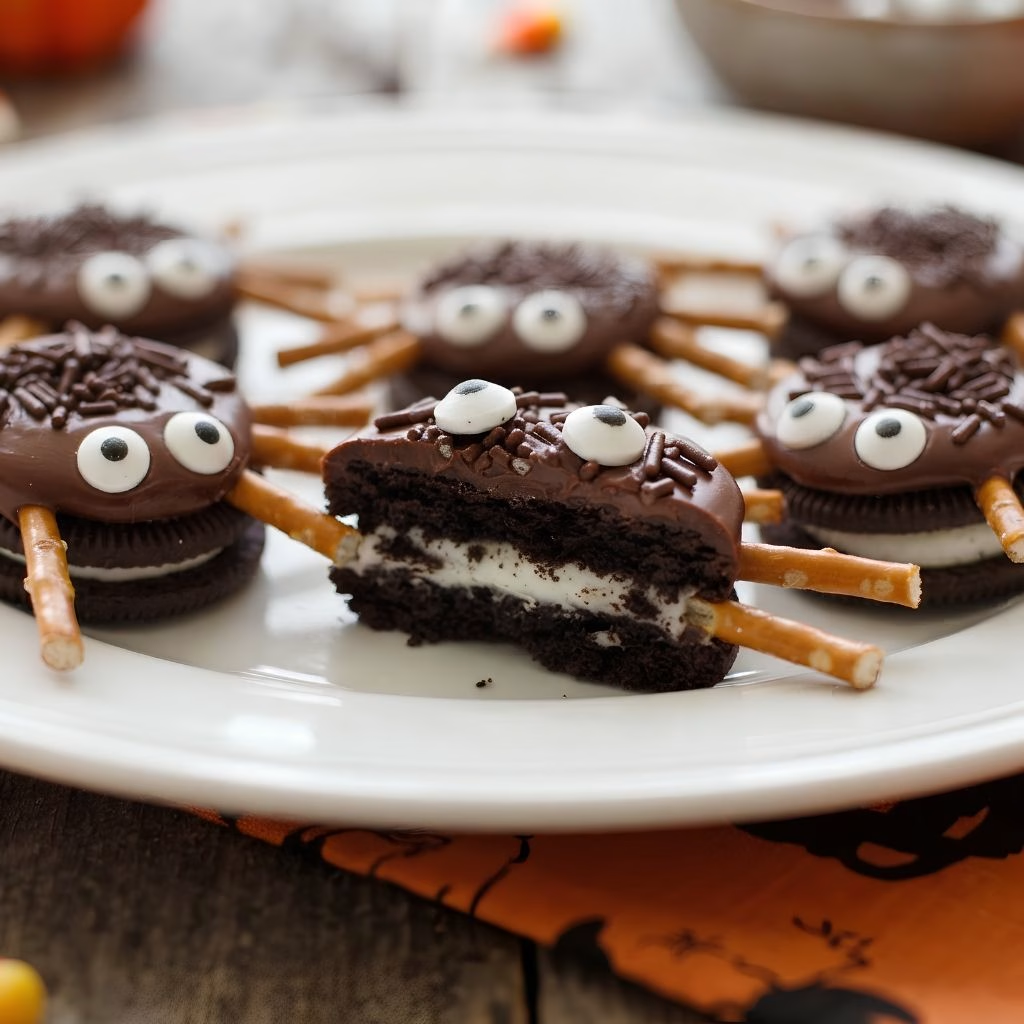
How to Make an Easy Spider Oreo Cookies Recipe?
This no-bake treat comes together in just a handful of simple steps, and there’s really no way to mess it up. I like laying out all my ingredients assembly-line style before I start so the process moves quickly once the chocolate is melted. Here’s exactly how I build mine from start to finish.
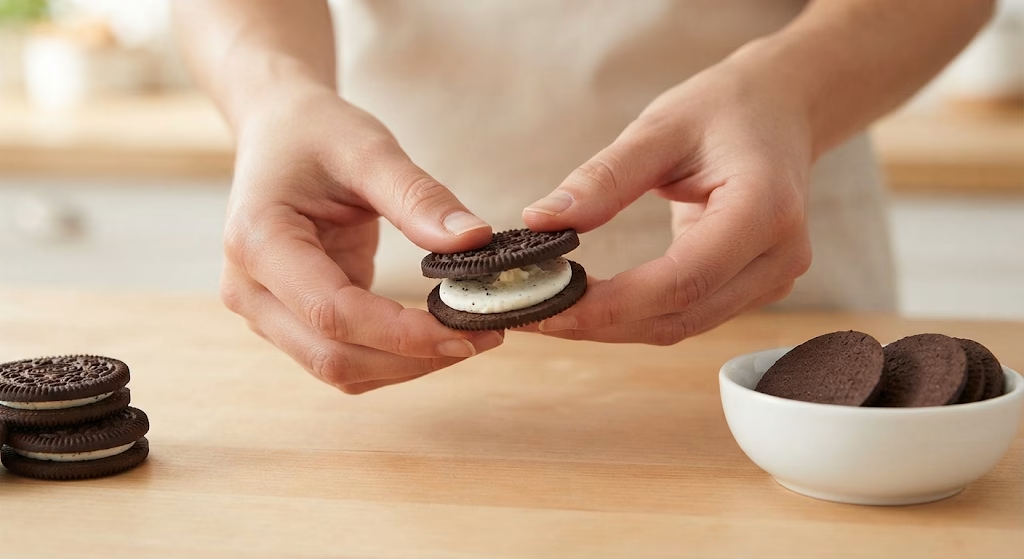
Step 1: Prep the Oreos
Gently twist apart each Oreo so the cream filling stays on one half. I go slow here so the cookie doesn’t crack in my hand. Set the plain cookie halves aside you’ll sandwich them back on later.
Step 2: Add the Pretzel Legs
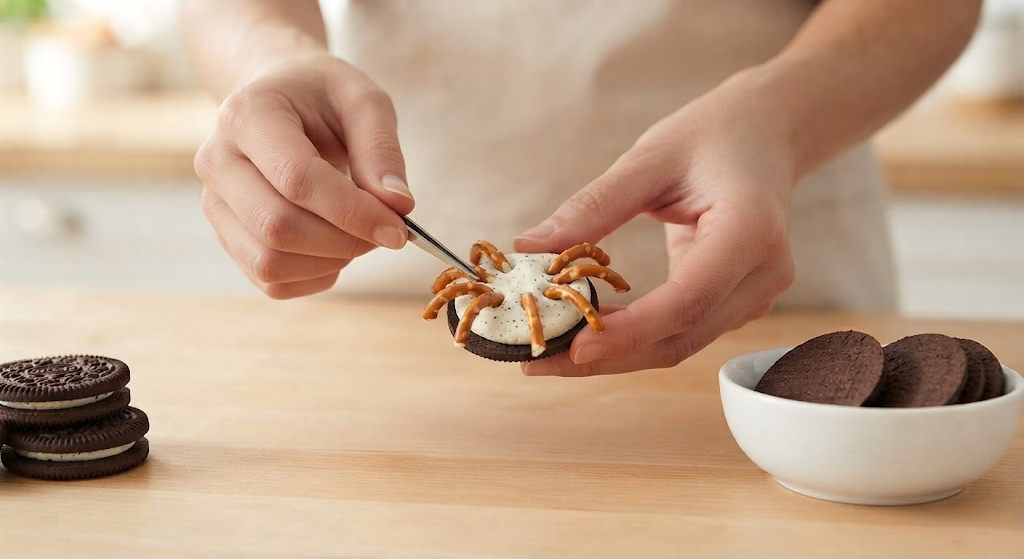
Press four broken pretzel halves into the cream filling on each cookie, four to a side, so you end up with eight legs sticking out. I like to fan them out slightly so the spider looks like it’s mid-crawl.
Step 3: Melt the Chocolate
Microwave your chocolate chips in 20-second bursts, stirring in between, until fully smooth. I never rush this step overheating chocolate makes it seize up and turn grainy instead of glossy.
Step 4: Sandwich the Cookies
Dollop a small spoonful of melted chocolate onto the cream side, then gently press the plain cookie half on top. This chocolate layer acts as the glue that locks the pretzel legs firmly in place.
Step 5: Decorate the Spiders
Spread a little more melted chocolate on top of each cookie, then sprinkle on your chocolate jimmies while it’s still wet. I press two candy eyes on right after so they stick without sliding off.
Step 6: Let Them Set
Place your finished spiders on the parchment-lined baking sheet and let the chocolate firm up completely at room temperature, or pop the tray in the fridge for about 10 minutes to speed things along.
Additional Tips for Making This Recipe Better
I’ve made these spider cookies more times than I can count, and here’s what actually makes a difference:
- I always use Double Stuf Oreos because the thicker cream layer holds the pretzel legs so much better than regular Oreos.
- I melt my chocolate low and slow in the microwave rushing it with high heat is the fastest way to ruin a smooth batch.
- I keep a damp paper towel nearby, since melted chocolate on my fingers always seems to end up everywhere.
- I like setting out all the pretzels pre-snapped before I start so I’m not fumbling with a bag mid-assembly.
- I chill the finished spiders for just a few minutes if I’m short on time, rather than waiting a full hour for the chocolate to harden naturally.
Common Mistakes to Avoid
- I once tried using regular thin Oreos and the cream just wasn’t thick enough to hold all eight pretzel legs stuck with Double Stuf.
- I learned the hard way that overheating chocolate in one long microwave blast makes it clumpy instead of silky smooth.
- I’ve pressed candy eyes too late before, and they slid right off once the chocolate started to firm up, so I added them immediately.
- I sometimes forget to let the cookies fully set before moving them, and the legs end up crooked or falling out.
- I used to overload each cookie with too much chocolate on top, which made the sprinkles clump instead of scattering evenly.
How to Serve Spider Oreo Cookies
These little spiders look best arranged on a black or orange platter so they really pop against the background. I like scattering a few extra chocolate sprinkles or a light dusting of cocoa powder around the plate for a “dirt” effect. For parties, try tucking them into cupcake liners or lining them up along the edge of a Halloween dessert table next to other spider cookies and spooky treats.
They also make a fun topper for ice cream sundaes or a batch of frosted Halloween cupcakes if you want to dress up a bigger dessert. If you’re building out a full spread, these pair really well with a batch of Halloween Cookie Bars for extra variety on the table you can check out a similar layered dessert idea in this Halloween cookie bars recipe.
Variations
- Swap pretzel sticks for thin black licorice strips if you want chewier, classic-looking spider legs.
- Use white chocolate or candy melts instead of semisweet for a lighter, sweeter spider body.
- Try dairy-free chocolate chips and dairy-free sandwich cookies to make this treat allergy-friendly.
- Add a touch of candy corn as tiny “fangs” for extra color and a playful Halloween look.
- Dip the entire cookie in melted chocolate before decorating for a richer, fully coated treat.
- Use Halloween-edition Oreos when available for a spookier, more festive base cookie.
Nutritional Information
Here’s a rough breakdown per spider cookie, based on standard ingredients:
- Calories: about 100–110 per cookie
- Protein: around 1–2 grams
- Carbohydrates: approximately 15–18 grams
- Fat: roughly 5–6 grams
Make Ahead and Storage
You can prep these spider cookies up to two days in advance and keep them looking fresh right up until party time.
Store finished Oreo spiders in an airtight container in the refrigerator, where they’ll stay fresh and crisp for up to 5 days.
I don’t recommend freezing these, since the pretzel legs tend to go soft and lose their crunch once thawed, so it’s best to enjoy them fresh.
Why You’ll Love This Recipe
This one has become a Halloween staple in my house for a few solid reasons:
- Ridiculously easy to make: There’s no baking involved at all, so it’s practically foolproof even for beginner bakers or young kids helping out.
- Perfect for parties: These are the kind of cute, bite-sized treats that disappear fast off any Halloween dessert table.
- Totally customizable: You can swap chocolates, legs, and toppings endlessly to match whatever spooky theme you’re going for.
- Great for little hands: Kids genuinely love pressing on the legs and sticking the candy eyes in place themselves.
- Budget-friendly: Every ingredient here is affordable and easy to find at any regular grocery store.
FAQs
Is an Oreo spider a real spider species?
No, an Oreo spider isn’t a real animal at all — it’s simply a cute nickname for this no-bake cookie treat made to look like a cartoon spider using pretzel legs and candy eyes.
Are Oreo spider cookies poisonous?
Not at all since these are completely edible and made from Oreos, pretzels, chocolate, and candy decorations, they’re totally safe to eat, unlike a real trapdoor spider you’d never want as a pet or find for sale anywhere near your kitchen.
Can I make spider cookies ahead of time for a party?
Yes, you can assemble these up to two days ahead and store them in the fridge in an airtight container until you’re ready to serve them.
What can I use instead of pretzel sticks for the legs?
Thin black licorice strips or even chocolate-covered pocky sticks work great as a substitute if you want a different texture or flavor for the spider legs.
Do I need any special equipment to make these?
No special tools are needed, just a baking sheet, parchment paper, a microwave-safe bowl, and a small spoon are all it takes to put these together.

Easy Spider Oreo Cookie Recipe
Ingredients
Method
- Gently twist apart each Oreo so the cream filling stays on one half. I go slow here so the cookie doesn’t crack in my hand. Set the plain cookie halves aside you’ll sandwich them back on later.
- Press four broken pretzel halves into the cream filling on each cookie, four to a side, so you end up with eight legs sticking out. I like to fan them out slightly so the spider looks like it’s mid-crawl.
- Microwave your chocolate chips in 20-second bursts, stirring in between, until fully smooth. I never rush this step overheating chocolate makes it seize up and turn grainy instead of glossy.
- Dollop a small spoonful of melted chocolate onto the cream side, then gently press the plain cookie half on top. This chocolate layer acts as the glue that locks the pretzel legs firmly in place.
- Spread a little more melted chocolate on top of each cookie, then sprinkle on your chocolate jimmies while it’s still wet. I press two candy eyes on right after so they stick without sliding off.
- Place your finished spiders on the parchment-lined baking sheet and let the chocolate firm up completely at room temperature, or pop the tray in the fridge for about 10 minutes to speed things along.
Notes
- I always use Double Stuf Oreos because the thicker cream layer holds the pretzel legs so much better than regular Oreos.
- I melt my chocolate low and slow in the microwave rushing it with high heat is the fastest way to ruin a smooth batch.
- I keep a damp paper towel nearby, since melted chocolate on my fingers always seems to end up everywhere.
- I like setting out all the pretzels pre-snapped before I start so I’m not fumbling with a bag mid-assembly.
- I chill the finished spiders for just a few minutes if I’m short on time, rather than waiting a full hour for the chocolate to harden naturally.