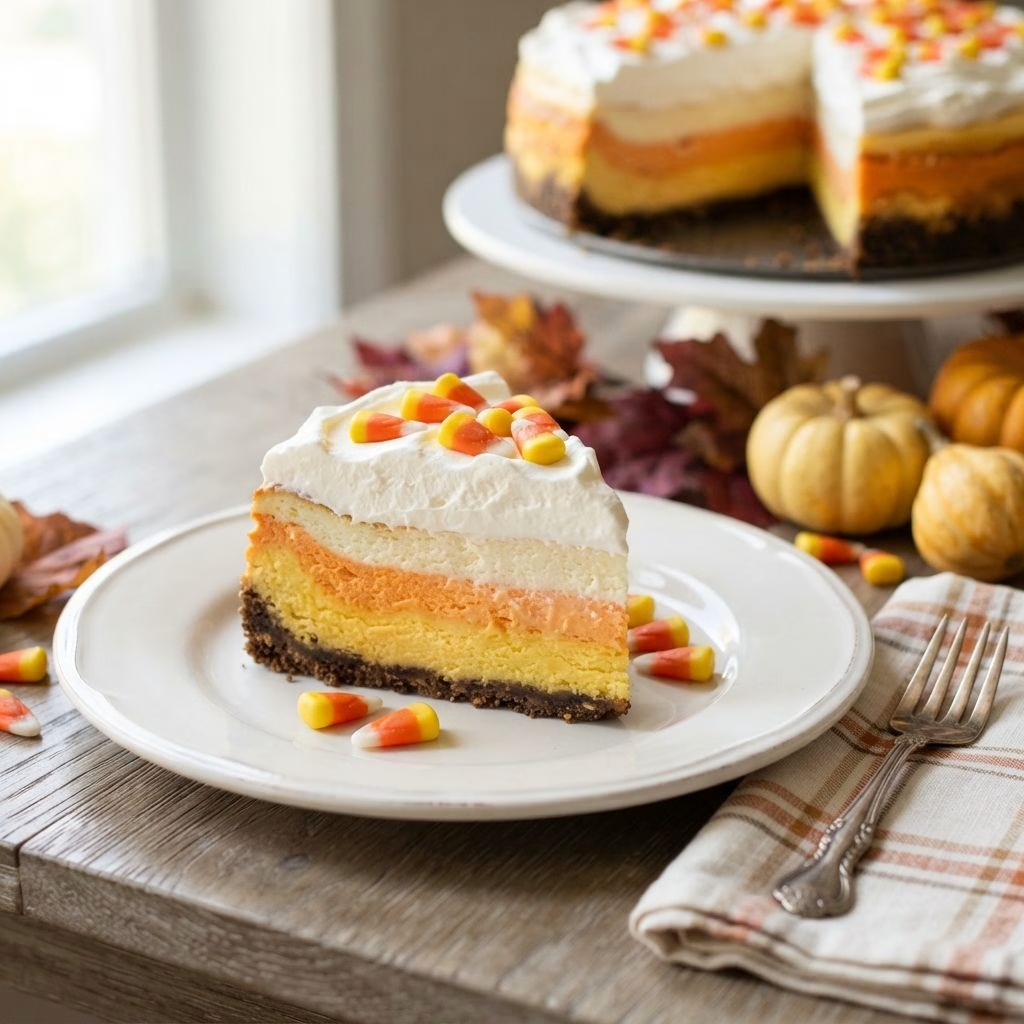
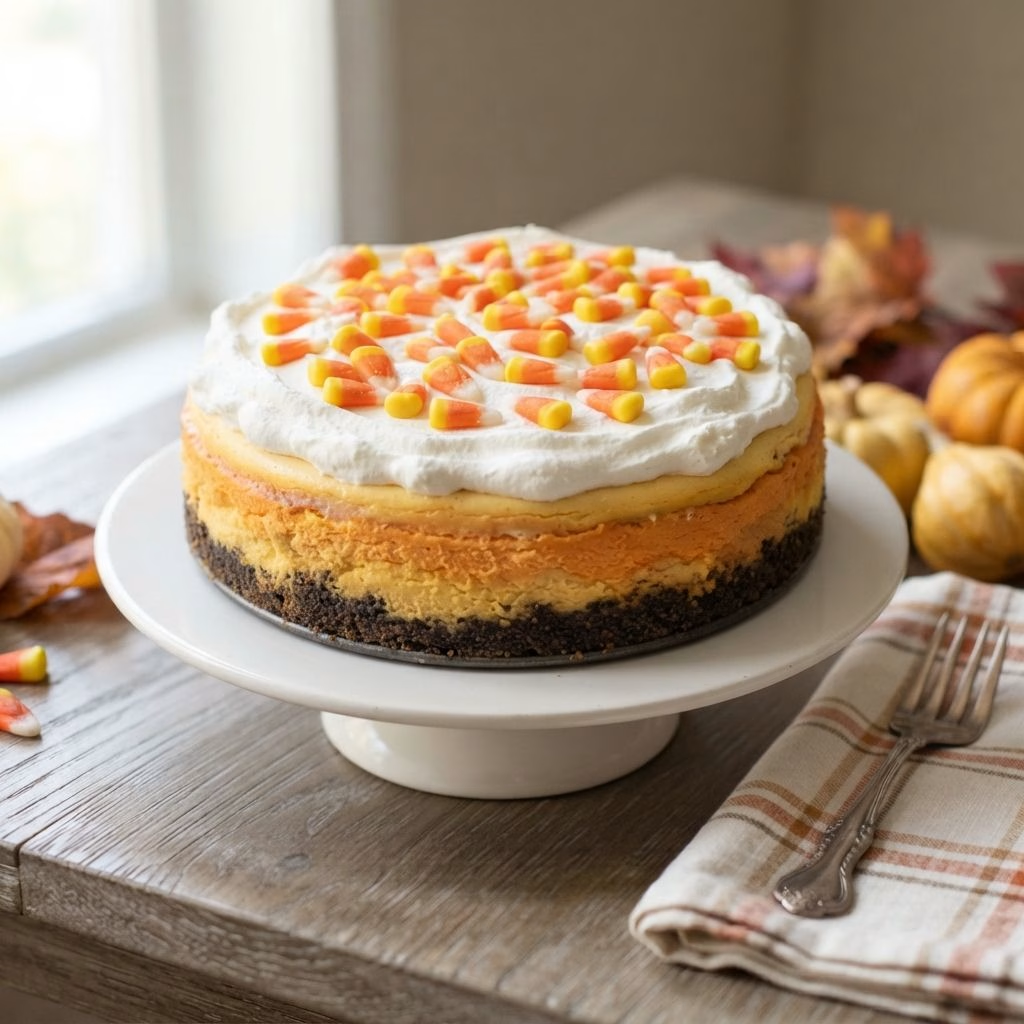
I made this candy corn cheesecake for a Halloween potluck last year, and I’m still getting texts about it. Three creamy layers of yellow, orange, and white stack up to look exactly like a giant slice of candy corn, and honestly, watching people’s faces when I cut into it was worth every hour of chilling time.
It’s rich, it’s a little bit fussy, and it’s 100% worth the effort if you want a dessert that steals the show. I’m walking you through every step I used, plus the mistakes I made so you don’t have to repeat them.

Cooking Time
- Prep Time: 45 minutes
- Cook Time: 1 hour 45 minutes (baked in three stages)
- Total Time: About 26 hours (includes a 24-hour chill)
Ingredients
- 2 cups chocolate sandwich cookie crumbs – forms the base; crush them fine so the crust holds together
- 6 tablespoons unsalted butter, melted – binds the crumbs; don’t skimp or the crust crumbles when sliced
- 24 oz cream cheese, softened – the heart of the filling; let it sit out for a full hour so it blends smooth, no lumps
- 8 oz mascarpone cheese – gives the filling that extra silky, slightly sweet richness store-bought cheesecakes never have
- 1 cup sour cream – adds tang and keeps the texture from turning dense
- 1/3 cup honey – a subtle floral sweetness that plays nicely against the plain sugar
- 3/4 cup granulated sugar – balances the honey and cuts the richness of the cheese
- 4 large eggs, room temperature – room temp eggs blend in without deflating the batter, so don’t rush this
- 3 tablespoons all-purpose flour – helps the layers set firm enough to slice cleanly
- 1/4 cup heavy cream – loosens the batter just enough to pour smoothly between layers
- 1 teaspoon pure vanilla extract – skip imitation vanilla here, you’ll actually taste the difference
- Yellow gel food coloring – gel gives true color without watering down the batter like liquid drops do
- Orange gel food coloring – same rule applies; a little goes a long way
- 1/2 cup heavy whipping cream, cold – whipped fresh for the topping; don’t use tub whipped topping, it won’t hold shape
- Candy corn candies, for garnish – the finishing touch that makes the whole cake read as “Halloween”
Note: This recipe makes one 10-inch cheesecake, serving 12 to 16 people.
Equipment You Need
- 10-inch springform pan – lets you release the cheesecake without wrecking those pretty layers
- Electric mixer – needed to get the cream cheese silky smooth without lumps
- Three mixing bowls – one for each colored batter layer
- Rubber spatula – for scraping down the sides so every bit of cheese gets incorporated
- Measuring cups and spoons – precision matters here since you’re dividing batter into thirds
- Cooling rack – helps each baked layer cool evenly before the next one goes on top
- Sharp knife – for cleanly releasing the crust and slicing neat servings later
How to Make Candy Corn Cheesecake Recipe?
This cheesecake isn’t hard, it’s just a patience game. You’re baking three layers back to back, letting each one set before pouring on the next. Give yourself a full afternoon plus overnight in the fridge, and you’ll be fine.
Prep the Pan and Crust
Preheat your oven to 350°F and lightly spray your 10-inch springform pan. Stir the cookie crumbs and melted butter together in a bowl until it looks like wet sand. Press it firmly and evenly into the bottom of the pan, then bake for 10 minutes. Pull it out and let it cool while you make the filling.
Mix the Cheesecake Base
Beat the cream cheese, mascarpone, and sour cream together until completely smooth, about 3 minutes on medium speed. Add the honey and sugar, then beat again until fully combined. Add the eggs one at a time, mixing well after each so the batter stays smooth and doesn’t curdle.
Finish the Batter
Turn the mixer to low and add the flour, heavy cream, and vanilla, mixing just until combined. Scrape down the bowl one more time to catch any hidden lumps. This is your base batter before it gets split and colored.
Divide and Color the Batter
Split the batter evenly into three bowls. Leave one bowl plain white. Tint the second bowl yellow and the third bowl orange using your gel colors, adding a little at a time until you love the shade.
Bake the Yellow Layer
Pour the yellow batter over your cooled crust and bake for 30 to 35 minutes, until the center is just set and no longer jiggly. Pull it out and let it cool on the counter for 20 minutes before moving to the next layer.
Bake the Orange Layer
Gently pour the orange batter over the baked yellow layer and bake for another 30 to 35 minutes. Cool for 20 minutes again this step keeps your layers distinct instead of blending together.
Bake the White Layer
Pour the remaining white batter on top and bake one final time, 30 to 35 minutes, until set. Let the whole cheesecake cool completely at room temperature before it goes anywhere near the fridge.
Chill and Top
Refrigerate the cheesecake for a full 24 hours, no shortcuts here. Once it’s chilled, run a knife around the edge, release the springform sides, and whip the cold heavy cream to stiff peaks. Spread it over the top and finish with a scattering of candy corn.
Additional Tips for Making This Recipe Better
I learned a few things the hard way, so let me save you the trouble.
- I always bring my cream cheese and mascarpone fully to room temperature — cold cheese leaves lumps you just can’t beat out later.
- I use gel color instead of liquid drops because liquid thins the batter and can mess with how the layers set.
- I bake my layers on the middle rack every time, since edges cook faster and I don’t want an unevenly set cheesecake.
- I let each layer cool the full 20 minutes before pouring the next one, or the layers bleed into each other and lose that clean candy corn look.
- I make this a full day ahead of when I need it, because rushing the 24-hour chill always leaves the center too soft to slice.
Common Mistakes to Avoid
- I once skipped room-temperature eggs and ended up with a curdled-looking batter always pull your eggs out early.
- I overmixed the batter once trying to rush it, and the cheesecake puffed up too much, then cracked as it cooled.
- I tried using a 9-inch pan without adjusting anything, and the batter overflowed during the second bake stick with a 10-inch pan or reduce your batter slightly.
- I cut into a cheesecake that hadn’t fully chilled once, and the layers just slid apart on the plate instead of holding their shape.
- I added too much food coloring in a hurry and ended up with neon layers instead of that soft candy corn palette add color gradually.
How to Serve Candy Corn Cheesecake?
Slice this cheesecake with a warm, clean knife (run it under hot water and dry it between cuts) so each slice shows off those three crisp layers. I like arranging slices on a black platter for contrast, then scattering a few extra candy corn pieces and maybe a plastic spider or two around the edges for full Halloween effect. A light dusting of cocoa powder near the plate rim adds a nice finishing touch if you want it to look a little more polished for a party table.
Variations
- Swap the mascarpone for extra cream cheese if you want a more budget-friendly version without losing much texture.
- Use a sugar-free sweetener blend in place of the granulated sugar for a lighter, sugar-free halloween dessert option.
- Try a dairy-free cream cheese and coconut cream swap if you’re serving guests with dietary restrictions.
- Add a splash of almond extract instead of vanilla for a subtle flavor twist in the filling.
- Turn this into mini cheesecakes using a muffin tin and cupcake liners for easier portioning at a big Halloween baking spread.
- Mix crushed pretzels into the crust for a salty-sweet contrast against the rich cheesecake layers.
Nutritional Information
Here’s a rough breakdown per slice, based on 14 servings from the full cheesecake.
- Calories: approximately 420 per slice
- Protein: approximately 7g per slice
- Carbohydrates: approximately 34g per slice
- Fat: approximately 29g per slice
Make Ahead and Storage
This cheesecake is actually better made ahead, since it needs that 24-hour chill anyway. Make it up to 2 days before your event and keep it covered in the fridge until you’re ready to add the whipped cream topping.
Store leftover slices in an airtight container in the fridge for up to 5 days. The whipped topping holds up fine for a couple of days but tastes best within the first 48 hours.
To freeze, wrap the un-topped cheesecake tightly in plastic wrap and foil, then freeze for up to 1 month. Thaw overnight in the fridge and add fresh whipped cream and candy corn right before serving.
Why You’ll Love This Recipe?
This cheesecake earns its spot on the Halloween table every single year, and here’s why.
- It’s a genuine showstopper. The three-layer color effect looks like something from a bakery window, even though it’s entirely doable at home.
- It’s make-ahead friendly. Since it needs an overnight chill anyway, you can knock this out days before your party without any last-minute stress.
- It’s flexible for dietary needs. Between sugar-free swaps and dairy-free substitutions, you can adjust it for pretty much any guest list.
- It tastes better than it looks. The honey and mascarpone give it a richer, more grown-up flavor than a typical boxed cheesecake mix.
- It’s a fun project. If you like a slightly involved baking day, dividing and coloring the batter is honestly kind of relaxing once you get into a rhythm.
If you’re planning a bigger dessert spread, this pairs really well with something chocolate-forward like the halloween cream cheese swirl brownies on my site the fudgy base is a nice contrast to the lighter cheesecake layers. And if this feels like more time than you have this week, I’ve also got a much faster easy halloween candy recipe that comes together in under 30 minutes.
FAQs
Can I make this cheesecake without a springform pan?
I wouldn’t recommend it. A springform pan lets you release the sides cleanly, which matters a lot for showing off the distinct color layers.
Why did my cheesecake crack on top?
Cracking usually means the oven was too hot or the batter was overmixed. Keep your mixer on low once the eggs go in, and don’t overbake past the “just set” point.
Can I use liquid food coloring instead of gel?
You can, but I don’t recommend it. Liquid coloring thins the batter and can throw off how firmly each layer sets during baking.
How far ahead can I make this for a party?
I make mine up to 2 days ahead and store it covered in the fridge, adding the whipped cream topping and candy corn right before serving.
Can I freeze leftover slices?
Yes, wrap individual slices tightly and freeze for up to a month. Thaw them in the fridge overnight before eating for the best texture.

Halloween Candy Corn Cheesecake Recipe
Ingredients
Method
- Preheat your oven to 350°F and lightly spray your 10-inch springform pan. Stir the cookie crumbs and melted butter together in a bowl until it looks like wet sand. Press it firmly and evenly into the bottom of the pan, then bake for 10 minutes. Pull it out and let it cool while you make the filling.
- Beat the cream cheese, mascarpone, and sour cream together until completely smooth, about 3 minutes on medium speed. Add the honey and sugar, then beat again until fully combined. Add the eggs one at a time, mixing well after each so the batter stays smooth and doesn’t curdle.
- Turn the mixer to low and add the flour, heavy cream, and vanilla, mixing just until combined. Scrape down the bowl one more time to catch any hidden lumps. This is your base batter before it gets split and colored.
- Split the batter evenly into three bowls. Leave one bowl plain white. Tint the second bowl yellow and the third bowl orange using your gel colors, adding a little at a time until you love the shade.
- Pour the yellow batter over your cooled crust and bake for 30 to 35 minutes, until the center is just set and no longer jiggly. Pull it out and let it cool on the counter for 20 minutes before moving to the next layer.
- Gently pour the orange batter over the baked yellow layer and bake for another 30 to 35 minutes. Cool for 20 minutes again — this step keeps your layers distinct instead of blending together.
- Pour the remaining white batter on top and bake one final time, 30 to 35 minutes, until set. Let the whole cheesecake cool completely at room temperature before it goes anywhere near the fridge.
- Refrigerate the cheesecake for a full 24 hours, no shortcuts here. Once it’s chilled, run a knife around the edge, release the springform sides, and whip the cold heavy cream to stiff peaks. Spread it over the top and finish with a scattering of candy corn.
Notes
- I always bring my cream cheese and mascarpone fully to room temperature cold cheese leaves lumps you just can’t beat out later.
- I use gel color instead of liquid drops because liquid thins the batter and can mess with how the layers set.
- I bake my layers on the middle rack every time, since edges cook faster and I don’t want an unevenly set cheesecake.
- I let each layer cool the full 20 minutes before pouring the next one, or the layers bleed into each other and lose that clean candy corn look.
- I make this a full day ahead of when I need it, because rushing the 24-hour chill always leaves the center too soft to slice.