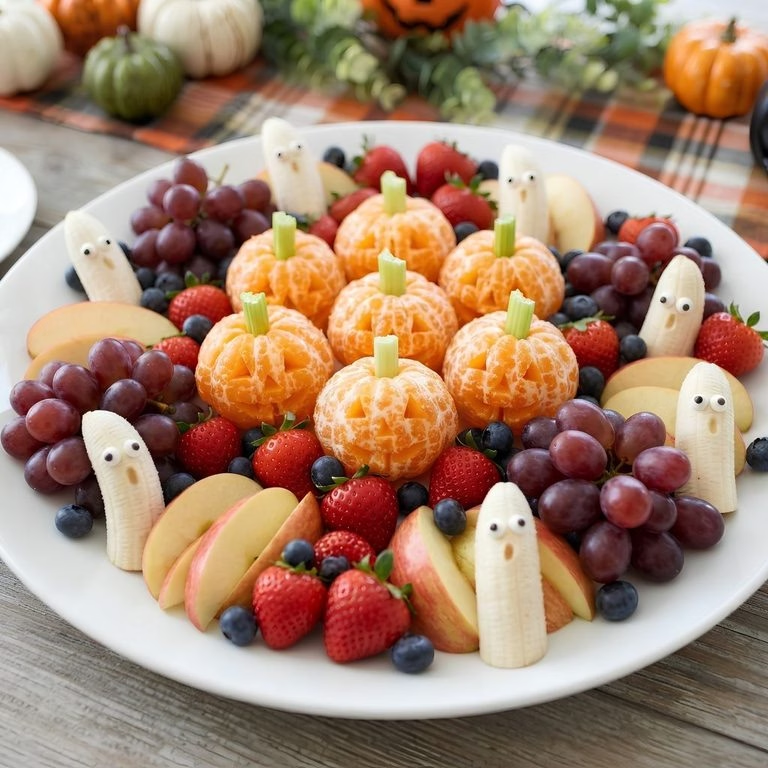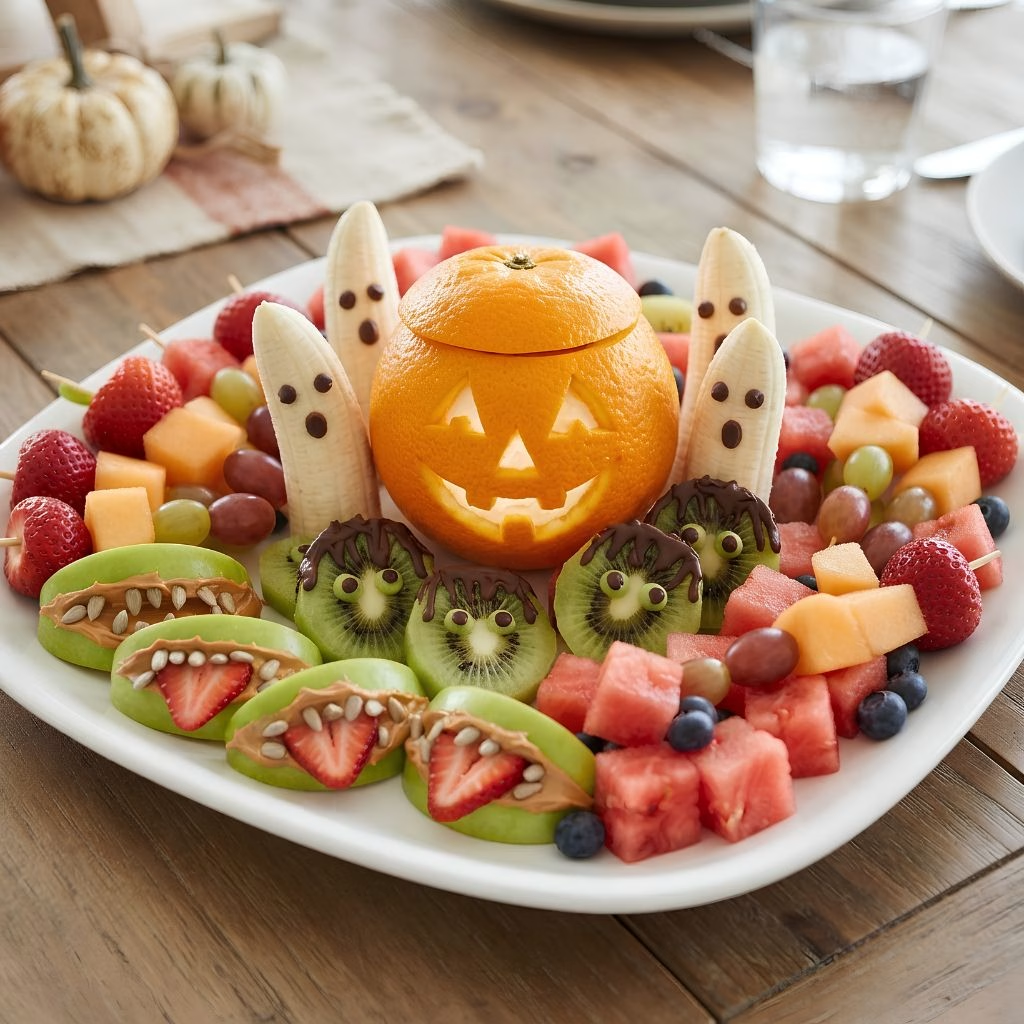
I still remember the first time I made a Halloween Fruit Tray Recipe for my daughter’s class party. I was tired of sending in another bag of candy, and I wanted something colorful that the kids would actually eat. The moment I set the orange Jack-O-Lantern down on the table, every kid wanted to dig in before I even finished arranging the ghosts.
Since then, this has become my go-to Halloween appetizer, because it takes basic fruit and turns it into something that feels like a treat. If you’ve been looking for a Halloween fruit platter that’s healthy, easy, and genuinely fun to make, I promise this one checks every box.
Cooking Time
- Prep Time: 35 minutes
- Cooking Time: 5 minutes (just for melting chocolate)
- Total Time: 40 minutes
Ingredients
- 2 large navel oranges – the base for my Jack-O-Lantern, so pick ones with smooth, firm skin
- 1 cup blueberries – shape the pumpkin’s eyes and nose, firm berries hold their shape best
- 1 cup red seedless grapes – adds sweetness and a pop of color across the tray
- 3 ripe bananas – the star of my ghost family, don’t use overripe ones since they brown fast
- 18 mini chocolate chips – form the ghost eyes and mouths, dark chocolate shows up clearest
- 3 kiwis – peeled and sliced thick to build the base of each Frankenstein face
- 1/2 cup dark chocolate chips, melted – piped on for Frankenstein hair and features
- 2 green apples – quartered for monster mouths, rub with lemon juice to stop browning
- 1/4 cup peanut butter or almond butter – glues the apple “teeth” in place and tastes great
- 16 unsalted sunflower seeds – pressed in as monster teeth, unsalted keeps the flavor balanced
- 1 pint strawberries – sliced for tongues and threaded whole onto skewers for color
- 1 cup cantaloupe chunks – fills out the fruit kabobs with a juicy bite
- 1 pound seedless watermelon, cubed – adds volume and bright color to the whole spread
- Candy eyeballs (optional) – a fun finishing touch that makes the fruit characters pop
Note: Serves 8-10 people, perfect for a Halloween party platter.
Equipment You Need
- Large serving platter or tray – to arrange all the fruit characters together
- Cutting board – gives you a stable surface for slicing fruit safely
- Paring knife – best for small detail cuts like the pumpkin’s face and apple mouths
- Bamboo skewers – thread the fruit kabobs so everything holds together neatly
- Microwave-safe bowl – melts the chocolate chips evenly without scorching them
- Small ziplock bag or piping bag – lets you drizzle chocolate details with control
- Toothpicks – handy for securing smaller decorative pieces in place
How to Make Halloween Fruit Tray Recipe?
I like to break this project into small, bite-sized tasks rather than trying to do it all at once. Each fruit character comes together in just a few minutes, so I usually prep one at a time while the previous one sets. Here’s exactly how I build mine from start to finish.
Carve the Orange Jack-O-Lantern
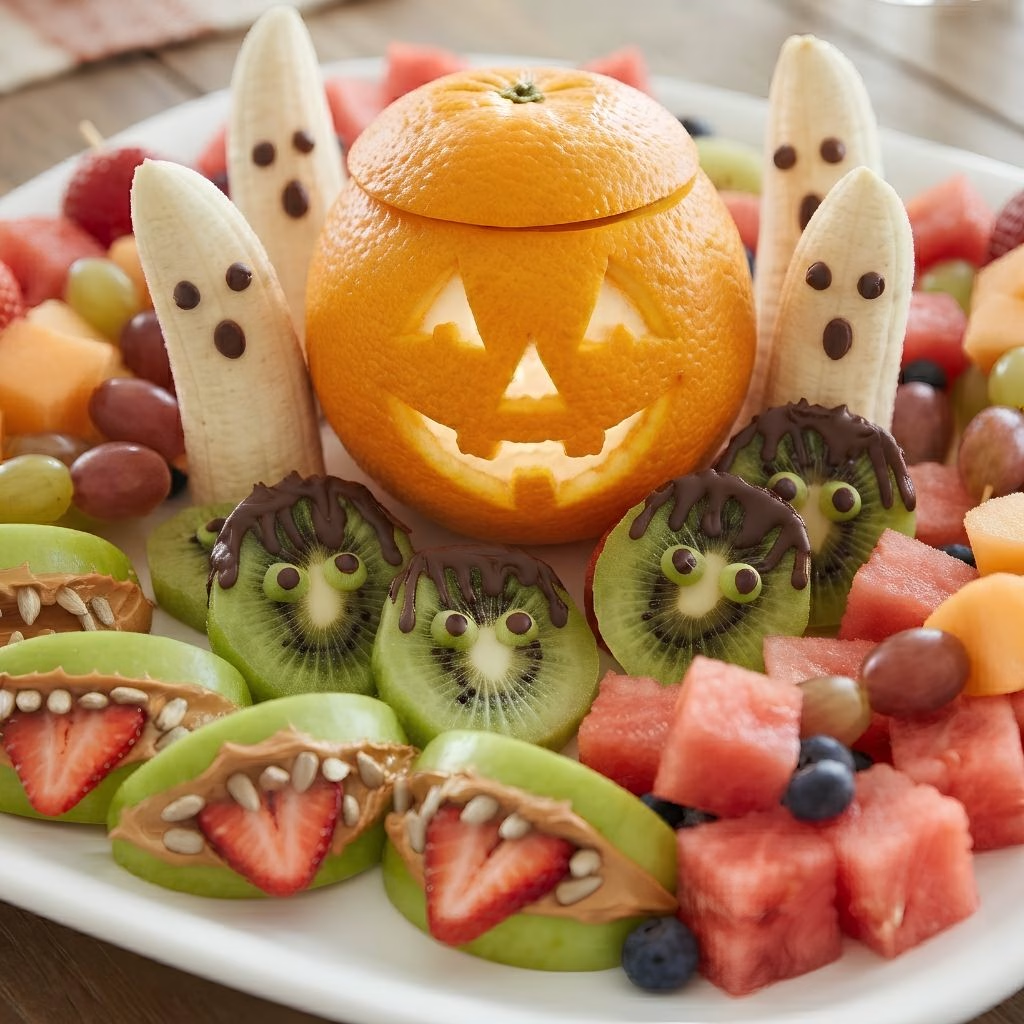
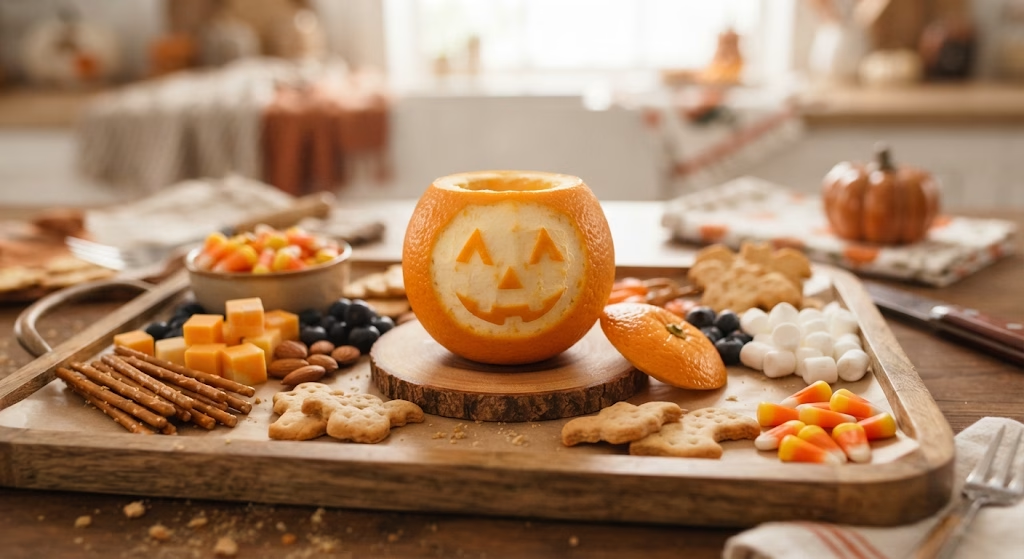
I start by slicing a small circle off the top of one orange to act as a lid, then use a paring knife to score a simple jack-o-lantern face into the peel. I carefully peel back just the scored sections so the white pith underneath shows through as the “glow.” This piece becomes the centerpiece of my whole tray.
Build the Banana Ghosts
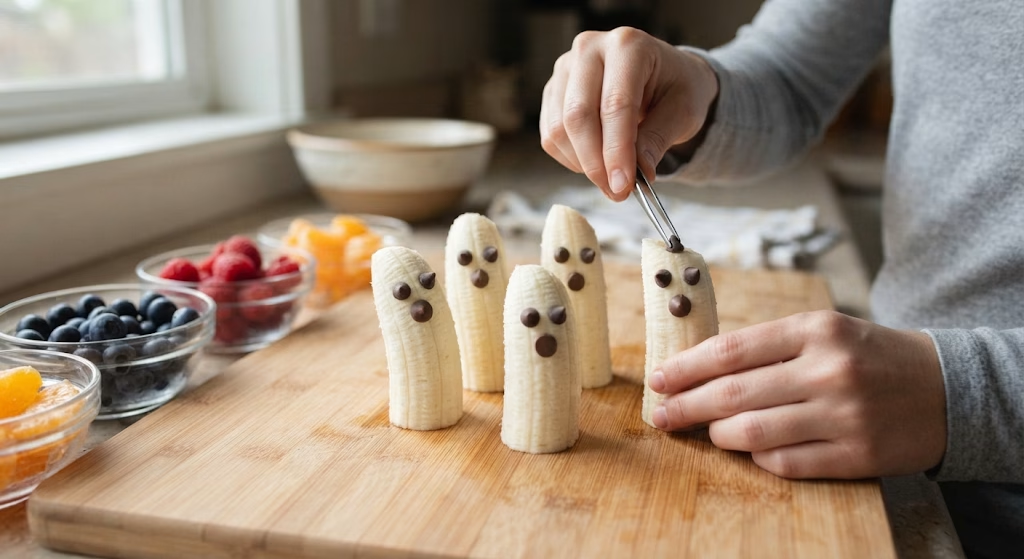
Next, I slice the bananas in half crosswise so they stand upright like little ghost bodies. I gently press two mini chocolate chips near the top for eyes and one slightly larger chip below for a mouth. I always do this step last among the fruit prep, since cut bananas brown the fastest.
Create the Kiwi Frankensteins
I peel the kiwis and slice them into thick rounds, then melt the dark chocolate in the microwave in short bursts. Using my piping bag, I drizzle chocolate “hair” across the top of each slice and add two small dots for Frankenstein’s eyes. This is honestly my favorite step because the green kiwi looks so convincing.
Make the Apple Monster Mouths
I quarter the green apples and rub lemon juice over the cut sides right away to stop browning. Using my paring knife, I carve a simple mouth shape into each wedge, then spread a little peanut butter inside and press in sunflower seeds as teeth. A strawberry slice tucked in as a “tongue” finishes the look.
Assemble the Fruit Kabobs
To fill out the tray, I thread strawberries, cantaloupe chunks, and grapes onto bamboo skewers in a repeating pattern. These kabobs add height and color between the character fruits, and they’re the easiest part for kids to help with.
Arrange and Chill the Tray
Finally, I place the orange Jack-O-Lantern in the center and build the ghosts, Frankensteins, and monster apples around it, filling gaps with watermelon cubes and loose blueberries. I pop the finished tray in the fridge for 15-20 minutes before serving so everything firms up and looks its best.
Additional Tips for Making This Recipe Better
- I always prep the Frankenstein kiwis first so the chocolate has time to set while I work on everything else.
- I cut the banana ghosts last of all, since they brown faster than any other fruit on the tray.
- I keep a small bowl of lemon water nearby to dip apple slices in it saves a step compared to rubbing lemon juice on each piece.
- I use a large platter (at least 16 inches) so there’s enough room to spread the characters out without crowding them.
- I sometimes swap in candy eyeballs instead of chocolate chips when I want an extra playful touch for a kids’ party.
Common Mistakes to Avoid
- I learned the hard way that cutting all the fruit too far in advance makes the tray look dry and tired by serving time.
- I used to melt chocolate on high power and ended up with a seized, clumpy mess short 20-30 second bursts work much better.
- I once skipped the lemon juice on my apples, and they turned brown before guests even arrived.
- I overcrowded my first tray and it looked messy I now leave small gaps so each fruit character stands out.
- I didn’t chill the tray before serving once, and the chocolate details started sliding off the kiwi slices.
How to Serve Halloween Fruit Tray
I love setting this tray out as the centerpiece of a Halloween spread, surrounded by a few plastic spiders or spooky napkins for extra atmosphere. A small bowl of yogurt dip or melted chocolate in the center gives guests something to dunk the kabobs into.
I also like scattering a few extra blueberries and grape “eyeballs” loosely around the base of the tray for a playful, slightly creepy finish that kids always notice first.
Variations
- Swap peanut butter for sunflower seed butter if you’re serving a nut-free classroom or party.
- Use dark chocolate instead of milk chocolate for a lower-sugar version of the ghost and Frankenstein details.
- Add pineapple chunks or mango slices for extra sweetness and tropical color variety.
- Try a dairy-free version by using dairy-free chocolate chips for all the decorative details.
- For a quicker version, skip the carved faces and simply arrange the fruit by color into a pumpkin-shaped mound. If you want more ideas in this style, I’d also point you toward [link to a second related fruit or snack recipe on your site] for another easy party option.
Nutritional Information
Since this tray is almost entirely fresh fruit, it’s a naturally lighter option compared to most Halloween treats. Here’s a rough estimate per serving (based on 8-10 servings):
- Calories: around 120-150 per serving
- Protein: about 2-3 grams
- Carbohydrates: roughly 28-32 grams
- Fat: about 2-4 grams
Make Ahead and Storage
I can prep the uncut fruit and melt the chocolate a few hours ahead, but I always assemble the tray itself close to serving time. Cut fruit starts to dry out and brown within an hour or two, so I treat assembly as the very last step.
If I do have leftovers, I store them in an airtight container in the fridge for up to a day. The texture softens a bit, so I don’t recommend keeping it much longer than that.
This tray isn’t a good candidate for freezing, since thawed fruit turns mushy and the chocolate details won’t hold their shape. I just make what I know will be eaten within a day.
Why You’ll Love This Recipe
I keep coming back to this tray every October because it hits so many notes at once — it’s festive, it’s healthy, and it genuinely gets eaten.
- It’s easy to prep — Every character uses simple cuts and basic tools, so I never feel like I need special skills to pull this off.
- It’s naturally healthier — Since it’s built from fresh fruit, I feel good serving it alongside candy-heavy Halloween spreads.
- It’s endlessly customizable — I can swap in whatever fruit is in season or on sale and the tray still looks festive.
- Kids love helping — My daughter loves threading the kabobs and pressing in the chocolate chip eyes, so it’s become a fun activity, not just a recipe.
- It works for any Halloween gathering — I’ve brought it to school parties, office potlucks, and trick-or-treat nights with equal success.
FAQs
Can I make this Halloween fruit tray ahead of time?
I recommend prepping components like melted chocolate early, but assembling the full tray within an hour of serving keeps the fruit looking fresh.
What fruits work best for a Halloween fruit tray?
Oranges, bananas, kiwis, apples, and berries all hold their shape and color well, making them my top picks for this tray.
Is this Halloween fruit platter safe for school parties?
Yes, I’ve made nut-free versions by swapping peanut butter for sunflower seed butter, which makes it classroom-friendly.
How do I keep the apple slices from turning brown?
I always dip or rub my apple pieces with lemon juice right after cutting, which slows down browning noticeably.
Can I add a dip to this fruit tray?
I love serving mine with a light yogurt dip or warm chocolate sauce on the side for extra flavor.

Halloween Fruit Tray Recipe
Ingredients
Method
- I start by slicing a small circle off the top of one orange to act as a lid, then use a paring knife to score a simple jack-o-lantern face into the peel. I carefully peel back just the scored sections so the white pith underneath shows through as the “glow.” This piece becomes the centerpiece of my whole tray.
- Next, I slice the bananas in half crosswise so they stand upright like little ghost bodies. I gently press two mini chocolate chips near the top for eyes and one slightly larger chip below for a mouth. I always do this step last among the fruit prep, since cut bananas brown the fastest.
- I peel the kiwis and slice them into thick rounds, then melt the dark chocolate in the microwave in short bursts. Using my piping bag, I drizzle chocolate “hair” across the top of each slice and add two small dots for Frankenstein’s eyes. This is honestly my favorite step because the green kiwi looks so convincing.
- I quarter the green apples and rub lemon juice over the cut sides right away to stop browning. Using my paring knife, I carve a simple mouth shape into each wedge, then spread a little peanut butter inside and press in sunflower seeds as teeth. A strawberry slice tucked in as a “tongue” finishes the look.
- To fill out the tray, I thread strawberries, cantaloupe chunks, and grapes onto bamboo skewers in a repeating pattern. These kabobs add height and color between the character fruits, and they’re the easiest part for kids to help with.
- Finally, I place the orange Jack-O-Lantern in the center and build the ghosts, Frankensteins, and monster apples around it, filling gaps with watermelon cubes and loose blueberries. I pop the finished tray in the fridge for 15-20 minutes before serving so everything firms up and looks its best.
Notes
- I always prep the Frankenstein kiwis first so the chocolate has time to set while I work on everything else.
- I cut the banana ghosts last of all, since they brown faster than any other fruit on the tray.
- I keep a small bowl of lemon water nearby to dip apple slices in it saves a step compared to rubbing lemon juice on each piece.
- I use a large platter (at least 16 inches) so there’s enough room to spread the characters out without crowding them.
- I sometimes swap in candy eyeballs instead of chocolate chips when I want an extra playful touch for a kids’ party.