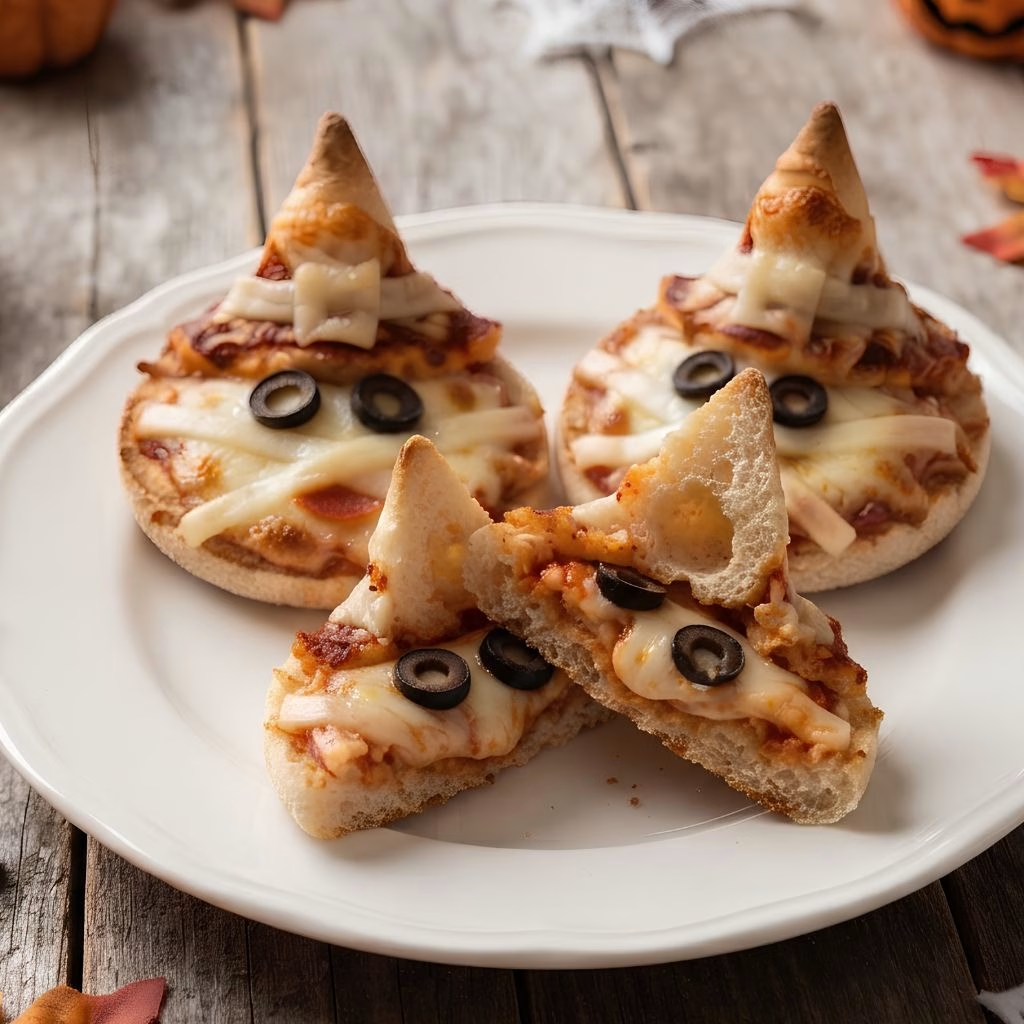
I still remember the first time I made this Mummy Pizza Bites Recipe for my daughter’s classroom party. The mummy faces got more giggles than the actual candy bowl!
I love that this snack takes barely any real cooking, just a warm oven and a few minutes of “wrapping” cheese around little pizza faces. Since our school went nut-free years ago, I’ve learned to keep a running list of treats that are safe for every kid in the room, and this one has become my go-to.
It’s cheap, it’s fast, and it doesn’t need any fancy decorating skills even my kids can do most of it themselves. If you’re hunting for easy halloween snacks that won’t have you up at midnight with a piping bag, this is the one I hand you first.
Cooking Time
- Prep Time: 15 minutes
- Cooking Time: 10 minutes
- Total Time: 25 minutes
Ingredients
- 6 whole wheat English muffins, split in half — the nooks and crannies help the “bandages” of cheese stick better than a flat surface would
- 1 cup pizza sauce or marinara — go for a lower-sodium jar so the flavor doesn’t overpower the little eaters
- 12 slices mozzarella cheese — sliced (not shredded) cheese lets you tear thin strips for realistic mummy wraps
- 24 sliced black olives — these become the “eyes,” so slice them yourself for a cleaner, kid-safe shape
- 1 tablespoon olive oil — a light brush on the muffins keeps the edges from drying out in the oven
- 1/2 teaspoon dried oregano — optional, but it adds a little extra flavor under all that cheese
- Cooking spray or parchment paper — keeps cleanup quick and stops sticking on the baking sheet
Note: This recipe makes 12 mummy pizza bites, enough to serve a classroom of around 10-12 kids as one snack each.
Equipment You Need
- Baking sheet — holds all the muffin halves for even baking
- Parchment paper — prevents sticking and makes cleanup effortless
- Small spoon — for spreading sauce evenly without tearing the muffin
- Kitchen scissors or a sharp knife — for cutting cheese into thin mummy-wrap strips
- Oven mitts — because that baking sheet comes out hot and fast
How to Make Mummy Pizza Bites Recipe?
This part is where the fun really starts, and honestly, it’s the easiest step of the whole process. I like to set everything out assembly-line style so little hands can help without making a mess. Here’s exactly how I put mine together every single time.
Preheat and Prep the Muffins
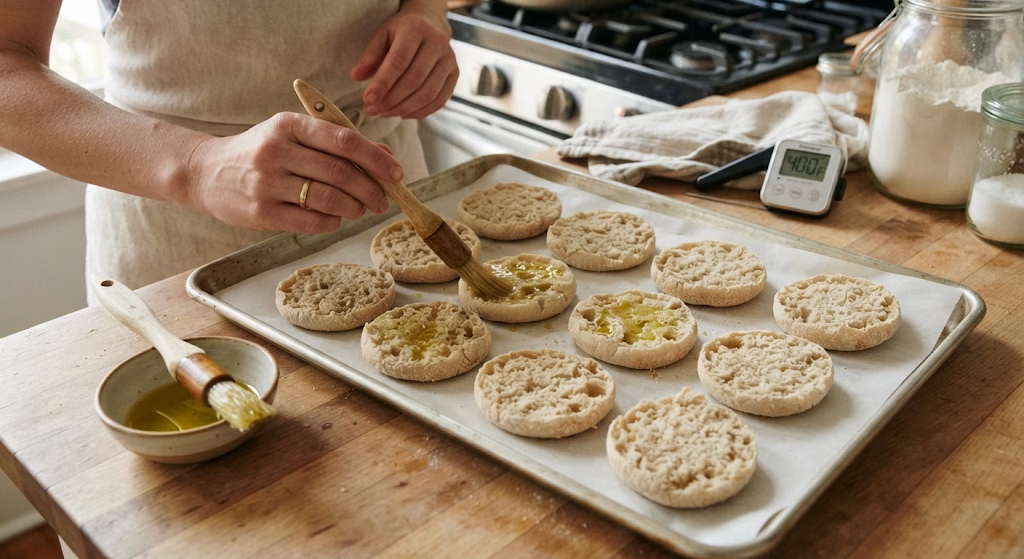
I always start by preheating my oven to 400°F and lining my baking sheet with parchment paper. Then I split each English muffin in half and lay all 12 pieces cut-side up on the tray. A quick brush of olive oil on each one keeps them from drying out.
Add the Sauce Layer
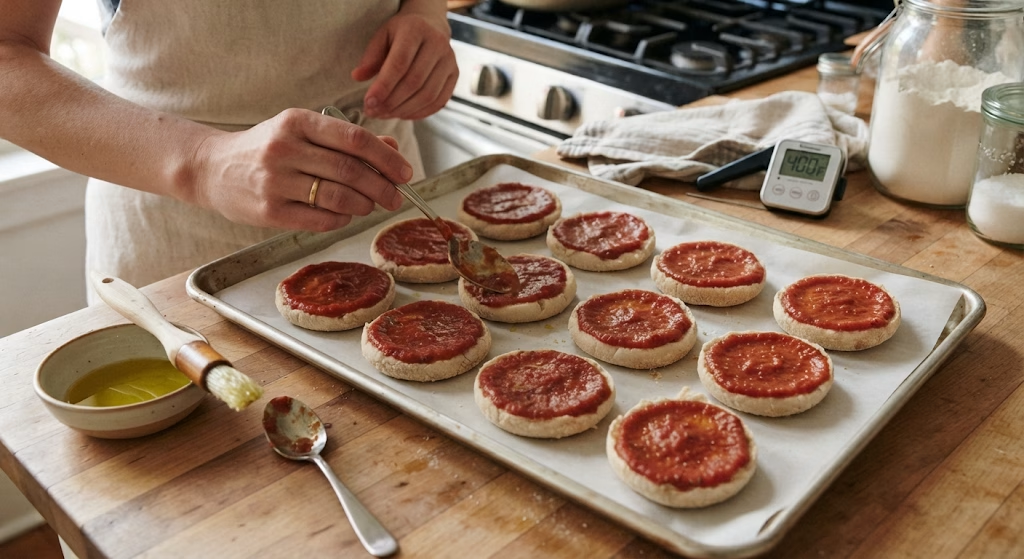
Next, I spoon about a tablespoon of pizza sauce onto each muffin half, spreading it almost to the edges. I leave a thin border of muffin showing so the crust still gets a little crisp. This is the step my kids fight over the most.
Cut and Wrap the Cheese
Now for the mummy magic. I slice each mozzarella piece into thin strips using kitchen scissors, then lay them criss-cross over the sauce so it looks like loosely wrapped bandages. I leave a small gap near the top for the eyes to peek through.
Add the Eyes
I press two olive slices into that gap I left, right where a mummy’s eyes would be. This is the step that turns a plain cheese pizza into something spooky and fun, and it’s the part kids love decorating themselves.
Bake Until Bubbly
I slide the tray into the oven and bake for 8 to 10 minutes, until the cheese is melted and just starting to turn golden at the edges. I keep an eye on it after the 7-minute mark since ovens vary a lot.
Cool and Serve
Once they’re out, I let the mummy pizzas rest for about 3 minutes on the tray. This keeps the cheese from sliding off when little hands grab them, and it also cools them down to a safe eating temperature for the classroom.
Additional Tips for Making This Recipe Better
I’ve made this recipe more times than I can count, and here’s what I’ve picked up along the way.
- I always use sliced cheese instead of shredded because it holds its “bandage” shape so much better once it melts.
- I pat my English muffins dry if they feel damp from the package, since extra moisture makes the sauce slide around.
- I prep the olive eyes the night before and store them in a small container so the party morning is faster.
- I bake a test batch of two before a big party day so I know exactly how my oven behaves.
- I keep a couple of dairy-free cheese slices on hand just in case a classmate has a dairy allergy alongside the nut-free rule.
Common Mistakes to Avoid
- I once overloaded the sauce, and the muffins turned soggy in the middle. A thin layer really is enough.
- I’ve learned not to walk away from the oven, because these go from golden to overly browned in under two minutes.
- I used to shred the cheese out of habit, but shredded cheese melts flat and loses that mummy-wrap look.
- I forgot to leave gaps for the eyes once, and the olives just slid off the melted cheese before baking.
- I tried assembling everything the night before, but the muffins got mushy, so I only prep toppings ahead, not the full pizza.
How to Serve Mummy Pizza Bites?
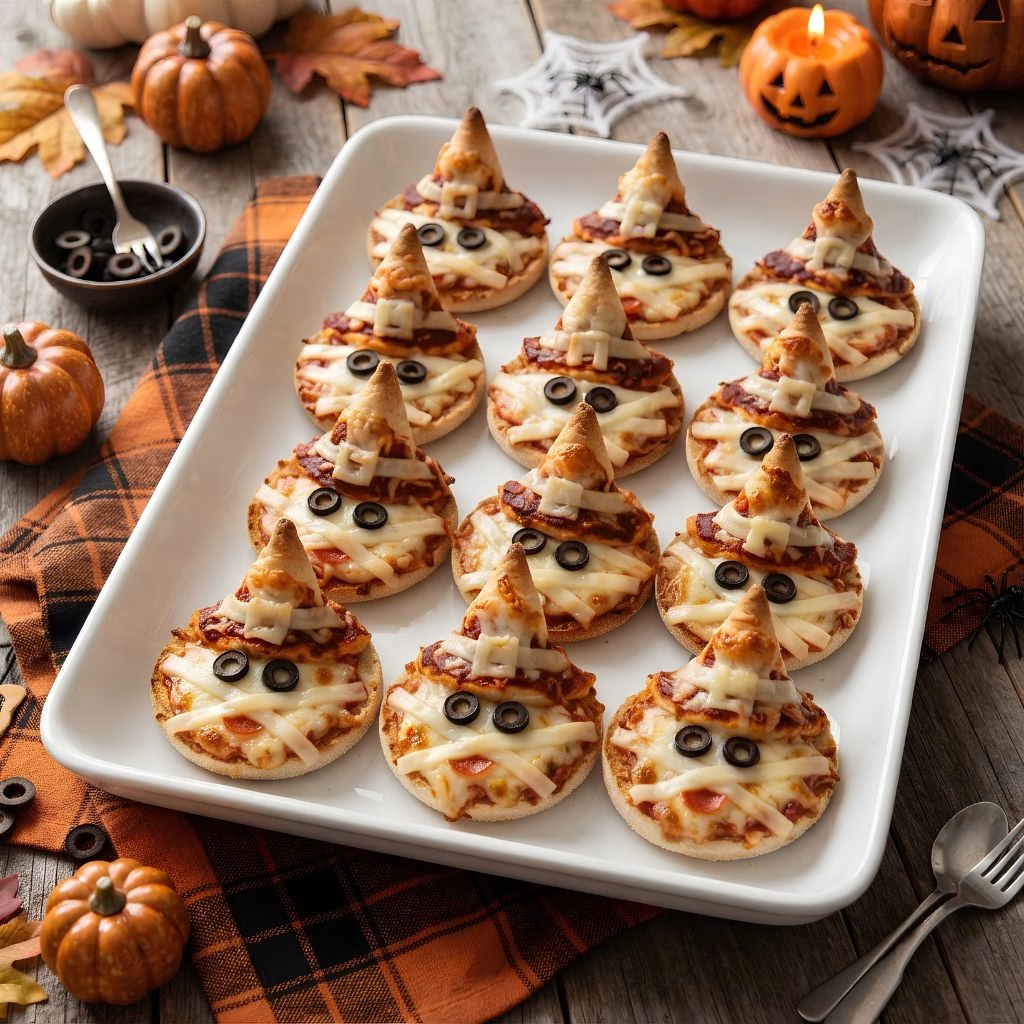
I like to arrange these on a black platter or a tray lined with parchment cut into a jagged “graveyard” shape for extra spooky effect. A few fresh basil leaves tucked between the pizzas add a pop of green that makes the orange sauce and white cheese really stand out.
If I’m sending them to school instead of a party table, I tuck each one into a small paper liner so they don’t slide around in the lunchbox. For a party spread, I set them next to other bite-sized halloween snack ideas for kid parties, like fruit skewers or pretzel spiders, so there’s a mix of savory and sweet on the table.
Variations
- Dairy-free: swap the mozzarella for a plant-based cheese slice that melts well, and check the pizza sauce label for hidden dairy.
- Gluten-free: use gluten-free English muffins or small rice cakes as the base instead.
- Extra veggies: add a few thin bell pepper strips under the cheese for color and a hidden veggie boost.
- Mini pepperoni: tuck a few small pepperoni pieces under the cheese bandages for a meatier bite, great for a heartier spooky snacks for halloween party spread.
- Spicy kick for adults: a light sprinkle of red pepper flakes turns this into one of the easy halloween party snacks for adults at a grown-up gathering.
- Whole grain swap: use whole grain naan cut into rounds instead of muffins for a chewier texture.
Nutritional Information
Here’s a rough breakdown per mummy pizza bite, based on the ingredients above:
- Calories: about 110 kcal
- Protein: about 6 g
- Carbohydrates: about 12 g
- Fat: about 4 g
Make Ahead and Storage
I prep the sauce and slice the cheese and olives up to a day ahead, storing each in separate airtight containers in the fridge. I don’t assemble the full pizzas until party morning, since the muffins get soggy if they sit topped for too long.
Leftovers keep well in an airtight container in the fridge for up to 3 days. I just reheat them in a 350°F oven for about 5 minutes, or a quick 20-second zap in the microwave if I’m in a hurry, though the oven keeps the muffin from getting rubbery.
These also freeze surprisingly well before baking. I assemble them, freeze on a tray until solid, then transfer to a freezer bag for up to 2 months, baking straight from frozen with a few extra minutes added to the cook time.
Why You’ll Love This Recipe?
This one earns a permanent spot on my Halloween list for a few simple reasons.
- Quick to pull together: from fridge to table in under 30 minutes, which matters a lot on a busy school morning.
- Naturally nut-free: every ingredient here skips nuts entirely, so it’s safe for classroom rules without any substitutions.
- Kid-approved assembly: the wrapping and eye-placing steps are simple enough for little hands to help, which makes it feel like a craft as much as a snack.
- Easy to customize: whether you need it dairy-free, gluten-free, or a little spicier for the adults in the room, it adapts without much fuss.
- Budget-friendly for a crowd: made from pantry staples, it’s one of the more affordable halloween snack ideas for toddlers and older kids alike when you’re feeding a whole classroom.
FAQs
Can I make these ahead for a classroom party?
I prep the sauce, cheese strips, and olive eyes a day ahead, but I always assemble and bake them the morning of the party for the best texture.
Are mummy pizza bites safe for nut allergies?
Yes, every ingredient in this recipe is naturally nut-free, but I still double-check my pizza sauce and cheese labels for any cross-contamination warnings.
Can I turn this into a halloween snack mix instead?
Not directly, since this is a baked pizza bite, but you can pair mini versions of it alongside a bowl of pretzels, crackers, and dried fruit for a fuller party spread.
What can I use instead of English muffins?
Mini bagels, naan rounds, or gluten-free flatbread all work well as a base if you want to switch up the texture or fit a dietary need.
How do I keep the pizzas from getting soggy in a lunchbox?
I let them cool completely before packing and tuck a small paper towel underneath to absorb any extra moisture from the sauce.

Mummy Pizza Bites Recipe
Ingredients
Method
- I always start by preheating my oven to 400°F and lining my baking sheet with parchment paper. Then I split each English muffin in half and lay all 12 pieces cut-side up on the tray. A quick brush of olive oil on each one keeps them from drying out.
- Next, I spoon about a tablespoon of pizza sauce onto each muffin half, spreading it almost to the edges. I leave a thin border of muffin showing so the crust still gets a little crisp. This is the step my kids fight over the most.
- Now for the mummy magic. I slice each mozzarella piece into thin strips using kitchen scissors, then lay them criss-cross over the sauce so it looks like loosely wrapped bandages. I leave a small gap near the top for the eyes to peek through
- I press two olive slices into that gap I left, right where a mummy’s eyes would be. This is the step that turns a plain cheese pizza into something spooky and fun, and it’s the part kids love decorating themselves.
- I slide the tray into the oven and bake for 8 to 10 minutes, until the cheese is melted and just starting to turn golden at the edges. I keep an eye on it after the 7-minute mark since ovens vary a lot.
- Once they’re out, I let the mummy pizzas rest for about 3 minutes on the tray. This keeps the cheese from sliding off when little hands grab them, and it also cools them down to a safe eating temperature for the classroom.
Notes
- I always use sliced cheese instead of shredded because it holds its “bandage” shape so much better once it melts.
- I pat my English muffins dry if they feel damp from the package, since extra moisture makes the sauce slide around.
- I prep the olive eyes the night before and store them in a small container so the party morning is faster.
- I bake a test batch of two before a big party day so I know exactly how my oven behaves.
- I keep a couple of dairy-free cheese slices on hand just in case a classmate has a dairy allergy alongside the nut-free rule.