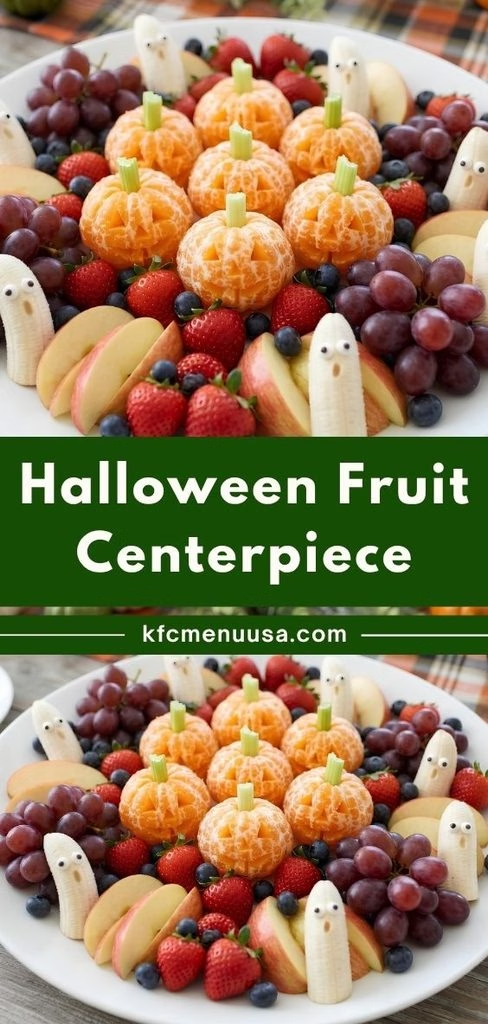
I make this Halloween Fruit Centerpiece Recipe every single year, and it has become one of my favorite parts of hosting a fall party. I love that it looks like it took hours of work when really it comes together with a little cutting and some playful arranging.
My kids get involved too, and it always turns into the centerpiece everyone gathers around before the candy even comes out. If you want an easy Halloween fruit idea that still feels like a showstopper, this one is it.
Prep Time, Cooking Time & Total Time
- Prep Time: 30 minutes
- Cooking Time: 0 minutes (this is a no-bake, no-cook centerpiece)
- Total Time: 30 minutes
Ingredients
- 4 navel oranges, these become your jack-o’-lantern faces so pick ones with flat bottoms so they stand up straight
- 2 green apples, slice right before serving so they don’t brown on the table
- 2 red apples, a mix of red and green gives the whole platter better color contrast
- 1 bunch green grapes, perfect for a caterpillar or a cluster of “witch eyes”
- 2 bananas, these work best for ghost shapes but should be sliced last since they brown the fastest
- 1 pint blueberries, great for filling in gaps and adding a deep, spooky color
- 1 pint strawberries, hull them so they sit flat and look tidy on the tray
- 1 small bag candy eyeballs, the easiest way to turn plain fruit into something spooky
- 2 tablespoons lemon juice, toss cut apples and bananas in this to slow down browning
- 1/4 cup peanut butter or yogurt, use this as edible glue to stick the candy eyes on
- 1 small bunch celery, cut into short pieces to use as pumpkin “stems” on the oranges
Note: this centerpiece easily serves 8 to 10 people as a shared party platter.
Equipment You Need
- Cutting board, gives you a stable surface for slicing all the fruit
- Sharp paring knife, makes clean cuts for carving orange faces and ghost shapes
- Large serving tray or platter, this is where the whole centerpiece comes together
- Small bowl, for mixing the lemon juice and water dip
- Toothpicks, handy for holding pieces together or propping up fruit shapes
- Piping bag or small spoon, for dotting peanut butter or yogurt as glue
How to Make Halloween Fruit Centerpiece Recipe?
This fruit centerpiece comes together in a handful of simple stages rather than one long cooking process. I like to prep each fruit separately before I start arranging, since that keeps the whole project from feeling overwhelming. Once everything is cut and ready, the fun part is really just playing with the layout until it looks right to you.
Prepare the Fruit
I start by washing every piece of fruit thoroughly and patting it dry with a clean towel. Then I slice the apples and bananas and toss them right away in a bowl with lemon juice and a splash of water. This simple step keeps everything looking fresh instead of turning brown while I’m still arranging the rest of the platter.
Carve the Orange Faces
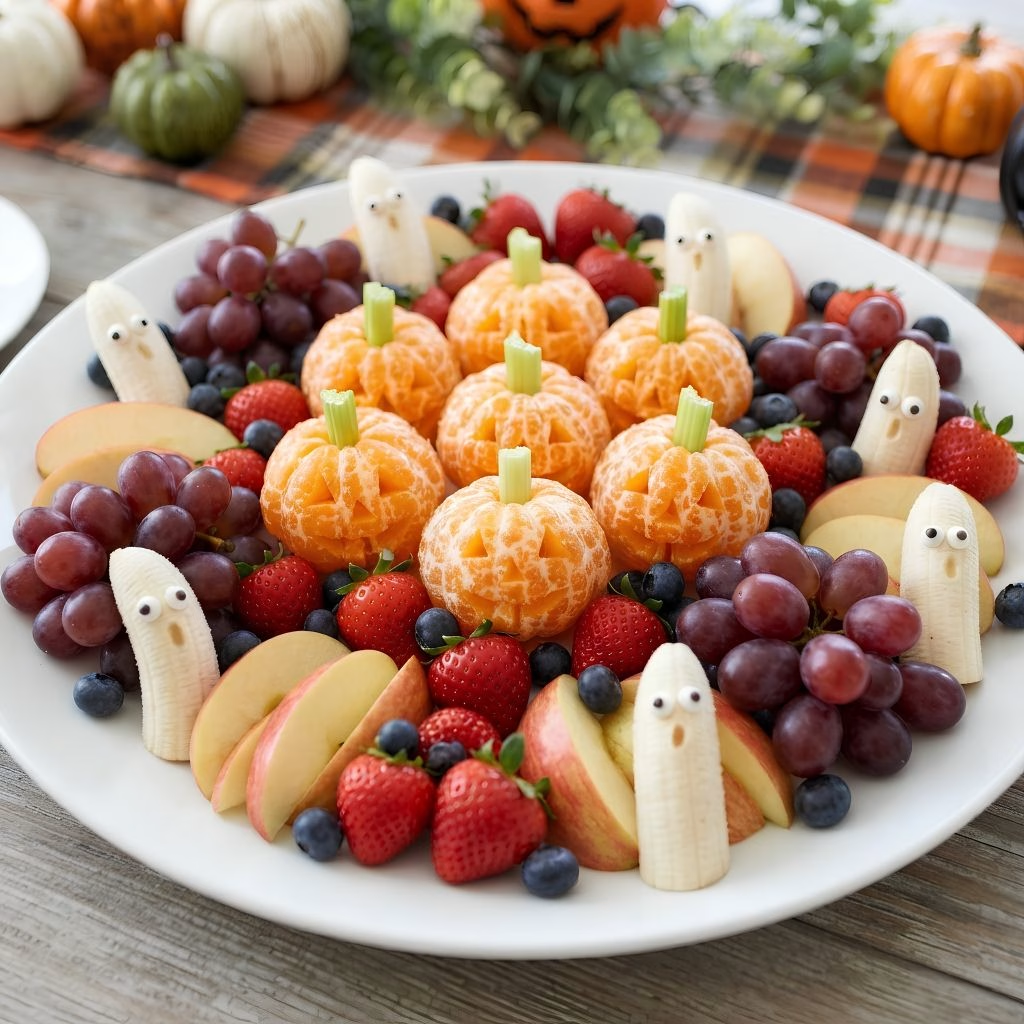
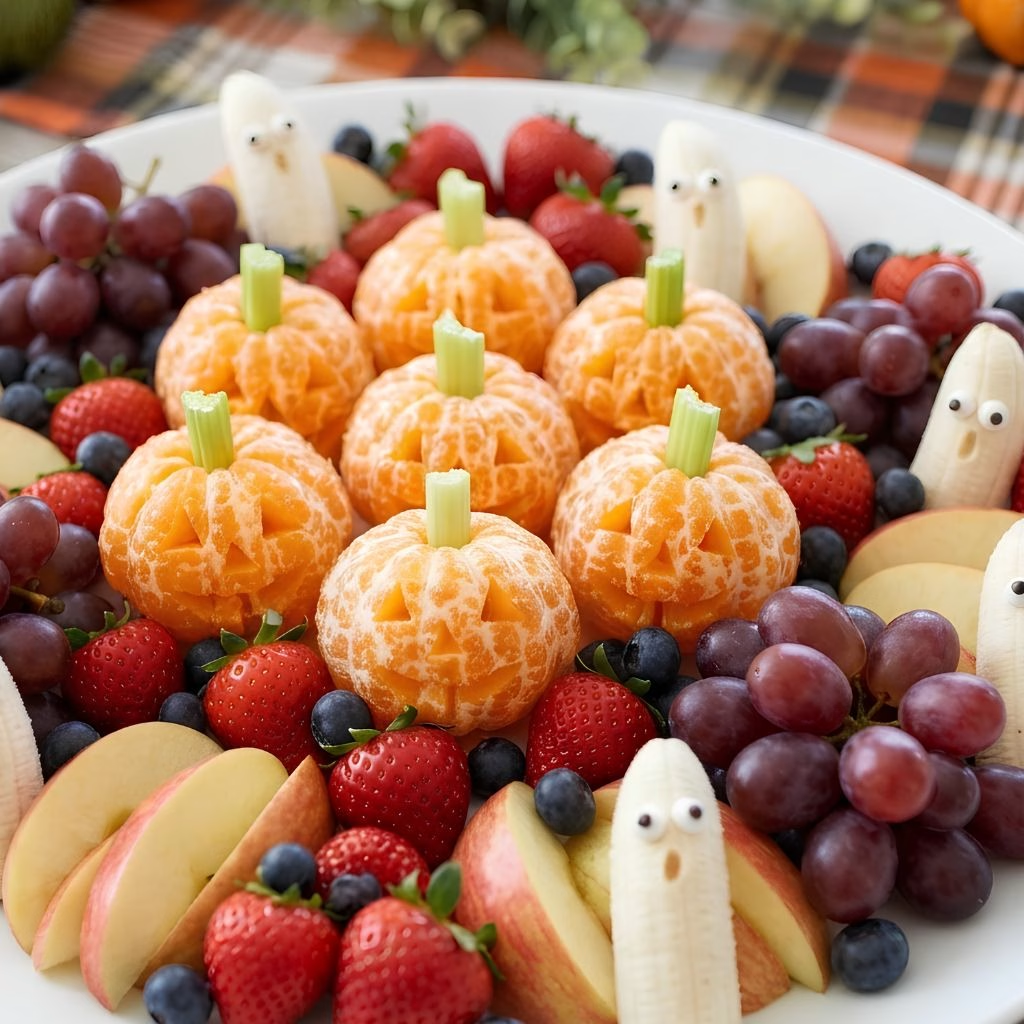
Next, I peel the oranges carefully, keeping them whole so they look like little pumpkins. I use a small paring knife to cut simple jack-o’-lantern faces into one side of each orange, then I tuck a short piece of celery into the top to act as a stem. It’s a small detail, but it instantly makes the platter feel festive.
Shape the Ghosts and Monsters
I cut each banana in half lengthwise, then again to make four ghost-shaped quarters. Using a dab of peanut butter or yogurt, I stick two candy eyes onto each piece before setting them aside on wax paper. This step is quick, but I always do it last so the bananas don’t sit out too long before serving.
Arrange the Platter
Once every piece is ready, I start building the centerpiece on my largest tray, placing the orange pumpkins toward the center as the focal point. I fill in around them with grapes, strawberries, blueberries, and the sliced apples, grouping colors together so the orange, red, and deep purple pop against each other. I finish by tucking the banana ghosts and any extra candy-eyed fruit into open spots.
Chill and Set
I like to pop the finished tray into the fridge for about ten minutes before serving, just long enough for everything to firm up slightly and look its best. This also gives me a moment to step back, check the arrangement, and add any last pieces of fruit where the tray looks a little bare.
Additional Tips for Making This Recipe Better
- I always cut my bananas last, right before guests arrive, since they brown faster than anything else on the tray.
- I like to chill my grapes and berries ahead of time so the whole platter feels cold and refreshing when it’s served.
- I’ve found that laying down a bed of lettuce or kale under the fruit gives the tray more height and makes cleanup so much easier.
- I try to keep a color pattern in mind as I go, alternating orange, purple, and green so the tray doesn’t look clumped together.
- I keep a damp paper towel nearby while arranging, since sticky fingers from the fruit juice can slow me down otherwise.
Common Mistakes to Avoid
- I used to cut all my fruit at once, and the apples and bananas turned brown before I even finished arranging the tray.
- I once skipped the lemon juice dip entirely, and by the time guests arrived, the platter looked tired instead of fresh.
- I made the mistake of using frozen fruit one year, and it turned mushy and watery as soon as it thawed on the tray.
- I’ve overcrowded the tray before, which actually hides the fun shapes instead of showing them off.
- I forgot to pat my fruit fully dry once, and the extra moisture made the candy eyes slide right off.
How to Serve Halloween Fruit Centerpiece
I love setting this tray in the middle of the table as the star of a Halloween spread, letting it sit alongside a small bowl of yogurt or chocolate dip. A sprinkle of mini chocolate chips or black sesame seeds over the top adds a nice spooky touch without much extra work. If you’re short on serving space, this also works beautifully split across two smaller trays placed on opposite ends of the table so everyone has easy access.
For an extra festive touch, I sometimes add a small cauldron of dip in the center and let the fruit “orbit” around it, which always gets a few smiles from the kids. This same approach to grouping colorful pieces around a centerpiece object works nicely if you’re also serving something like the halloween oreo pops recipe as a second treat station nearby.
Variations
- Swap peanut butter for sunbutter or cream cheese if you’re serving guests with nut allergies.
- Use honeydew and cantaloupe carved into ghost shapes for a dairy-free, allergy-friendly option.
- Add a handful of candy corn around the edges for extra color, if you don’t mind a little sugar mixed in.
- Try mandarin oranges instead of navel oranges for a smaller, bite-sized pumpkin look.
- Drizzle a little melted dark chocolate over the banana ghosts for a richer, dessert-like finish.
- Pair the tray with a sweeter option on the side, like the cobweb chocolate tart recipe , for guests who want something a little more indulgent.
Nutritional Information
Since this centerpiece is almost entirely fresh fruit, it stays light and naturally sweet without added sugar. Here’s a general idea of what one serving looks like:
- Calories: approximately 90 per serving
- Protein: 1 gram
- Carbohydrates: 22 grams
- Fat: 0.5 grams
Make Ahead and Storage
You can wash and prepare the oranges, grapes, and berries up to a day ahead of time and store them covered in the fridge. I just hold off on cutting the apples and bananas until closer to serving time so they stay fresh and don’t brown.
Once assembled, this fruit tray is best enjoyed within a few hours, since the cut fruit will start to soften the longer it sits out. If you have leftovers, store them in an airtight container in the fridge and they’ll stay good for about a day, though the bananas won’t hold up quite as well.
I don’t recommend freezing this one, since fresh fruit like grapes and berries turns mushy once thawed and loses the crisp texture that makes this centerpiece so enjoyable.
Why You’ll Love This Recipe
This fruit centerpiece checks every box for an easy, crowd-pleasing Halloween fruit idea, and here’s why I keep coming back to it every year.
- It’s incredibly easy to put together, since there’s no cooking involved and most of the work is just slicing and arranging.
- It’s naturally healthy, which makes it a nice balance next to all the candy and sugary treats at a Halloween party.
- It’s easy to customize, so you can swap in whatever fruit is in season or already sitting in your fridge.
- It looks far more impressive than the effort it actually takes, which makes it one of my favorite low-stress party projects.
- It works for every age group, from little kids who love the spooky faces to adults who appreciate a lighter snack option.
FAQs
Can I make this Halloween fruit tray ahead of time?
You can prep most of the fruit a day ahead, but I recommend waiting to cut the apples and bananas until just before serving so they stay fresh.
What fruit works best for a Halloween fruit bowl?
Oranges, apples, grapes, bananas, and berries all work wonderfully since their natural colors fit the Halloween theme so well.
How do I keep the apples and bananas from turning brown?
A quick dip in lemon juice mixed with a little water slows down browning and keeps the fruit looking fresh for hours.
Is this recipe good for a school Halloween party?
Yes, this is one of my favorite halloween fruit ideas for school since it’s healthy, easy to transport, and simple to make nut-free if needed.
Can I turn this into a bigger halloween fruit platter?
Absolutely, just double the fruit amounts and use a larger tray, keeping the same color grouping so the bigger platter still looks balanced.

Halloween Fruit Centerpiece Recipe
Ingredients
Method
- I start by washing every piece of fruit thoroughly and patting it dry with a clean towel. Then I slice the apples and bananas and toss them right away in a bowl with lemon juice and a splash of water. This simple step keeps everything looking fresh instead of turning brown while I’m still arranging the rest of the platter.
- Next, I peel the oranges carefully, keeping them whole so they look like little pumpkins. I use a small paring knife to cut simple jack-o’-lantern faces into one side of each orange, then I tuck a short piece of celery into the top to act as a stem. It’s a small detail, but it instantly makes the platter feel festive.
- I cut each banana in half lengthwise, then again to make four ghost-shaped quarters. Using a dab of peanut butter or yogurt, I stick two candy eyes onto each piece before setting them aside on wax paper. This step is quick, but I always do it last so the bananas don’t sit out too long before serving.
- Once every piece is ready, I start building the centerpiece on my largest tray, placing the orange pumpkins toward the center as the focal point. I fill in around them with grapes, strawberries, blueberries, and the sliced apples, grouping colors together so the orange, red, and deep purple pop against each other. I finish by tucking the banana ghosts and any extra candy-eyed fruit into open spots.
- I like to pop the finished tray into the fridge for about ten minutes before serving, just long enough for everything to firm up slightly and look its best. This also gives me a moment to step back, check the arrangement, and add any last pieces of fruit where the tray looks a little bare.
Notes
- I always cut my bananas last, right before guests arrive, since they brown faster than anything else on the tray.
- I like to chill my grapes and berries ahead of time so the whole platter feels cold and refreshing when it’s served.
- I’ve found that laying down a bed of lettuce or kale under the fruit gives the tray more height and makes cleanup so much easier.
- I try to keep a color pattern in mind as I go, alternating orange, purple, and green so the tray doesn’t look clumped together.
- I keep a damp paper towel nearby while arranging, since sticky fingers from the fruit juice can slow me down otherwise.