Cream Cheese Chicken Enchiladas Recipe: The Ultimate Comfort Food Recipe
I discovered this incredible cream cheese chicken enchilada recipe during a busy weeknight when I needed something that would wow my family without hours of prep work. After making these creamy, flavorful enchiladas dozens of times, I can confidently say they’ve become our go-to Mexican comfort food.
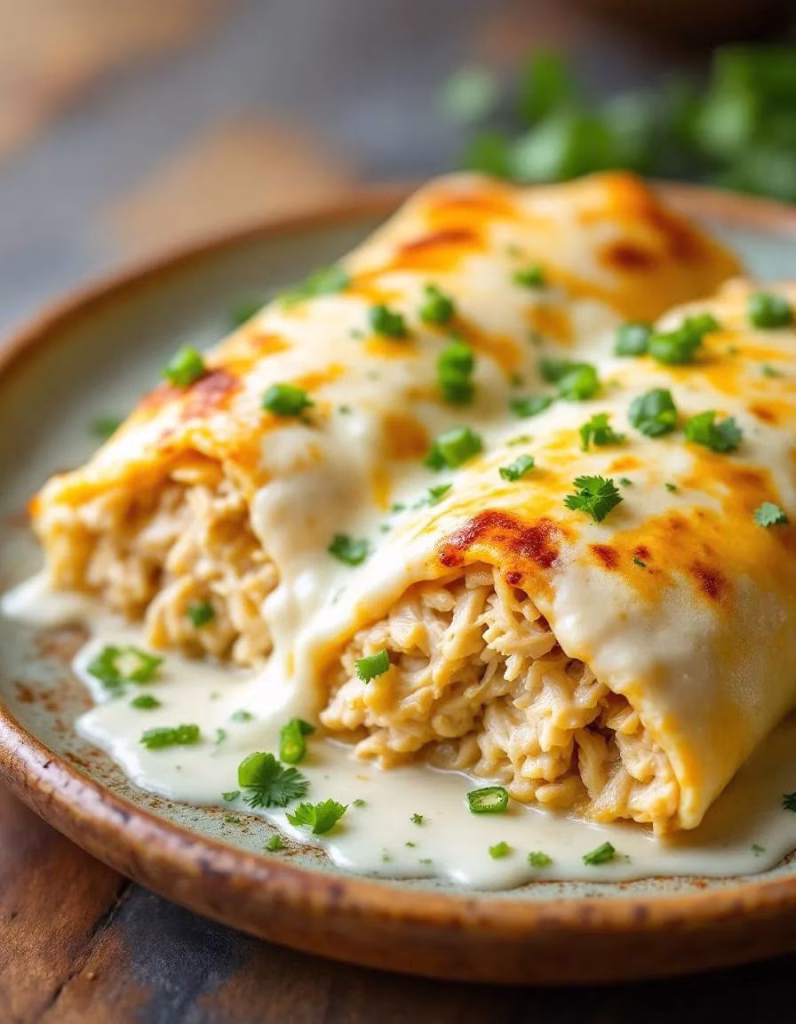
The combination of tender shredded chicken, rich cream cheese, and zesty spices creates a filling that’s both indulgent and satisfying. What makes this recipe special is how the cream cheese base creates incredibly moist enchiladas that never dry out, even as leftovers.
Trust me when I say these will become a staple in your dinner rotation once you experience their amazing flavor and ease of preparation.

Ingredients Section
- 3 skinless, boneless chicken breasts – Choose plump, even-sized breasts for consistent cooking. I prefer organic when possible for better flavor.
- 2 (8 ounce) packages cream cheese, softened – Let this sit at room temperature for at least 2 hours. Cold cream cheese won’t mix smoothly and creates lumps in your filling.
- 4 cloves garlic, crushed – Fresh garlic makes a huge difference here. Avoid pre-minced garlic from jars as it lacks the punch fresh cloves provide.
- 1 tablespoon ground cumin – This spice is essential for authentic Mexican flavor. Check your spice rack freshness; old cumin loses its earthy warmth.
- 2 teaspoons salt – Use fine sea salt for even distribution throughout the mixture.
- 1 teaspoon ground black pepper – Freshly ground pepper adds more flavor than pre-ground varieties.
- 1 (15 ounce) can petite diced tomatoes, drained – Drain thoroughly to prevent watery enchiladas. Save the liquid for soups or stews.
- 8 green onions, chopped – Use both white and green parts for maximum flavor and color contrast.
- 1 (7 ounce) can diced green chiles – Fire-roasted varieties add extra depth. Mild chiles work for sensitive palates.
- ½ cup chopped fresh cilantro – Never substitute dried cilantro. Fresh herbs brighten the entire dish significantly.
- ¼ cup lime juice – Freshly squeezed lime juice is crucial. Bottled lime juice lacks the bright acidity needed here.
- 2 cups shredded Cheddar cheese, divided – Grate your own cheese for better melting. Pre-shredded cheese contains anti-caking agents that affect texture.
- 10 large flour tortillas – Choose soft, pliable tortillas. Warm them slightly before rolling to prevent cracking.
- 1 (15 ounce) can green enchilada sauce – Look for brands with authentic flavor profiles without artificial additives.
Note: This recipe serves 10 people generously, making it perfect for family dinners or meal prep.
Variations
- Dairy-Free Options: Replace cream cheese with cashew cream cheese and use dairy-free cheddar shreds. Coconut cream can substitute for regular cream cheese if blended with nutritional yeast for cheesy flavor.
- Protein Alternatives: Swap chicken for pulled pork, turkey, or even black beans and corn for vegetarian versions. Leftover rotisserie chicken works perfectly and saves time.
- Heat Level Adjustments: Add jalapeños or chipotle peppers for spice lovers. Use poblano peppers for mild heat with smoky flavor. Hot sauce enthusiasts can incorporate their favorite varieties into the cream cheese mixture.
- Cheese Variations: Mix Monterey Jack with cheddar for creamier texture. Pepper Jack adds heat while maintaining creaminess. Queso fresco crumbles on top provide authentic Mexican restaurant flavor.
- Vegetable Additions: Sautéed bell peppers, mushrooms, or spinach add nutrition and color. Corn kernels provide sweetness and texture contrast. Diced onions can replace green onions for stronger flavor.
Cooking Time
- Prep Time: 20 minutes
- Cooking Time: 30 minutes
- Total Time: 50 minutes
Equipment You Need
- Large saucepan – For cooking chicken breasts until tender and fully cooked
- 9×13-inch baking dish – Essential for arranging enchiladas in single layer for even baking
- Large mixing bowl – Needed for combining cream cheese mixture and incorporating all ingredients
- Electric mixer or hand mixer – Makes cream cheese smooth and fluffy for better texture
- Sharp knife – For chopping vegetables and shredding cooked chicken efficiently
- Cutting board – Provides stable surface for ingredient preparation and chicken shredding
- Measuring cups and spoons – Ensures accurate ingredient proportions for consistent results
- Can opener – Required for opening canned ingredients like tomatoes and enchilada sauce
- Two forks – Perfect for shredding cooked chicken into bite-sized pieces
How to Make Cream Cheese Chicken Enchiladas?
Creating these delicious enchiladas involves three main phases: preparing the chicken, making the creamy filling, and assembling everything for baking. Each step builds flavor while maintaining simplicity that makes this recipe accessible for home cooks. The key is working with room-temperature ingredients and properly seasoned components.
Prepare the Chicken
Start by preheating your oven to 350 degrees F and greasing your 9×13-inch baking dish thoroughly. Bring a large saucepan of lightly salted water to a rolling boil over medium-high heat. Add the chicken breasts and cook for 7-10 minutes until they reach an internal temperature of 165°F and juices run clear when pierced with a knife.
Make the Cream Cheese Mixture
Remove the cooked chicken to a cutting board and let it cool completely before handling. In your large mixing bowl, beat the softened cream cheese until smooth and fluffy using an electric mixer. Add crushed garlic, cumin, salt, and pepper, beating until well incorporated and the mixture is creamy without lumps.
Combine the Filling Ingredients
Fold in the drained diced tomatoes, chopped green onions, diced green chiles, fresh cilantro, and lime juice into the cream cheese base. Add 1 cup of the shredded cheddar cheese and mix gently to distribute evenly. Shred the cooled chicken using two forks and fold it into the cream cheese mixture until every piece is coated.
Assemble the Enchiladas
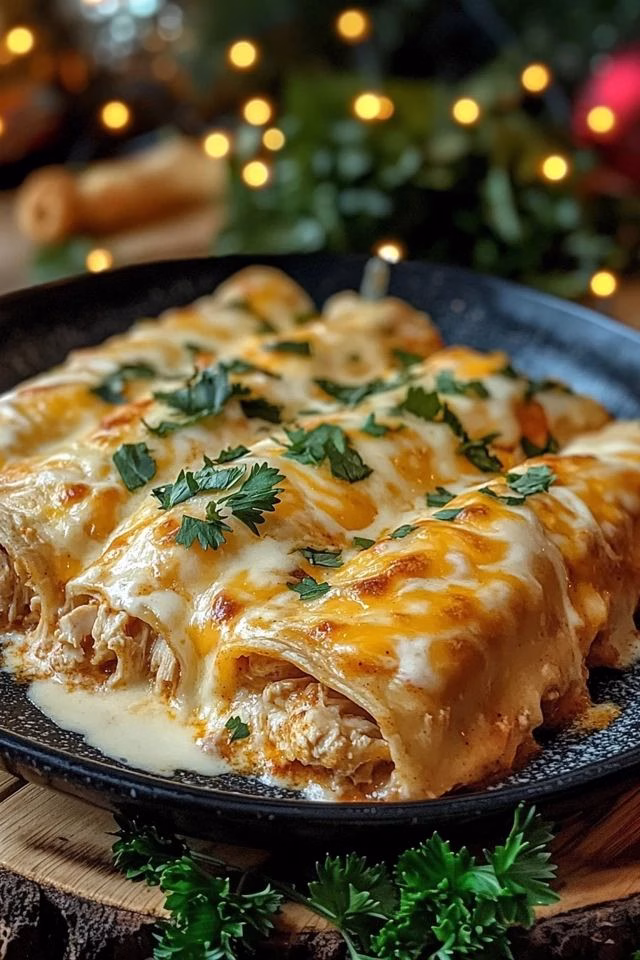
Place about ½ cup of the chicken mixture in the center of each flour tortilla, being careful not to overfill. Roll the tortilla tightly around the filling and place seam-side down in your prepared baking dish. Arrange all enchiladas snugly in the dish, then top with the remaining cheddar cheese and pour the green enchilada sauce evenly over everything.
Bake to Perfection
Bake the assembled enchiladas in your preheated oven for 20 minutes until the cheese is melted and bubbly. The enchiladas should be heated through and the sauce should be simmering around the edges. Let them rest for 5 minutes before serving to allow the filling to set slightly and prevent spillage when cutting.
Additional Tips for Making this Recipe Better
- I always cook extra chicken and freeze portions for future batches – this recipe is so good you’ll want to make it regularly.
- Warming the tortillas in a damp paper towel in the microwave for 30 seconds makes them more pliable and less likely to tear during rolling.
- I’ve found that mixing the filling a few hours ahead and refrigerating it actually improves the flavors as everything melds together beautifully.
- Don’t skip draining the tomatoes completely – I even press them with paper towels to remove excess moisture and prevent soggy enchiladas.
- I like to reserve some of the enchilada sauce to serve alongside for people who want extra sauce on their individual portions.
- Adding a handful of black olives to the filling gives a nice briny contrast to the rich cream cheese base.
- For meal prep, I assemble everything except the final cheese topping and sauce, then add those right before baking.
How to Serve Cream Cheese Chicken Enchiladas?
These enchiladas shine as the centerpiece of a complete Mexican feast that brings restaurant-quality dining to your table. Serve them immediately after resting, garnished with fresh chopped cilantro, diced tomatoes, and sliced green onions for color and freshness. A dollop of sour cream and a sprinkle of lime zest on each serving adds tangy richness that complements the creamy filling perfectly.
Pair these enchiladas with Mexican rice, refried beans, and a crisp side salad with lime vinaigrette for a well-rounded meal. Warm corn tortillas on the side allow guests to create impromptu tacos with any leftover filling. For beverages, serve with lime-infused sparkling water, cold beer, or traditional agua fresca.
Present the dish family-style in the baking dish, or plate individual portions with sides arranged attractively around each serving. A sprinkle of crumbled queso fresco and a few lime wedges make the presentation restaurant-worthy while providing guests options to customize their plates.
Nutritional Information
Here’s the approximate nutritional breakdown per serving based on the complete recipe divided into 10 portions:
- Calories: 576 calories per serving provide substantial energy for active families
- Protein: 24 grams supports muscle health and keeps you satisfied longer
- Carbohydrates: 50 grams mainly from tortillas provide quick energy for busy lifestyles
- Fat: 31 grams from cheese and cream cheese create the rich, satisfying texture
Make Ahead and Storage
Make Ahead: Assemble the entire dish up to 24 hours before baking, cover tightly with plastic wrap, and refrigerate. Add an extra 10 minutes to baking time when cooking from cold. You can also prepare the filling mixture up to 2 days ahead and store it separately from tortillas.
Storage: Leftover enchiladas keep beautifully in the refrigerator for up to 4 days when stored in airtight containers. The cream cheese base actually helps maintain moisture, preventing the typical drying out that plagues leftover Mexican food.
Freezing: These freeze exceptionally well for up to 3 months when wrapped individually in foil or stored in freezer-safe containers. Thaw overnight in the refrigerator before reheating for best texture and to ensure even heating throughout.
Reheating: Reheat individual portions in the microwave for 1-2 minutes, or warm the entire dish in a 325°F oven for 15-20 minutes until heated through. Add a splash of enchilada sauce if they seem dry after reheating to restore that saucy goodness.
Why You’ll Love This Recipe?
This recipe strikes the perfect balance between impressive flavor and manageable preparation, making it ideal for both weeknight dinners and entertaining guests.
- Incredibly Forgiving: The cream cheese base means these enchiladas stay moist and delicious even if slightly overcooked, making them perfect for nervous cooks or busy schedules. Unlike traditional enchiladas that can dry out quickly, these maintain their creamy texture and rich flavor even as leftovers.
- Crowd-Pleasing Appeal: The mild, creamy flavors appeal to both adults and children, while the customizable toppings let everyone personalize their plate. I’ve never served these without getting requests for the recipe, and they’re always the first dish to disappear at potlucks.
- Make-Ahead Friendly: Perfect for meal prep enthusiasts and busy parents, these assemble easily ahead of time and actually improve in flavor overnight. The convenience factor makes them ideal for Sunday meal prep or preparing for company.
- Budget-Friendly Comfort: Using simple ingredients that are often pantry staples, this recipe feeds a crowd without breaking the bank. The hearty portions and satisfying nature mean a little goes a long way, making it economical for large families.
- Versatile Foundation: Once you master this base recipe, endless variations become possible – from adding different vegetables to switching up proteins or adjusting spice levels. It’s become my go-to template for using up leftover ingredients creatively.
Cream Cheese Chicken Enchiladas Recipe
Ingredients
Method
- Start by preheating your oven to 350 degrees F and greasing your 9×13-inch baking dish thoroughly. Bring a large saucepan of lightly salted water to a rolling boil over medium-high heat. Add the chicken breasts and cook for 7-10 minutes until they reach an internal temperature of 165°F and juices run clear when pierced with a knife.
- Remove the cooked chicken to a cutting board and let it cool completely before handling. In your large mixing bowl, beat the softened cream cheese until smooth and fluffy using an electric mixer. Add crushed garlic, cumin, salt, and pepper, beating until well incorporated and the mixture is creamy without lumps.
- Fold in the drained diced tomatoes, chopped green onions, diced green chiles, fresh cilantro, and lime juice into the cream cheese base. Add 1 cup of the shredded cheddar cheese and mix gently to distribute evenly. Shred the cooled chicken using two forks and fold it into the cream cheese mixture until every piece is coated.
- Place about ½ cup of the chicken mixture in the center of each flour tortilla, being careful not to overfill. Roll the tortilla tightly around the filling and place seam-side down in your prepared baking dish. Arrange all enchiladas snugly in the dish, then top with the remaining cheddar cheese and pour the green enchilada sauce evenly over everything.
- Bake the assembled enchiladas in your preheated oven for 20 minutes until the cheese is melted and bubbly. The enchiladas should be heated through and the sauce should be simmering around the edges. Let them rest for 5 minutes before serving to allow the filling to set slightly and prevent spillage when cutting.
Notes
- I always cook extra chicken and freeze portions for future batches – this recipe is so good you’ll want to make it regularly.
- Warming the tortillas in a damp paper towel in the microwave for 30 seconds makes them more pliable and less likely to tear during rolling.
- I’ve found that mixing the filling a few hours ahead and refrigerating it actually improves the flavors as everything melds together beautifully.
- Don’t skip draining the tomatoes completely – I even press them with paper towels to remove excess moisture and prevent soggy enchiladas.
- I like to reserve some of the enchilada sauce to serve alongside for people who want extra sauce on their individual portions.
- Adding a handful of black olives to the filling gives a nice briny contrast to the rich cream cheese base.
- For meal prep, I assemble everything except the final cheese topping and sauce, then add those right before baking.