Coffee Mousse Recipe | Rich & Creamy Espresso Dessert
I still can’t believe how easy and delicious this Coffee Mousse Recipe turned out when I made it last weekend! If you’re like me and adore coffee in any form, you’ll love this too. It’s silky, fluffy, and has the perfect balance of sweetness and coffee flavor.
Whether you’re looking for something fancy to serve at a dinner party or just craving a sweet pick-me-up, this dessert checks all the boxes. You can also enjoy similar creative desserts like Oreo Sushi Recipe for another fun twist on classic flavors.
And the best part? It only takes a handful of ingredients and very little time to whip up. The creamy texture combined with the bold coffee taste makes every spoonful feel like a luxurious indulgence. Trust me, you’ll want to make this dessert again and again.
Why You’ll Love This Recipe?
This coffee mousse recipe will easily become one of your favorite desserts. Here’s why it’s so special!
Easy and No-Bake
You don’t need any baking skills or fancy equipment to make it. A simple electric mixer and a few bowls are all you need. Even beginners can tackle this recipe with ease, and there’s no need to turn on the oven.
Perfect for Coffee Lovers
The bold coffee flavor paired with rich chocolate creates a dessert that feels like a delicious coffee shop treat. It’s like your favorite iced coffee, but in dessert form! This is sure to satisfy your caffeine cravings in a whole new way.
Quick and Convenient
With only five ingredients and minimal prep time, you can have an impressive dessert ready in no time! It’s a life-saver when you’re short on time but still want something delicious and visually stunning to serve.
Customizable
Whether you want to make it sugar-free, dairy-free, or extra indulgent, this recipe adapts beautifully to your preferences. You can even switch up the flavor by adding different extracts or toppings, making it a versatile choice for any dietary need.
Light Yet Decadent
Each spoonful melts in your mouth without being overly heavy, making it perfect even after a big meal. It delivers all the richness of a dessert but with a surprisingly light texture that won’t leave you feeling stuffed.
Cooking Time
Here’s a quick look at how much time is needed to make this delightful dessert.
- Prep Time: 5 minutes
- Cook Time: 5 minutes
- Total Time: 10 minutes
Ingredients
- Heavy cream
- Milk
- Espresso or strong coffee (cooled)
- Powdered sugar
- Dark chocolate (melted and cooled)
Variations
This coffee mousse is super versatile. Here are a few ways you can switch it up!
- Decaf Option: Use decaffeinated coffee for a caffeine-free version.
- Sugar-Free: Replace powdered sugar with a zero-calorie sweetener and use sugar-free chocolate chips for a healthier treat.
- Extra Flavor Kick: Add a teaspoon of vanilla or a pinch of cinnamon for added depth of flavor. You can also try other comforting seasonal desserts like Pumpkin Pie Recipe for a cozy fall-inspired treat.
Equipment You’ll Need
- Mixer: Essential for whipping the cream.
- Heatproof Bowl: To melt the chocolate gently.
- Mixing Bowls: For combining the ingredients together.
- Serving Glasses: For the final presentation.
How to Make Coffee Mousse?
Follow these steps to create a fluffy and creamy coffee mousse that tastes as good as it looks!
Step 1: Whip the Cream
Start by chilling your mixing bowl and whisk attachment in the fridge for about 10 minutes. Once cold, pour in the heavy cream and beat it with a mixer until stiff peaks form. This will give the mousse its light and airy texture.
Step 2: Combine the Main Ingredients
In a separate bowl, mix the cooled coffee, milk, powdered sugar, and melted chocolate. Stir gently until all the ingredients combine into a velvety, smooth mixture.
Step 3: Fold It All Together
Take your whipped cream and slowly fold it into the chocolate and coffee mixture in batches. Be careful to fold gently, so you don’t lose the airiness of the whipped cream.
Step 4: Assemble the Mousse
Spoon the mixture evenly into serving glasses or bowls. Smooth out the tops with a spatula if you like, but leaving them textured also works!
Step 5: Chill and Serve
Refrigerate the mousse for at least 2 hours to allow the flavors to marry and the texture to firm up. Serve chilled with a garnish of your choice, and enjoy every creamy bite!
Tips for Making the Recipe
Here are some helpful tips to ensure your dessert turns out perfect every time:
Chill Your Mixing Tools: Cold tools help the cream whip faster and better, giving it that perfect fluffy consistency.
Careful with the Coffee Strength: Use freshly brewed, strong coffee or espresso for the best flavor, but be careful not to make it too overpowering.
Patience with Folding: Take your time folding the whipped cream into the mixture so it doesn’t deflate. It’s worth the careful effort!
How to Serve Coffee Mousse?
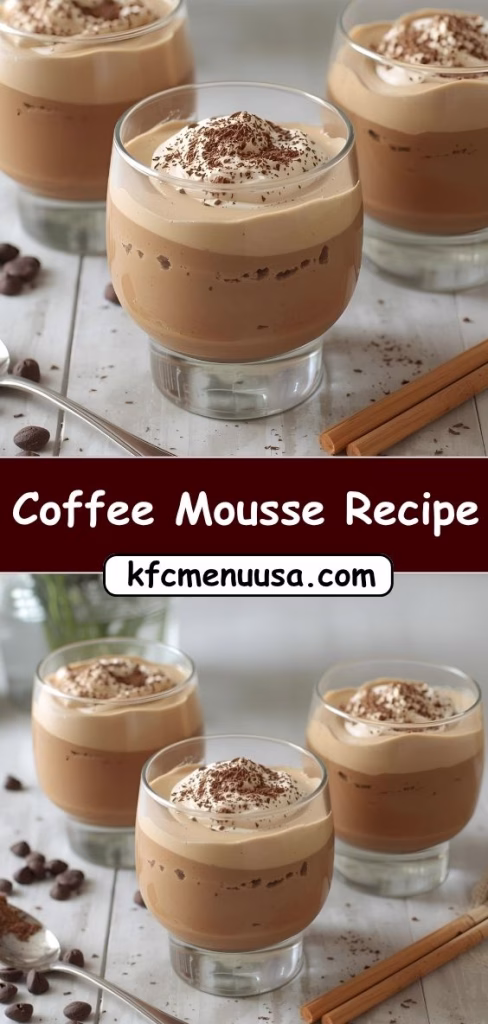
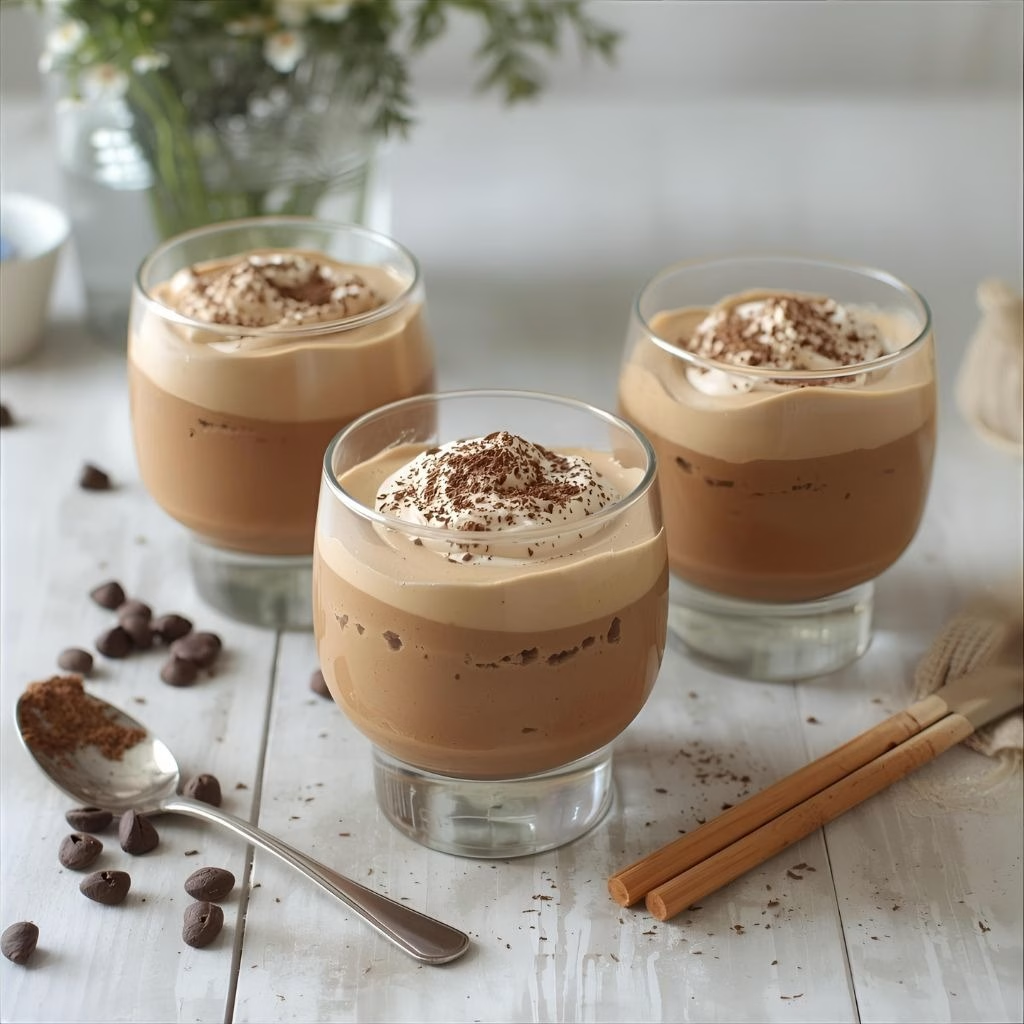
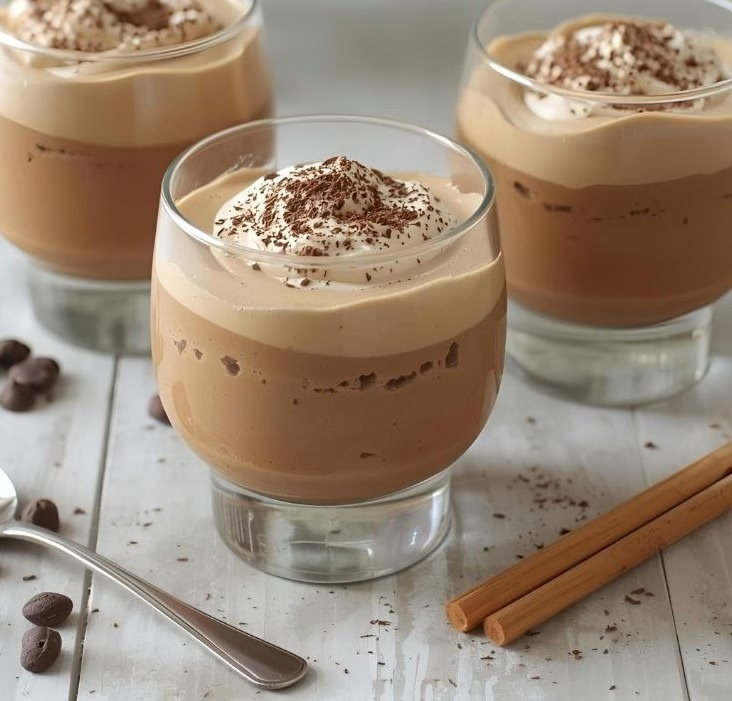
Coffee mousse is a showstopper on its own, but a few thoughtful finishes can make it truly spectacular. Top each serving with cocoa powder, chocolate curls, or a few chocolate-covered coffee beans for a beautiful touch. For extra indulgence, you can layer the mousse in clear glasses with crushed cookies or cake crumbs for an elegant twist. Serve with a side of espresso or a warm latte for that ultimate café vibe.
Nutritional Information
Here’s a quick glance at the nutritional profile per serving of coffee mousse.
- Calories: 271
- Protein: 3g
- Carbohydrates: 15g
- Fat: 23g
Make Ahead and Storage
This dessert is perfect for prepping ahead of time!
- Refrigeration: Store the mousse in the fridge, covered with plastic wrap or a lid, for up to 2 weeks. The flavors deepen as it sits.
- Freezing: You can freeze the mousse for up to 6 months in an airtight container. Allow it to thaw overnight in the fridge when you’re ready to enjoy.
Coffee mousse is a delightful dessert that feels decadent yet is incredibly simple to make. It’s sure to impress guests at dinner parties or provide a luxurious pick-me-up at any time. Give it a try, and you’ll see why it’s a favorite among coffee and dessert enthusiasts alike!
Coffee Mousse Recipe
Ingredients
Method
- Start by chilling your mixing bowl and whisk attachment in the fridge for about 10 minutes. Once cold, pour in the heavy cream and beat it with a mixer until stiff peaks form. This will give the mousse its light and airy texture.
- In a separate bowl, mix the cooled coffee, milk, powdered sugar, and melted chocolate. Stir gently until all the ingredients combine into a velvety, smooth mixture.
- Take your whipped cream and slowly fold it into the chocolate and coffee mixture in batches. Be careful to fold gently, so you don’t lose the airiness of the whipped cream.
- Spoon the mixture evenly into serving glasses or bowls. Smooth out the tops with a spatula if you like, but leaving them textured also works!
- Refrigerate the mousse for at least 2 hours to allow the flavors to marry and the texture to firm up. Serve chilled with a garnish of your choice, and enjoy every creamy bite!