The Ultimate Gingerbread House Recipe Guide
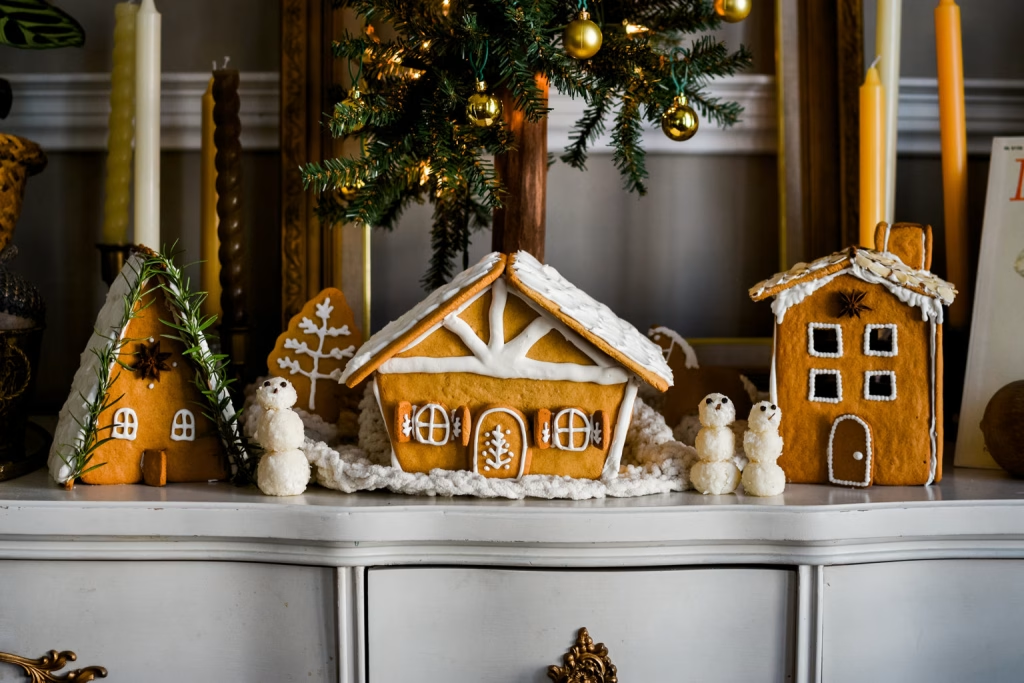
I’ve always loved making gingerbread houses because they’re more than just cookies—they’re a little holiday adventure.
The first time I made one, I remember the smell of warm spices filling my kitchen while I struggled to keep the roof from sliding off (yes, it happened!). Over the years, I’ve learned that patience and the right icing make all the difference.
Now, every time I make a gingerbread house, it feels like I’m creating a piece of edible art to share with family and friends. Trust me, once you try this recipe, you’ll be hooked on the festive fun just like me.

Ingredients
Here’s everything you’ll need to bring your gingerbread house to life. I’ve added some notes and pro tips to help you get the best results.
For the Gingerbread:
- 3 cups all-purpose flour – stick to all-purpose for sturdiness (whole wheat works, but the texture is denser).
- 1 teaspoon baking soda – helps the dough rise just slightly without puffing too much.
- 1 teaspoon salt – balances the sweetness beautifully.
- 1 tablespoon ground ginger – gives that classic warm bite.
- 1 tablespoon ground cinnamon – adds depth and a cozy aroma.
- 1/2 teaspoon ground cloves – a little goes a long way for spiced richness.
- 1/2 cup unsalted butter, softened – room temperature butter creams better than cold.
- 3/4 cup brown sugar – gives moisture and a deeper caramel sweetness (coconut sugar works too).
- 1 large egg – binds everything together.
- 1/2 cup molasses – the star ingredient for color, flavor, and chewiness.
- 1 teaspoon vanilla extract – rounds out the flavor.
For the Royal Icing (the “glue”):
- 4 cups powdered sugar – sifted for a smooth, lump-free icing.
- 3 egg whites (pasteurized) or 1/4 cup meringue powder + 1/2 cup water – egg whites make icing firm, meringue powder is safer for kids.
- 1/2 teaspoon cream of tartar – helps the icing set and stay stable.
Optional Decorations:
Candy canes, gumdrops, mini marshmallows, peppermint candies, chocolate buttons, sprinkles, or even healthier options like dried fruit and coconut “snow.”
Note: This recipe makes enough for one medium gingerbread house serving several people.
Variations
- Dairy-free: Swap butter with coconut oil or vegan butter.
- Sugar-free: Use a sugar substitute like monk fruit or stevia in the dough.
- Flavor boost: Add orange zest or a dash of nutmeg to the dough for extra holiday flair.
- Healthier twist: Replace half the all-purpose flour with oat flour for a rustic flavor.
Cooking Time
- Prep Time: 30–45 minutes
- Chill Time: 1 hour
- Cooking Time: 25–30 minutes
- Decoration Time: 1–2 hours
- Total Time: About 3.5–4 hours
Equipment You Need
- Rolling pin – to roll dough evenly without cracks.
- Parchment paper or silicone baking mat – prevents sticking and makes cleanup easier.
- Cookie cutters or paper templates – for precise house shapes.
- Sharp knife or pizza cutter – for clean, straight edges.
- Stand mixer or hand mixer – saves time when mixing dough and icing.
- Baking sheets – heavy-duty ones help bake pieces evenly.
- Piping bags with tips – essential for gluing and decorating.
- Cooling rack – lets the pieces cool and firm up properly.
How to Make Gingerbread House Recipe?
Prepare the Dough
First, I mix all the dry ingredients—flour, baking soda, salt, and spices—so the flavors combine evenly. In another bowl, I beat the butter and brown sugar until light and fluffy, which makes the dough tender. Then I add the egg, molasses, and vanilla, mixing well before slowly folding in the dry mix. The dough will be sticky, so I divide it into two portions, wrap them in plastic, and chill for at least an hour. This step keeps the shapes from spreading while baking.
Roll and Cut the Pieces
Once the dough is chilled, I preheat the oven to 350°F (175°C). I roll the dough to about 1/4-inch thick on parchment paper so it won’t stick. Using templates or cutters, I cut out walls, roof panels, and doors. Clean edges are important here since they’ll need to fit together later. I carefully transfer them to lined baking sheets.
Bake the Gingerbread
The pieces bake for about 25–30 minutes, just until the edges are firm. They might feel slightly soft when warm, but they’ll harden as they cool. I always let them rest on a wire rack until completely cooled—if you rush this step, the icing won’t hold.
Make the Royal Icing
While the gingerbread cools, I whip egg whites (or meringue powder with water) and powdered sugar with cream of tartar until stiff peaks form. If the icing feels too thick, I add a drop or two of water. If it’s runny, I mix in more sugar. This icing is the glue that holds everything together.
Assemble the House
This is the fun (and sometimes tricky) part! I pipe thick lines of icing along the edges and press the walls together, holding them for a few seconds until stable. Once the base is firm, I attach the roof. To avoid collapsing, I let the house dry for at least an hour before decorating.
Decorate Your House
Finally, I let creativity take over! I use the icing to attach candies, marshmallows, and sprinkles, sometimes even dusting coconut flakes for a snowy effect. This part is messy but magical—it’s where the gingerbread house really comes alive.

Additional Tips for Making this Recipe Better
Over time, I’ve learned a few tricks that make this recipe much smoother and more enjoyable:
- I always prep my candies and decorations before I start assembling—it saves me from sticky fingers later.
- If I want extra-strong walls, I bake the pieces a couple of minutes longer for sturdiness.
- I sometimes make the dough the night before so I can focus just on decorating the next day.
- I keep extra icing handy in case any pieces slide or need “repairs.”
How to Serve Gingerbread House Recipe?
Even though a gingerbread house looks like a display piece, it’s still edible! I like breaking off pieces and enjoying them with a hot cup of cocoa. For parties, I sometimes cut out smaller gingerbread cookies alongside the house for guests to nibble without destroying the centerpiece. You can also wrap pieces in cellophane bags as festive edible gifts.
Nutritional Information
Here’s a rough breakdown per serving (varies by decoration):
- Calories: 300
- Protein: 4g
- Carbohydrates: 55g
- Fat: 8g
Make Ahead and Storage
Storing at Room Temperature
Once assembled, I keep the gingerbread house in a cool, dry place covered lightly with plastic wrap. It lasts about 1 week for eating, though as a display, it can sit longer.
Freezing
I sometimes freeze the unbaked dough or even the baked pieces. Wrapped tightly, they last up to 2 months. Just thaw before assembling.
Reheating
If I’m eating leftover pieces, a quick 10-second microwave zap makes them soft and delicious again.
Why You’ll Love This Recipe?
This gingerbread house recipe isn’t just about baking—it’s about creating memories. Here’s why I keep coming back to it year after year:
- It’s beginner-friendly yet fun for experienced bakers too.
- You can customize everything—from flavors to decorations.
- It doubles as both a festive centerpiece and a tasty dessert.
- It’s easy to make ahead and enjoy stress-free during the holidays.
- It brings everyone together for a hands-on, creative activity.
Gingerbread House Recipe
Ingredients
Method
- First, I mix all the dry ingredients—flour, baking soda, salt, and spices—so the flavors combine evenly. In another bowl, I beat the butter and brown sugar until light and fluffy, which makes the dough tender.
- Then I add the egg, molasses, and vanilla, mixing well before slowly folding in the dry mix. The dough will be sticky, so I divide it into two portions, wrap them in plastic, and chill for at least an hour. This step keeps the shapes from spreading while baking.
- Once the dough is chilled, I preheat the oven to 350°F (175°C). I roll the dough to about 1/4-inch thick on parchment paper so it won’t stick. Using templates or cutters, I cut out walls, roof panels, and doors. Clean edges are important here since they’ll need to fit together later. I carefully transfer them to lined baking sheets.
- The pieces bake for about 25–30 minutes, just until the edges are firm. They might feel slightly soft when warm, but they’ll harden as they cool. I always let them rest on a wire rack until completely cooled—if you rush this step, the icing won’t hold.
- While the gingerbread cools, I whip egg whites (or meringue powder with water) and powdered sugar with cream of tartar until stiff peaks form. If the icing feels too thick, I add a drop or two of water. If it’s runny, I mix in more sugar.
- This icing is the glue that holds everything together.
- This is the fun (and sometimes tricky) part! I pipe thick lines of icing along the edges and press the walls together, holding them for a few seconds until stable. Once the base is firm, I attach the roof. To avoid collapsing, I let the house dry for at least an hour before decorating.
- Finally, I let creativity take over! I use the icing to attach candies, marshmallows, and sprinkles, sometimes even dusting coconut flakes for a snowy effect. This part is messy but magical—it’s where the gingerbread house really comes alive
Notes
- I always prep my candies and decorations before I start assembling—it saves me from sticky fingers later.
- If I want extra-strong walls, I bake the pieces a couple of minutes longer for sturdiness.
- I sometimes make the dough the night before so I can focus just on decorating the next day.
- I keep extra icing handy in case any pieces slide or need “repairs.”