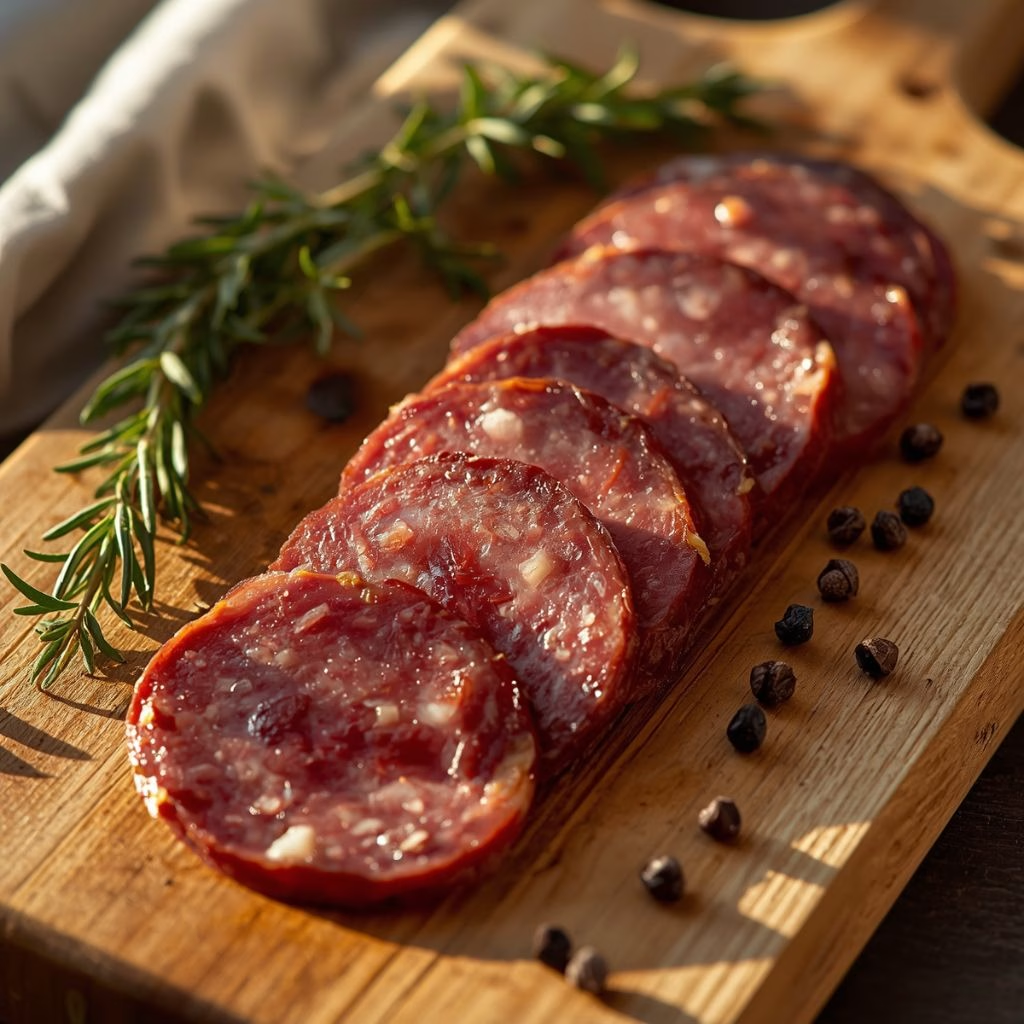
I still remember the first time I pulled a fully smoked beef salami off my smoker and sliced into it, watching that deep red color and marbled fat catch the light. I made this recipe using grass fed beef because I wanted a cleaner, more natural flavor without relying on hormones or antibiotics in the meat.
It took a bit of patience, but the payoff was a firm, smoky, savory salami that beat anything I had bought from a store. I love that I can control exactly what goes into it, from the spice blend to how long it smokes. Once you try making your own, I promise you will never look at store bought salami the same way again.

Ingredients
- 5 pounds grass fed beef chuck or brisket, cut into cubes (grass fed beef has less fat marbling than grain fed, so I add a bit of beef fat to keep the salami from drying out)
- 1 pound grass fed beef fat, cubed (do not skip this, since fat is what keeps sliced salami moist and tender after smoking)
- 3 tablespoons kosher salt (regular table salt is too fine and can make the mixture overly salty, so stick with kosher or curing salt blends)
- 1 teaspoon curing salt (Prague Powder No. 1), used specifically for the fermentation and smoking process to keep the meat safe
- 2 tablespoons cracked black pepper (freshly cracked gives a much bolder bite than pre-ground pepper)
- 1 tablespoon garlic powder
- 1 tablespoon smoked paprika (this boosts the smoky flavor even before the meat hits the smoker)
- 1 teaspoon crushed red pepper flakes (optional, for a little heat)
- 1 teaspoon ground mustard seed
- 1/4 cup dry red wine or beef broth (helps bind the spices to the meat and adds depth)
- 1/4 cup dry milk powder or soy protein concentrate (acts as a binder and helps the salami hold its shape when sliced)
- Natural or collagen casings, soaked according to package directions
- Beef starter culture (optional but recommended for a traditional tangy fermented flavor)
Note: This recipe makes about 6 pounds of finished salami, which is enough for roughly 20 to 24 servings depending on how thick you slice it.
Variations
- Swap the beef fat for pork fat if you are not strictly avoiding pork products, since it renders a bit softer texture.
- Use a sugar free curing blend if you want to keep this completely sugar free, since some commercial cure mixes include dextrose.
- Add fennel seed and orange zest for an Italian style twist on the classic beef salami flavor.
- Try smoked chili powder in place of smoked paprika for a spicier, more rustic profile.
- Go dairy free by using soy protein concentrate instead of dry milk powder as your binder.
- Mix in a splash of bourbon instead of red wine for a slightly sweeter, smokier undertone.
Cooking Time
- Prep Time: 45 minutes
- Cooking Time: 4 to 6 hours (smoking time)
- Total Time: 3 days (including fermentation and resting time) plus 6 hours active smoking
Equipment You Need
- Meat grinder – breaks down the beef and fat into a workable, even texture
- Stand mixer or large mixing bowl – helps combine spices and binders evenly through the meat
- Sausage stuffer – fills the casings tightly without air pockets
- Digital meat thermometer – checks internal temperature so the salami smokes safely
- Smoker – provides the low, steady heat and smoke flavor this recipe depends on
- Butcher’s twine – ties off the ends of the casings securely
- Fermentation chamber or warm spot in the kitchen – lets the culture develop flavor before smoking
How to Make Grass Fed Smoked Beef Salami Recipe?
Making salami at home is really a process of grinding, seasoning, stuffing, fermenting, and smoking in that order. I know it looks like a long list, but each stage is simple on its own. Here is exactly how I break it down every time I make a batch.
Grind the Meat and Fat
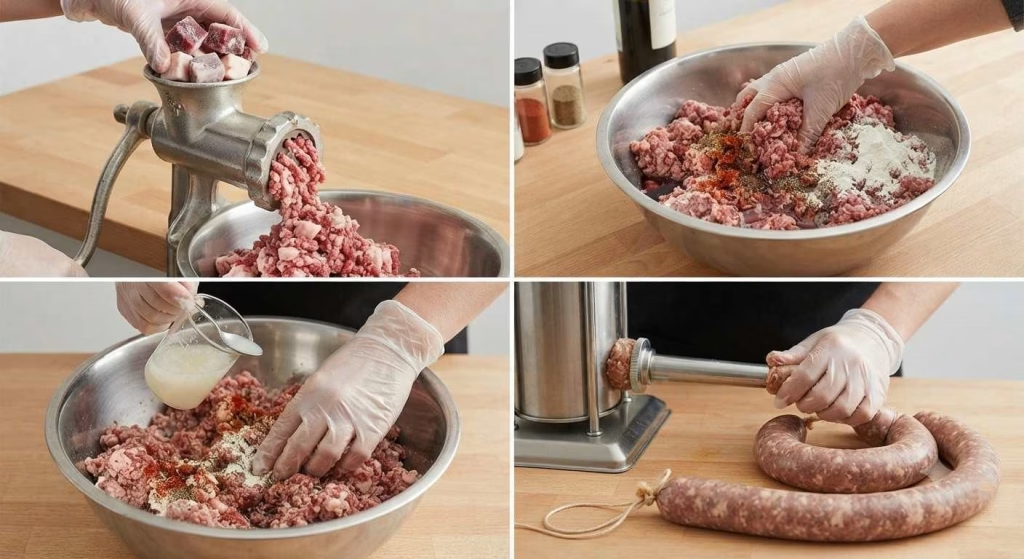
Cut your grass fed beef and beef fat into cubes that fit your grinder easily. Keep everything cold, even partially frozen, since warm fat smears instead of grinding cleanly. Run it all through a coarse grinding plate first for the best texture in your final salami.
Mix in the Seasonings
Add your salt, curing salt, pepper, garlic powder, smoked paprika, and any optional spices to the ground meat. Pour in the wine or broth along with the milk powder or soy protein concentrate. Mix thoroughly by hand or in a stand mixer until the mixture feels tacky and holds together.
Add the Starter Culture
If you are using a starter culture, dissolve it in a small amount of cool water first. Fold it into the meat mixture gently so it distributes evenly throughout. This step is what gives traditional salami its tangy, slightly fermented flavor.
Stuff the Casings
Load your seasoned meat mixture into the sausage stuffer and fill your prepared casings snugly. Work slowly to avoid trapping air pockets, which can cause spoilage spots later. Tie off both ends tightly with butcher’s twine once each casing is filled.
Ferment the Salami
Hang the stuffed salami in a warm spot, around 70 to 85 degrees Fahrenheit, for 12 to 24 hours. This fermentation step allows the culture to develop that classic tang and helps preserve the meat safely. Keep humidity moderate so the casings do not dry out too fast.
Smoke the Salami
Set your smoker to a low temperature, around 100 to 130 degrees Fahrenheit, and gradually increase it over several hours. Smoke the salami until the internal temperature reaches 152 degrees Fahrenheit, which usually takes 4 to 6 hours.
Use a digital thermometer throughout so you never have to guess. If you enjoy experimenting with smoky flavors, the Grilled Aubergine Vegan Summer Stack Recipe is another great homemade recipe to try.
Cool and Slice
Once smoked, let the salami hang at room temperature until it cools completely, then refrigerate for a few hours before slicing. Slice thinly with a sharp knife or meat slicer for the best texture and presentation. Store any extra in the refrigerator right away to keep it fresh.

Additional Tips for Making This Recipe Better
I have made this recipe enough times to pick up a few tricks that genuinely make a difference.
- I always keep my meat and fat ice cold before grinding, since this keeps the fat from smearing and ruining the texture.
- I invested in a simple digital thermometer with a probe, because guessing the internal temperature is not worth the risk with cured meats.
- I let my salami ferment a little longer when my kitchen runs cooler, since the culture needs enough time and warmth to activate properly.
- I never rush the smoking stage, since raising the temperature too fast can cause the fat to render out before the inside finishes cooking.
- I label and date every batch I make, so I always know exactly how long it has been resting in the fridge.
How to Serve Grass Fed Smoked Beef Salami
I like to slice this salami thin and fan it out on a wooden board next to a few sharp cheeses, olives, and crusty bread. Adding some grainy mustard or a small dish of honey on the side brings out the smoky and savory notes even more.
For a casual gathering, I roll a few slices around a pickle spear or cube the salami into a pasta salad for extra protein. It also works beautifully layered into a sandwich with arugula and a swipe of dijon mustard.
If you enjoy bold, savory meals with a touch of sweetness and spice, the Hot Honey Pepperoni Ricotta Pizza Recipe pairs well with the same flavor profile.

Nutritional Information
Here is a general idea of what you can expect per serving of this homemade salami.
- Calories: 110 per 2-ounce serving
- Protein: 9 grams
- Carbohydrates: 1 gram
- Fat: 8 grams
Make Ahead and Storage
Refrigerating: Once your salami has cooled and been sliced or left whole, wrap it tightly and store it in the refrigerator. It stays fresh for up to three weeks when kept well wrapped and away from moisture.
Freezing: You can freeze whole salami logs for up to six months without much change in flavor or texture. Wrap them tightly in plastic and then foil to prevent freezer burn before placing them in the freezer.
Reheating: This salami is fully cooked and ready to eat cold, so reheating is not necessary. If you prefer it slightly warm, let slices sit at room temperature for about ten minutes before serving.
Why You’ll Love This Recipe
This homemade salami checks a lot of boxes for anyone who loves bold, smoky flavors and knows exactly what is in their food.
- I love that I control every ingredient, so there are no unnecessary fillers or mystery additives in every bite.
- It is easy to customize, since you can swap spices or add ins to match whatever flavor profile you are craving that week.
- It works for so many occasions, from casual snacking to elegant cheese boards at a dinner party.
- Using grass fed beef gives this salami a cleaner, richer flavor compared to standard grain fed options.
- It stores well, which means one batch can stretch across weeks of lunches, snacks, and appetizers.

Grass Fed Smoked Beef Salami Recipe
Ingredients
Method
- Cut your grass fed beef and beef fat into cubes that fit your grinder easily. Keep everything cold, even partially frozen, since warm fat smears instead of grinding cleanly. Run it all through a coarse grinding plate first for the best texture in your final salami.
- Add your salt, curing salt, pepper, garlic powder, smoked paprika, and any optional spices to the ground meat. Pour in the wine or broth along with the milk powder or soy protein concentrate. Mix thoroughly by hand or in a stand mixer until the mixture feels tacky and holds together.
- If you are using a starter culture, dissolve it in a small amount of cool water first. Fold it into the meat mixture gently so it distributes evenly throughout. This step is what gives traditional salami its tangy, slightly fermented flavor.
- Load your seasoned meat mixture into the sausage stuffer and fill your prepared casings snugly. Work slowly to avoid trapping air pockets, which can cause spoilage spots later. Tie off both ends tightly with butcher’s twine once each casing is filled.
- Hang the stuffed salami in a warm spot, around 70 to 85 degrees Fahrenheit, for 12 to 24 hours. This fermentation step allows the culture to develop that classic tang and helps preserve the meat safely. Keep humidity moderate so the casings do not dry out too fast.
- Set your smoker to a low temperature, around 100 to 130 degrees Fahrenheit, and gradually increase it over several hours. Smoke the salami until the internal temperature reaches 152 degrees Fahrenheit, which usually takes 4 to 6 hours. Use a digital thermometer throughout so you never have to guess.
- Once smoked, let the salami hang at room temperature until it cools completely, then refrigerate for a few hours before slicing. Slice thinly with a sharp knife or meat slicer for the best texture and presentation. Store any extra in the refrigerator right away to keep it fresh.
Notes
- I always keep my meat and fat ice cold before grinding, since this keeps the fat from smearing and ruining the texture.
- I invested in a simple digital thermometer with a probe, because guessing the internal temperature is not worth the risk with cured meats.
- I let my salami ferment a little longer when my kitchen runs cooler, since the culture needs enough time and warmth to activate properly.
- I never rush the smoking stage, since raising the temperature too fast can cause the fat to render out before the inside finishes cooking.
- I label and date every batch I make, so I always know exactly how long it has been resting in the fridge.