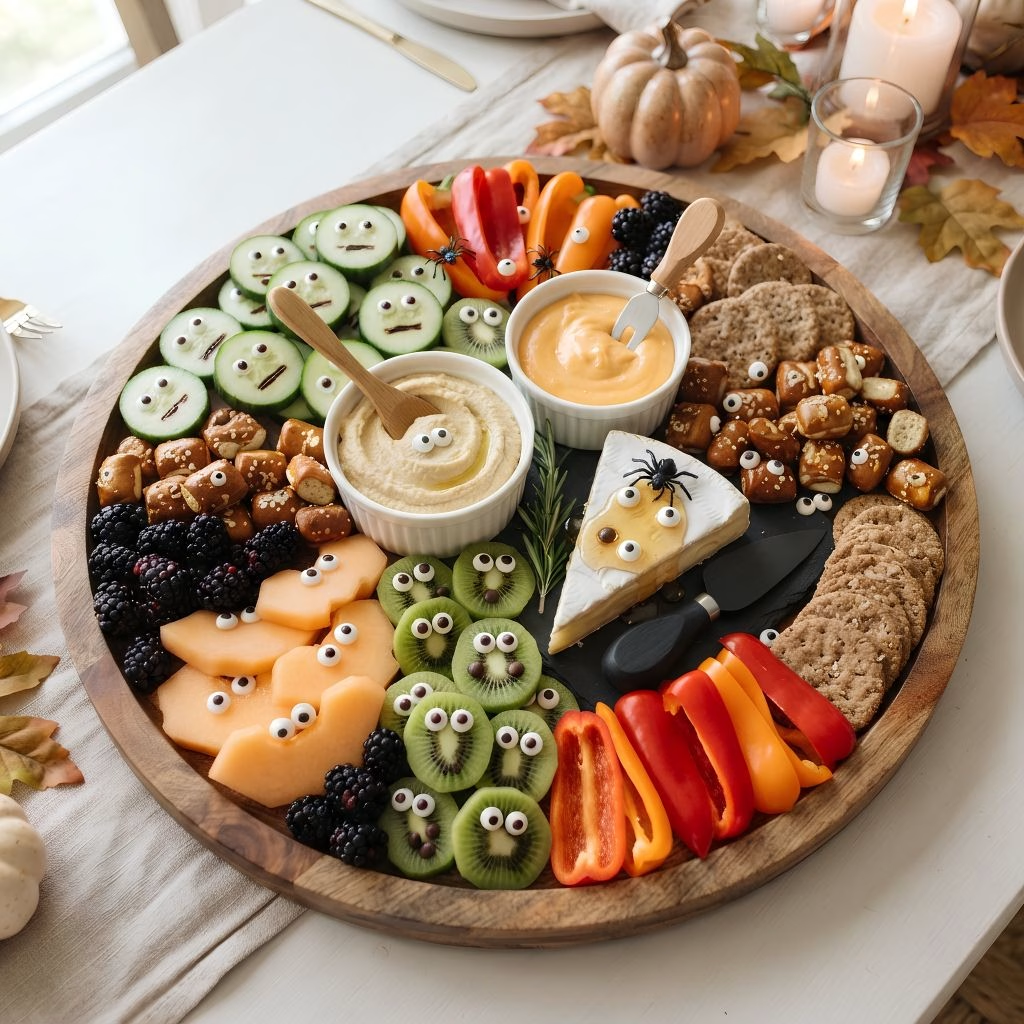
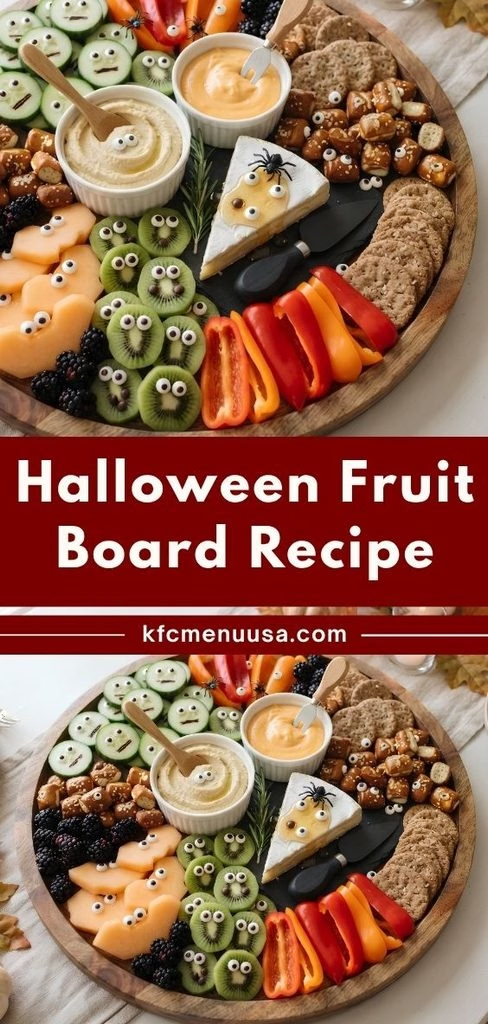
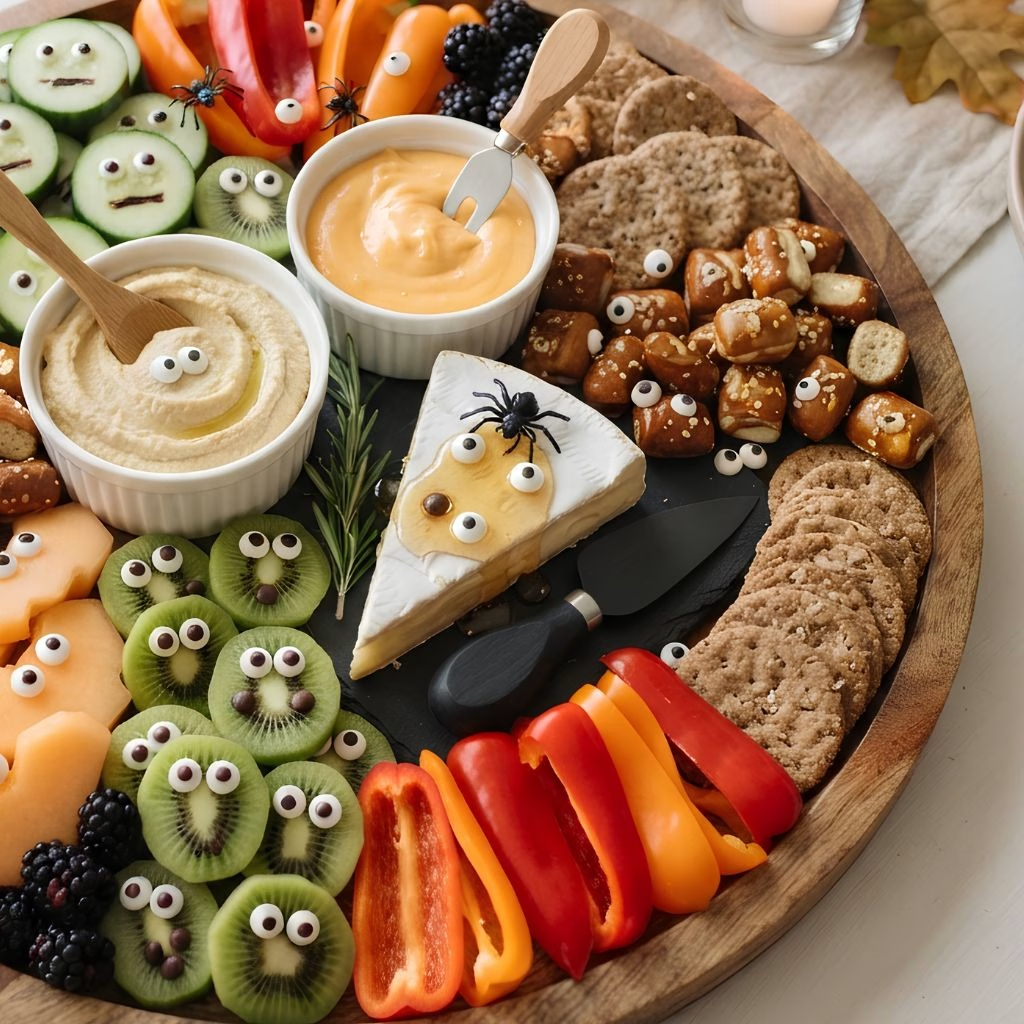
I made this Halloween Fruit Board Recipe last weekend, and it was gone in minutes. I wanted something festive that needed no oven and no long prep list. So I cut fruit into bats, one-eyed kiwi monsters, and silly cucumber faces.
Then I filled every gap with cheese, crackers, and berries. It is a great Halloween fruit platter for parties, and it also works as one of those easy Halloween fruit ideas for school.
Cooking Time
Here is how long this no-cook board takes from start to finish.
- Prep Time: 30 minutes
- Cooking Time: 0 minutes (no cooking needed)
- Total Time: 30 minutes
Ingredients
Everything here is easy to find at a regular grocery store. Pick fresh, firm produce for the best look.
- 1 English cucumber, sliced into rounds: Thin skin means no peeling; slice just before serving so it stays crisp.
- 1 medium cantaloupe: Cut into flat sheets so you can stamp out orange bat shapes.
- 3 green kiwis: Choose ripe but firm ones so the slices hold their shape.
- 1/2 orange bell pepper, sliced: Adds a pumpkin-orange crunch and a veggie option.
- 1 cup blackberries: Their dark color feels spooky; rinse and pat dry so they don’t bleed.
- 2 to 3 cheeses (about 6 ounces each): Mix mild and tangy, soft and hard for variety.
- 2 to 3 kinds of crackers and breads (about 1 cup each): Offer both plain and seeded for different tastes.
- 1 cup pretzel bites: Salty crunch that balances the sweet fruit.
- 1/4 cup mustard (optional): A tangy dip for the pretzel bites.
- 2 tablespoons honey: Drizzle over cheese and bread; use a small bowl with a spoon.
- 1/4 cup candy eyes: Press onto fruit and cheese for instant monster faces.
- 2 tablespoons mini chocolate chips: Perfect tiny pupils and creepy spots.
- Plastic spiders and vampire teeth (a few): Fun props only; remove them before anyone eats.
Note: serves several
Equipment You Need
You probably own most of this already.
- Large serving board: The base that holds everything together.
- Sharp knife: Cuts fruit, veggies, and cheese cleanly.
- Cutting board: Gives you a safe surface for slicing.
- Mini Halloween cookie cutter: Stamps cantaloupe into bats.
- Clean marker lid: Pops a “mouth” out of each cucumber slice.
- Small bowls: Hold honey, mustard, and berries.
- Small spoons and serving forks: Make grabbing cheese and dips easy.
How to Make Halloween Fruit Board Recipe?
This board comes together in a few simple steps. You cut a few spooky shapes, then arrange everything by color. I will walk you through the exact order I use so the board looks full and balanced.
Set Out Everything
Place all your ingredients on the counter before you start. Seeing it all lets you quickly judge how much you have. I also wash and dry the produce at this stage so nothing gets soggy later.
Cut the Cucumber Monsters
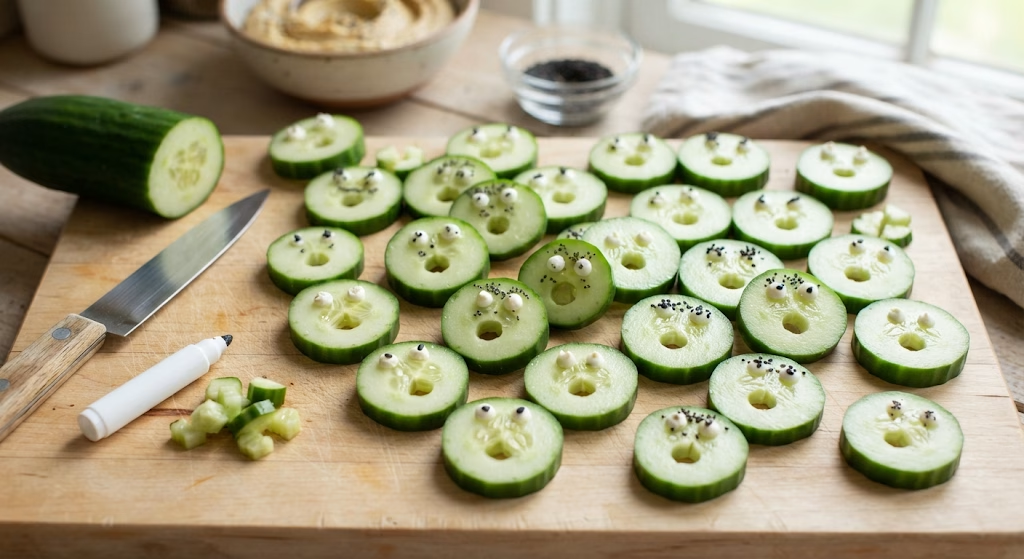
Slice the cucumber into rounds about a quarter inch thick. Press the lid of a clean marker into each round to cut out a small “mouth.” The slices look like friendly little monsters, and they take only a couple of minutes.
Make the Cantaloupe Bats
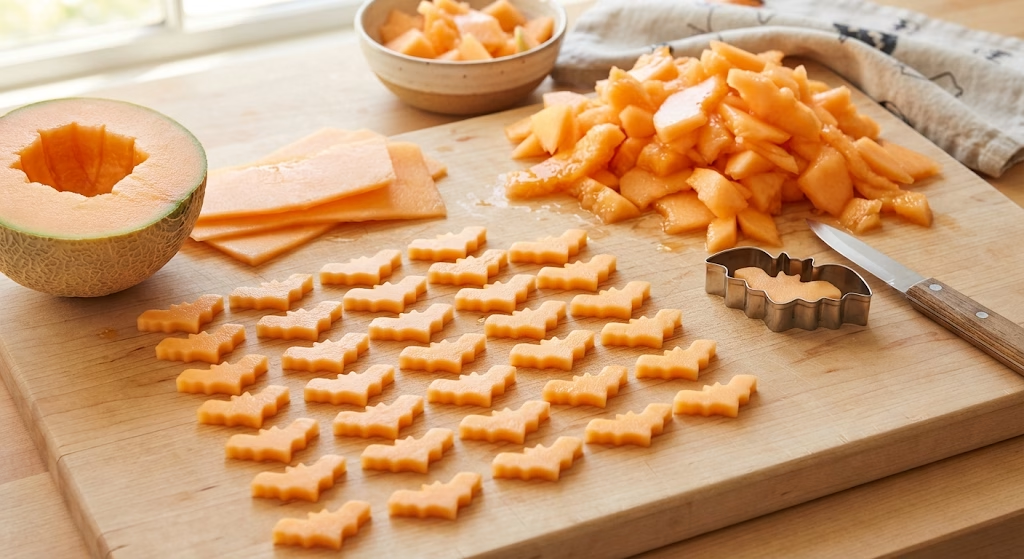
Cut the cantaloupe into large, flat sheets. Use a mini Halloween cookie cutter to stamp out bat shapes. Save the leftover scraps for snacking, since they taste just as sweet.
Create the One-Eyed Kiwi
Peel the kiwis and slice them into rounds. Press one candy eye onto the center of each slice to make a cyclops. Add a mini chocolate chip on top of the eye for a tiny pupil if you like.
Place the Anchor Items
Put the cheeses and small bowls in the middle of your large board first. These bigger pieces act as anchors for everything else. I add a small knife or serving fork next to each cheese now so I don’t forget.
Fill the Board by Color
Add one ingredient at a time and fill small sections as you go. Place contrasting colors side by side, and keep two green items on opposite sides. Keep working outward until you reach the edges and the board looks full.
Add the Final Spooky Touches
Tuck in the blackberries, pretzel bites, crackers, and bell pepper slices. Drizzle honey over the cheese, then set candy eyes and a few plastic spiders for fun. Give the dips a spoon and the board is ready to serve.
Additional Tips for Making This Recipe Better
These small tricks came from my own trial and error. They make the board look better and taste fresher.
- I always cut the fruit shapes first, because cutting is the slowest part and I like to finish it before I get hungry.
- I pat every fruit dry with a paper towel, which keeps the crackers from turning soft.
- I use a sharp cookie cutter, since a dull one tears the cantaloupe instead of cutting it cleanly.
- I keep the cheeses cold until the last minute, so they slice neatly and stay firm.
- I choose one bold color for each section, which makes the whole board pop in photos.
- I place the plastic props on after everything else, so I don’t mix them up with the food.
Common Mistakes to Avoid
I have made all of these, so you don’t have to.
- Slicing the cucumber too early: I did this once, and the slices went limp. Cut them right before serving.
- Piling similar colors together: Two green items side by side looked dull to me. Spread them to opposite sides.
- Using underripe fruit: Hard kiwi and bland cantaloupe made the board taste flat. Pick ripe, firm fruit.
- Forgetting serving tools: Guests were poking cheese with their fingers. I now add a knife or fork for each cheese.
- Leaving plastic props near the food: I once almost served a plastic spider with the berries. Remove all props before eating.
How to Serve Halloween Fruit Board?
A fun presentation turns a simple snack into the star of the table. Here are my favorite ways to serve it. Set the board in the middle of the party table so guests can graze from every side. I like a dark wooden board because the orange and green pop against it. Add small spoons for the berries and dips, and keep napkins close by.
This board works as an appetizer at a neighborhood party. It is also an easy grazing dinner before the kids head out to trick or treat. For garnish, scatter a few candy eyes across the cheese. Place a bat or two on top of a cracker stack for height. These touches make a simple Halloween fruit tray feel extra special.
Variations
Easy swaps let you shape the board to fit your crowd. Here are some ideas.
- Dairy-free: Swap the cheese for hummus, dairy-free cheese slices, or a nut-based spread.
- Sugar-free: Skip the honey and candy eyes. Use plain berries and a few unsweetened dried fruits instead.
- Gluten-free: Use gluten-free crackers and skip the pretzel bites.
- Veggie-forward: Add carrot sticks, snap peas, and cherry tomatoes for more Halloween fruit and veggie ideas.
- More fruit: Add orange segments, red grapes, or pomegranate seeds for extra color.
- School-friendly: Leave out the plastic props and use only fruit shapes for a Halloween fruit idea for school.
- Halloween fruit bowl: Toss kiwi, melon cubes, and blackberries in a large bowl for a quick Halloween fruit bowl.
Nutritional Information
These are rough estimates for one serving, based on a board that serves about eight. Exact numbers will change with your cheese and cracker choices.
- Calories: about 280 kcal
- Protein: about 10 g
- Carbohydrates: about 28 g
- Fat: about 14 g
Make Ahead and Storage
You can prep most of this board early, and leftovers keep well if you store them right.
Make Ahead
Cut the cantaloupe bats, kiwi slices, and cheese a few hours before the party. Store each item in its own airtight container in the fridge. Assemble the board just before guests arrive so everything looks fresh.
Storage
Cover leftovers and keep them in the fridge for up to two days. Store crackers separately so they stay crisp. Toss any fruit that looks soft or watery.
Freezing
I don’t recommend freezing this board. Fresh fruit, cucumber, and cheese lose their texture after thawing. It is best to make a fresh board instead.
Reheating
This board is served cold, so it needs no reheating. Just let the cheese sit out for ten to fifteen minutes before serving. That brings out its flavor and makes it easier to slice.
Why You’ll Love This Recipe?
This board is as easy as it is cute. Here is why I keep making it every October.
- It is quick and simple: You only slice, stamp, and arrange. There is no cooking, so you can build it in about thirty minutes.
- It is fully customizable: Swap the cheeses, fruit, or veggies to suit your guests. You can make it dairy-free, gluten-free, or sugar-light with simple changes.
- It looks impressive: The bats, one-eyed kiwi, and cucumber faces catch every eye. Guests always ask how I made them.
- It suits any crowd: Kids love the silly faces, and adults enjoy the cheese and honey. It works as an appetizer, a snack tray, or a light dinner.
- It sneaks in fresh produce: Fruit and veggies take center stage. That makes it a fun, lighter option next to all the Halloween candy.
FAQs
Can I make this board ahead of time?
Yes, you can cut the fruit and cheese a few hours early. Keep them covered in the fridge, then assemble just before serving.
What cheeses work best for a Halloween fruit board?
Aim for a mix of mild and tangy, soft and hard. Cheddar cubes, goat cheese, and a rind-edged cheese all work nicely.
Can I make it kid-friendly for school?
Absolutely. Skip the plastic props and use only edible decorations like fruit bats and candy eyes. Check school allergy rules for nuts and dairy first.
What can I use if I don’t have a Halloween cookie cutter?
Cut simple bat shapes with a small knife, or use a round cutter for pumpkin-like circles. Even plain fruit slices look festive with candy eyes.
How long can the board sit out?
Keep it out for no more than two hours at room temperature. Put leftovers back in the fridge right away to stay safe.

Halloween Fruit Board Recipe
Ingredients
Method
- Place all your ingredients on the counter before you start. Seeing it all lets you quickly judge how much you have. I also wash and dry the produce at this stage so nothing gets soggy later.
- Slice the cucumber into rounds about a quarter inch thick. Press the lid of a clean marker into each round to cut out a small “mouth.” The slices look like friendly little monsters, and they take only a couple of minutes.
- Cut the cantaloupe into large, flat sheets. Use a mini Halloween cookie cutter to stamp out bat shapes. Save the leftover scraps for snacking, since they taste just as sweet.
- Peel the kiwis and slice them into rounds. Press one candy eye onto the center of each slice to make a cyclops. Add a mini chocolate chip on top of the eye for a tiny pupil if you like.
- Put the cheeses and small bowls in the middle of your large board first. These bigger pieces act as anchors for everything else. I add a small knife or serving fork next to each cheese now so I don’t forget.
- Add one ingredient at a time and fill small sections as you go. Place contrasting colors side by side, and keep two green items on opposite sides. Keep working outward until you reach the edges and the board looks full.
- Tuck in the blackberries, pretzel bites, crackers, and bell pepper slices. Drizzle honey over the cheese, then set candy eyes and a few plastic spiders for fun. Give the dips a spoon and the board is ready to serve.
Notes
- I always cut the fruit shapes first, because cutting is the slowest part and I like to finish it before I get hungry.
- I pat every fruit dry with a paper towel, which keeps the crackers from turning soft.
- I use a sharp cookie cutter, since a dull one tears the cantaloupe instead of cutting it cleanly.
- I keep the cheeses cold until the last minute, so they slice neatly and stay firm.
- I choose one bold color for each section, which makes the whole board pop in photos.
- I place the plastic props on after everything else, so I don’t mix them up with the food.