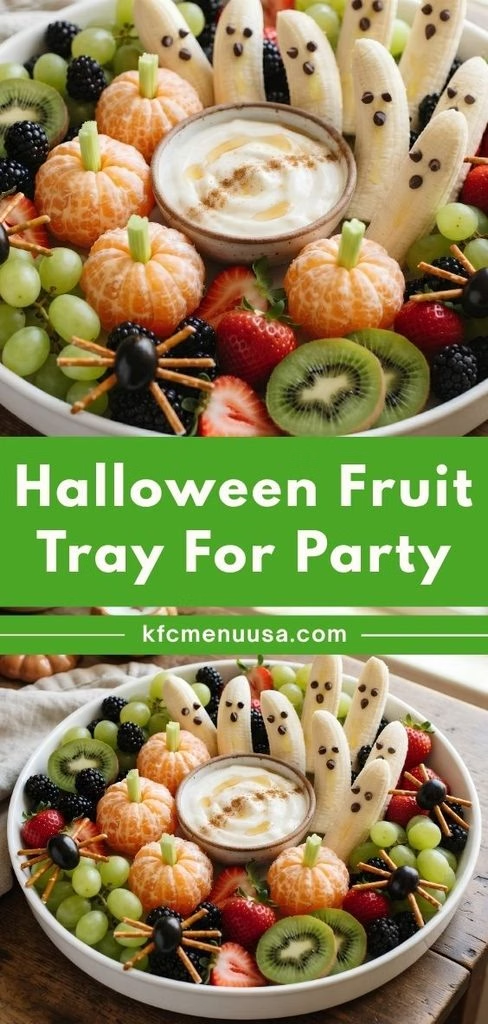
I made this Halloween fruit tray for my niece’s party last October, and it vanished faster than the candy bowl. I wanted a snack that looked wickedly fun but still felt fresh and light.
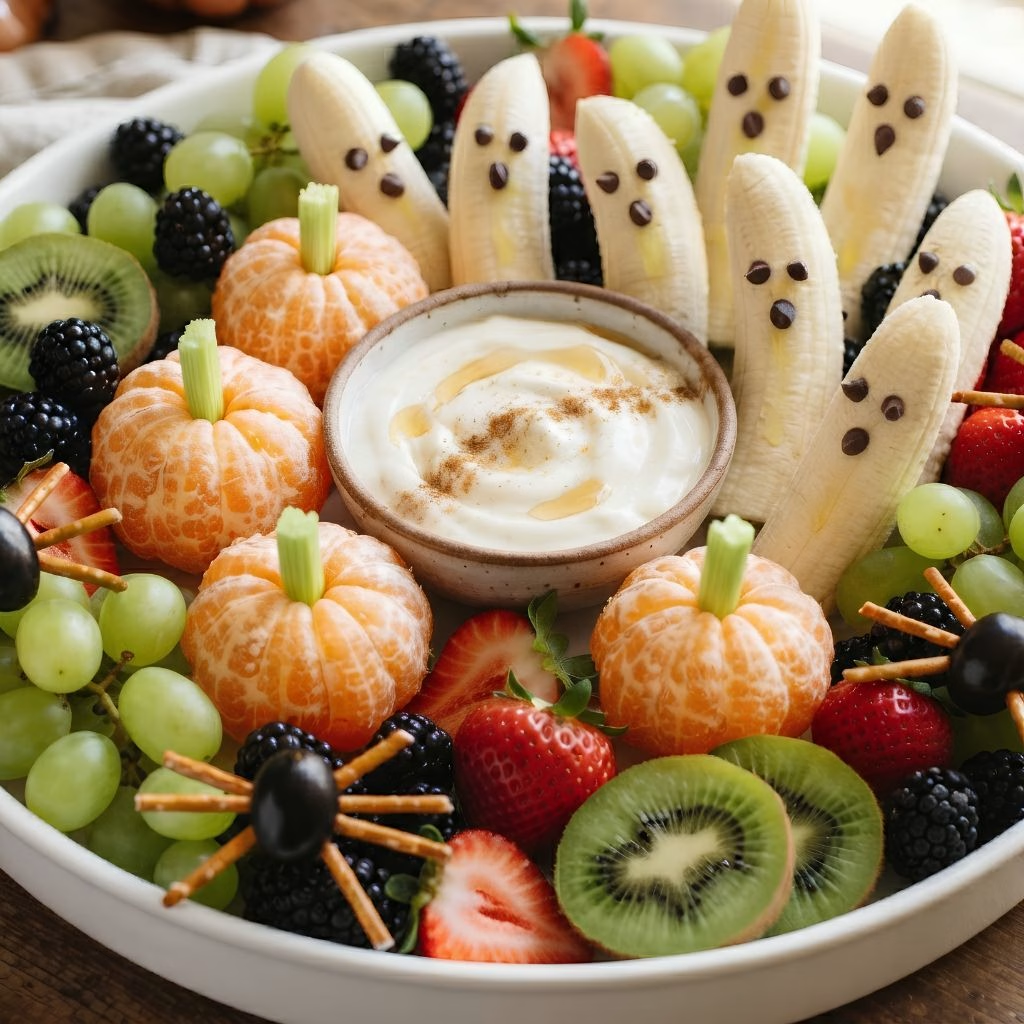
Banana ghosts, clementine pumpkins, and grape spiders did the job beautifully. It took me about half an hour, and no oven was needed. If you want a simple Halloween fruit platter that kids and adults both reach for, I promise this one delivers.
Cooking Time
This is a no-cook recipe, so most of your time goes into cutting and arranging. Here is how the time breaks down:
- Prep Time: 30 minutes
- Cooking Time: 0 minutes
- Total Time: 30 minutes
Ingredients for Halloween Fruit Tray
Everything here is easy to find at a regular grocery store. I kept each ingredient’s job short so you know why it is on the tray.
- 8 clementines: peel into easy little pumpkins.
- 4 firm bananas: shape the ghosts, so skip very ripe ones.
- 1/4 cup mini chocolate chips: make the ghost eyes and mouths.
- 2 cups green grapes: fill the tray with bright color.
- 2 cups black or deep purple grapes: become the spider bodies.
- 1 cup pretzel sticks: act as crunchy spider legs.
- 4 kiwis: add a slimy green look once sliced.
- 1 cup blackberries: give the tray a dark, creepy tone.
- 1 cup blueberries: fill gaps and add deep color.
- 1 cup strawberries: bring a “blood red” pop.
- 2 celery stalks: cut into tiny pumpkin stems.
- 1 tablespoon lemon juice: keeps the bananas from browning.
- 1 cup vanilla Greek yogurt: the creamy base for the dip.
- 1 tablespoon honey: sweetens the dip lightly.
Note: serves several
Equipment You Need
You do not need fancy tools for this fruit platter idea. A few basics are plenty.
- Large platter or tray (16 inches works best): holds the whole spooky scene.
- Cutting board: gives you a safe, stable surface.
- Sharp knife: slices the bananas and kiwis cleanly.
- Small paring knife: helps with celery stems and fine details.
- Toothpicks: hold ghost faces and spider legs in place.
- Small bowl: hold the yogurt dip.
- Paper towels: dry the fruit so it looks crisp.
How to Make Halloween Fruit Tray Recipe?
This recipe is all about simple shapes and smart placement. You will prep each fruit character first, then build the tray in one go. I like to work in small batches so nothing sits out too long.
Wash and Dry All the Fruit
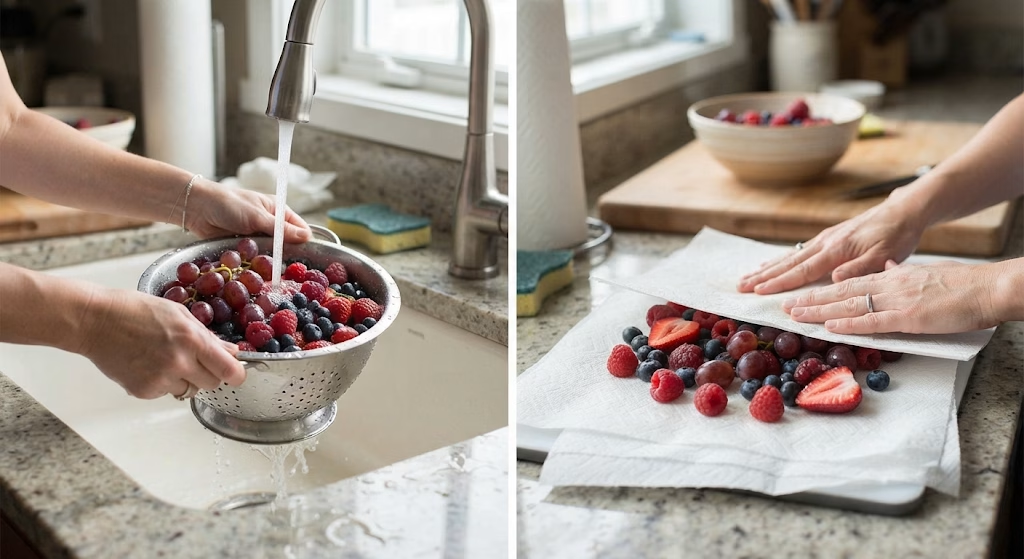
Rinse the grapes, berries, and strawberries under cool water. Pat everything dry with paper towels so the tray does not turn watery. Dry fruit also looks shinier and holds decorations better.
Peel the Clementine Pumpkins
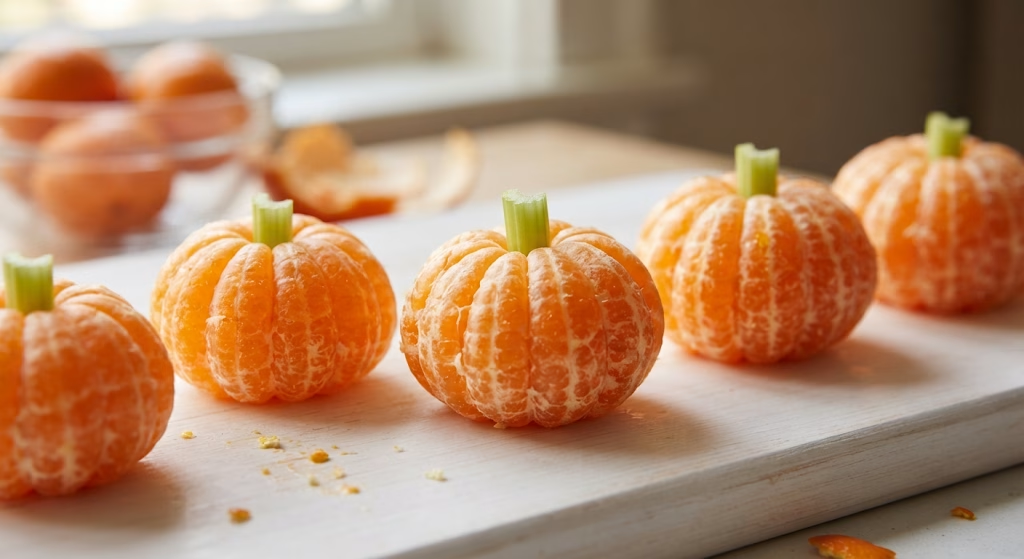
Peel each clementine gently and keep the segments together so it looks like a tiny pumpkin. Remove the white pith if you can. Press a small celery piece into the top to make the stem.
Make the Banana Ghosts
Cut each banana in half crosswise, then stand the halves upright on a plate. Brush the cut edges with lemon juice to slow browning. Press two mini chocolate chips in for eyes and one for the mouth.
Build the Grape Spiders
Take one black grape for the body and push 4 pretzel sticks into each side using the pointed end. Snap the sticks to different lengths so the legs look natural. Add a tiny chocolate chip dot as an eye if you like.
Slice the Kiwi and Strawberries
Peel the kiwis and cut them into rounds about half an inch thick. Hull the strawberries and leave them whole or halve them if they are big. These two fruits add the bold green and red that make the tray pop.
Mix the Creamy Yogurt Dip
Stir the vanilla Greek yogurt and honey together in a small bowl until smooth. Taste it and add a little more honey if you want it sweeter. Set the bowl in the middle or at one edge of your platter.
Arrange the Tray
Place the dip bowl first, then set the pumpkins and ghosts in separate clusters. Fill the open spaces with green grapes, kiwi rounds, and blackberries. Tuck the spiders near the edges so they look like they are crawling off the tray.
Chill and Serve
Cover the finished tray loosely and chill it for 20 to 30 minutes before the party. The cold fruit tastes crisp and refreshing. Bring it out right before guests arrive so the ghosts stay fresh.
Additional Tips for Making This Recipe Better
A few small habits made my Halloween fruit tray look much better after I tried it a couple of times.
- I always buy the bananas a day early, but only when they are still slightly green at the tips. Firm bananas hold their shape much better.
- I pick clementines that feel heavy for their size because they peel cleanly and stay juicy.
- I cut the pretzel legs just before assembling so they stay crunchy and do not go soft.
- I keep a small bowl of extra chocolate chips nearby because the ghost faces take a few tries to get right.
- I place the tray on a dark platter or a black cloth because the orange and green colors stand out more.
- I add the yogurt dip last so it does not drip onto the fruit while I am building.
Common Mistakes to Avoid
Most problems with a fruit platter come down to timing and moisture. Here are the mistakes I ran into and how I fixed them.
- Using very ripe bananas: I once made ghosts from spotty bananas, and they turned mushy fast. Choose firm ones and use lemon juice.
- Skipping the drying step: I rushed this once and ended up with a watery tray. Always pat the fruit dry first.
- Adding pretzels too early: My spider legs went soft in minutes. I now attach them right before serving.
- Overcrowding the platter: A packed tray looks messy. I leave small gaps so each character stands out.
- Leaving it out too long: I learned to keep the tray chilled and only bring it out when guests are ready.
How to Serve Halloween Fruit Tray?
Presentation is half the fun with a Halloween fruit tray. A few simple styling choices turn good fruit into a showpiece.
Set the platter in the center of your snack table and scatter a few plastic spiders or fake cobwebs around it. Use a black or dark purple platter so the oranges and greens glow. For a school party, tuck the tray beside small paper plates and let kids pick their own favorites.
If you are planning a bigger spread, a Halloween veggie tray fits in nicely beside it. I also like pairing the fruit with a fresh, tangy side such as this Easy German Coleslaw Recipe so guests get something crisp and savory too. For hungry little ones, I serve the tray next to a batch of Homemade Chicken Nuggets so there is a balanced plate for everyone.
For garnish, I add a few mint leaves near the pumpkins to look like little vines. A drizzle of melted dark chocolate over the berries adds a creepy, dripping effect.
Variations
This Halloween fruit platter is easy to adjust. Here are some ideas I have tried or would happily try again.
- Dairy-free: Swap the Greek yogurt for coconut yogurt and use dairy-free chocolate chips.
- Sugar-free: Skip the honey and use unsweetened vanilla yogurt with a pinch of cinnamon.
- Nut-friendly school version: Replace the pretzels with thin carrot sticks for spider legs.
- Halloween veggie tray twist: Add cucumber slices, cherry tomatoes, and baby carrots in the same spooky shapes.
- Extra flavor: Stir a little orange zest or vanilla extract into the dip.
- Bonus color: Add pomegranate seeds or red grapes for a deeper, bloodier look.
Nutritional Information
These numbers are approximate for one serving, based on a tray that serves about 12. Exact values will vary with the fruit you choose.
- Calories: 165 kcal
- Protein: 4 g
- Carbohydrates: 32 g
- Fat: 3 g
Make Ahead and Storage
This tray tastes best fresh, but you can prep a lot of it in advance. Here is how I handle each stage.
Make Ahead
I wash, dry, and slice the kiwis, strawberries, and grapes up to a day before. I store them in airtight containers in the fridge. I make the banana ghosts and spiders only on the day of the party.
Storage
Leftovers stay good in the fridge for up to 24 hours in a covered container. The bananas will darken a little, but they still taste fine. I store the dip separately and keep the pretzel legs in a dry container.
Freezing
I do not recommend freezing the finished tray. Fresh fruit turns soft once thawed. If you want to freeze something, save the grapes and berries for smoothies.
Reheating
This is a cold dish, so there is no reheating. If the fruit feels too chilled, let the tray sit out for 10 minutes before serving.
Why You’ll Love This Recipe?
This tray is made for busy hosts who still want something special on the table. Here is what I love most about it.
- Easy to make: There is no cooking, and the shapes are very beginner-friendly. If you can peel a clementine and slice a banana, you can make this.
- Kid approved: Children love the ghost and spider characters. They often eat more fruit simply because it looks fun.
- A healthier party snack: It balances out all the sugary candy at Halloween. You still get a treat, but with real fruit and a light yogurt dip.
- Flexible and customizable: You can swap fruits, make it dairy-free, or turn it into a veggie tray. It fits school parties, classroom treats, and family nights.
- Beautiful on any table: The bright oranges, greens, and deep purples look amazing together. Guests always ask how I made it.
FAQs
Can I make this Halloween fruit tray the night before?
You can prep the sliced fruit the night before and store it in airtight containers. Make the banana ghosts and spiders on the day for the best look.
How do I stop the banana ghosts from turning brown?
Brush the cut edges with lemon juice right after cutting. Keep them chilled until serving.
What are good Halloween fruit ideas for school?
Clementine pumpkins, banana ghosts, and grape spiders are easy and kid-friendly. Skip the pretzels and chocolate if your school has nut or allergy rules.
Can I use other fruits on this tray?
Yes, you can swap in melon, pineapple, pears, or red grapes. Pick fruits in orange, green, purple, and red for the best Halloween look.
How long can the tray sit out at a party?
I keep it out for no more than two hours. After that, I cover it and put it back in the fridge to keep it fresh and safe.

Halloween Fruit Tray For Party
Ingredients
Method
- Rinse the grapes, berries, and strawberries under cool water. Pat everything dry with paper towels so the tray does not turn watery. Dry fruit also looks shinier and holds decorations better.
- Peel each clementine gently and keep the segments together so it looks like a tiny pumpkin. Remove the white pith if you can. Press a small celery piece into the top to make the stem.
- Cut each banana in half crosswise, then stand the halves upright on a plate. Brush the cut edges with lemon juice to slow browning. Press two mini chocolate chips in for eyes and one for the mouth.
- Take one black grape for the body and push 4 pretzel sticks into each side using the pointed end. Snap the sticks to different lengths so the legs look natural. Add a tiny chocolate chip dot as an eye if you like.
- Peel the kiwis and cut them into rounds about half an inch thick. Hull the strawberries and leave them whole or halve them if they are big. These two fruits add the bold green and red that make the tray pop.
- Stir the vanilla Greek yogurt and honey together in a small bowl until smooth. Taste it and add a little more honey if you want it sweeter. Set the bowl in the middle or at one edge of your platter.
- Place the dip bowl first, then set the pumpkins and ghosts in separate clusters. Fill the open spaces with green grapes, kiwi rounds, and blackberries. Tuck the spiders near the edges so they look like they are crawling off the tray.
- Cover the finished tray loosely and chill it for 20 to 30 minutes before the party. The cold fruit tastes crisp and refreshing. Bring it out right before guests arrive so the ghosts stay fresh
Notes
- I always buy the bananas a day early, but only when they are still slightly green at the tips. Firm bananas hold their shape much better.
- I pick clementines that feel heavy for their size because they peel cleanly and stay juicy.
- I cut the pretzel legs just before assembling so they stay crunchy and do not go soft.
- I keep a small bowl of extra chocolate chips nearby because the ghost faces take a few tries to get right.
- I place the tray on a dark platter or a black cloth because the orange and green colors stand out more.
- I add the yogurt dip last so it does not drip onto the fruit while I am building.