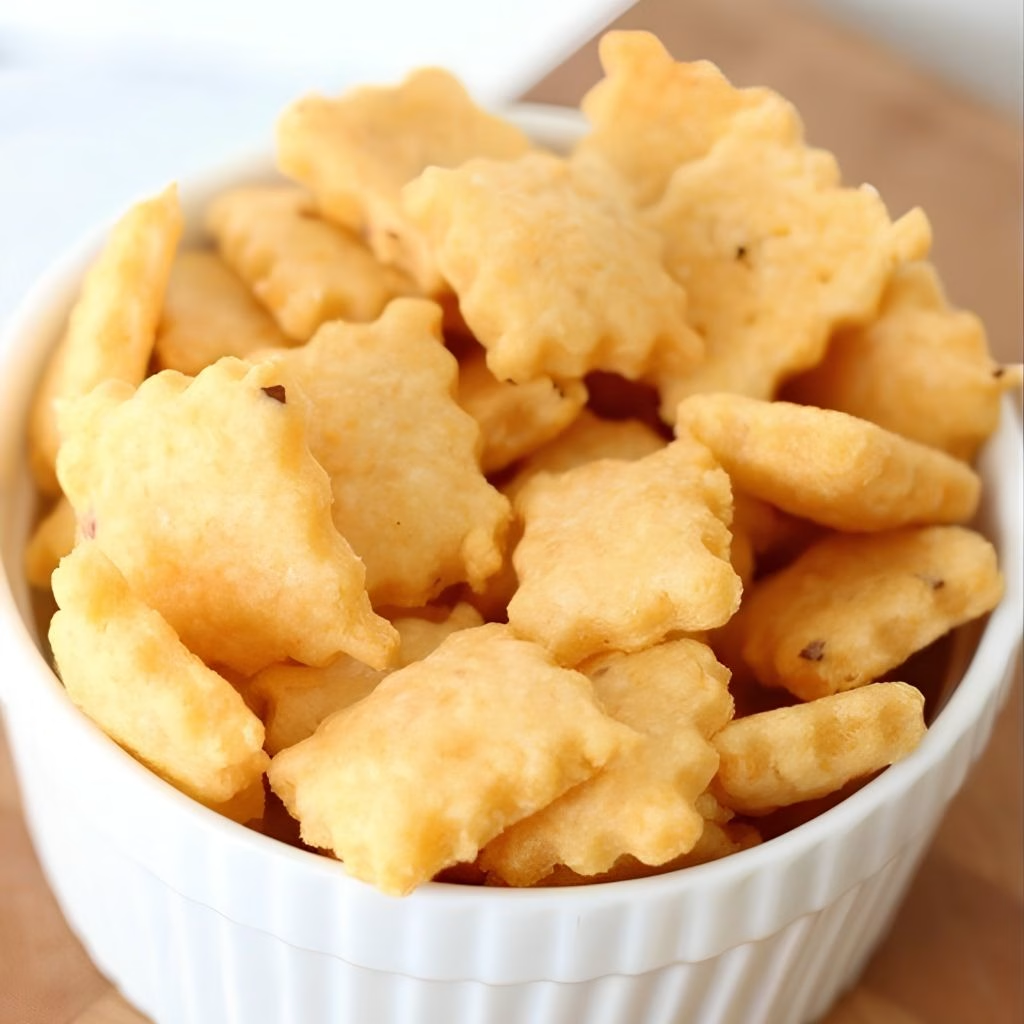
I started making this Nut-Free School Snack Crackers Recipe the week my son’s class went “allergy aware,” and store shelves suddenly felt useless to me. I didn’t want to send him off with another sad rice cake, so I pulled out my food processor and started experimenting with sunflower seeds instead of nuts.
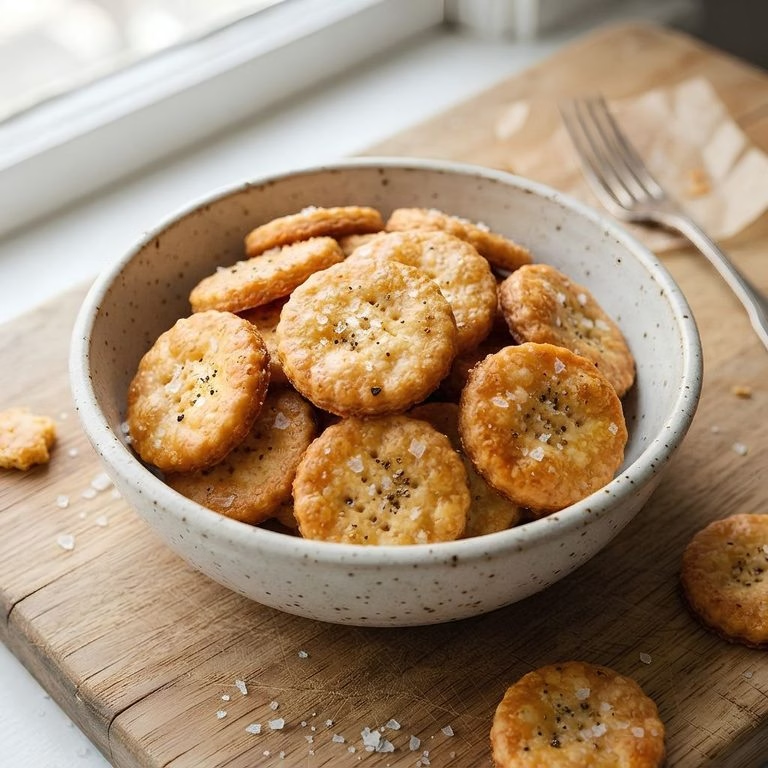
A few batches later, I landed on a cracker that’s crunchy, a little nutty-tasting (without a single actual nut), and sturdy enough to survive a backpack. My kids ask for these by name now, and honestly, so do I.
Cooking Time
- Prep Time: 15 minutes
- Chill Time: 30 minutes
- Cook Time: 15 minutes
- Total Time: 1 hour
Ingredients
- 1 cup raw sunflower seeds – this is the nut-free base that gives the crackers their toasty flavor and protein boost
- 2 tablespoons oat flour – helps bind the dough without adding any wheat or nuts
- 1 tablespoon honey or maple syrup – adds gentle sweetness so the crackers taste like a treat, not cardboard
- 1 egg – acts as the glue holding everything together, so don’t skip it or swap it without testing
- 1/4 teaspoon baking powder – gives the crackers a slightly lighter, snappier bite
- 1/4 teaspoon salt – balances the sweetness and wakes up the seed flavor
- 1/4 teaspoon cinnamon (optional) – a warm little flavor note that kids seem to love
- 1 tablespoon melted coconut oil – keeps the dough from being dry and crumbly
- 1 teaspoon vanilla extract – rounds out the flavor so it doesn’t taste one-note
Note: This recipe makes about 4 servings, enough for four lunchboxes or one generous after-school snack bowl.
Equipment You’ll Need
- Food processor or high-speed blender – grinds the sunflower seeds into a fine, workable meal
- Mixing bowl – for combining the ground seeds with the rest of the ingredients
- Rolling pin – flattens the dough evenly so crackers bake at the same rate
- Parchment paper or wax paper – keeps the sticky dough from clinging to your counter and rolling pin
- Small cookie cutters (or a knife) – shapes the crackers into fun bites or simple squares
- Baking sheet – holds the crackers while they bake to a crisp
- Wire cooling rack – lets air circulate so the crackers crisp up fully after baking

How to Make Nut-Free School Snack Crackers?
This recipe comes together in just a few simple stages: grinding, mixing, chilling, and baking. None of the steps are tricky, and most of the work happens hands-off in the fridge. Here’s exactly how I make a batch from start to finish.
Grind the Sunflower Seeds
I start by adding the raw sunflower seeds to my food processor and pulsing until they turn into a fine, sandy meal. I stop before it turns into seed butter — a coarse, flour-like texture is exactly what this dough needs. This step is what replaces nuts entirely while still giving the crackers a rich, toasty base flavor.
Mix the Dough
Next, I pour the seed meal into a mixing bowl and add the oat flour, baking powder, salt, and cinnamon, stirring them together first. Then I add the egg, honey, melted coconut oil, and vanilla, mixing until a soft, slightly sticky dough forms. It should hold together easily when I press a bit between my fingers.
Chill the Dough
I wrap the dough or cover the bowl and pop it in the fridge for about 30 minutes. This short rest firms up the coconut oil and makes the dough far easier to roll without sticking everywhere. I don’t skip this step, even when I’m in a hurry, because it really does change the texture.
Roll and Cut the Crackers
Once chilled, I place the dough between two sheets of parchment paper and roll it out to about 1/8-inch thickness. Thinner dough means crispier crackers, so I try not to rush this part. Then I cut it into small squares, circles, or fun shapes using cookie cutters or a knife.
Bake Until Golden
I transfer the shapes onto a lined baking sheet, spacing them slightly apart, and bake at 300°F for about 15 minutes. I watch the edges for a light golden color, since oven times can vary a little. They’ll firm up more as they cool, so slightly soft crackers straight from the oven are completely normal.
Cool Completely
Finally, I move the crackers to a wire rack and let them cool all the way before touching them again. This last step is what turns them from “soft and bendy” into that satisfying, snappy crunch everyone loves. Skipping it means softer crackers that don’t hold up as well in a lunchbox.
Additional Tips for Making This Recipe Better
I’ve made this cracker recipe more times than I can count, and these small tweaks have made a real difference for me:
- I always roll the dough as thin and even as possible, since thick spots stay chewy instead of crisp
- I use a light dusting of oat flour on my rolling pin if the dough feels tacky, instead of adding it straight into the mixture
- I bake one test cracker first to check my oven’s exact timing before committing the whole tray
- I let the crackers cool fully on the tray for a few minutes before moving them, so they don’t break apart
- I double the batch on weekends so I have a stash ready for busy school mornings
Common Mistakes to Avoid
Here are a few things I got wrong before I figured out what actually works:
- I once skipped chilling the dough, and it stuck to everything — don’t skip that 30-minute rest
- I rolled the dough too thick early on, which left the centers soft instead of crunchy
- I pulled the crackers out too soon because they looked “done,” but they needed the full bake time to firm up
- I stored a warm batch in a sealed container, and they turned soggy overnight instead of staying crisp
- I used pre-ground sunflower seed flour once, and the texture came out dense, so freshly grinding whole seeds works better for me
How to Serve Nut-Free School Snack Crackers
I love setting these out on a small plate with soft cheese cubes or a scoop of hummus for dipping, since the plain, slightly sweet flavor pairs well with both savory and creamy sides. For lunchboxes, I just tuck a handful into a small container alongside apple slices or grapes.
If I’m serving them at a party or classroom event, I’ll arrange the shapes in a circle around a bowl of yogurt dip and scatter a few dried fruit pieces on top for color. They also travel well tucked next to a thermos of soup for a heartier midday meal.
If your family also loves easy make-ahead mornings, this Easy Overnight Baked Oatmeal Recipe pairs nicely with a cracker-and-fruit snack plate for busy weekdays.
Variations
- Dairy-free option: this recipe is already dairy-free as written, so no swaps are needed here
- Egg-free option: try a flax egg (1 tablespoon ground flax mixed with 3 tablespoons water) in place of the whole egg
- Sugar-free option: leave out the honey or maple syrup and add an extra pinch of cinnamon for flavor instead
- Savory version: skip the cinnamon and honey, and stir in a pinch of garlic powder and dried herbs
- Extra protein boost: mix in a tablespoon of hemp hearts or ground flaxseed along with the seed meal
- Seed swap: pumpkin seeds work as a nut-free substitute for sunflower seeds if you want a different flavor
If freezer-friendly school snacks are your thing, my Freezer Baked Oatmeal Recipe is another one I keep stocked for quick mornings and after-school hunger.
Nutritional Information
Here’s a rough idea of what one serving of these crackers looks like, based on the ingredients above:
- Calories: 141 kcal
- Protein: 4g
- Carbohydrates: 8g
- Fat: 11g
Make Ahead and Storage
I make a batch of this dough up to two days ahead and keep it wrapped tightly in the fridge until I’m ready to roll and bake. This actually makes the whole process faster on busy weeks, since the hardest part is already done.
Once baked and fully cooled, I store the crackers in an airtight container at room temperature, and they stay crisp for about five days. I try to keep the container in a cool spot, away from any steam or moisture that could soften them.
For longer storage, I freeze the baked crackers in a freezer-safe bag for up to two months. I just let them sit at room temperature for about 15 minutes before packing them into a lunchbox, and they crisp right back up.
Why You’ll Love This Recipe
This cracker recipe has become a staple in my house for a few solid reasons:
- Truly nut-free: made entirely with sunflower seeds, so it’s genuinely safe for nut-free classrooms and shared snack tables
- Simple pantry ingredients: nothing exotic here, just things I already had in my kitchen the first time I tried it
- Kid-approved flavor: the light sweetness and cinnamon note make these taste like a treat, even though they’re wholesome
- Easy to customize: I can make them sweet or savory depending on what my kids are in the mood for that week
- Great for meal prep: the dough and baked crackers both store well, so I’m never scrambling on a school morning
FAQs
Can I make these crackers without a food processor?
You can try a high-speed blender instead, pulsing in short bursts so the seeds turn into meal without overheating.
Are these crackers safe for a nut-free school policy?
Yes, sunflower seeds replace nuts entirely here, though I’d still double-check your school’s specific seed policy since some classrooms restrict seeds too.
Can I substitute the egg in this recipe?
A flax egg works well as a binder if you need an egg-free version, though the texture will be very slightly softer.
How do I keep these crackers from going soft?
Make sure they’re completely cool before sealing them in a container, since trapped warmth creates moisture that softens the crunch.
Can I double this recipe for a classroom party?
Absolutely, I’ve doubled it plenty of times just working in batches so you’re not overcrowding your food processor or baking sheet.

Nut-Free School Snack Crackers Recipe
Ingredients
Method
- I start by adding the raw sunflower seeds to my food processor and pulsing until they turn into a fine, sandy meal. I stop before it turns into seed butter a coarse, flour-like texture is exactly what this dough needs. This step is what replaces nuts entirely while still giving the crackers a rich, toasty base flavor.
- Next, I pour the seed meal into a mixing bowl and add the oat flour, baking powder, salt, and cinnamon, stirring them together first. Then I add the egg, honey, melted coconut oil, and vanilla, mixing until a soft, slightly sticky dough forms. It should hold together easily when I press a bit between my fingers.
- I wrap the dough or cover the bowl and pop it in the fridge for about 30 minutes. This short rest firms up the coconut oil and makes the dough far easier to roll without sticking everywhere. I don’t skip this step, even when I’m in a hurry, because it really does change the texture.
- Once chilled, I place the dough between two sheets of parchment paper and roll it out to about 1/8-inch thickness. Thinner dough means crispier crackers, so I try not to rush this part. Then I cut it into small squares, circles, or fun shapes using cookie cutters or a knife.
- I transfer the shapes onto a lined baking sheet, spacing them slightly apart, and bake at 300°F for about 15 minutes. I watch the edges for a light golden color, since oven times can vary a little. They’ll firm up more as they cool, so slightly soft crackers straight from the oven are completely normal.
- Finally, I move the crackers to a wire rack and let them cool all the way before touching them again. This last step is what turns them from “soft and bendy” into that satisfying, snappy crunch everyone loves. Skipping it means softer crackers that don’t hold up as well in a lunchbox.
Notes
- I always roll the dough as thin and even as possible, since thick spots stay chewy instead of crisp
- I use a light dusting of oat flour on my rolling pin if the dough feels tacky, instead of adding it straight into the mixture
- I bake one test cracker first to check my oven’s exact timing before committing the whole tray
- I let the crackers cool fully on the tray for a few minutes before moving them, so they don’t break apart
- I double the batch on weekends so I have a stash ready for busy school mornings