I still remember the first time I made this Spicy Honey Garlic Chicken Recipe. I was skeptical that a soda water batter could actually make a difference, but one bite of that shatter-crisp coating soaked in sticky, spicy-sweet sauce and I was hooked.
I’ve made it more times than I can count since then, tweaking the batter and the sauce until I finally landed on a version that stays crunchy even after it’s tossed.
It’s the kind of recipe that turns a regular weeknight into something worth looking forward to. My family asks for it on repeat, and honestly, I don’t mind making it that often. If you love bold flavors and crispy textures, this one’s about to become your go-to as well.

Cooking Time
- Prep Time: 15 minutes
- Cooking Time: 15 minutes
- Total Time: 30 minutes
Ingredients
- 6 boneless chicken thighs, cut into bite-size pieces – thighs stay juicy even after frying, so skip the breast if you can
- ⅓ cup rice flour – this is the real secret to that light, shattering crunch
- ¼ cup corn starch – helps the batter crisp up and cling to every piece
- 1 tablespoon garlic powder – builds a savory base flavor into the coating itself
- Salt and pepper, to taste – season generously, the batter needs it
- ⅓ cup soda water – the bubbles create air pockets for an extra-crispy bite
- 1 large egg – binds the batter together so it sticks to the chicken
- 8 cloves garlic, chopped – fresh garlic makes the sauce taste alive, don’t swap for jarred
- 2 tablespoons Korean chili paste (gochujang) – brings the heat and a deep savory-sweet base
- 3 tablespoons honey – balances the spice and helps the sauce turn glossy and sticky
- 1 tablespoon soy sauce – adds saltiness that keeps the honey from tasting one-note
- 1 tablespoon sesame seeds – finishes the dish with a nutty crunch and nice presentation
- Oil, for frying – use a neutral oil with a high smoke point like vegetable or canola
Note: This recipe serves 3 to 4 people as a main dish.
Equipment You Need
- Mixing bowl – for combining the chicken with the batter ingredients
- Deep pot or wok – gives enough depth for the chicken to fry evenly
- Kitchen thermometer – keeps your oil at the right frying temperature
- Slotted spoon or spider strainer – for lifting chicken out without excess oil
- Small saucepan or skillet – for cooking down the sticky sauce
- Paper towels or wire rack – drains extra oil after frying

How to Make Spicy Honey Garlic Chicken Recipe?
This recipe comes together in two quick stages: frying the chicken until golden and crisp, then tossing it in a glossy, spicy-sweet sauce. Once you’ve got your ingredients prepped, the actual cooking moves fast, so it helps to have everything measured out ahead of time. Here’s exactly how I put it together every time.
Prepare the Chicken Batter
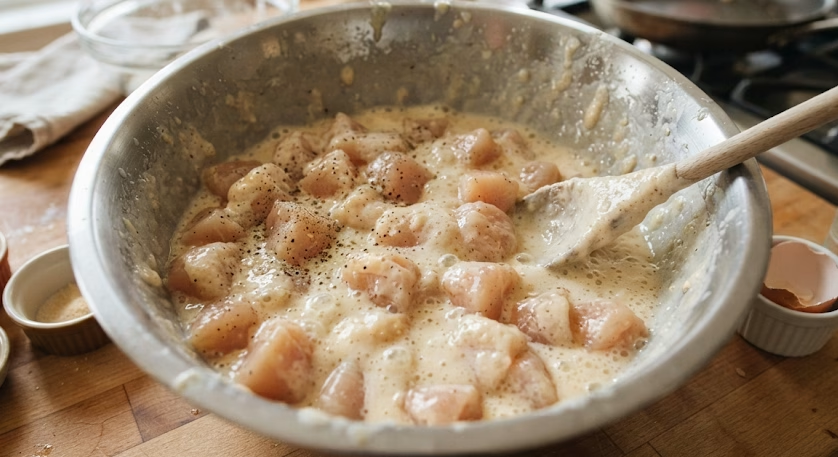
In a mixing bowl, combine the chicken pieces with salt, pepper, garlic powder, corn starch, rice flour, egg, and soda water. Stir until every piece is evenly coated in a thick, slightly bubbly batter. Let it rest for about 10 minutes so the batter sets and clings better during frying.
Heat the Oil
Pour oil into a deep pot or wok and heat it over medium-high heat. I always test the temperature with a thermometer or by dropping in a small bit of batter if it sizzles right away, the oil is ready. Getting this step right is what prevents soggy, greasy chicken later.
Fry Until Golden
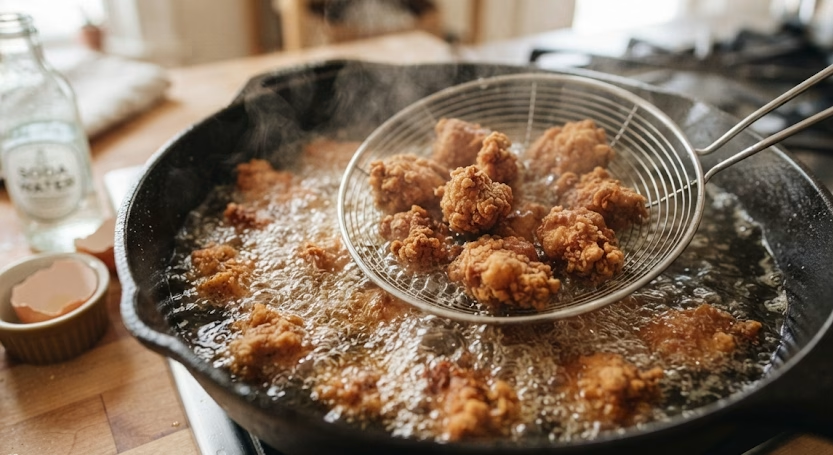
Carefully lower the battered chicken pieces into the hot oil in batches, avoiding overcrowding the pot. Fry for 4 to 5 minutes, turning occasionally, until each piece turns a deep golden brown. Overcrowding drops the oil temperature, so give each piece room to crisp properly.
Double Fry for Extra Crunch
Once the first fry is done, let the chicken rest for a minute or two, then drop it back into the hot oil for another 1 to 2 minutes. This second fry pushes out any remaining moisture and locks in that extra-crispy texture that holds up even after saucing.
Make the Sticky Sauce
In a separate pan, combine the chopped garlic, Korean chili paste, honey, and soy sauce over medium-low heat. Stir continuously until the mixture turns smooth, glossy, and fragrant. This only takes a couple of minutes, so keep an eye on it to avoid burning the garlic.
Toss and Finish
Add the crispy fried chicken straight into the sauce pan and toss quickly so every piece gets fully coated. Turn the heat up to high for about a minute to help the sauce cling and slightly caramelize. Sprinkle sesame seeds over the top and serve immediately while it’s still hot and crunchy.
Additional Tips for Making This Recipe Better
I’ve made this dish enough times to pick up a few tricks that genuinely make a difference.
- I always pat my chicken dry before the batter goes on. Any extra moisture makes the coating slide right off.
- I keep my oil temperature steady around 350°F because fluctuating heat is the biggest reason my batter turns greasy instead of crisp.
- I toss the chicken in the sauce only right before serving, since letting it sit too long softens the crunch.
- I like doubling the sauce when I’m serving it over rice, because the extra glaze soaks in beautifully.
- I toast my sesame seeds for thirty seconds in a dry pan. First it wakes up the flavor so much more.
Common Mistakes to Avoid
- I used to skip resting the batter, and the coating came out uneven. Give it those 10 minutes, it really helps.
- I once crowded the pot with too much chicken at once, and it dropped the oil temperature so everything turned soggy.
- I’ve learned not to skip the double fry step, since it’s the real reason the crust stays crisp under the sauce.
- I made the mistake of adding cold sauce to hot chicken once, and it never got that glossy, sticky finish that always heats it through.
- I’ve burned garlic before by walking away from the sauce pan, so I stay close and stir the whole time.
How to Serve Spicy Honey Garlic Chicken?
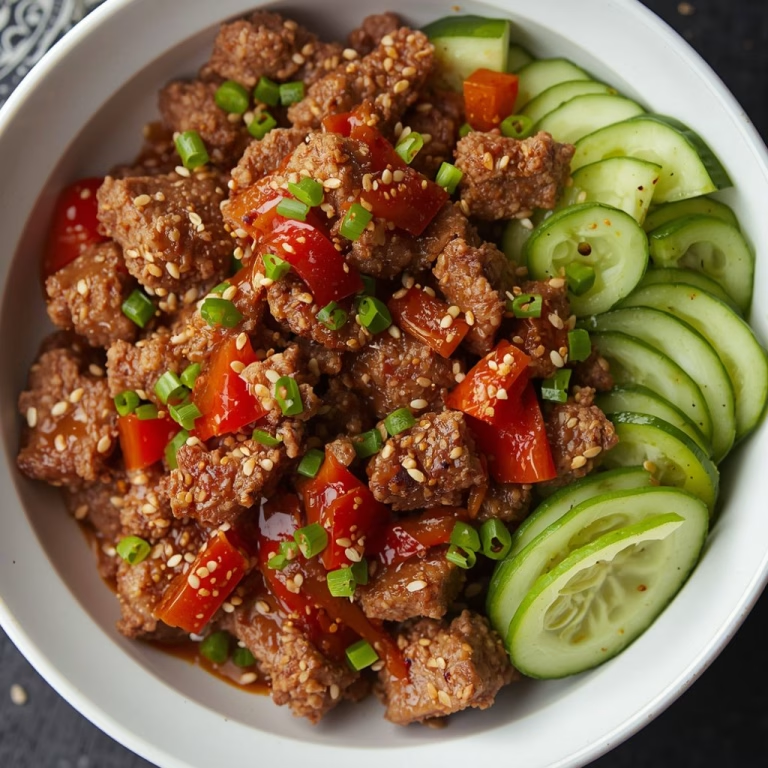
I love serving this over a bowl of steamed jasmine rice so the extra sauce has somewhere to go. A sprinkle of chopped green onions and extra sesame seeds on top makes it look like something from a restaurant menu. For a fuller meal, I add a side of quick-pickled cucumbers or steamed broccoli to balance the richness.
If you’re serving a variety of chicken dishes, a Costco Chicken Caesar Salad Recipe can also make a fresh side option. If you’re hosting, serving it in a big shallow bowl with the sauce pooling at the bottom always gets compliments before anyone even takes a bite.
Variations
- Swap the chicken thighs for chicken breast if you prefer a leaner bite, just watch the frying time so it doesn’t dry out.
- Make it kid-friendly by replacing the Korean chili paste with 2 tablespoons of ketchup plus 1 tablespoon of soy sauce for a milder, tangier glaze.
- Add a tablespoon of butter to the sauce at the end for a rounder, honey garlic butter chicken flavor.
- Use tamari instead of soy sauce for a gluten-free version of the sauce.
- Stir in a spoon of gochugaru or extra chili paste if you want the Korean honey garlic chicken flavor turned up even more.
- Try air-frying the battered chicken at 400°F for a lighter version, though it won’t be quite as crisp as deep-frying.
A Costco Chicken Pot Pie Copycat Recipe is another hearty chicken option for when you’re looking for a different kind of comfort-food meal.
Nutritional Information
Here’s a general estimate per serving, though exact numbers will vary depending on portion size and exact ingredients used.
- Calories: approximately 420 kcal
- Protein: approximately 28g
- Carbohydrates: approximately 32g
- Fat: approximately 19g
Make Ahead and Storage
You can prep the chicken batter and chop the sauce ingredients up to a day ahead and store them separately in the fridge. This cuts down on prep time significantly when you’re ready to cook.
For leftovers, store the fried chicken and sauce separately in airtight containers in the fridge for up to 3 days, then combine and reheat together. Reheat in an air fryer or oven at 375°F for about 8 minutes to bring back the crisp texture, since microwaving tends to make it soft.
To freeze, cool the fried chicken completely before storing in a freezer-safe bag for up to 2 months. Thaw in the fridge overnight, then re-fry briefly or air-fry before tossing in freshly made sauce.
Why You’ll Love This Recipe?
This dish checks every box I look for in a weeknight favorite, and I think you’ll feel the same way once you try it.
- It’s genuinely easy to make. The steps are simple enough for a beginner, yet the results taste like something from a restaurant.
- It’s endlessly customizable. You can dial the spice up or down, or swap the protein depending on what you’re craving.
- It reheats well with the right method. A quick air-fry brings back the crunch, so leftovers never feel like a downgrade.
- It’s a crowd-pleaser. Between the sticky glaze and the crispy texture, it disappears fast whenever I serve it to guests.
- It comes together in 30 minutes. That makes it realistic for busy weeknights without sacrificing flavor.
FAQs
What makes this the best honey garlic chicken recipe?
The soda water and rice flour batter is what sets it apart, giving the chicken a light, extra-crispy texture. Combined with the balanced spicy-sweet sauce, it holds up better than most versions.
Can I use chicken thighs instead of chicken breast?
Yes, honey garlic chicken thighs actually work best since they stay juicier during frying. Boneless, skinless thighs cut into bite-size pieces fry evenly and hold flavor well.
Is this considered a Korean honey garlic chicken recipe?
It draws inspiration from Korean fried chicken thanks to the gochujang-based sauce. You can make it more traditionally Korean by adding gochugaru for extra depth.
Can I turn this into honey garlic butter chicken?
Absolutely, just stir a tablespoon of butter into the sauce right before tossing in the chicken. It adds richness and rounds out the spice nicely.
How do I keep the chicken crispy after adding the sauce?
Toss the chicken in the sauce only right before serving, and don’t let it sit too long in the pan. The double-fry step also helps the crust hold up better under the glaze.

Spicy Honey Garlic Chicken Recipe
Ingredients
Method
- In a mixing bowl, combine the chicken pieces with salt, pepper, garlic powder, corn starch, rice flour, egg, and soda water. Stir until every piece is evenly coated in a thick, slightly bubbly batter. Let it rest for about 10 minutes so the batter sets and clings better during frying.
- Pour oil into a deep pot or wok and heat it over medium-high heat. I always test the temperature with a thermometer or by dropping in a small bit of batter if it sizzles right away, the oil is ready. Getting this step right is what prevents soggy, greasy chicken later.
- Carefully lower the battered chicken pieces into the hot oil in batches, avoiding overcrowding the pot. Fry for 4 to 5 minutes, turning occasionally, until each piece turns a deep golden brown. Overcrowding drops the oil temperature, so give each piece room to crisp properly.
- Once the first fry is done, let the chicken rest for a minute or two, then drop it back into the hot oil for another 1 to 2 minutes. This second fry pushes out any remaining moisture and locks in that extra-crispy texture that holds up even after saucing.
- In a separate pan, combine the chopped garlic, Korean chili paste, honey, and soy sauce over medium-low heat. Stir continuously until the mixture turns smooth, glossy, and fragrant. This only takes a couple of minutes, so keep an eye on it to avoid burning the garlic.
- Add the crispy fried chicken straight into the sauce pan and toss quickly so every piece gets fully coated. Turn the heat up to high for about a minute to help the sauce cling and slightly caramelize. Sprinkle sesame seeds over the top and serve immediately while it’s still hot and crunchy.
Notes
- I always pat my chicken dry before the batter goes on. Any extra moisture makes the coating slide right off.
- I keep my oil temperature steady around 350°F because fluctuating heat is the biggest reason my batter turns greasy instead of crisp.
- I toss the chicken in the sauce only right before serving, since letting it sit too long softens the crunch.
- I like doubling the sauce when I’m serving it over rice, because the extra glaze soaks in beautifully.
- I toast my sesame seeds for thirty seconds in a dry pan. First it wakes up the flavor so much more.