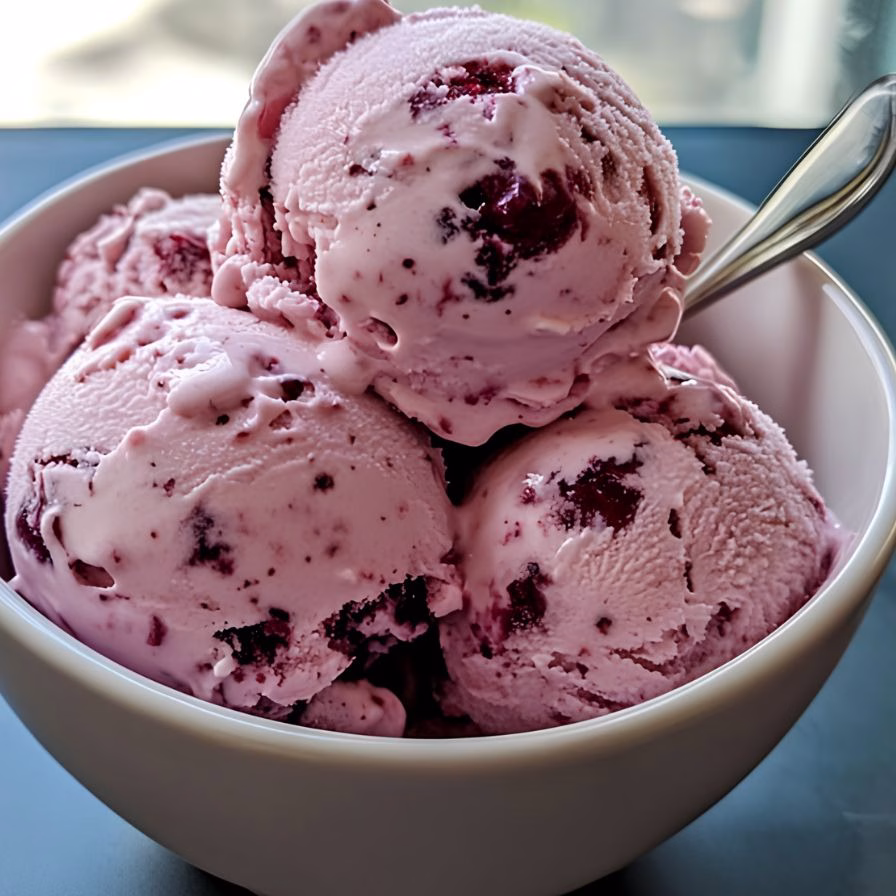
I still remember the first time I made this no-churn mulberry ice cream—it felt almost too easy to be real. I had a bowl full of fresh mulberries and wanted something refreshing without turning on any complicated equipment.
This recipe came together in minutes, and the result was unbelievably creamy and rich. The natural sweetness of mulberries really shines here, making every bite taste like summer. If you’re like me and love simple desserts with big flavor, you’re going to enjoy this one.
Ingredients
Here’s everything you’ll need to create this creamy, no-churn delight:
- 2 cups fresh mulberries
These bring a sweet-tart flavor and gorgeous color. Fresh works best for texture and taste. - 3/4 cup granulated sugar
Helps balance the tartness of the berries and enhances their natural flavor. - 1 teaspoon lemon juice
Brightens the flavor and keeps the fruit tasting fresh. - 2 cups heavy whipping cream
Creates that rich, creamy base. Make sure it’s cold for better whipping results. - 1 can (14 oz) sweetened condensed milk
This replaces the need for churning and gives the ice cream a smooth consistency. - 1 teaspoon vanilla extract
Adds depth and enhances the fruity flavor.
Note: This recipe yields approximately 6 servings, perfect for a small family or gathering.
Variations
Want to customize your mulberry ice cream? Try these ideas:
- Use coconut cream instead of heavy cream for a dairy-free version.
- Swap sugar with honey or maple syrup for a natural sweetener option.
- Add crushed cookies or chocolate chips for extra texture.
- Mix in a swirl of blackberry or raspberry puree for a berry blend twist.
- Add a hint of mint or basil for a refreshing herbal note.
- You can also take inspiration from savory fusion dishes like Spiced Salmon with Cheesy Asparagus Garlic Herb Potatoes Recipe for creative flavor balancing ideas when experimenting with sweet and savory pairings.
Cooking Time
Here’s how long it takes from start to finish:
- Prep Time: 15 minutes
- Freezing Time: 6–8 hours
- Total Time: About 8 hours 15 minutes
Equipment You Need
- Mixing bowls – For combining ingredients smoothly
- Hand mixer or stand mixer – To whip the cream properly
- Saucepan – For cooking the mulberry mixture
- Strainer – To remove seeds for a smoother texture
- Loaf pan or container – For freezing the ice cream
- Spatula – For folding and mixing ingredients gently
How to Make a No-Churn Mulberry Ice Cream Recipe?
This recipe is simple, fun, and perfect even if you’ve never made ice cream before. Follow these easy steps to create a creamy dessert without any special machine. Each step builds flavor and texture, so take your time and enjoy the process.
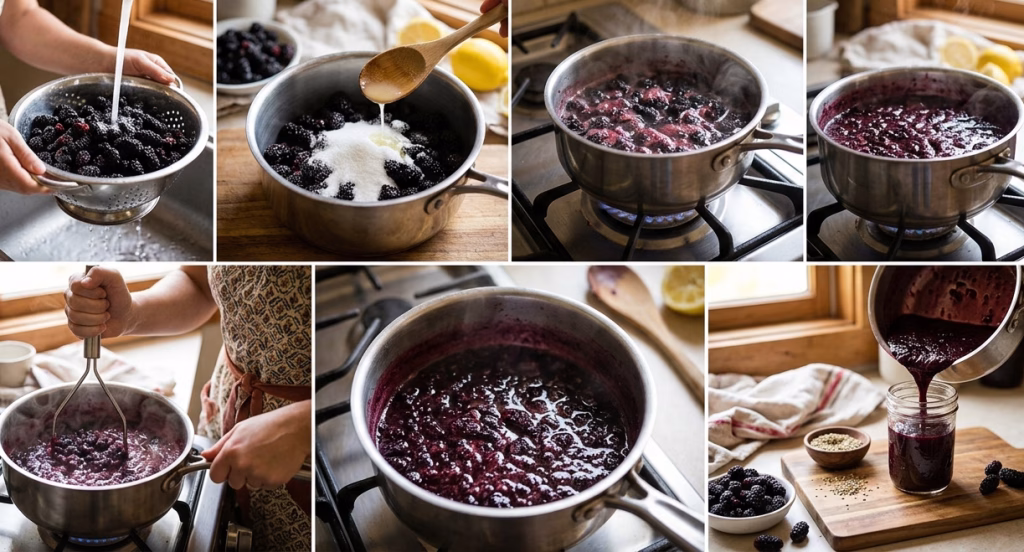
Prepare the Mulberries
Start by rinsing the mulberries thoroughly and removing any stems. Add them to a saucepan with sugar and lemon juice. Cook over medium heat until they soften and release their juices.
Once softened, mash the berries gently and let the mixture simmer for a few minutes. This helps concentrate the flavor. Strain the mixture to remove seeds if you prefer a smoother texture, then let it cool completely.
Whip the Cream
Pour the cold heavy whipping cream into a large bowl. Using a mixer, whip it until stiff peaks form. This step is key to achieving a light and airy texture in your ice cream.
Be careful not to over-whip, as it can turn grainy. You want a smooth, fluffy consistency that holds its shape well.
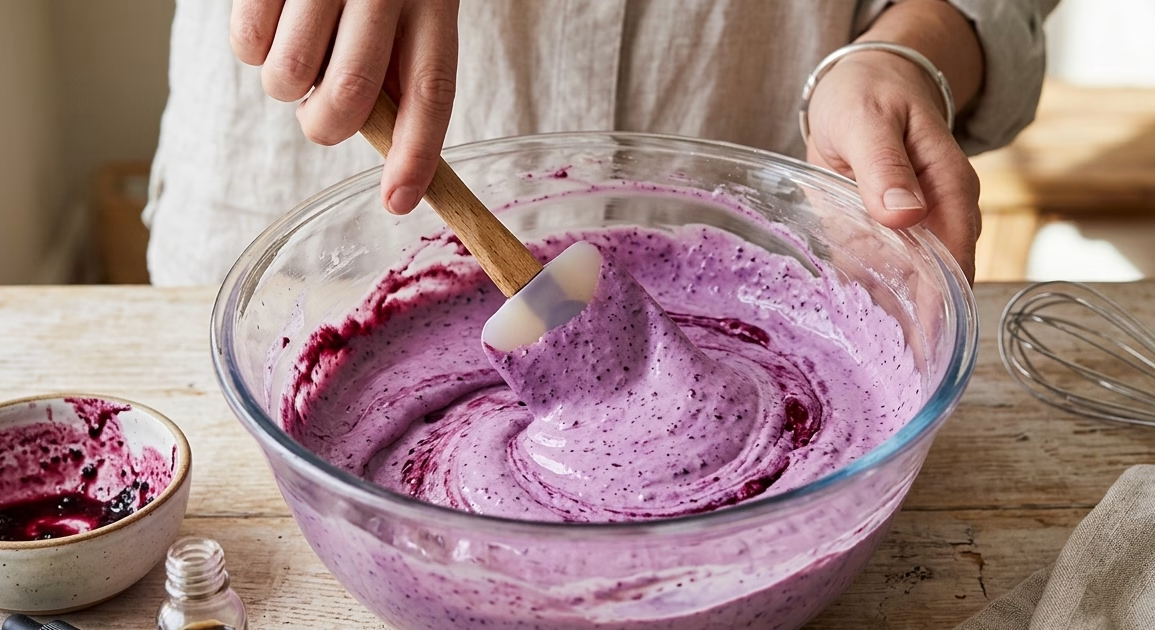
Mix the Base
In another bowl, combine the sweetened condensed milk and vanilla extract. Stir until smooth and well blended. This mixture forms the sweet and creamy base of your ice cream.
Gently fold in the cooled mulberry puree, making sure it’s evenly distributed. The color will turn a beautiful purple shade.
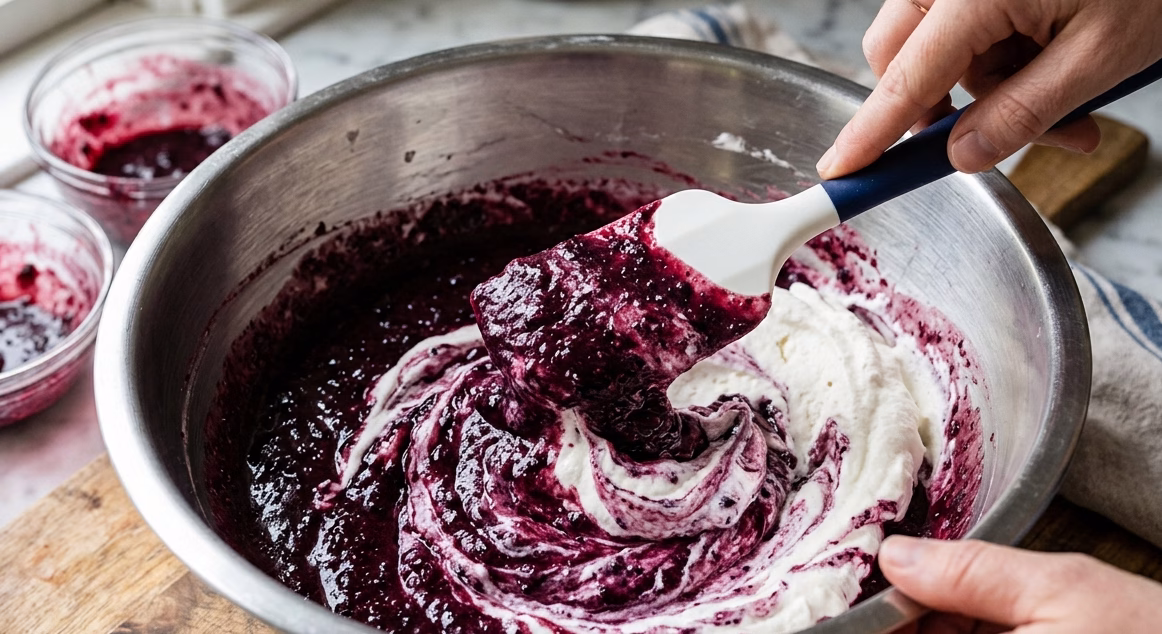
Combine Everything
Now, fold the whipped cream into the mulberry mixture. Do this slowly and gently to keep the mixture airy. Use a spatula and fold until no streaks remain.
This step ensures the ice cream stays light while still being rich and creamy. Avoid stirring too aggressively.
Freeze the Ice Cream
Transfer the mixture into a loaf pan or airtight container. Smooth the top with a spatula and cover it tightly. Place it in the freezer for at least 6–8 hours or overnight.
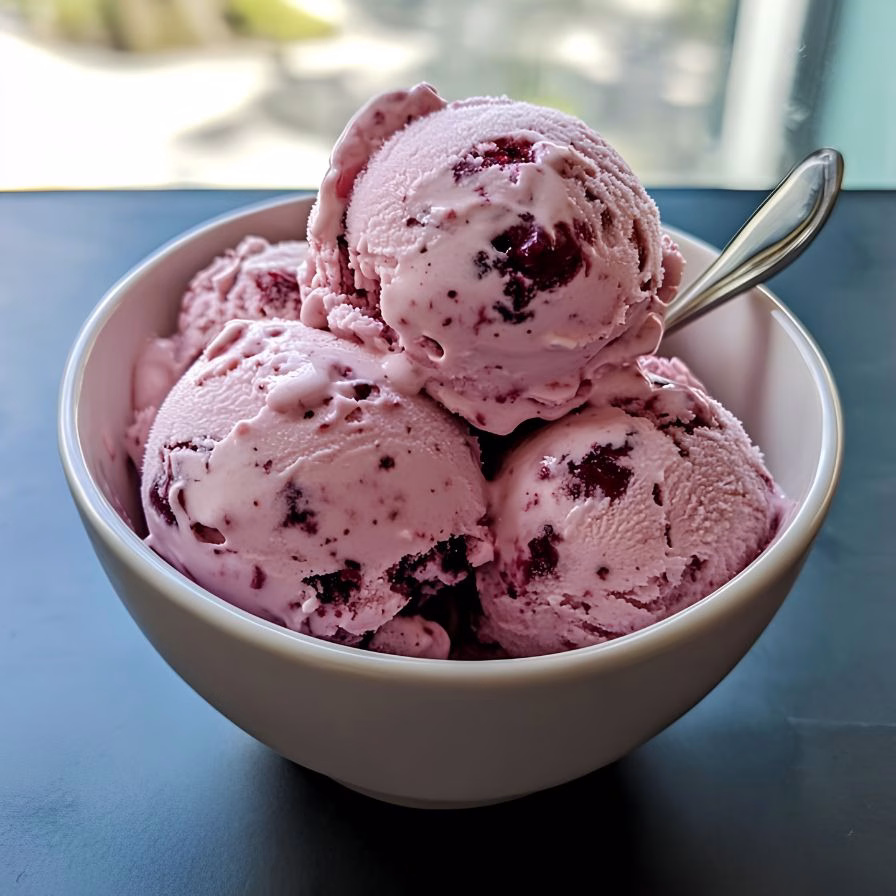
Once fully frozen, scoop and serve. The texture will be creamy and soft, just like churned ice cream.
Additional Tips for Making This Recipe Better
After making this a few times, I picked up some helpful tricks:
- I always chill my mixing bowl before whipping cream—it makes a big difference.
- I like to taste the mulberry mixture before freezing and adjust sweetness if needed.
- I sometimes leave a few berry chunks for a more rustic texture.
- I avoid skipping the straining step when serving guests—it looks and feels smoother.
- I let the ice cream sit for 5 minutes before scooping for easier serving.
How to Serve No-Churn Mulberry Ice Cream Recipe?
Serving this ice cream can be just as fun as making it. I love scooping it into chilled bowls and topping it with fresh mulberries for a vibrant look. You can also drizzle a bit of honey or chocolate syrup for added flavor.
For a fancier presentation, serve it in waffle cones or alongside a slice of cake. A sprig of mint on top adds a nice finishing touch and makes it look extra special.
It also pairs surprisingly well as a refreshing dessert after richer meals like Rolled Up Chicken with Feta Spinach and Sun-Dried Tomatoes Recipe, balancing savory flavors with something cool and creamy.
Nutritional Information
Here’s a quick look at the approximate nutrition per serving:
- Calories: 320
- Protein: 4g
- Carbohydrates: 35g
- Fat: 18g
Make Ahead and Storage
Storing
Store the ice cream in an airtight container in the freezer. This helps prevent ice crystals from forming and keeps the texture smooth. It stays fresh for up to 2 weeks.
Freezing
Always keep the container tightly sealed to avoid freezer burn. You can also place a layer of plastic wrap directly on the surface before sealing. This keeps it creamy longer.
Reheating (Softening for Serving)
Since it freezes solid, let it sit at room temperature for about 5–10 minutes before scooping. This makes it easier to serve and improves the texture.
Why You’ll Love This Recipe?
This recipe is one of my favorites, and here’s why I think you’ll love it too:
- Super easy to make
I didn’t need any ice cream machine, and it still turned out perfect every time. - Rich and creamy texture
The combination of whipped cream and condensed milk creates a luxurious feel. - Naturally flavorful
The mulberries bring a unique taste that feels fresh and slightly tangy. - Customizable options
I’ve tried different add-ins, and it always adapts well to new flavors. - Perfect for any occasion
Whether it’s a casual treat or a dinner party dessert, it always impresses.
This no-churn mulberry ice cream recipe is proof that you don’t need complicated steps to create something truly delicious. Once you try it, you’ll probably find yourself making it again and again—just like I do!
No-Churn Mulberry Ice Cream Recipe
Ingredients
Method
- Start by rinsing the mulberries thoroughly and removing any stems. Add them to a saucepan with sugar and lemon juice. Cook over medium heat until they soften and release their juices.
- Once softened, mash the berries gently and let the mixture simmer for a few minutes. This helps concentrate the flavor. Strain the mixture to remove seeds if you prefer a smoother texture, then let it cool completely.
- Pour the cold heavy whipping cream into a large bowl. Using a mixer, whip it until stiff peaks form. This step is key to achieving a light and airy texture in your ice cream.
- Be careful not to over-whip, as it can turn grainy. You want a smooth, fluffy consistency that holds its shape well.
- In another bowl, combine the sweetened condensed milk and vanilla extract. Stir until smooth and well blended. This mixture forms the sweet and creamy base of your ice cream.
- Gently fold in the cooled mulberry puree, making sure it’s evenly distributed. The color will turn a beautiful purple shade.
- Now, fold the whipped cream into the mulberry mixture. Do this slowly and gently to keep the mixture airy. Use a spatula and fold until no streaks remain.
- This step ensures the ice cream stays light while still being rich and creamy. Avoid stirring too aggressively.
- Transfer the mixture into a loaf pan or airtight container. Smooth the top with a spatula and cover it tightly. Place it in the freezer for at least 6–8 hours or overnight.
- Once fully frozen, scoop and serve. The texture will be creamy and soft, just like churned ice cream.
Notes
- I always chill my mixing bowl before whipping cream—it makes a big difference.
- I like to taste the mulberry mixture before freezing and adjust sweetness if needed.
- I sometimes leave a few berry chunks for a more rustic texture.
- I avoid skipping the straining step when serving guests—it looks and feels smoother.
- I let the ice cream sit for 5 minutes before scooping for easier serving.