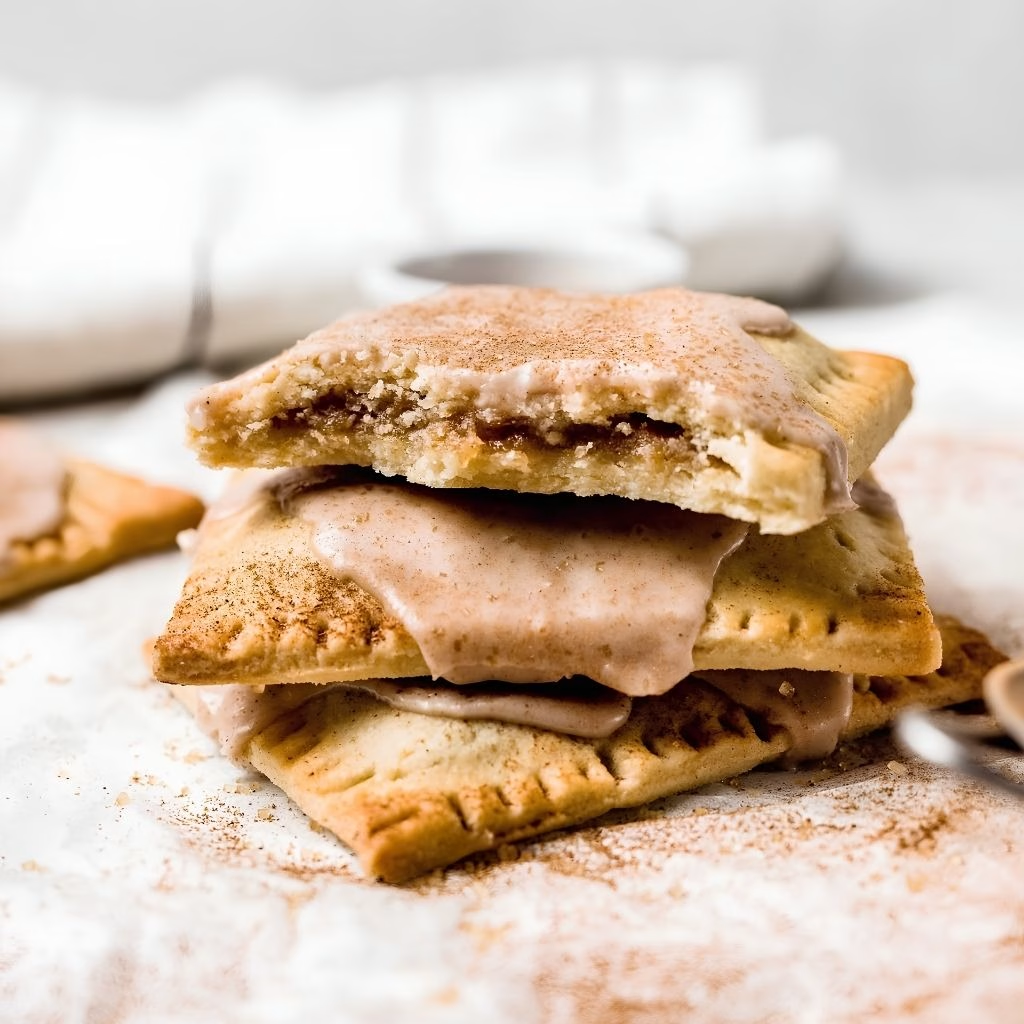
I still remember the first time I pulled a tray of Apple Cinnamon Pop Tarts Recipe out of my oven. The whole kitchen smelled like a fall candle shop, and I knew instantly I’d never go back to the foil-wrapped kind. I’ve made this batch more times than I can count now, tweaking the filling and the glaze until it felt just right.
What I love most is how forgiving the dough is, even for someone who isn’t a “pastry person.” If you grew up loving apple pop-tarts unfrosted or the frosted crisp apple pop-tarts from the cereal aisle, this recipe brings back that same nostalgia, just fresher and flakier. Let me walk you through exactly how I make them at home.
Cooking Time
- Prep Time: 40 minutes
- Cooking Time: 20-22 minutes
- Total Time: 1 hour 30 minutes (includes chilling)
Ingredients
- 2 ½ cups all-purpose flour – the base of your flaky homemade pie dough
- 1 cup unsalted butter, cold and cubed – cold butter is the secret to flaky layers, don’t let it soften
- 1 tsp salt – balances the sweetness in both dough and filling
- 6-8 tbsp ice water – binds the dough without melting the butter
- 2 medium apples, peeled and diced (Honeycrisp or Granny Smith work best) – pick a firm, slightly tart apple so the filling doesn’t turn mushy
- 2 tbsp unsalted butter – for sautéing the apples until soft
- ⅓ cup brown sugar – adds a deep, caramel-like sweetness to the filling
- 1 tsp ground cinnamon – the star spice, don’t skimp on this
- ¼ tsp nutmeg – rounds out the warm, cozy flavor
- pinch of ground cloves – adds a subtle fall spice note
- 1 tbsp cornstarch – thickens the apple filling so it doesn’t leak while baking
- 1 egg, beaten – for the egg wash that gives the crust its golden color
- ¾ cup powdered sugar – for the glaze
- 1 tbsp milk – thins the glaze to a drizzle consistency
- ½ tsp vanilla extract – adds warmth to the glaze
- ¼ tsp cinnamon (for glaze) – ties the topping back to the filling flavor
Note: This recipe makes about 6 full-sized pop tarts, serving 6 people.
Equipment You’ll Need
- Rolling pin – to roll the pie dough into even rectangles
- Pastry cutter or food processor – to cut cold butter into the flour for a flaky crust
- Medium skillet – to cook down the apple cinnamon filling
- Baking sheet – to bake the pop tarts evenly
- Parchment paper – to keep the tarts from sticking
- Fork – to crimp and seal the edges shut
- Small bowl – to whisk together the glaze
- Pastry brush – to apply the egg wash for a golden finish
How to Make Apple Cinnamon Pop Tarts Recipe?
Making these from scratch is much easier than it looks, I promise. The process breaks down into just a few stages: dough, filling, assembly, and baking. Once you’ve done it once, you’ll have it down for every future batch.
Make the Pie Dough
Combine the flour and salt in a large bowl, then cut in the cold cubed butter until it looks like coarse crumbs. Slowly add ice water, one tablespoon at a time, until the dough just comes together. Divide it into two discs, wrap in plastic, and chill for at least 30 minutes.
Cook the Apple Filling
While the dough chills, melt butter in a skillet over medium heat and add the diced apples. Sprinkle in the brown sugar, cinnamon, nutmeg, and cloves, stirring gently. Cook for 4-5 minutes until the apples soften, then stir in cornstarch to thicken the juices before removing from heat to cool.
Roll and Cut the Dough
On a lightly floured surface, roll out each disc of chilled dough to about ¼-inch thickness. Use a knife or pizza cutter to slice the dough into even rectangles, roughly 3×4 inches, so you get matching top and bottom pieces for each tart.
Fill and Seal the Tarts
Spoon about 2 tablespoons of the cooled apple filling onto half of the rectangles, leaving a small border around the edges. Top each with a second rectangle, then press the edges firmly with a fork to seal and prevent any filling from leaking out during baking.
Chill Before Baking
Place the assembled pop tarts on a parchment-lined tray and pop them in the freezer for 15 minutes, or the fridge for 30 minutes. This step firms up the butter again, which is what keeps your crust flaky instead of greasy.
Bake Until Golden
Preheat your oven to 375°F. Brush each tart with the beaten egg wash and poke a few small holes on top to let steam escape. Bake for 20-22 minutes, until the crust is golden brown and slightly puffed.
Glaze and Serve
Once the tarts have cooled for about 15 minutes, whisk together powdered sugar, milk, vanilla, and a pinch of cinnamon until smooth. Drizzle or spread the glaze over each tart and let it set for a few minutes before digging in.
Additional Tips for Making This Recipe Better
I’ve made this recipe enough times to have a few tricks up my sleeve, and these are the things that really make a difference for me:
- I always keep my butter and water ice-cold. Even a few warm minutes can make the dough greasy instead of flaky.
- I let my apple filling cool completely before assembling, otherwise it melts the butter in the dough and I lose that layered texture.
- I never skip the chilling step before baking. I learned the hard way that skipping it makes the tarts spread out flat.
- I like doubling the filling recipe and freezing half so my next batch comes together twice as fast.
- I brush a thin second layer of egg wash halfway through baking if I want an extra glossy, bakery-style finish.
Common Mistakes to Avoid
Over the years I’ve made just about every mistake possible with this recipe, so let me save you the trouble:
- I once used warm, freshly diced apples straight into the dough, and it turned into a soggy mess, always cooling the filling first.
- I didn’t seal the edges tightly enough on my first try, and the filling oozed out all over the tray.
- I overfilled a batch thinking more filling means more flavor, but it just made sealing nearly impossible.
- I skipped poking steam vents once, and the tops puffed unevenly and cracked.
- I rushed the chilling step when I was in a hurry, and the tarts baked up flat instead of flaky.
How to Serve Apple Cinnamon Pop Tarts?
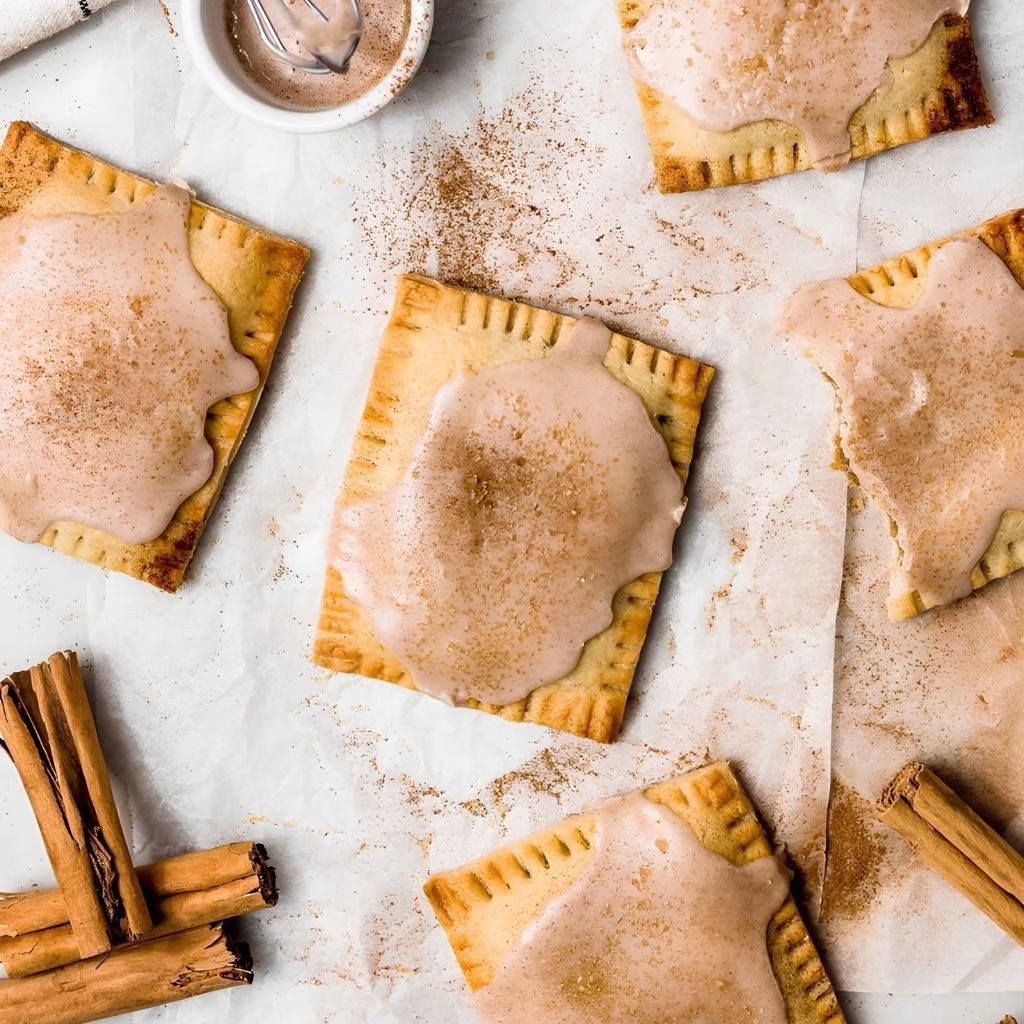
I love serving these warm, right after the glaze has set just enough to hold its shine but is still a little soft. A light dusting of extra cinnamon on top makes them look bakery-fresh, and I sometimes drizzle a bit of caramel sauce over each tart for a caramel apple pop tart recipe twist.
They’re great plated on a wooden board with a few thin apple slices scattered around for a rustic, fall-morning presentation. Pair them with a hot cup of coffee or chai for a cozy breakfast, or serve alongside other classic favorites like chicken tenders for a fun sweet-and-savory brunch spread. I also like cutting them in half diagonally so the apple filling peeks out. It’s a small touch that makes them feel special for guests.
Variations
Once you’ve mastered the base recipe, it’s fun to switch things up depending on what you’re craving:
- Swap the glaze for a cream cheese frosting if you want something closer to caramel apple cheesecake pop tarts.
- Use a store-bought puff pastry instead of pie dough for a quicker, flakier homemade apple pop tarts with puff pastry version.
- Stir a spoonful of apple butter into the filling for extra depth and a richer, apple butter pop tarts flavor.
- Make them dairy-free by swapping butter for a plant-based alternative in both the dough and filling.
- Cut the sugar in the filling and glaze for a lighter, less sweet version if you prefer a more balanced treat.
- Add a drizzle of salted caramel sauce on top for a caramel apple pop tart recipe spin that’s perfect for parties.
- If you’re in the mood for more cozy, oven-baked treats, it’s worth browsing through a few dessert recipes for other ideas to try next.
Nutritional Information
Here’s a rough breakdown per pop tart, based on a batch of 6:
- Calories: 340 kcal
- Protein: 4g
- Carbohydrates: 45g
- Fat: 17g
Make Ahead and Storage
You can prepare the dough and filling up to 2 days in advance and store them separately in the fridge until you’re ready to assemble and bake.
Baked pop tarts stay fresh at room temperature in an airtight container for up to 2 days, or in the fridge for about 5 days.
To freeze, wrap unbaked assembled tarts tightly and freeze for up to 2 months; bake straight from frozen, adding a few extra minutes to the bake time. For leftovers, reheat baked tarts in a toaster oven for a few minutes to bring back that fresh-baked crispness.
Why You’ll Love This Recipe?
There’s a reason I keep coming back to this recipe every fall, and I think you’ll feel the same once you try it:
- Better than store-bought: These taste nothing like the mass-produced apple cinnamon pop-tarts discontinued flavors. You might remember the crust is buttery and the filling actually tastes like real apples.
- Easy to customize: Whether you want them frosted, unfrosted, or filled with something like apple butter, this dough works as a blank canvas.
- Great for meal prep: You can freeze a big batch and bake fresh tarts whenever a craving hits.
- Kid and adult approved: The nostalgic flavor appeals to kids while the homemade quality wins over adults too.
- Perfect for fall gatherings: They make an easy, hand-held dessert or breakfast that always gets compliments.
FAQs
Can I use puff pastry instead of pie dough?
Yes, puff pastry works great if you want a quicker, easy apple cinnamon pop tarts recipe with a lighter, flakier texture.
Why did my filling leak out while baking?
This usually happens if the edges weren’t sealed tightly enough or the filling wasn’t cooled before assembling to make sure both are done properly.
Can I make these ahead of time?
Absolutely, you can prep the dough and fill a couple of days ahead, or freeze fully assembled unbaked tarts for later.
How do I keep the glaze from melting off?
Let the tarts cool for at least 15 minutes before glazing so the surface isn’t too warm, and let the glaze fully set before storing.
Can I make a sugar-free version?
Yes, you can substitute the sugar in the filling and glaze with a sugar-free sweetener of your choice, though the texture may vary slightly.

Apple Cinnamon Pop Tarts Recipe
Ingredients
Method
- Combine the flour and salt in a large bowl, then cut in the cold cubed butter until it looks like coarse crumbs. Slowly add ice water, one tablespoon at a time, until the dough just comes together. Divide it into two discs, wrap in plastic, and chill for at least 30 minutes.
- While the dough chills, melt butter in a skillet over medium heat and add the diced apples. Sprinkle in the brown sugar, cinnamon, nutmeg, and cloves, stirring gently. Cook for 4-5 minutes until the apples soften, then stir in cornstarch to thicken the juices before removing from heat to cool.
- On a lightly floured surface, roll out each disc of chilled dough to about ¼-inch thickness. Use a knife or pizza cutter to slice the dough into even rectangles, roughly 3×4 inches, so you get matching top and bottom pieces for each tart.
- Spoon about 2 tablespoons of the cooled apple filling onto half of the rectangles, leaving a small border around the edges. Top each with a second rectangle, then press the edges firmly with a fork to seal and prevent any filling from leaking out during baking.
- Place the assembled pop tarts on a parchment-lined tray and pop them in the freezer for 15 minutes, or the fridge for 30 minutes. This step firms up the butter again, which is what keeps your crust flaky instead of greasy.
- Preheat your oven to 375°F. Brush each tart with the beaten egg wash and poke a few small holes on top to let steam escape. Bake for 20-22 minutes, until the crust is golden brown and slightly puffed.
- Once the tarts have cooled for about 15 minutes, whisk together powdered sugar, milk, vanilla, and a pinch of cinnamon until smooth. Drizzle or spread the glaze over each tart and let it set for a few minutes before digging in.
Notes
- I always keep my butter and water ice-cold. Even a few warm minutes can make the dough greasy instead of flaky.
- I let my apple filling cool completely before assembling, otherwise it melts the butter in the dough and I lose that layered texture.
- I never skip the chilling step before baking. I learned the hard way that skipping it makes the tarts spread out flat.
- I like doubling the filling recipe and freezing half so my next batch comes together twice as fast.
- I brush a thin second layer of egg wash halfway through baking if I want an extra glossy, bakery-style finish.