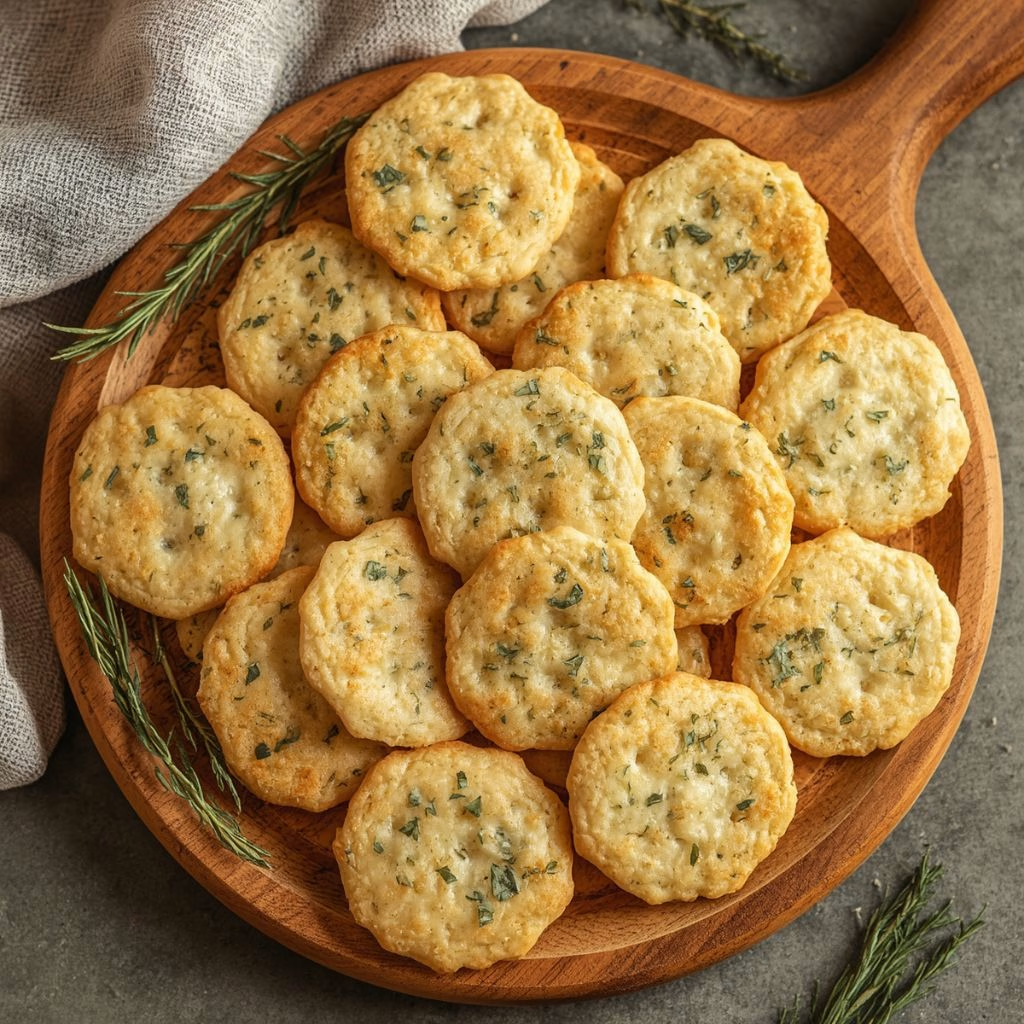
I still remember the first time I pulled a tray of this Garlic Herb Cheese Crackers Recipe out of the oven and my whole kitchen smelled like a cheese shop that had a garlic bread emergency. I honestly didn’t expect homemade crackers to taste this much better than the boxed kind.
Every bite is buttery, sharp, and just a little garlicky, with flecks of herbs baked right into the dough. Once I figured out the right thickness and bake time, this became my go-to snack whenever I want something impressive without much fuss. I’m walking you through exactly how I make them so yours turn out just as crisp and flavorful.

Cooking Time
- Prep Time: 20 minutes (plus 30 minutes chilling)
- Cooking Time: 15 minutes
- Total Time: 1 hour 5 minutes
Ingredients
- 1 1/2 cups all-purpose flour – gives the crackers their sturdy, crisp base
- 1 1/2 cups sharp cheddar cheese, freshly grated – grate it yourself, pre-shredded cheese doesn’t melt as evenly
- 6 tablespoons unsalted butter, cold and cubed – cold butter is the secret to a flaky, crumbly texture
- 2 garlic cloves, minced – fresh garlic beats garlic powder for a punchier flavor
- 1 tablespoon fresh chives, chopped – adds a mild oniony freshness to every bite
- 1 teaspoon dried rosemary, crushed – crushing it releases more flavor into the dough
- 1 teaspoon dried thyme – pairs beautifully with the cheddar and garlic
- 1/2 teaspoon fine sea salt – balances the richness of the butter and cheese
- 1/4 teaspoon freshly ground black pepper – gives a subtle warmth without overpowering the herbs
- 3 to 4 tablespoons ice-cold water – added gradually so the dough doesn’t turn gummy
- Flaky sea salt, for topping – a light sprinkle before baking adds crunch and visual appeal
Note: This recipe makes about 45 to 50 small crackers, serving 6 to 8 people as a snack or appetizer.
Equipment You Need
- Food processor – quickly cuts the butter into the flour for an even dough
- Mixing bowl – useful if you’re combining ingredients by hand instead
- Rolling pin – rolls the dough out thin and even for crisp crackers
- Baking sheet – holds the crackers while they bake to golden perfection
- Parchment paper – prevents sticking and makes cleanup effortless
- Pizza cutter or sharp knife – cuts clean, even squares in seconds
- Fork – pricks the dough so it bakes flat instead of puffing up
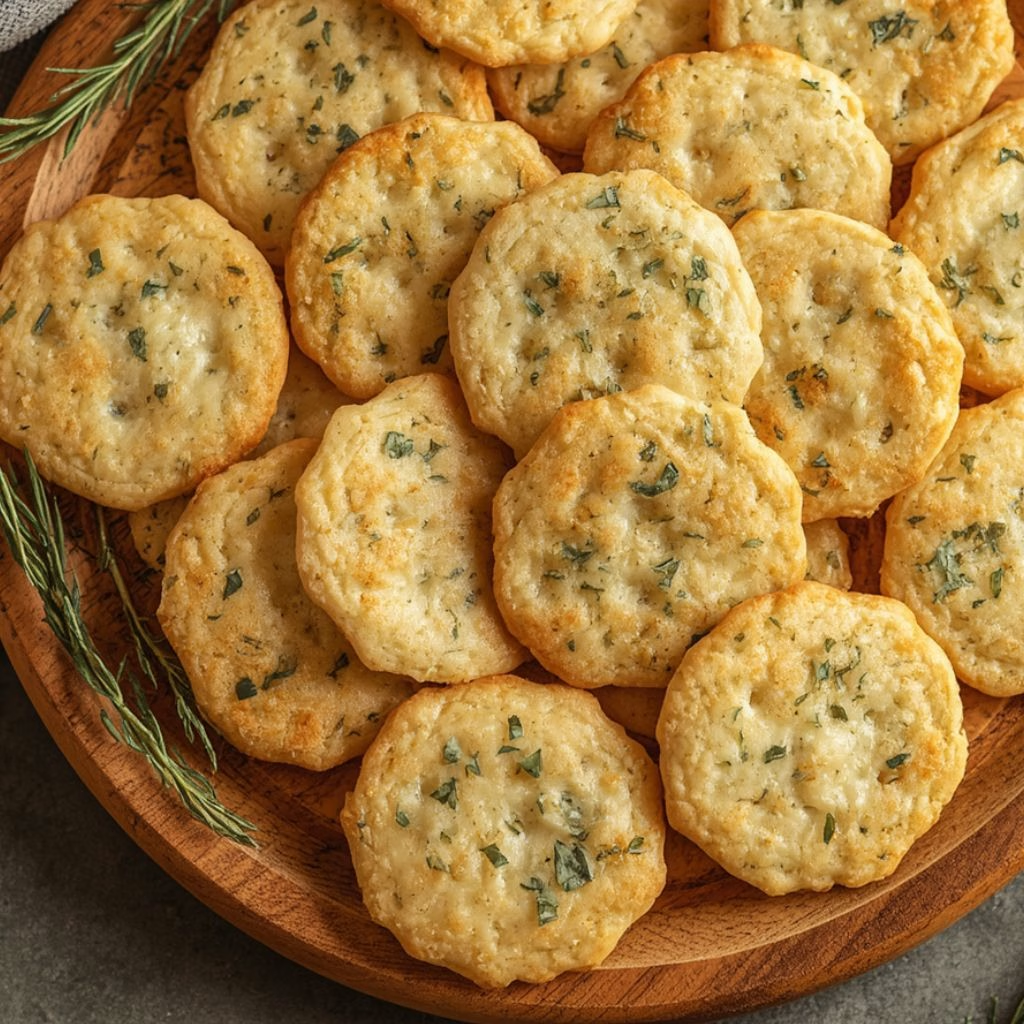
How to Make Garlic Herb Cheese Crackers Recipe?
Making these crackers is much simpler than it looks once you break it down into a few short stages. I promise you don’t need any fancy baking skills, just a little patience while the dough chills. Here’s exactly how I put mine together from start to finish.
Prepare the Dough Base
I start by adding the flour, salt, and pepper to my food processor, then pulsing in the cold, cubed butter until the mixture looks like coarse crumbs. This step is quick, so I try not to overprocess it, since overworked dough turns tough instead of flaky. Keeping the butter cold at this stage is what gives the final crackers their light, crisp bite.
Add the Cheese, Garlic, and Herbs
Next, I mix in the freshly grated cheddar, minced garlic, chives, rosemary, and thyme, pulsing just until everything is evenly distributed. I like to scrape down the sides of the bowl once so no dry pockets of flour get left behind. The dough should look crumbly but well combined at this point, with visible flecks of green herb throughout.
Bring the Dough Together
With the processor running, I drizzle in the ice water one tablespoon at a time until the dough starts clumping into a ball. I stop as soon as it holds together when pressed, since too much water makes the dough sticky and hard to roll. I then turn it out onto a floured surface and gently shape it into a flat disc.
Chill the Dough
I wrap the disc tightly in plastic wrap and refrigerate it for at least 30 minutes. This resting time firms the butter back up and relaxes the dough, which makes rolling so much easier. If I’m short on time, I pop it in the freezer for about 12 to 15 minutes instead.
Roll and Cut the Crackers
Once chilled, I roll the dough out on a lightly floured surface until it’s about 1/8-inch thick, aiming for as even a thickness as possible. Uneven dough bakes unevenly, so I take my time here. Using a pizza cutter, I slice the dough into small squares, then prick each one a couple of times with a fork.
Bake Until Golden
I transfer the crackers onto a parchment-lined baking sheet, leaving a little space between each one, then sprinkle flaky sea salt on top. They bake at 375°F for 12 to 15 minutes, until the edges turn a deep golden brown. I let them cool completely on the tray so they crisp up fully before serving.
Additional Tips for Making This Recipe Better
I’ve made this recipe enough times now to know exactly what makes the biggest difference, so here’s what I always keep in mind.
- I always grate my own cheese straight off the block since pre-shredded cheese has anti-caking additives that keep the dough from coming together smoothly.
- I roll the dough between two sheets of parchment paper, which saves me from adding extra flour and keeps the texture light.
- I rotate my baking sheet halfway through baking because my oven runs a little hotter in the back.
- I let the crackers cool completely before storing them, otherwise trapped steam makes them go soft.
- I double the batch and freeze half the dough, so I always have a quick snack ready to bake later.
Common Mistakes to Avoid
- I once skipped chilling the dough and ended up with crackers that spread out and lost their shape in the oven.
- I’ve rolled the dough too thick before, and it baked up doughy in the center instead of crisp all the way through.
- I learned the hard way that using warm butter makes the dough greasy, so I always keep mine cold until the last second.
- I’ve pulled crackers out too early because the centers looked pale, but they crisp up more as they cool, so I wait for a deep golden edge.
- I forgot to prick the dough once, and a few crackers puffed up unevenly instead of baking flat.
How to Serve Garlic Herb Cheese Crackers?
I love setting these out on a wooden board alongside a wedge of soft brie or a bowl of whipped goat cheese for dipping. A few clusters of grapes, some dried apricots, and a small dish of honey turn this into a full-on charcuterie spread in minutes.
For something heartier, I serve them next to a bowl of tomato soup, since they hold up well for dipping without going soggy. If I’m hosting, I scatter a few extra fresh rosemary sprigs around the board for a garnish that makes the whole platter look intentional and inviting.
Variations
- Swap the cheddar for parmesan or gruyere if you want a nuttier, more savory flavor profile, similar to the flavor in these garlic parmesan breadsticks.
- Add a pinch of cayenne or smoked paprika for a subtle kick without changing the herb base.
- Use a gluten-free all-purpose flour blend for a celiac-friendly version of the same recipe.
- Make it dairy-free by using a plant-based butter and a dairy-free cheddar-style shred.
- Mix in everything bagel seasoning instead of the herbs for a completely different flavor direction.
- Add finely chopped sun-dried tomatoes for a slightly tangy, Mediterranean twist.
Nutritional Information
Here’s a rough breakdown per serving of about six crackers, though exact numbers will vary slightly based on the cheese and butter you use.
- Calories: 160 kcal
- Protein: 5g
- Carbohydrates: 11g
- Fat: 11g
Make Ahead and Storage
You can prepare the dough up to two days ahead of time and keep it wrapped tightly in the refrigerator until you’re ready to roll and bake it.
Once baked and fully cooled, store the crackers in an airtight container at room temperature, where they’ll stay crisp and fresh for up to one week.
For longer storage, freeze the unbaked dough disc for up to three months, or freeze the baked crackers themselves in a sealed bag, then re-crisp them in a 300°F oven for a few minutes before serving.
Why You’ll Love This Recipe?
This recipe has earned a permanent spot in my snack rotation, and I think you’ll feel the same once you try it.
- Simple pantry ingredients: I rarely have to make a special trip to the store since flour, butter, and cheese are already staples in my kitchen.
- Endless customization: I can swap the cheese or herbs depending on what I’m craving, so it never feels repetitive.
- Great for entertaining: These crackers always look homemade and thoughtful, so they make my cheese boards feel a little more special.
- Make-ahead friendly: I can prep the dough in advance, which makes hosting so much less stressful.
- Kid-approved snack: My family reaches for these over store-bought crackers every single time I make a batch.
FAQs
Can I use garlic powder instead of fresh garlic?
Yes, I sometimes swap in about 1/2 teaspoon of garlic powder when I’m out of fresh cloves, though the flavor is a touch milder.
Why did my crackers turn out soft instead of crisp?
This usually means they were rolled too thick or pulled from the oven too early, so I always check for a deep golden edge before removing them.
Can I make these garlic parmesan crackers instead?
Absolutely, just swap the cheddar for parmesan for a version closer to a classic garlic parmesan crackers recipe with a saltier, nuttier bite.
How long do homemade savoury crackers stay fresh?
Stored in an airtight container at room temperature, these crackers stay crisp and fresh for about a week.
Can I make this recipe without a food processor?
Yes, I’ve made the dough by hand plenty of times by cutting the cold butter into the flour with a pastry cutter or my fingertips until it looks crumbly.
If you enjoyed this recipe, you might also like this homemade cheese and rice crackers recipe for another crunchy, cheesy snack to add to your rotation.

Garlic Herb Cheese Crackers Recipe
Ingredients
Method
- I start by adding the flour, salt, and pepper to my food processor, then pulsing in the cold, cubed butter until the mixture looks like coarse crumbs. This step is quick, so I try not to overprocess it, since overworked dough turns tough instead of flaky. Keeping the butter cold at this stage is what gives the final crackers their light, crisp bite.
- Next, I mix in the freshly grated cheddar, minced garlic, chives, rosemary, and thyme, pulsing just until everything is evenly distributed. I like to scrape down the sides of the bowl once so no dry pockets of flour get left behind. The dough should look crumbly but well combined at this point, with visible flecks of green herb throughout.
- With the processor running, I drizzle in the ice water one tablespoon at a time until the dough starts clumping into a ball. I stop as soon as it holds together when pressed, since too much water makes the dough sticky and hard to roll. I then turn it out onto a floured surface and gently shape it into a flat disc.
- I wrap the disc tightly in plastic wrap and refrigerate it for at least 30 minutes. This resting time firms the butter back up and relaxes the dough, which makes rolling so much easier. If I’m short on time, I pop it in the freezer for about 12 to 15 minutes instead.
- Once chilled, I roll the dough out on a lightly floured surface until it’s about 1/8-inch thick, aiming for as even a thickness as possible. Uneven dough bakes unevenly, so I take my time here. Using a pizza cutter, I slice the dough into small squares, then prick each one a couple of times with a fork.
- I transfer the crackers onto a parchment-lined baking sheet, leaving a little space between each one, then sprinkle flaky sea salt on top. They bake at 375°F for 12 to 15 minutes, until the edges turn a deep golden brown. I let them cool completely on the tray so they crisp up fully before serving.
Notes
- I always grate my own cheese straight off the block since pre-shredded cheese has anti-caking additives that keep the dough from coming together smoothly.
- I roll the dough between two sheets of parchment paper, which saves me from adding extra flour and keeps the texture light.
- I rotate my baking sheet halfway through baking because my oven runs a little hotter in the back.
- I let the crackers cool completely before storing them, otherwise trapped steam makes them go soft.
- I double the batch and freeze half the dough, so I always have a quick snack ready to bake later.