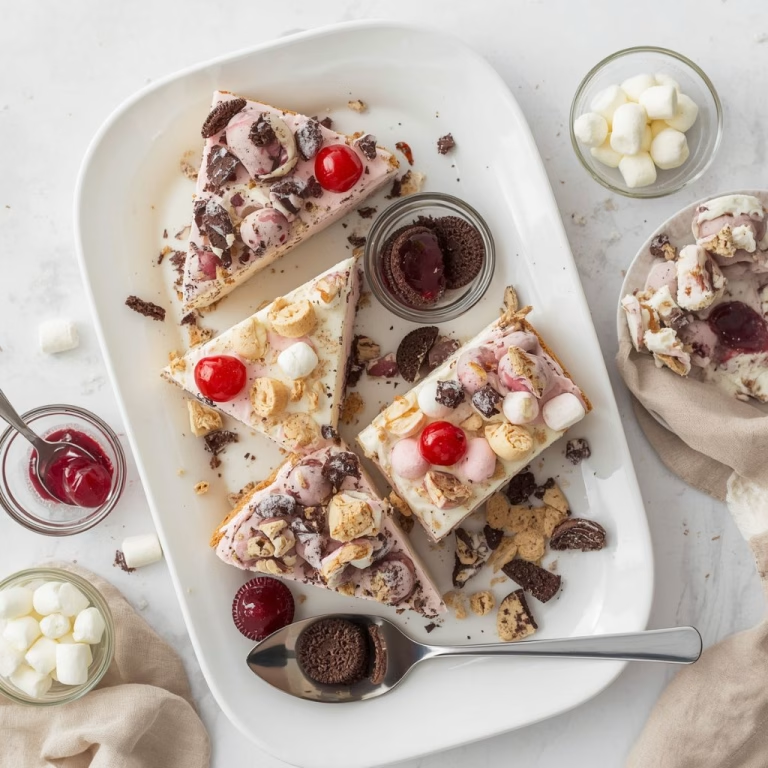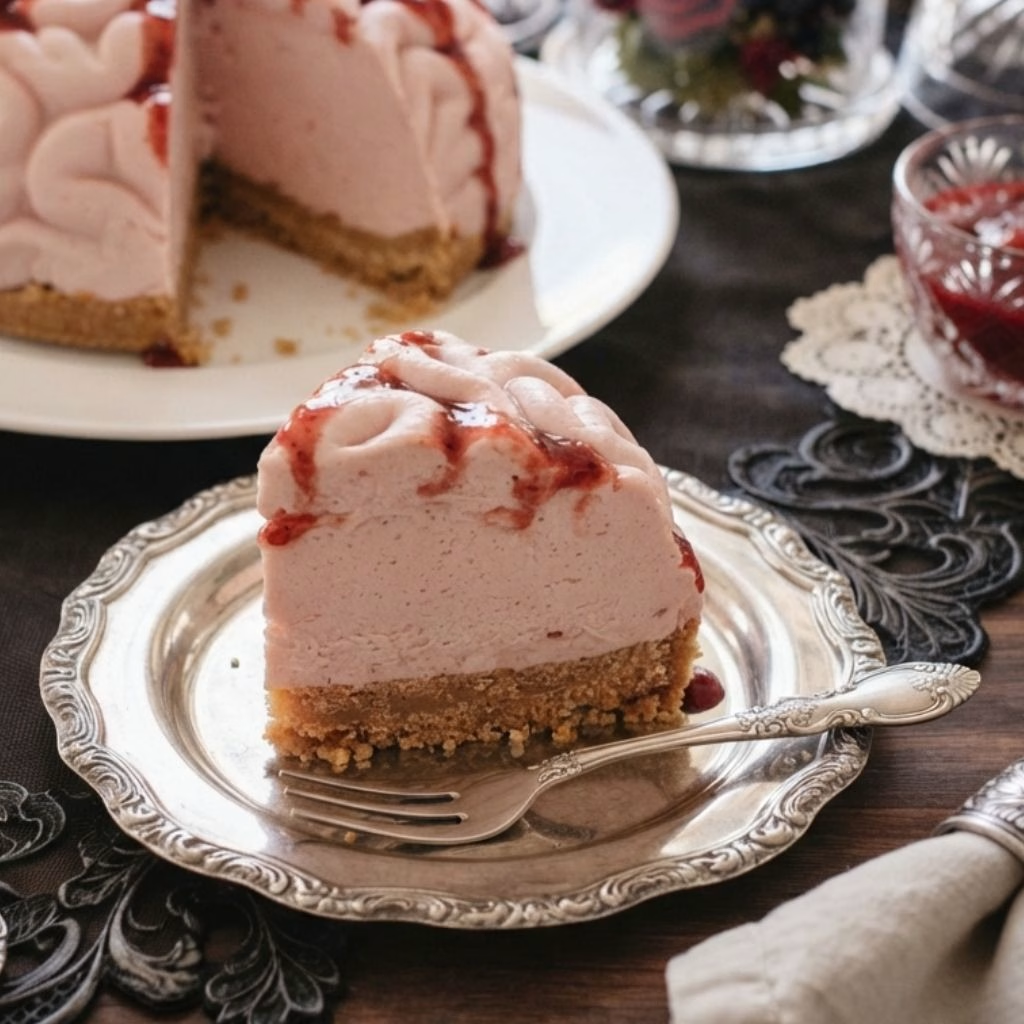
I made this No Bake Strawberry Cheesecake Brain Recipe for my daughter’s Halloween sleepover, and it honestly stole the whole party. I loved that I didn’t have to touch my oven, since the entire dessert comes together with a food processor, a mold, and a whole lot of chilling time.
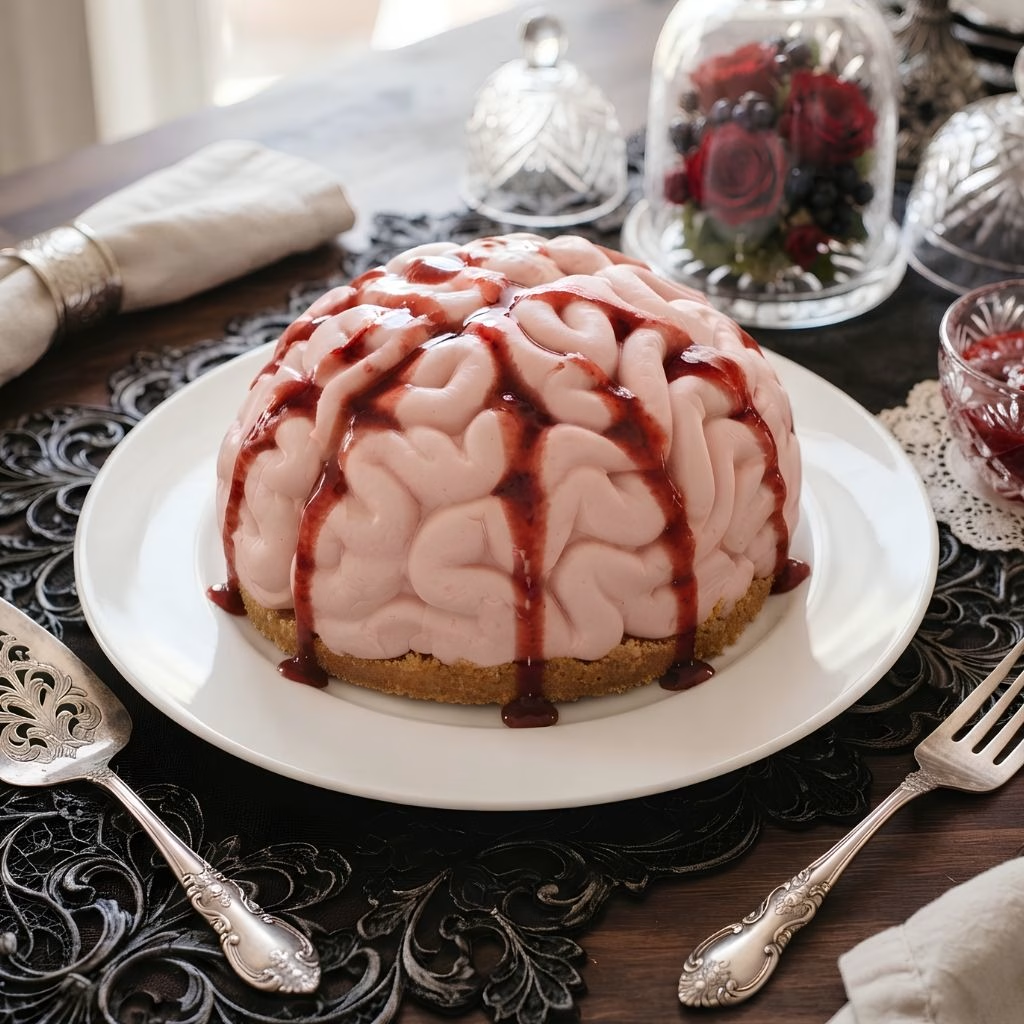
The strawberry “blood” syrup dripping over the pale pink brain had every kid squealing before they even got a bite. I promise the taste is way better than the spooky look suggests, with a smooth cheesecake center and a buttery graham crust underneath. If you want a make-ahead Halloween showstopper that tastes as good as it looks creepy, this is the one I keep coming back to.
Cooking Time
- Prep Time: 40 minutes
- Chill and Freeze Time: 4 hours 20 minutes
- Total Time: 5 hours
Ingredients
For the Graham Cracker Crust
- 9 whole graham crackers, crushed – the base layer that gives the brain its sturdy bottom
- 1/3 cup packed light brown sugar – adds a warm caramel note under the tangy filling
- 1/2 teaspoon ground cinnamon – a small pinch that keeps the crust from tasting flat
- Pinch of fine salt – balances the sweetness in the crust
- 8 tablespoons unsalted butter, melted – binds the crumbs so the crust holds its shape
For the Cheesecake Filling
- 2 tablespoons plus 1 1/2 teaspoons unflavored powdered gelatin – this is what lets the cheesecake set without any baking
- 1/3 cup warm water – used to bloom the gelatin before mixing it in
- 1 pound cream cheese, softened – the base of the filling, so let it come fully to room temperature
- 3/4 cup granulated sugar – sweetens the filling without overpowering the tang
- 1/2 teaspoon pure vanilla extract – rounds out the flavor
- Pinch of fine salt – keeps the sweetness in check
- Juice of 1/2 lemon – brightens the filling and cuts the richness
- 2 cups heavy cream – whipped into the batter for a light, mousse-like texture
- Pink or red gel food coloring – just enough to tint the filling to a pale, brain-like pink
For the Strawberry Syrup
- 1 pound strawberries, hulled and halved – fresh berries give the syrup its real fruit flavor, so skip the frozen ones if you can
- 3/4 cup granulated sugar – sweetens the syrup as it simmers down
- Juice of 1/2 lemon – adds a little tartness so the syrup isn’t cloying
- 1/4 cup water – helps the berries soften evenly
- Nonstick cooking spray – for coating the mold so the brain releases cleanly
Note: This recipe makes about 8 servings, so it’s perfect for a small Halloween gathering or a classroom party.
Equipment You Need
- Food processor – for crushing the crust and blending the cheesecake filling smooth
- Brain-shaped silicone or plastic mold – gives the cheesecake its signature spooky shape
- Medium saucepan – for cooking down the strawberry syrup
- Fine mesh strainer – separates the smooth syrup from the softened berry chunks
- Rubber spatula – for spreading the batter evenly inside the mold
- Mixing bowls – for the crust mixture and for chilling the syrup
How to Make No-Bake Strawberry Cheesecake Brain Recipe?
I know the ingredient list looks long, but the actual process is really just four components coming together in stages. Once you’ve made the crust, filling, and syrup, the rest is just layering, freezing, and waiting. Here’s exactly how I put mine together from start to finish.
Make the Graham Cracker Crust
I pulse the graham crackers, brown sugar, cinnamon, and salt in the food processor until they turn into fine crumbs. Then I drizzle in the melted butter and pulse again until the mixture looks like damp sand. I set this aside in a bowl and wipe out the processor bowl before moving on, since I need it clean for the cheesecake filling next.
Bloom the Gelatin
I whisk the gelatin into the warm water in a small bowl and let it sit for about five minutes until it turns thick and spongy. This step matters more than people think, because unbloomed gelatin leaves lumps in your filling. I never skip it, even when I’m in a rush to finish the rest of the recipe.
Blend the Cheesecake Filling
I pulse the softened cream cheese in the food processor until it’s completely smooth, scraping down the sides as I go. Then I add the sugar, vanilla, salt, lemon juice, and the bloomed gelatin, pulsing again until combined. With the processor still running, I stream in the heavy cream and a few drops of food coloring until the batter turns a soft, pale pink.
Cook the Strawberry Syrup
I combine the strawberries, sugar, lemon juice, and water in a saucepan over medium-high heat, bringing it to a simmer until the berries soften but still hold their shape. I strain the syrup into a separate bowl, then return just the liquid to the pan and keep cooking until it thickens, about ten minutes. I chill both the berries and the syrup separately until I’m ready to serve.
Build the Brain Layers in the Mold
I coat my brain mold generously with cooking spray, then pour in half of the cheesecake batter, swirling it around to coat the sides. I freeze this for about five minutes so it firms up slightly, then use the back of a spoon to push the batter up the walls of the mold, leaving a hollow center for the crust layer.
Add the Crust and Finish Filling
I press the crumb mixture into the hollow center of the mold, then pour in the rest of the cheesecake batter to cover it completely. I smooth the top with my spatula so the base sits flat once I flip the mold over later, since that flat side becomes the bottom of the finished brain.
Freeze and Set
I cover the mold and freeze the whole thing for at least four hours, though I usually leave mine overnight when I have the time. This long freeze is what lets the cheesecake hold its brain shape once it’s out of the mold, so I don’t rush this part no matter how tempting it is to peek early.
Unmold and Add the “Blood” Syrup
When I’m ready to serve, I dip the mold briefly in warm water and gently pull it away from the cheesecake. I let the brain sit in the fridge for about twenty minutes to soften slightly, then I drizzle the chilled strawberry syrup over the top so it pools and drips down the grooves like blood.
Additional Tips for Making This Recipe Better
- I always make sure my cream cheese is fully softened before blending, or I end up with small lumps in the filling that never fully smooth out.
- I add the food coloring one drop at a time, since it’s much easier to deepen the pink than to fix a batter that’s gone too dark.
- I freeze the mold overnight whenever my schedule allows it, because a fully frozen brain releases from the mold so much more cleanly than one that’s just barely set.
- I keep my strawberry syrup a little looser than I think I need, since it thickens more as it chills in the fridge.
- I set a timer for the water bath step instead of guessing, because leaving the mold in too long can start to melt the cheesecake’s surface detail.
Common Mistakes to Avoid
- I once used strawberries that weren’t fully ripe, and the syrup turned out pale and watery instead of rich and red.
- I’ve learned not to skip straining the syrup, since skipping it leaves berry pieces that make the “blood” look chunky instead of smooth.
- I don’t rush the freezing time, because a brain that hasn’t set completely will slump and lose its shape the moment it hits the plate.
- I make sure to spray every crevice of the mold, since a missed spot is exactly where the cheesecake tends to stick and tear.
- I stopped trying to unmold the cheesecake straight from the freezer, since it needs that brief warm-water dip first or it just won’t budge.
How to Serve No-Bake Strawberry Cheesecake Brain?
I like to serve mine on a plain white or dark platter so the pink cheesecake and red syrup really stand out against the background. Right before guests arrive, I drizzle extra strawberry syrup over the top and let it drip down onto the plate for a dramatic pooled-blood effect.
A few whole or halved strawberries scattered around the base add a nice pop of color and hint at the flavor inside. If you’re setting up a full dessert table, this pairs really well next to other spooky bakes, and I love placing it beside a batch of Halloween Ghost Cupcakes for a mix of cute and creepy on the same table.
Variations
- Dairy-free option: swap the cream cheese and heavy cream for dairy-free versions and use a plant-based butter in the crust
- Sugar-free option: replace the granulated sugar with a granulated sugar substitute in both the filling and the syrup
- Extra chocolate twist: mix in a spoonful of cocoa powder to the crust for a darker, more graveyard-style base
- Mixed berry syrup: swap in raspberries or a strawberry-raspberry blend for a slightly different shade of “blood”
- Mini brain molds: use small silicone brain mold trays instead of one large mold to make individual servings for parties
- Cheese ball spin-off: if you love the shape more than the sweet version, a savory brain cheese ball recipe made with cream cheese and cheddar is a fun way to reuse the same silicone brain mold recipe for a party appetizer table
Nutritional Information
Here’s a general idea of what to expect per serving, though your exact numbers will shift slightly based on the ingredients and toppings you use.
- Calories: approximately 810 per serving
- Protein: approximately 8 grams per serving
- Carbohydrates: approximately 69 grams per serving
- Fat: approximately 58 grams per serving
Make Ahead and Storage
I make this cheesecake at least a day ahead of time, since it needs several hours in the freezer anyway to hold its brain shape properly. Once it’s unmolded, I keep it covered in the refrigerator and add the syrup right before serving so it stays fresh looking.
Stored in the fridge, the finished cheesecake stays good for about 3 to 4 days, though the texture is best within the first two days. If you want to freeze it for longer, wrap the unmolded cheesecake tightly and store it in the freezer for up to a month, then thaw it in the fridge overnight before adding the syrup.
Why You’ll Love This Recipe
This dessert checks every box for a Halloween party, since it looks impressively creepy but doesn’t ask much of you in the kitchen. Here’s why I keep making it every October.
- No oven required: since the whole recipe is no-bake, I never have to worry about oven space when I’m juggling other Halloween food.
- Make-ahead friendly: I can prep this a full day before the party, which takes so much pressure off the day of the event.
- Big visual payoff: the brain shape combined with the strawberry syrup makes it the centerpiece of any dessert table without much extra effort.
- Kid and adult approved: the strawberry cheesecake flavor is genuinely delicious, so it isn’t just a novelty item that looks better than it tastes.
- Easy to customize: I can swap the syrup color, the mold size, or the crust flavor depending on the crowd I’m feeding.
FAQs
Can I use frozen strawberries instead of fresh ones?
I don’t recommend it, since frozen strawberries release extra water and can make the syrup thinner and less vibrant in color.
What if I don’t have a brain-shaped mold?
Any silicone brain mold recipe trick works here, but you can also use a plain loaf pan or a decorative gelatin mold if a brain shape isn’t available.
How do I get the cheesecake out of the mold without it breaking?
I dip the mold in warm water for just a few seconds and gently pull the edges away before flipping it out, which keeps it from tearing.
Can I make this ahead for a party the next day?
Yes, this is actually one of those Halloween desserts that tastes better after it’s had a full day to set and chill in the fridge.
Is this the same as a jello brain mold recipe?
Not quite, since a jello brain mold recipe usually relies on flavored gelatin alone, while this version uses a cheesecake filling that’s set with gelatin for a creamier, richer bite.

No Bake Strawberry Cheesecake Brain Recipe
Ingredients
Method
- I pulse the graham crackers, brown sugar, cinnamon, and salt in the food processor until they turn into fine crumbs. Then I drizzle in the melted butter and pulse again until the mixture looks like damp sand. I set this aside in a bowl and wipe out the processor bowl before moving on, since I need it clean for the cheesecake filling next.
- I whisk the gelatin into the warm water in a small bowl and let it sit for about five minutes until it turns thick and spongy. This step matters more than people think, because unbloomed gelatin leaves lumps in your filling. I never skip it, even when I’m in a rush to finish the rest of the recipe.
- I pulse the softened cream cheese in the food processor until it’s completely smooth, scraping down the sides as I go. Then I add the sugar, vanilla, salt, lemon juice, and the bloomed gelatin, pulsing again until combined. With the processor still running, I stream in the heavy cream and a few drops of food coloring until the batter turns a soft, pale pink.
- I combine the strawberries, sugar, lemon juice, and water in a saucepan over medium-high heat, bringing it to a simmer until the berries soften but still hold their shape. I strain the syrup into a separate bowl, then return just the liquid to the pan and keep cooking until it thickens, about ten minutes. I chill both the berries and the syrup separately until I’m ready to serve.
- I coat my brain mold generously with cooking spray, then pour in half of the cheesecake batter, swirling it around to coat the sides. I freeze this for about five minutes so it firms up slightly, then use the back of a spoon to push the batter up the walls of the mold, leaving a hollow center for the crust layer.
- I press the crumb mixture into the hollow center of the mold, then pour in the rest of the cheesecake batter to cover it completely. I smooth the top with my spatula so the base sits flat once I flip the mold over later, since that flat side becomes the bottom of the finished brain.
- I cover the mold and freeze the whole thing for at least four hours, though I usually leave mine overnight when I have the time. This long freeze is what lets the cheesecake hold its brain shape once it’s out of the mold, so I don’t rush this part no matter how tempting it is to peek early.
- When I’m ready to serve, I dip the mold briefly in warm water and gently pull it away from the cheesecake. I let the brain sit in the fridge for about twenty minutes to soften slightly, then I drizzle the chilled strawberry syrup over the top so it pools and drips down the grooves like blood.
Notes
- I always make sure my cream cheese is fully softened before blending, or I end up with small lumps in the filling that never fully smooth out.
- I add the food coloring one drop at a time, since it’s much easier to deepen the pink than to fix a batter that’s gone too dark.
- I freeze the mold overnight whenever my schedule allows it, because a fully frozen brain releases from the mold so much more cleanly than one that’s just barely set.
- I keep my strawberry syrup a little looser than I think I need, since it thickens more as it chills in the fridge.
- I set a timer for the water bath step instead of guessing, because leaving the mold in too long can start to melt the cheesecake’s surface detail.