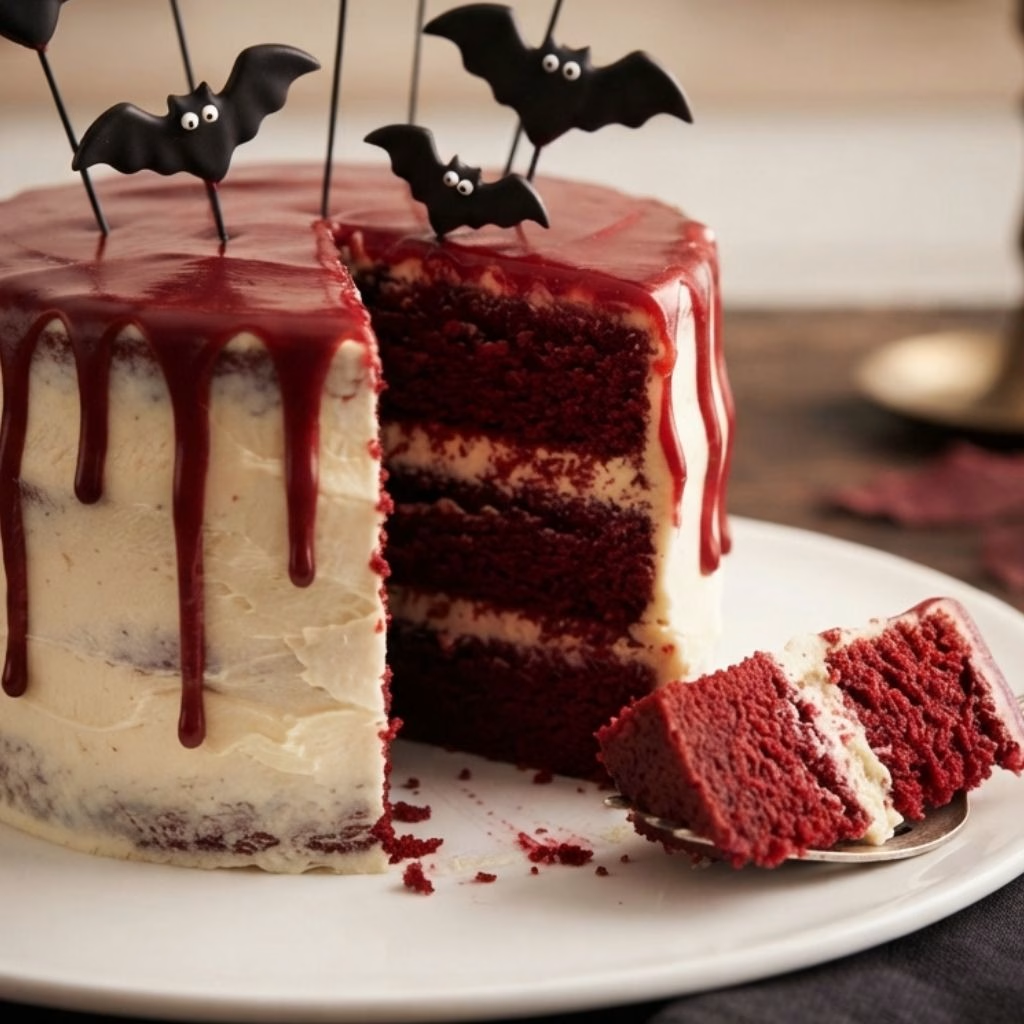
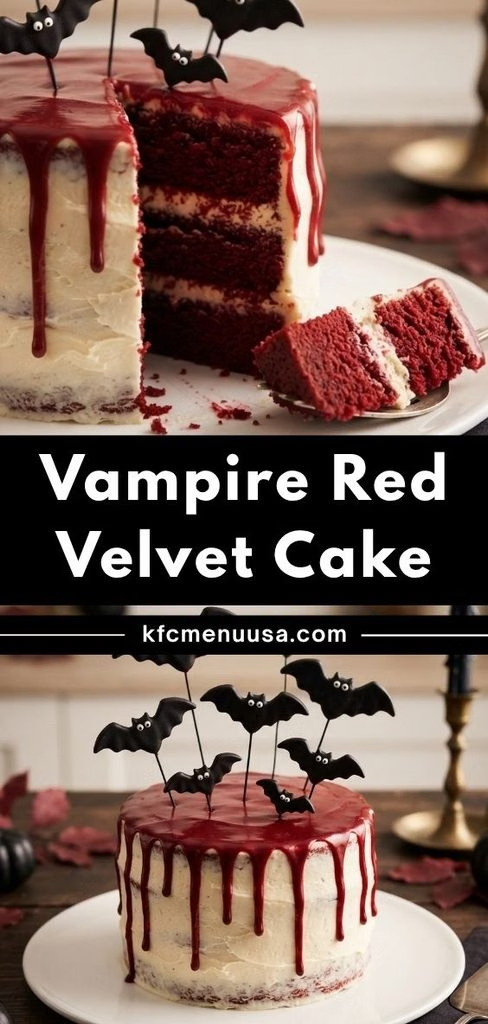
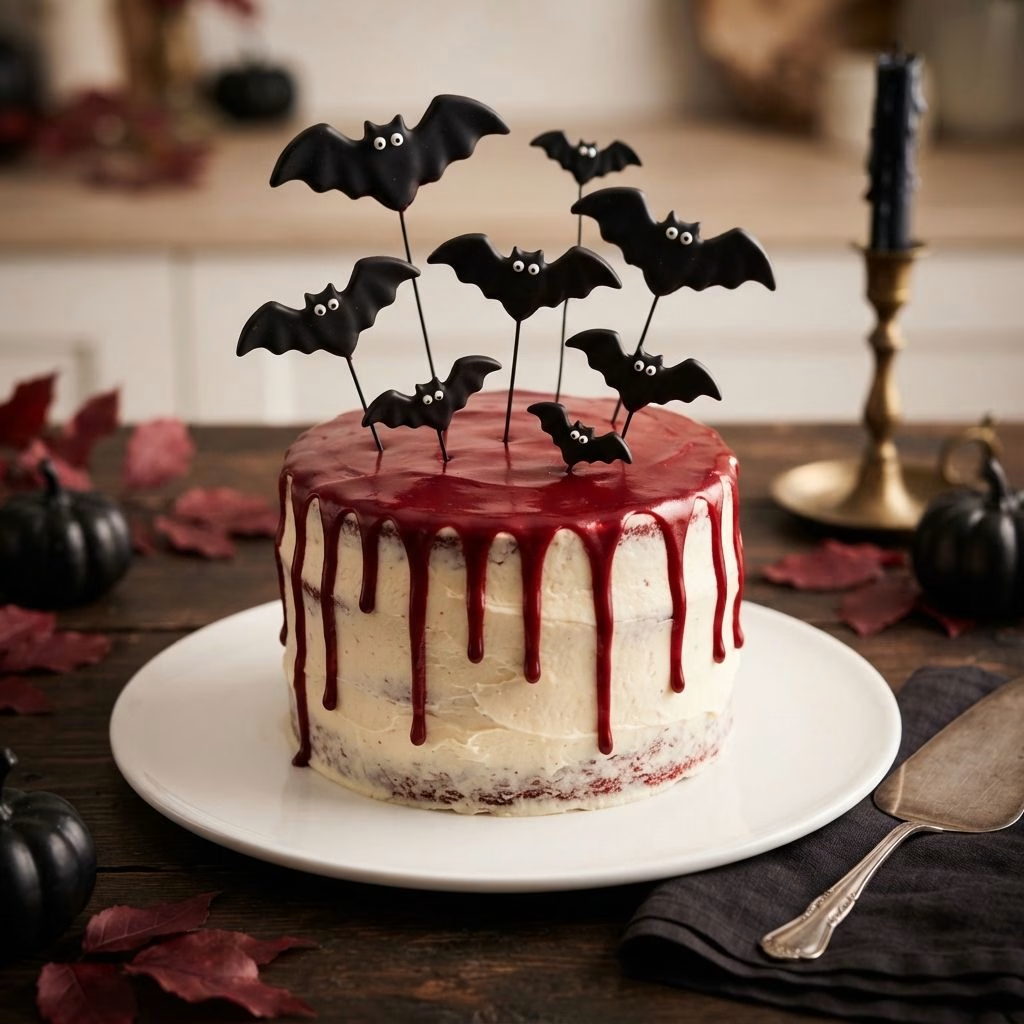
I made this Vampire Red Velvet Cake Recipe for the first time three Halloweens ago, and it’s been requested every year since. I love how dramatic it looks with that deep red ganache dripping down the sides, yet it’s honestly one of the easiest “fancy” cakes I’ve ever pulled off.
The chocolate bats perched on top always get a gasp from guests before anyone even takes a bite. If you want a dessert that feels like a showstopper without demanding hours of decorating skill, I really think you’ll love making this one as much as I do.
Cooking Time
- Prep Time: 25 minutes
- Cooking Time: 30 minutes
- Total Time: 1 hour 30 minutes (includes cooling and chilling)
Ingredients
For the Red Velvet Cake
- 2 large eggs — bring them to room temperature so they blend into the batter smoothly
- 1 ½ cups vegetable oil — keeps the crumb moist for days without drying out
- 1 cup buttermilk — adds tang and helps activate the baking soda for a soft rise
- 1 tablespoon white vinegar — reacts with the baking soda to give the cake extra lift
- 2 teaspoons vanilla extract — rounds out the cocoa flavor with warmth
- 2 ounces red food coloring — this is what gives red velvet its signature vampire-worthy color
- 2 ½ cups all-purpose flour — spoon and level it rather than scooping directly from the bag
- 2 cups granulated sugar — balances the tang from the buttermilk and vinegar
- 1 tablespoon cocoa powder — just enough for a subtle chocolate note, not a full chocolate cake
- 1 teaspoon salt — sharpens all the other flavors
- 1 teaspoon baking soda — your main leavening agent, so make sure it’s fresh
For the Red Ganache “Blood”
- 6 ounces red candy melts — melts smoothly and holds its bold color better than chocolate alone
- 5 tablespoons heavy cream — heats the candy melts into a pourable, glossy ganache
For the Chocolate Bats
- 4 ounces black candy melts — easy to pipe and sets up hard enough to stand upright
- Candy eyes — for sticking onto the bats to give them a bit of personality
Note: this recipe serves 10 to 12, using two 8-inch cake layers or three 6-inch layers.
Equipment You Need
- Two 8-inch or three 6-inch cake pans — shapes and bakes the red velvet layers
- Large mixing bowl — for combining your wet and dry ingredients
- Whisk or electric mixer — makes sure your batter comes together evenly
- Wire cooling rack — lets the layers cool fully without getting soggy on the bottom
- Offset spatula — spreads frosting smoothly between layers and around the cake
- Small saucepan — for heating cream to make the ganache
- Parchment paper — used to pipe and set your chocolate bat shapes
- Piping bag or zip-top bag — controls the flow of melted candy for detailed bat outlines
How to Make Vampire Red Velvet Cake Recipe?
Once you break it down, this cake really comes together in stages that are simple on their own. I like to bake my layers a day ahead so the rest of the process feels relaxed. Here’s exactly how I put mine together every time.
Bake the Red Velvet Layers
Preheat your oven to 350°F and grease your cake pans well. Whisk together the eggs, oil, buttermilk, vinegar, vanilla, and food coloring in one bowl. In a separate bowl, whisk the flour, sugar, cocoa powder, salt, and baking soda, then combine both mixtures until smooth.
Cool and Level the Cakes
Divide the batter evenly and bake for 25 to 30 minutes, until the layers spring back when lightly touched. Let them cool in the pans for 10 minutes, then move them to a wire rack. Once completely cool, trim the domed tops flat with a serrated knife.
Frost and Crumb Coat
Fill and stack your layers with your favorite buttercream, then apply a thin crumb coat around the entire cake. Chill the cake for about 15 minutes so this coat firms up. Add a second, slightly thicker layer of frosting on top, and don’t stress over making it perfectly smooth.
Make the Red Ganache
Finely chop your red candy melts and place them in a heatproof bowl. Warm the heavy cream in a saucepan until it’s just about to simmer, then pour it over the candy melts. Stir until completely smooth and glossy.
Pour and Drip the Ganache
Spoon the warm ganache onto the center of your chilled cake. Use an offset spatula to gently push it toward the edges, letting it naturally drip down the sides in uneven streaks for that classic “bloody” effect.
Make and Attach the Bats
Pipe bat outlines onto parchment paper using melted black candy melts, then insert a small stick or wire into each one while still wet for support. Once set, peel them off, attach candy eyes with a dab of melted candy, and press them into the top of the cake at varying heights.
Additional Tips for Making This Recipe Better
I’ve made this cake more times than I can count now, and here’s what actually makes a difference for me.
- I always chill my cake before pouring the ganache, since a cold cake helps it set up faster instead of sliding off completely.
- I like using gel food coloring for a more vivid red without thinning out my batter.
- I never skip the crumb coat, because it keeps stray cake crumbs from showing up in my final frosting layer.
- I make my chocolate bats a day in advance so I’m not rushing while my ganache is still warm and workable.
- I keep a spare batch of candy melts on hand in case my first round of bats break while I’m peeling them off the parchment.
Common Mistakes to Avoid
- I once poured my ganache onto a warm cake, and it slid straight off the sides instead of dripping neatly.
- I used liquid food coloring thinking it would work the same as gel, and my batter turned out thinner than expected.
- I rushed my crumb coat and skipped chilling it, so my final frosting layer ended up full of visible crumbs.
- I tried moving my chocolate bats before they fully hardened, and a couple of the wings snapped clean off.
- I overbaked my layers slightly by not checking early enough, which left the edges a bit dry compared to the center.
How to Serve Vampire Red Velvet Cake?
I like setting this cake on a black or dark slate cake stand so the red ganache really pops against the background. Slicing into it reveals that bright red velvet crumb underneath the “blood,” which always gets a reaction at the table.
A few extra candy eyes scattered around the base or a light dusting of cocoa powder on the plate adds a nice finishing touch for a Halloween spread. If you’re planning a full spooky dessert table, this cake pairs really well with something equally chocolatey but a little less dramatic, like a slice of moist chocolate chip cake set out alongside it.
Variations
- Swap the red velvet layers for a classic chocolate cake if you want a deeper, richer base under the ganache
- Use dairy-free buttermilk and plant-based butter in your frosting for an easy dairy-free version
- Try a natural beet-based red coloring instead of artificial food coloring for a more subtle vampire cupcake look
- Skip the full cake and turn this into red velvet vampire cupcakes for easier portioning at parties
- Add a layer of cream cheese frosting between layers for a tangier, richer bite
- Top with white chocolate fangs alongside the bats for extra vampire cupcake toppers flair
Nutritional Information
Here’s a rough breakdown per slice, assuming the cake is cut into 12 servings.
- Calories: 420 kcal
- Protein: 5 g
- Carbohydrates: 52 g
- Fat: 21 g
Make Ahead and Storage
You can bake the red velvet layers up to two days ahead of time, wrap them tightly in plastic, and store them at room temperature until you’re ready to frost.
Once assembled, store the finished cake in an airtight container in the refrigerator, where it will stay fresh for up to 4 days.
For longer storage, wrap unfrosted cake layers tightly and freeze for up to 3 months, thawing them at room temperature before frosting and decorating.
Why You’ll Love This Recipe?
This cake has become my go-to Halloween centerpiece, and here’s why I think it’ll win you over too.
- It looks far fancier than it actually is: The dripping ganache hides any imperfections in your frosting, so even a slightly uneven cake looks intentional and dramatic.
- It’s endlessly adaptable: Whether you turn this into red velvet halloween cupcakes or a full layered cake, the base recipe flexes to whatever format you need.
- It’s a genuine crowd-pleaser: Between the moist red velvet crumb and the playful chocolate bats, this cake appeals to kids and adults at the same party.
- It works ahead of time: With cake layers that bake well in advance, you can spread the work out instead of scrambling the day of your gathering.
FAQs
Can I turn this into red velvet vampire cupcakes instead of a full cake?
Yes, just fill cupcake liners two-thirds full and bake for 15 to 20 minutes, then top each one with a small pour of the red ganache and a mini chocolate bat.
Why did my red ganache slide off the cake instead of dripping neatly?
This usually happens when the cake underneath isn’t cold enough, so chill it thoroughly before pouring the warm ganache on top.
Can I use melted chocolate instead of candy melts for the bats?
Yes, though candy melts tend to set up firmer and hold their shape better, which makes them slightly easier to peel off the parchment paper.
How far in advance can I make this vampire red velvet cheesecake style dessert?
If you’re adapting this into a cheesecake version, you can bake and chill it up to two days ahead, then add the ganache and bats the day you plan to serve it.
Does this taste like a delish vampire cupcakes version people usually make for parties?
Yes, the red velvet base has that same tangy, lightly chocolatey flavor people love in classic red velvet cupcakes, just presented as a full layered cake here.
If you’re building out a whole spooky dessert table for the season, this cake pairs nicely with something equally shareable, like a batch of warm, gooey cherry pie poppers set out alongside it.

Vampire Red Velvet Cake Recipe
Ingredients
Method
- Preheat your oven to 350°F and grease your cake pans well. Whisk together the eggs, oil, buttermilk, vinegar, vanilla, and food coloring in one bowl. In a separate bowl, whisk the flour, sugar, cocoa powder, salt, and baking soda, then combine both mixtures until smooth.
- Divide the batter evenly and bake for 25 to 30 minutes, until the layers spring back when lightly touched. Let them cool in the pans for 10 minutes, then move them to a wire rack. Once completely cool, trim the domed tops flat with a serrated knife.
- Fill and stack your layers with your favorite buttercream, then apply a thin crumb coat around the entire cake. Chill the cake for about 15 minutes so this coat firms up. Add a second, slightly thicker layer of frosting on top, and don’t stress over making it perfectly smooth.
- Finely chop your red candy melts and place them in a heatproof bowl. Warm the heavy cream in a saucepan until it’s just about to simmer, then pour it over the candy melts. Stir until completely smooth and glossy.
- Spoon the warm ganache onto the center of your chilled cake. Use an offset spatula to gently push it toward the edges, letting it naturally drip down the sides in uneven streaks for that classic “bloody” effect.
- Pipe bat outlines onto parchment paper using melted black candy melts, then insert a small stick or wire into each one while still wet for support. Once set, peel them off, attach candy eyes with a dab of melted candy, and press them into the top of the cake at varying heights.
Notes
- I always chill my cake before pouring the ganache, since a cold cake helps it set up faster instead of sliding off completely.
- I like using gel food coloring for a more vivid red without thinning out my batter.
- I never skip the crumb coat, because it keeps stray cake crumbs from showing up in my final frosting layer.
- I make my chocolate bats a day in advance so I’m not rushing while my ganache is still warm and workable.
- I keep a spare batch of candy melts on hand in case my first round of bats break while I’m peeling them off the parchment.