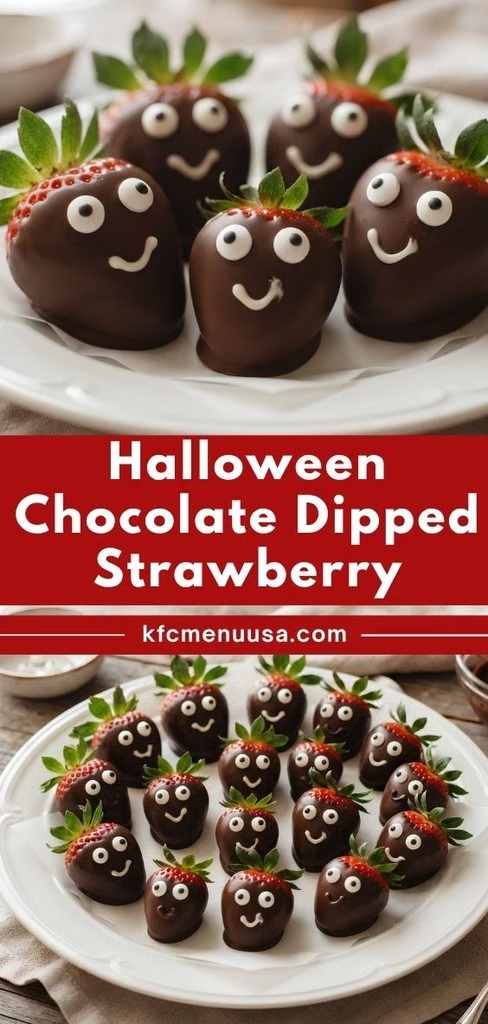
I still remember the first time I made these for a Halloween get-together. I honestly thought it would take me all afternoon, and I was so wrong. I had a bowl of melted chocolate, a bag of fresh strawberries, and about twenty minutes before my guests showed up.
What came out of my kitchen looked like something from a bakery window, and nobody believed me when I said it was just three ingredients. If you want a treat that looks impressive but takes almost no effort, this is Halloween Chocolate Dipped Strawberries Recipe I keep coming back to every October.
Cooking Time
- Prep Time: 15 minutes
- Cooking Time: 5 minutes (melting the chocolate)
- Total Time: 20 minutes, plus 20–30 minutes to let the chocolate set
Ingredients
- 12 medium to large strawberries – I always pick firm, dry berries since bruised or soft ones won’t hold the chocolate coating well
- 6 oz (170 g) white or dark chocolate, chopped or in baking chips – good quality chocolate with real cocoa butter melts smoother and tastes far better than cheap candy melts
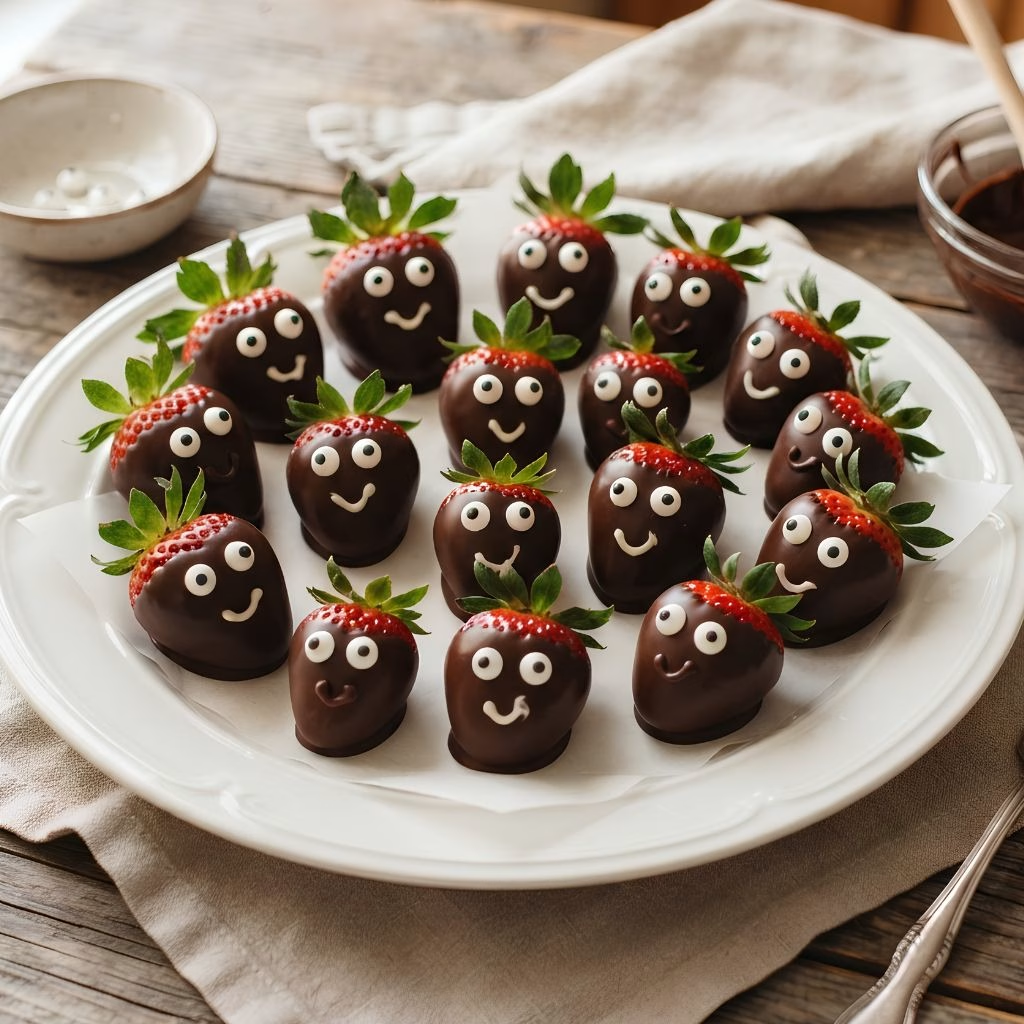
- 24 candy eyeballs – these are what turn plain dipped strawberries into little ghosts, mummies, or monsters
- 12 chocolate chips or chocolate callets – used upside down as tiny mouths for the ghost version
- Halloween sprinkles (optional) – a fun, no-skill way to decorate if you’re short on time
- A few drops of green or orange food coloring (optional) – for a Frankenstein or pumpkin twist
Note: This recipe makes about 12 dipped strawberries, which comfortably serves 6 people as a party treat.
Equipment You Need
- Baking sheet – gives you a flat surface to set the strawberries on as they dry
- Parchment paper – stops the chocolate from sticking to the tray
- Heatproof bowl – holds the chocolate while it melts gently
- Saucepan – used underneath the bowl for the double-boiler method
- Paper towels – essential for drying the strawberries completely before dipping
- Rubber spatula – helps you stir and scrape the melted chocolate cleanly
How to Make Halloween Chocolate Dipped Strawberries Recipe?
I promise this is easier than it looks in photos. There’s no piping bag, no fancy decorating tools, and no real skill required. Just three simple stages: prep, melt, and dip, and you’re basically done.
Prep the Strawberries
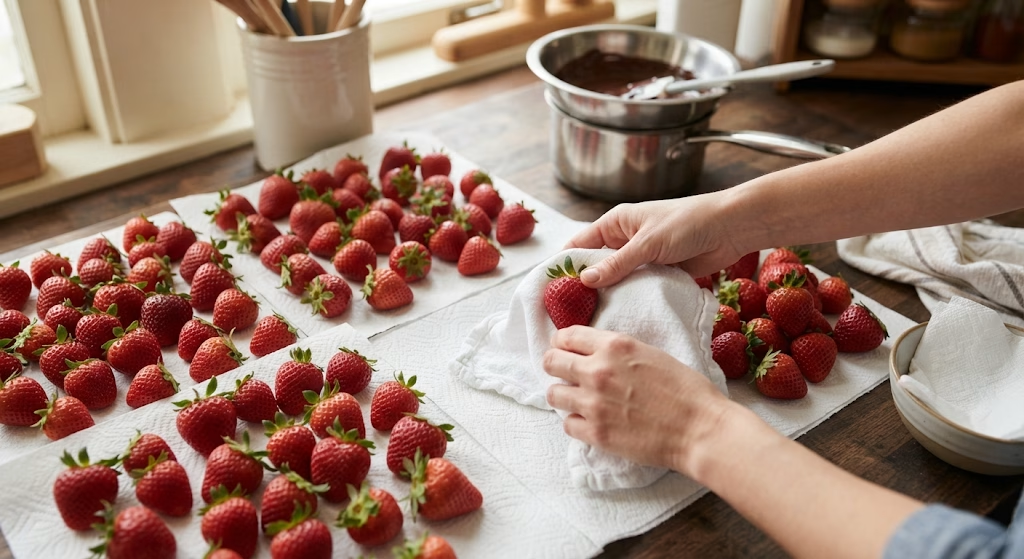
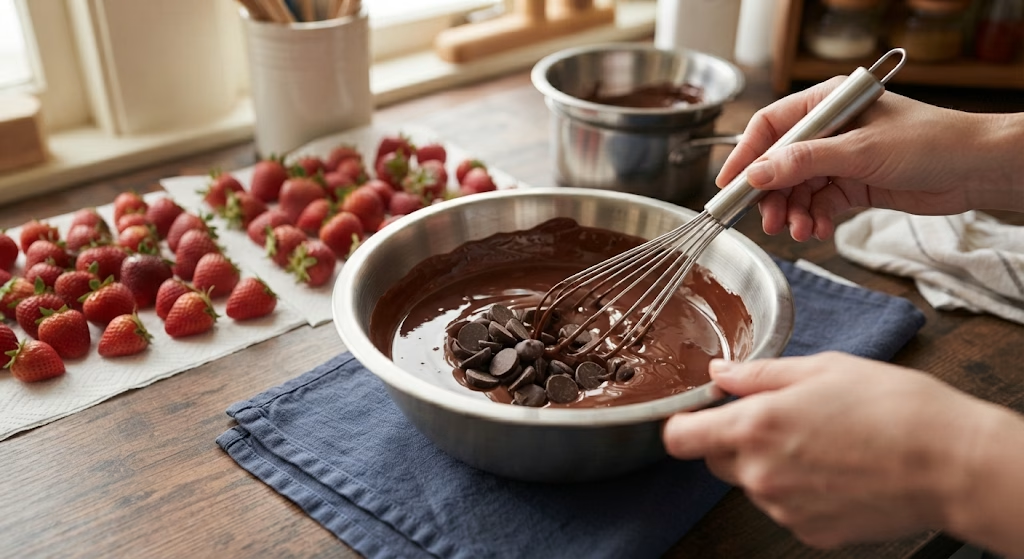
Wash the strawberries under cool water, then lay them out on paper towels and pat each one completely dry. This step matters more than people think, because any leftover water will stop the chocolate from sticking properly. I like to let the air dry for a few extra minutes while I set up my melting station.
Melt the Chocolate
Set aside a small handful of chocolate, then place the rest in a heatproof bowl over a pan of barely simmering water, making sure the bowl doesn’t touch the water. Stir until smooth, then take it off the heat and mix in the reserved chocolate so it cools slightly and thickens just right. This trick keeps the coating glossy instead of dull.
Dip and Decorate
Hold each strawberry by the leaves and dip it into the melted chocolate, letting the extra drip back into the bowl. Set it on your parchment-lined tray and add candy eyeballs, sprinkles, or a chocolate chip mouth while the coating is still wet. I usually do a small batch at a time so the chocolate doesn’t harden before I finish decorating.
Let Them Set
Once every strawberry is dipped and decorated, leave the tray at room temperature for about 20–30 minutes, or pop it in the fridge for 10–15 minutes if you’re in a hurry. The chocolate needs to firm up completely before you move or serve them, or the decorations can slide right off.
Additional Tips for Making This Recipe Better
I’ve made a lot of batches of these over the years, and these little tricks have saved me every single time.
- I always buy my strawberries the day before and store them unwashed in the fridge, since washing them too early makes them soften faster
- I never skip drying the berries with a paper towel even a little moisture causes the chocolate to seize up
- I like tempering my chocolate slightly by stirring in reserved chunks instead of melting it all at once, since it sets shinier
- I keep my decorating station ready before I even start melting the chocolate, because the coating firms up fast
- I place a toothpick or two in the strawberry top if I’m doing a design like Frankenstein, since it gives me a better grip while dipping
Common Mistakes to Avoid
- I once rushed the drying step and ended up with grainy, seized chocolate — now I always double-check my strawberries are bone dry
- I’ve overheated chocolate in the microwave before and it turned clumpy, so I stick to short 20-second bursts or a gentle double boiler
- I used to refrigerate my strawberries hours before dipping, and the condensation ruined the coating, so now I dip them close to room temperature
- I made the mistake of stacking strawberries on the tray before they set, and the chocolate smudged I always give them space to dry flat
- I tried decorating too slowly once and the chocolate hardened before I could add the eyeballs, so now I work in small batches of two or three at a time
How to Serve Halloween Chocolate Dipped Strawberries?
I love laying these out on a black serving platter or a tiered stand, since the dark background makes the white and colored chocolate really pop. A few plastic skeleton hands or spiderweb décor around the edges instantly makes the display feel festive without any extra cooking.
If you’re hosting a bigger crowd, mixing ghost strawberries, chocolate-dipped mummies, and sprinkle-covered ones on the same tray gives guests a fun variety to pick from. These also pair nicely as a side dessert if you’re already serving other festive treats, similar to how a batch of Halloween-Themed Chocolate Bark rounds out a dessert table with minimal extra work.
Variations
- Dairy-free version – use a dairy-free dark chocolate bar so everyone at the party can enjoy them
- Sugar-free option – swap in a sugar-free chocolate baking bar sweetened with stevia or monk fruit
- Strawberry ghost drink pairing – serve alongside a white chocolate strawberry milkshake for a spookier dessert table
- Strawberry mummies – wrap thin melted white chocolate strips around the berry before adding eyeballs
- Ghost strawberry cheesecake bites – crumble a few dipped strawberries over mini cheesecake cups for extra texture
- Flavor boost – mix a pinch of cinnamon or a drop of peppermint extract into the melted chocolate for a seasonal twist
Nutritional Information
Here’s a general estimate per strawberry, which can shift slightly depending on the chocolate brand you use.
- Calories: about 45–55 kcal
- Protein: around 0.5 g
- Carbohydrates: roughly 6–7 g
- Fat: about 2–3 g
Make Ahead and Storage
I’ve found these are best enjoyed the same day they’re made, since chocolate-coated strawberries don’t hold up well over long periods. If you need to prep ahead, you can melt the chocolate and wash the berries a few hours early, then dip them right before serving for the freshest texture.
For storage, keep any leftovers loosely covered at room temperature for up to 8 hours, or in the fridge for no more than a day, since the fruit will start releasing moisture. I don’t recommend freezing these, as the strawberries turn watery and mushy once thawed, which ruins both the texture and the chocolate coating.
Why You’ll Love This Recipe
This one has become a Halloween staple in my house, and here’s why I keep making it every year.
- Ridiculously easy to make – with just three main ingredients and no special baking skills, I can whip up a full batch in under 30 minutes
- Fully customizable – I can turn plain strawberries into ghosts, mummies, or monsters just by switching up the decorations
- Great for parties and potlucks – these disappear fast at every gathering I bring them to, and they always look more impressive than the effort required
- Kid-friendly fun – my nieces and nephews love helping decorate the eyeballs and sprinkles, which makes it a great activity as well as a treat
- Naturally gluten-free – since it’s just fruit and chocolate, I don’t need to adjust anything for guests avoiding gluten
FAQs
Can I use frozen strawberries for this recipe?
I wouldn’t recommend it, since frozen strawberries release too much water when thawed, which stops the chocolate from setting properly.
What’s the best chocolate to use for dipping?
I always reach for real baking chocolate with cocoa butter rather than chocolate chips alone, since it melts smoother and coats more evenly.
How far in advance can I make Halloween chocolate covered strawberries?
I suggest making them no more than a few hours before your event, since they taste and look best when fresh.
Why did my melted chocolate turn thick and grainy?
This usually happens when a little water gets into the bowl, so I always make sure my equipment and strawberries are completely dry before starting.
Can I make a dairy-free version of these strawberry halloween snacks?
Yes, I’ve had great results swapping in a dairy-free dark chocolate bar, and the texture barely changes.

Halloween Chocolate Dipped Strawberries Recipe
Ingredients
Method
- Wash the strawberries under cool water, then lay them out on paper towels and pat each one completely dry. This step matters more than people think, because any leftover water will stop the chocolate from sticking properly. I like to let the air dry for a few extra minutes while I set up my melting station.
- Set aside a small handful of chocolate, then place the rest in a heatproof bowl over a pan of barely simmering water, making sure the bowl doesn’t touch the water. Stir until smooth, then take it off the heat and mix in the reserved chocolate so it cools slightly and thickens just right. This trick keeps the coating glossy instead of dull.
- Hold each strawberry by the leaves and dip it into the melted chocolate, letting the extra drip back into the bowl. Set it on your parchment-lined tray and add candy eyeballs, sprinkles, or a chocolate chip mouth while the coating is still wet. I usually do a small batch at a time so the chocolate doesn’t harden before I finish decorating.
- Once every strawberry is dipped and decorated, leave the tray at room temperature for about 20–30 minutes, or pop it in the fridge for 10–15 minutes if you’re in a hurry. The chocolate needs to firm up completely before you move or serve them, or the decorations can slide right off.
Notes
- I always buy my strawberries the day before and store them unwashed in the fridge, since washing them too early makes them soften faster
- I never skip drying the berries with a paper towel even a little moisture causes the chocolate to seize up
- I like tempering my chocolate slightly by stirring in reserved chunks instead of melting it all at once, since it sets shinier
- I keep my decorating station ready before I even start melting the chocolate, because the coating firms up fast
- I place a toothpick or two in the strawberry top if I’m doing a design like Frankenstein, since it gives me a better grip while dipping