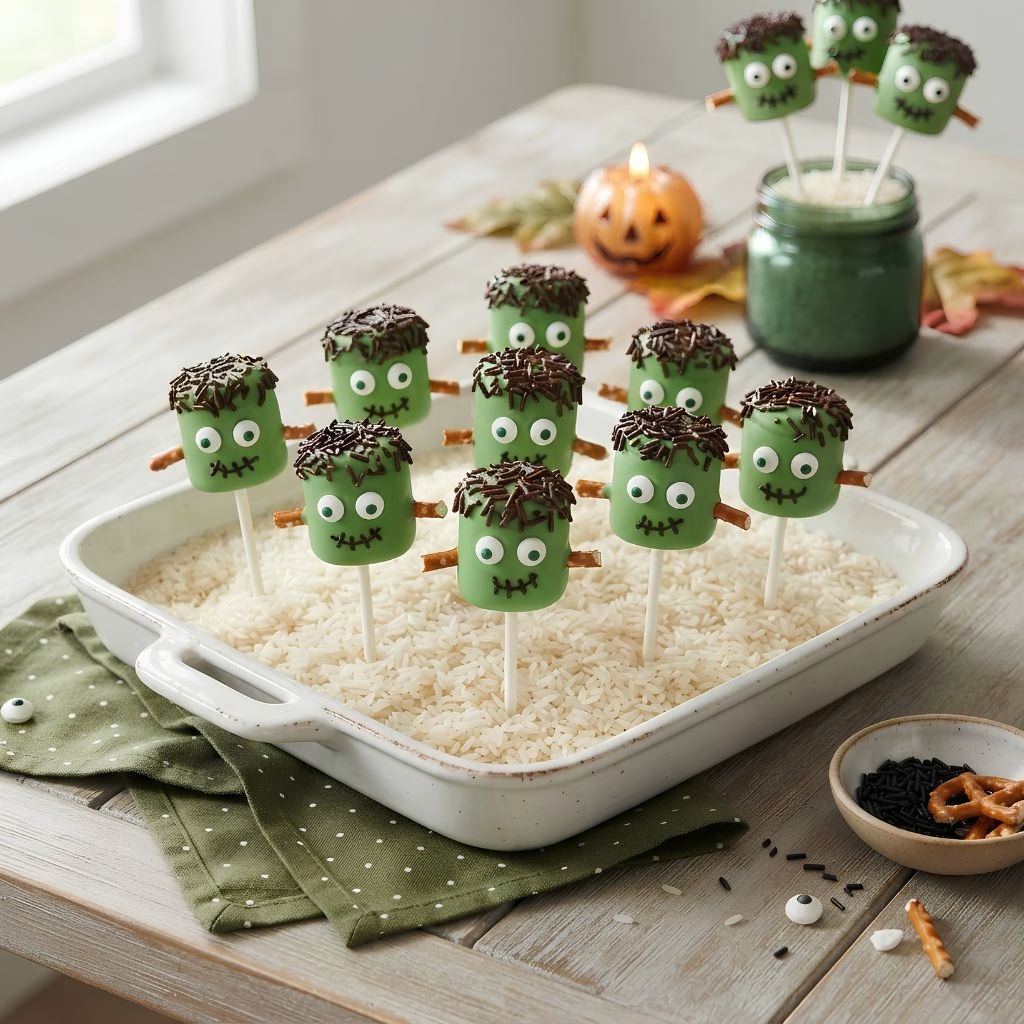
I still remember the first time I tried making this Frankenstein Marshmallow Pops Recipe, and let’s just say my “monsters” looked more like seasick little blobs than anything from a horror movie.
After a few more tries, though, I finally cracked the code, and now these are one of my favorite silly recipes to whip up every October. They’re goofy, a little messy, and genuinely fun to make with kids hanging around the kitchen. Honestly, once you get the hang of dipping and decorating, you won’t want to stop at just one batch.
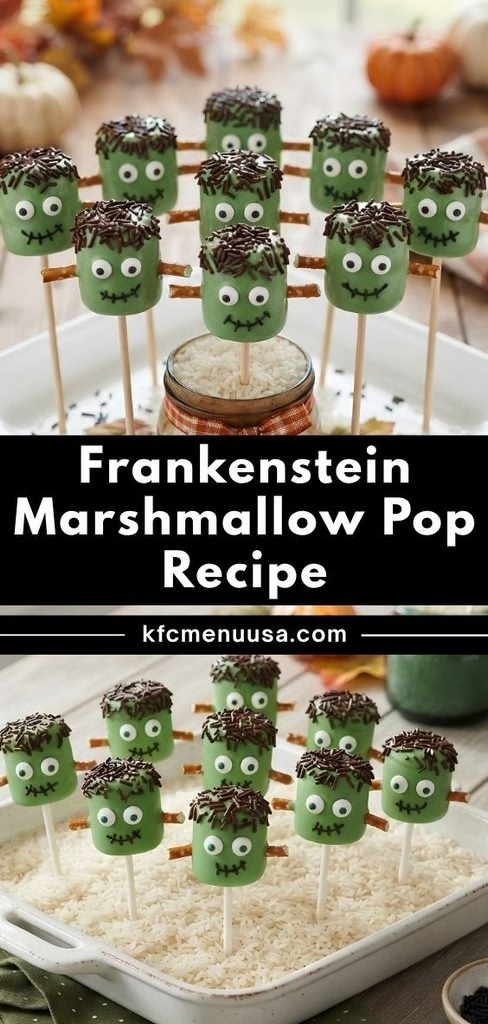
Cooking Time
- Prep Time: 15 minutes
- Cooking Time: 0 minutes (no baking required)
- Total Time: 25 minutes (includes setting time)
Ingredients
- 12 large marshmallows — the standard-size ones work best since minis are too small to decorate easily
- 12 lollipop sticks — these give you a handle for dipping and a fun stick-treat presentation
- 12 ounces green candy melts — melt smoothly and set with a nice matte finish, perfect for Frankenstein’s skin
- 24 candy eyeballs — press these on while the coating is still wet so they stick properly
- black or brown sprinkles — these become Frankenstein’s messy hair, so don’t skip them
- 12 pretzel sticks, broken into small pieces — these form the “bolts” poking out of his neck
- red or black edible marker — draws on the stitched mouth for that classic monster look
Note: serves 12, since this recipe makes one Frankenstein pop per person.
Equipment You Need
- Microwave-safe bowl — for melting the candy melts evenly
- Rubber spatula — helps stir the candy melts until fully smooth
- Tall glass filled with rice or oats — holds the pops upright while the coating hardens
- Baking sheet lined with parchment — gives you a mess-free surface for decorating
- Small plate — handy for holding your sprinkles and eyeballs while you work
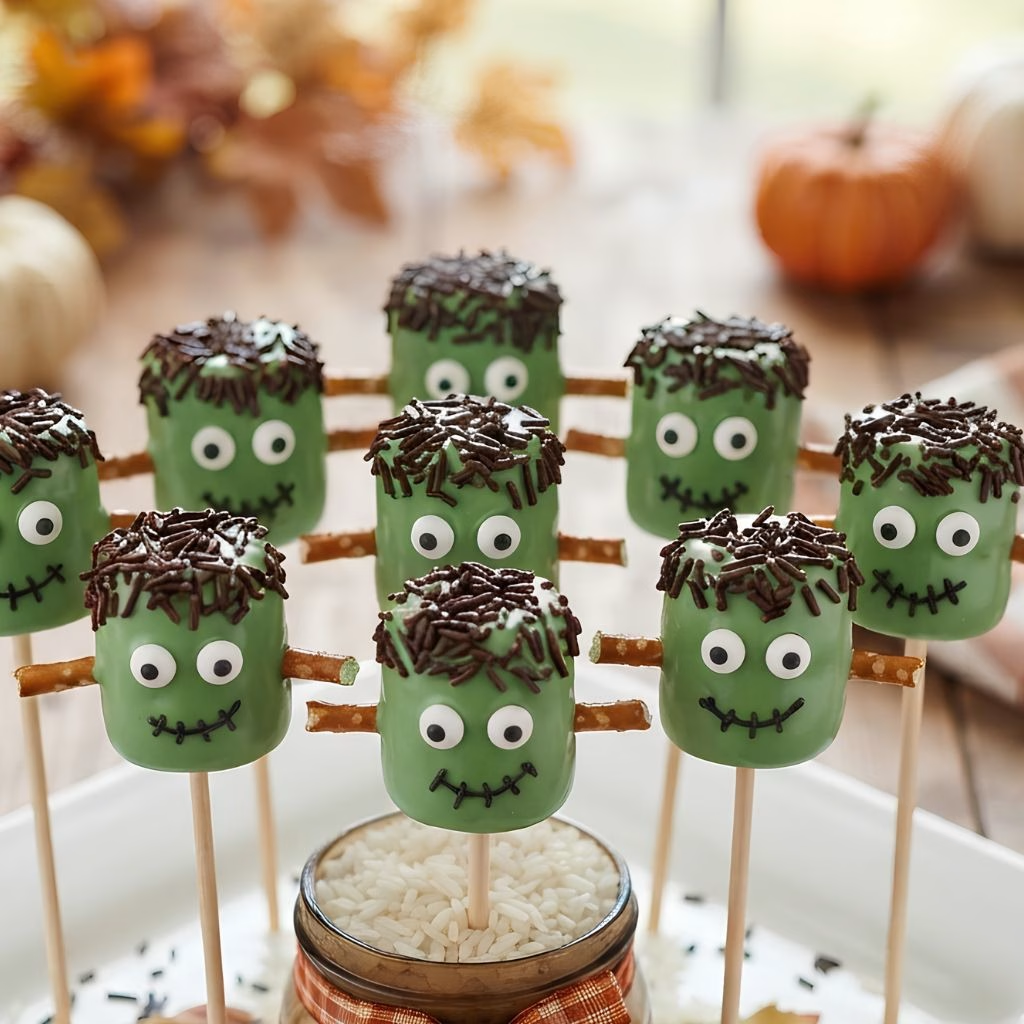
How to Make Frankenstein Marshmallow Pops Recipe?
This recipe really comes together in just a handful of simple steps, and none of them require any actual cooking. I like laying out all my toppings before I even melt the candy, since things move fast once the coating is ready.
Melt the Candy Melts
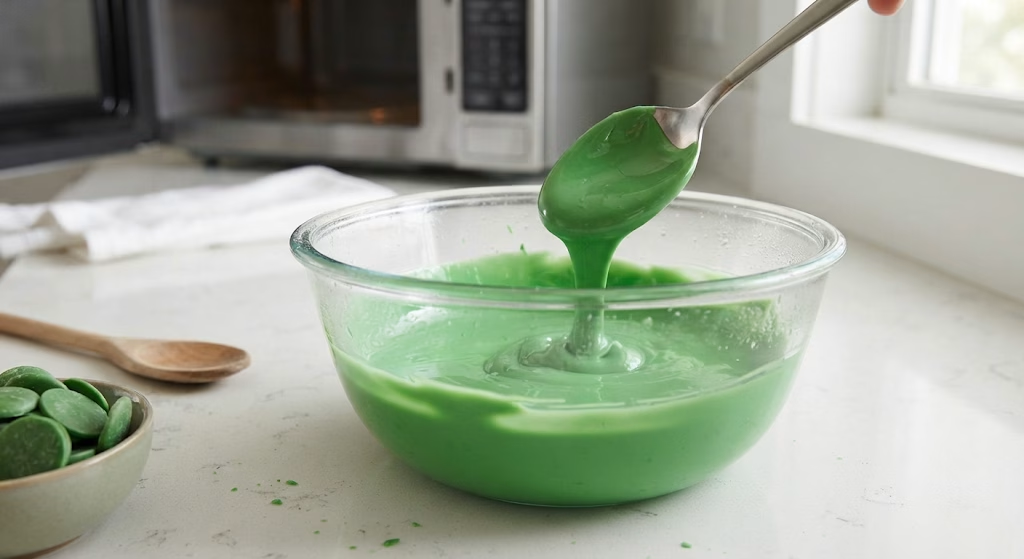
Pour your green candy melts into a microwave-safe bowl and heat them in short 30-second bursts, stirring in between each round. Keep going until the mixture is fully smooth and glossy with no lumps left. Avoid rushing this step, since scorched candy melts turn grainy and won’t coat the marshmallows evenly.
Insert the Lollipop Sticks
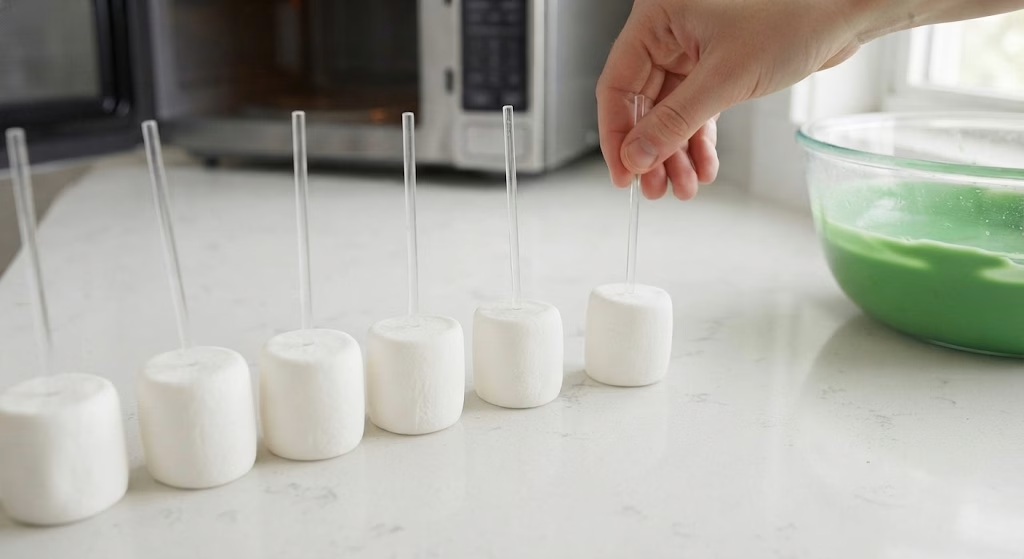
Push one lollipop stick into the flat end of each marshmallow, going about halfway through so it holds steady. This gives you a handle for the next steps and makes the final treat easy to hold. Set them aside on your prepared baking sheet once they’re ready.
Dip the Marshmallows
Holding each marshmallow by its stick, dip it into the melted green candy, turning it until it’s fully coated on all sides. Let any extra drip off before pulling it out completely. Move quickly here since the coating starts setting the moment it touches the cool marshmallow.
Add the Face and Hair
While the coating is still wet, press two candy eyeballs onto the front of each marshmallow. Sprinkle on the black or brown jimmies right at the top to look like messy hair. Work fast, because once the candy melts firm up, nothing else will stick.
Attach the Bolts and Mouth
Push a small broken piece of pretzel stick into each side of the marshmallow to form Frankenstein’s neck bolts. Once everything has set for a few minutes, use your edible marker to draw a simple stitched mouth. Stand the finished pops upright in your glass of rice until fully hardened.
Additional Tips for Making This Recipe Better
I’ve made more batches of these than I can count, and here’s what genuinely helps.
- I always melt my candy in small increments, because overheating it even a little makes it seize up and turn clumpy.
- I keep a damp paper towel nearby, since my fingers get sticky within minutes of starting the eyeball placement.
- I work in small batches of three or four marshmallows at a time so the coating doesn’t harden before I get the decorations on.
- I like using a fork to dip instead of my fingers, it gives a smoother, more even coat.
- I always make a couple of extras, because at least one or two never survive the decorating process intact.
Common Mistakes to Avoid
- I melted my candy melts too quickly on high power once, and the whole batch turned into an unusable clumpy mess.
- I didn’t dry my marshmallows before dipping, and the moisture made the coating slide right off in patches.
- I waited too long between dipping and adding the eyes, so nothing would stick to the hardened shell.
- I pushed the pretzel bolts in too hard, which cracked the coating right where I’d just decorated.
- I stood my finished pops in a cold fridge instead of at room temperature, and condensation ruined the smooth finish.
How to Serve Frankenstein Marshmallow Pops?
I love setting these up in a tall vase or mug filled with colorful candy corn so they look like they’re growing straight out of a little monster garden. Arranging them on a black platter with some fake cobwebs stretched around makes for an easy centerpiece at any Halloween party.
They also work great individually wrapped in small cellophane bags with a ribbon tied at the top if you’re sending them home as party favors or handing them out as gf halloween recipes for guests with gluten sensitivities, since marshmallows and candy melts are naturally gluten-free. If you’re building out a whole spooky spread, these pair beautifully with something like a chilled no-bake strawberry cheesecake brain for the dessert table.
Variations
- Use white candy melts instead of green for a classic mummy-style pop rather than a monster look
- Swap the pretzel bolts for small silver dragées if you want a shinier, more polished finish
- Try dark chocolate melts for a more grown-up flavor twist on the same design
- Add a drizzle of white chocolate over the green coating for extra texture and detail
- Make a batch of healthy halloween treats recipes by using dark chocolate melts, which contain less added sugar than standard candy coating
- Turn them into a mixed-monster tray by decorating half as Frankenstein and half as ghosts with plain white coating
Nutritional Information
Here’s an approximate breakdown per pop, though this will vary a bit depending on the brand of candy melts you use.
- Calories: 140 kcal
- Protein: 1 g
- Carbohydrates: 24 g
- Fat: 5 g
Make Ahead and Storage
You can prep and decorate these up to two days in advance, keeping them upright in a container at room temperature away from direct sunlight.
Store finished pops in an airtight container at room temperature for up to five days, since refrigeration tends to make the candy coating sweat and lose its shine.
These don’t freeze particularly well, as the marshmallow texture turns gummy once thawed, so it’s best to enjoy them fresh within the week.
Why You’ll Love This Recipe?
These pops have become a Halloween tradition in my house, and here’s why I think they deserve a spot on your list too.
- They’re genuinely easy: With no oven and just a microwave for melting candy, this comes together with almost zero cleanup involved.
- They’re endlessly customizable: From color swaps to different candy coatings, you can turn this into all kinds of silly recipes depending on the occasion.
- They travel well: These hold their shape nicely for school parties, lunchboxes, or as take-home favors after a gathering.
- They’re a hit with all ages: Kids love decorating them just as much as adults enjoy eating them, which makes it a great group activity.
FAQs
Can I use mini marshmallows instead of regular ones?
I wouldn’t recommend it, since mini marshmallows are too small to hold a stick steady or leave enough room for decorating the face.
Why did my candy coating turn out lumpy?
This usually happens from overheating in the microwave, so always melt in short bursts and stir frequently to keep it smooth.
Can I make these ahead of time for a party?
Yes, you can make them up to two days ahead and store them at room temperature in a sealed container until you’re ready to serve.
What can I use instead of candy eyeballs?
Mini chocolate chips or small white chocolate dots with a dot of black gel icing work well as a substitute if you can’t find candy eyes.
Do these need to be refrigerated?
No, keeping them in the fridge actually causes condensation that ruins the finish, so room temperature storage works best.
If you’re rounding out your spooky dessert table, a plate of ghost toast makes a fun, kid-friendly addition alongside these pops for breakfast or brunch on Halloween morning.

Frankenstein Marshmallow Pops Recipe
Ingredients
Method
- Pour your green candy melts into a microwave-safe bowl and heat them in short 30-second bursts, stirring in between each round. Keep going until the mixture is fully smooth and glossy with no lumps left. Avoid rushing this step, since scorched candy melts turn grainy and won’t coat the marshmallows evenly.
- Push one lollipop stick into the flat end of each marshmallow, going about halfway through so it holds steady. This gives you a handle for the next steps and makes the final treat easy to hold. Set them aside on your prepared baking sheet once they’re ready.
- Holding each marshmallow by its stick, dip it into the melted green candy, turning it until it’s fully coated on all sides. Let any extra drip off before pulling it out completely. Move quickly here since the coating starts setting the moment it touches the cool marshmallow.
- While the coating is still wet, press two candy eyeballs onto the front of each marshmallow. Sprinkle on the black or brown jimmies right at the top to look like messy hair. Work fast, because once the candy melts firm up, nothing else will stick.
- Push a small broken piece of pretzel stick into each side of the marshmallow to form Frankenstein’s neck bolts. Once everything has set for a few minutes, use your edible marker to draw a simple stitched mouth. Stand the finished pops upright in your glass of rice until fully hardened.
Notes
- I always melt my candy in small increments, because overheating it even a little makes it seize up and turn clumpy.
- I keep a damp paper towel nearby, since my fingers get sticky within minutes of starting the eyeball placement.
- I work in small batches of three or four marshmallows at a time so the coating doesn’t harden before I get the decorations on.
- I like using a fork to dip instead of my fingers, it gives a smoother, more even coat.
- I always make a couple of extras, because at least one or two never survive the decorating process intact.