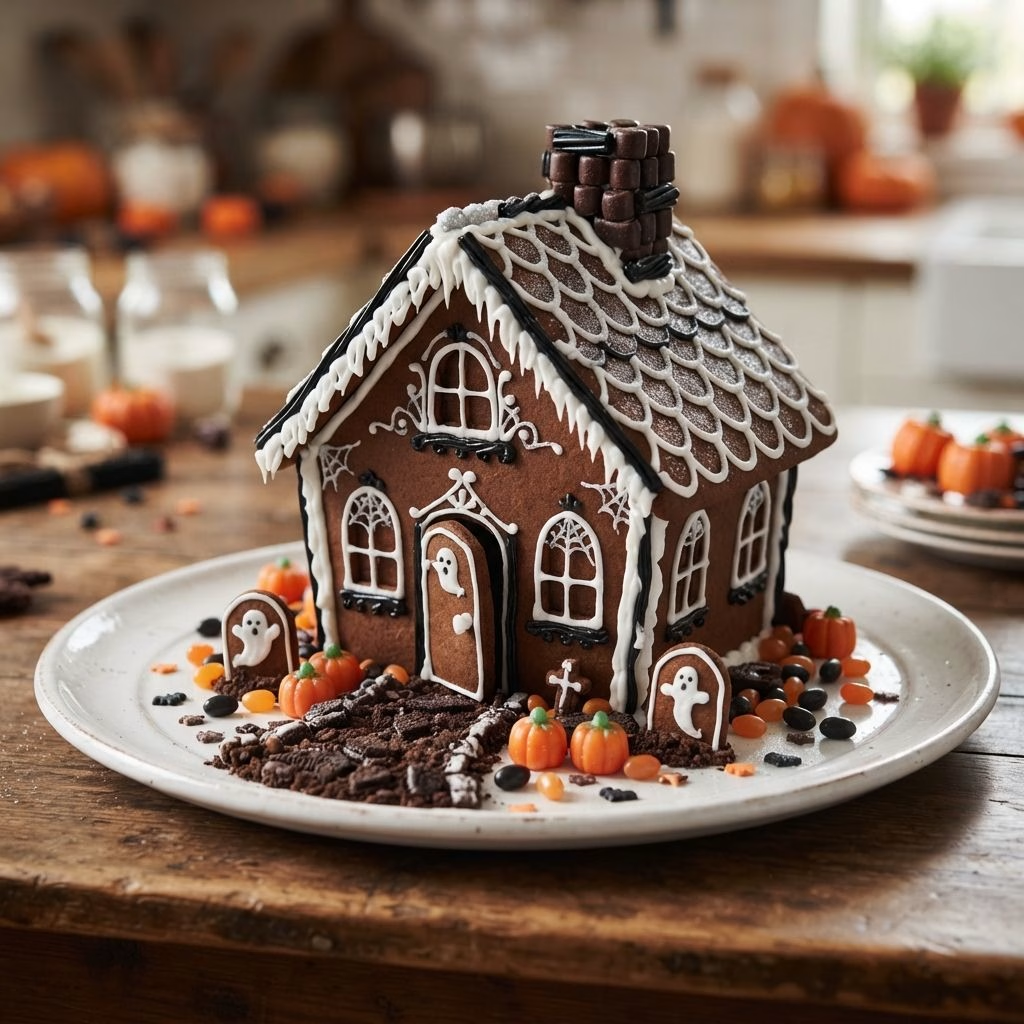
I built my first Haunted House Gingerbread Recipe last October after my kids begged me to try something spookier than the usual Christmas version, and honestly, I got hooked. There’s something about snapping together crooked little walls and piping on cobwebs that feels way more fun than a plain old cookie.
I messed up my first roof (it slid right off), but a few batches later I finally nailed the technique I’m sharing here. If you’ve ever wanted to try a haunted gingerbread showdown at home, this is the recipe I’d hand you first.
Cooking Time
- Prep Time: 45 minutes
- Cooking Time: 15 minutes
- Total Time: 2 hours 30 minutes (includes chilling and assembly)
Ingredients
- 350g plain flour — gives the dough enough structure to hold its shape once baked
- 1 tablespoon ground ginger — the backbone flavor of any good gingerbread, don’t skimp on it
- 1 teaspoon ground cinnamon — adds warmth without overpowering the ginger
- ½ teaspoon mixed spice — rounds out the flavor with a subtle hint of clove and nutmeg
- ½ teaspoon bicarbonate of soda — helps the dough hold together while keeping it firm, not puffy
- ¼ teaspoon salt — balances the sweetness so the gingerbread doesn’t taste flat
- 100g unsalted butter — adds richness and makes the dough easier to roll out evenly
- 100g dark brown sugar — brings moisture and a deeper caramel-like flavor than white sugar
- 4 tablespoons golden syrup — the sticky binder that keeps everything together, don’t substitute honey here
- 1 large egg, beaten — helps bind the dry ingredients into a workable dough
- 500g icing sugar, sifted — the base for the royal icing that glues your house together
- 2 egg whites — whips into a strong, stiff icing that sets hard for structural support
- Black and orange food coloring gel — for that classic haunted house color scheme
- Assorted Halloween sweets — for chimneys, windows, and creepy little details on the roof
Note: this recipe serves 8, making one full haunted gingerbread house plus a few extra decorative pieces.
Equipment You Need
- Rolling pin — for rolling the dough out to an even thickness
- Cardboard templates or a printed haunted house template — keeps your wall and roof shapes consistent
- Sharp knife or pizza cutter — for cutting clean edges around your templates
- Baking sheets lined with parchment — prevents the dough from sticking while it bakes
- Wire cooling rack — lets the baked pieces cool completely before assembly
- Piping bags fitted with small round tips — for detailed icing work like windows and cobwebs
- Stand mixer or hand mixer — whips the royal icing to the right stiff, pipeable consistency
- Sturdy serving board or cake board — gives your finished house a stable base to stand on
How to Make a Haunted House Gingerbread Recipe?
This recipe comes together in three parts: baking the pieces, letting them cool completely, then assembling and decorating your haunted house. Take your time with each stage, since rushing the drying steps is where most houses go wrong. Here’s exactly how I do it from start to finish.
Make the Gingerbread Dough
In a large pan, gently melt the butter, brown sugar, and golden syrup together over low heat until smooth. Let this cool slightly, then stir in the beaten egg. Sift in the flour, spices, bicarbonate of soda, and salt, and mix until a firm dough forms.
Chill and Roll the Dough
Wrap the dough and chill it in the fridge for at least 30 minutes, since warm dough spreads too much in the oven. Once firm, roll it out on a floured surface to about 5mm thick for sturdy, stackable walls.
Cut and Bake the Pieces
Lay your templates over the rolled dough and cut around them with a sharp knife, then transfer the pieces to lined baking sheets. Bake at 180°C (350°F) for 12 to 15 minutes, until firm and lightly golden at the edges.
Cool Completely
Let the gingerbread pieces sit on the baking sheet for five minutes, then move them to a wire rack to cool fully. This step matters more than it seems, since warm gingerbread bends and breaks during assembly.
Make the Royal Icing
Whisk the egg whites until frothy, then gradually beat in the sifted icing sugar until you get a thick, glossy icing that holds stiff peaks. Divide and tint portions black and orange for decorating.
Assemble the House
Pipe a thick line of white icing along the edges of your wall pieces and press them together, using cans or mugs to prop them upright while they set. Once the walls are firm, attach the roof panels the same way.
Decorate and Finish
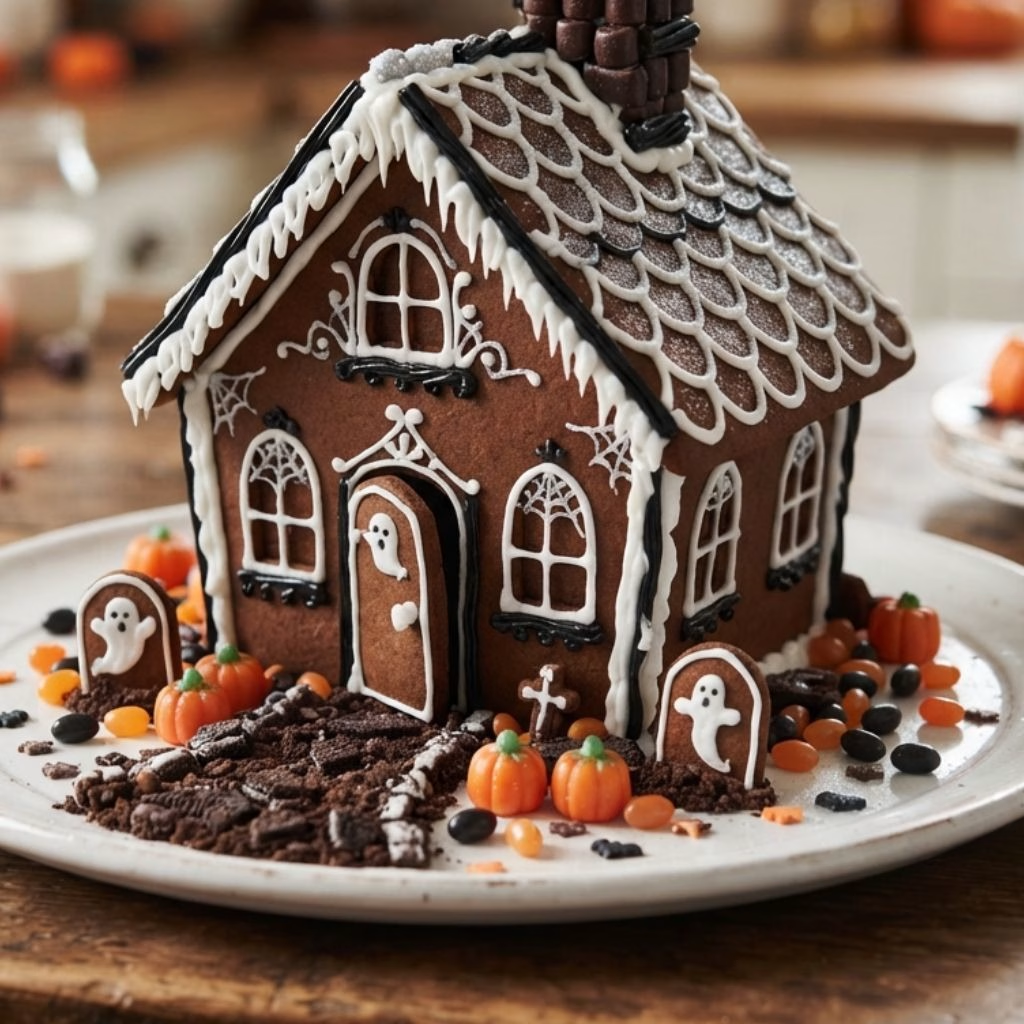
Once your structure is fully set, pipe on spooky windows, doors, and cobweb details using your tinted icing. Add sweets for chimneys, tombstones, or creepy little extras, then let everything harden before serving.
Additional Tips for Making This Recipe Better
I’ve built more than a few of these now, so here’s what genuinely helps.
- I always chill my dough twice, once before rolling and once after cutting the shapes, since it keeps the edges crisp in the oven.
- I bake my wall pieces a touch longer than the roof pieces because thicker sections need the extra minute or two to firm up properly.
- I let my icing rest under a damp cloth so it doesn’t crust over while I’m working on different sections.
- I prop my walls with heavy mugs while the icing sets, which has saved me from more than one lopsided collapse.
- I always make a spare wall or two, because gingerbread is brittle and something almost always cracks.
Common Mistakes to Avoid
- I rushed the cooling step once and my walls warped slightly in the humidity, so now I always wait until they’re completely cool.
- I rolled my dough too thin the first time I tried this, and the walls snapped the moment I tried to lift them.
- I used runny icing as glue and my whole structure slid apart before it could set, so I make sure mine holds stiff peaks now.
- I forgot to prop the walls while assembling, and I came back to a house leaning at an alarming angle.
- I decorated before the base structure had fully hardened, and I ended up smudging half my careful icing work.
How to Serve Haunted House Gingerbread?
I like setting my finished house on a dark serving board dusted with crushed chocolate cookie crumbs to look like dirt, with a few flickering LED tea lights tucked behind the windows for extra spookiness. Scatter some candy pumpkins, plastic spiders, or extra gingerbread bats around the base for a fuller scene.
It also works beautifully as the centerpiece of a Halloween dessert table, right alongside other handmade treats like a batch of spooky spider web cookies for guests to nibble on while they admire the house.
Variations
- Swap the butter for a dairy-free block butter alternative if you need a dairy-free version
- Use a sugar-free golden syrup substitute and a sugar-free icing sugar blend for a lower-sugar option
- Add orange and purple food coloring instead of black for a brighter, more playful halloween gingerbread house decor look
- Use a store-bought halloween gingerbread house kit as a shortcut base and personalize the decorating from there
- Try piping green icing “slime” dripping down the roofline for an extra creepy touch
- Add crushed black cookies around the base to mimic a scorched, haunted dimensions gingerbread house effect
Nutritional Information
Here’s a rough breakdown per serving, based on one-eighth of the finished house and decorations.
- Calories: 410 kcal
- Protein: 4 g
- Carbohydrates: 78 g
- Fat: 9 g
Make Ahead and Storage
You can bake the gingerbread pieces up to a week in advance and store them unassembled in an airtight container at room temperature until you’re ready to build.
Once fully assembled and decorated, the finished house stays sturdy and safe to display for up to two weeks if kept somewhere cool and dry, away from direct sunlight.
Gingerbread pieces also freeze well before assembly, and they’ll keep for up to two months if wrapped tightly and stored flat in a freezer bag.
Why You’ll Love This Recipe?
This haunted house gingerbread has become a genuine Halloween tradition in my house, and here’s why I think you’ll want to make it too.
- It’s a fun group activity: Building and decorating the house together turns baking into an actual event, especially with kids who love adding the spooky details.
- It doubles as decor: Once it’s built, this isn’t just a dessert, it’s a centerpiece that can sit on your table for weeks as seasonal decoration.
- It’s flexible for any skill level: Whether you follow a simple halloween gingerbread house template or freehand your own design, this recipe adapts either way.
- It’s endlessly customizable: From color schemes to added candy details, every haunted gingerbread house ends up looking completely different.
FAQs
Can I use a halloween gingerbread house kit instead of baking from scratch?
Yes, a kit works fine as a shortcut for the structural pieces, and you can still use this recipe’s icing and decorating steps to personalize it.
Why did my gingerbread house collapse during assembly?
This usually happens when the icing wasn’t stiff enough to act as glue, so make sure your royal icing holds firm peaks before using it to join pieces.
Can I make the dough ahead of time?
Absolutely, the dough keeps well in the fridge for up to three days, or you can freeze it for up to a month before rolling and baking.
Is this haunted house recipe safe to actually eat?
Yes, every piece is fully edible, though most people treat it as a display piece since the icing hardens quite firm over time.
How do I keep the roof from sliding off while it sets?
Prop the roof panels with cans or small boxes while the icing dries, and avoid touching the structure again until it’s completely hardened.
For more Halloween baking inspiration to round out your spread, I’d also recommend trying a batch of Halloween cookie decorating with the kids, since the icing techniques carry over nicely from this gingerbread project.

Haunted House Gingerbread Recipe
Ingredients
Method
- In a large pan, gently melt the butter, brown sugar, and golden syrup together over low heat until smooth. Let this cool slightly, then stir in the beaten egg. Sift in the flour, spices, bicarbonate of soda, and salt, and mix until a firm dough forms.
- Wrap the dough and chill it in the fridge for at least 30 minutes, since warm dough spreads too much in the oven. Once firm, roll it out on a floured surface to about 5mm thick for sturdy, stackable walls.
- Lay your templates over the rolled dough and cut around them with a sharp knife, then transfer the pieces to lined baking sheets. Bake at 180°C (350°F) for 12 to 15 minutes, until firm and lightly golden at the edges.
- Let the gingerbread pieces sit on the baking sheet for five minutes, then move them to a wire rack to cool fully. This step matters more than it seems, since warm gingerbread bends and breaks during assembly.
- Whisk the egg whites until frothy, then gradually beat in the sifted icing sugar until you get a thick, glossy icing that holds stiff peaks. Divide and tint portions black and orange for decorating.
- Pipe a thick line of white icing along the edges of your wall pieces and press them together, using cans or mugs to prop them upright while they set. Once the walls are firm, attach the roof panels the same way.
- Once your structure is fully set, pipe on spooky windows, doors, and cobweb details using your tinted icing. Add sweets for chimneys, tombstones, or creepy little extras, then let everything harden before serving.
Notes
- I always chill my dough twice, once before rolling and once after cutting the shapes, since it keeps the edges crisp in the oven.
- I bake my wall pieces a touch longer than the roof pieces because thicker sections need the extra minute or two to firm up properly.
- I let my icing rest under a damp cloth so it doesn’t crust over while I’m working on different sections.
- I prop my walls with heavy mugs while the icing sets, which has saved me from more than one lopsided collapse.
- I always make a spare wall or two, because gingerbread is brittle and something almost always cracks.