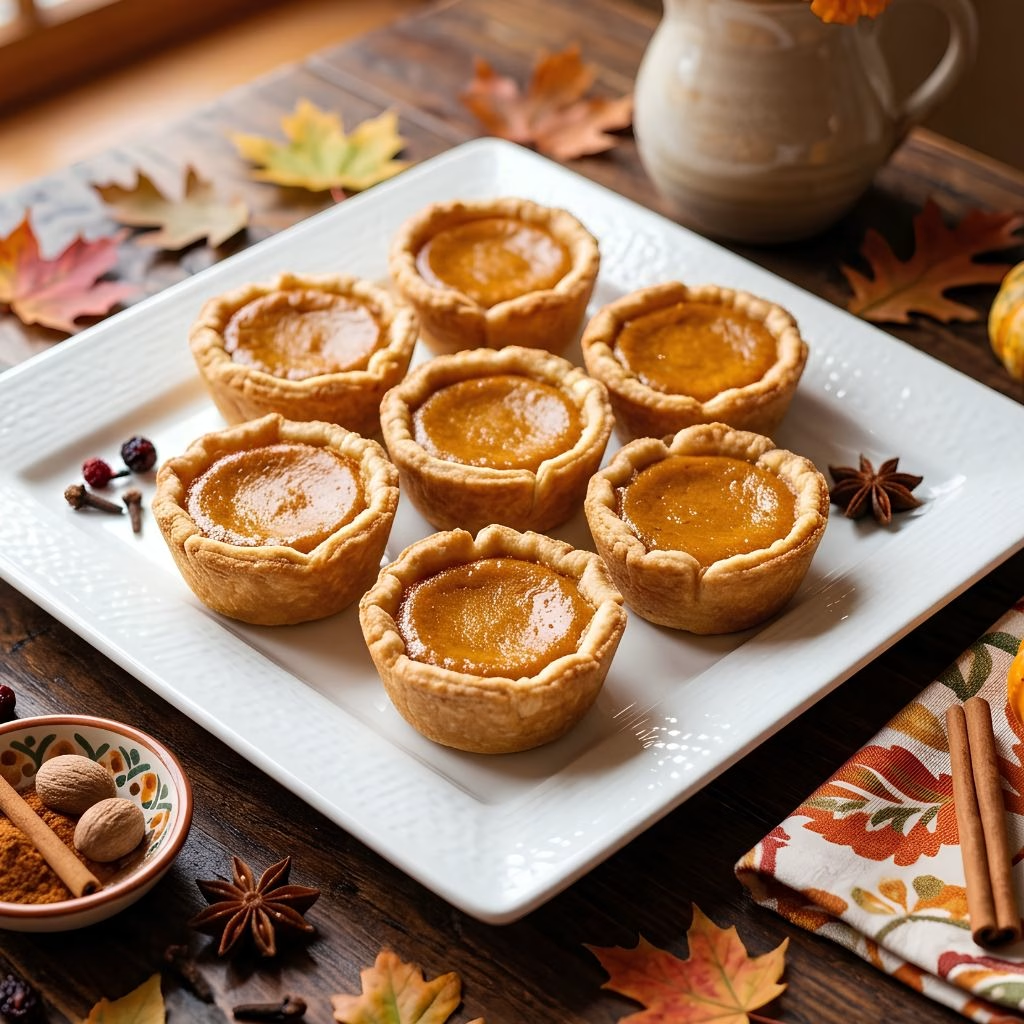
I made this Easy Mini Pumpkin Pie Recipe on a chilly afternoon, and my kitchen smelled like fall within minutes. They are the best mini pumpkin pie recipe I have tried because they use just six simple ingredients.
I grabbed a pre-made crust, pressed it into a muffin tin, and the hard work was done. The filling bakes up silky, spiced, and perfectly sweet, with a golden, flaky edge on every pie. If you love mini pumpkin recipes that feel fancy but take almost no effort, you are going to love these.

Cooking Time
Here is how long this easy fall dessert takes from start to finish.
- Prep Time: 20 minutes
- Cooking Time: 30 minutes
- Total Time: 50 minutes (plus cooling time before serving)
Ingredients
This pumpkin pie filling recipe keeps things short and sweet. Each item below has one job, and I added a quick tip so your pies turn out right.
- 1 refrigerated pie crust (homemade or store-bought): Gives you the flaky base, and store-bought saves loads of time.
- 1 cup (244 g) pumpkin puree: Adds the earthy pumpkin flavor, so grab plain puree, not pie filling.
- 5 oz (about 180 g) sweetened condensed milk: Makes the filling sweet and creamy, which is why no evaporated milk is needed.
- 1 large egg: Sets the custard so the pies slice and hold their shape.
- ½ teaspoon salt: Balances the sweetness and makes the spices pop.
- 1 teaspoon pumpkin pie spice: Brings the cozy fall flavor, and fresh spice smells stronger.
- Nonstick cooking spray: Keeps the crusts from sticking to the pan.
Note: Serves several (makes 9 mini pies).
Equipment You Need
You probably own everything on this list already.
- Mixing bowl: Holds and combines the filling ingredients.
- Whisk: Blends the filling until smooth and lump-free.
- Standard muffin tin: Shapes the mini pies into neat, even rounds.
- 4-inch round cookie cutter (or a jar lid): Cuts perfect circles from the dough.
- Rolling pin (optional): Smooths the dough and stretches the scraps.
- Butter knife: Loosens each cooled pie so it pops out cleanly.
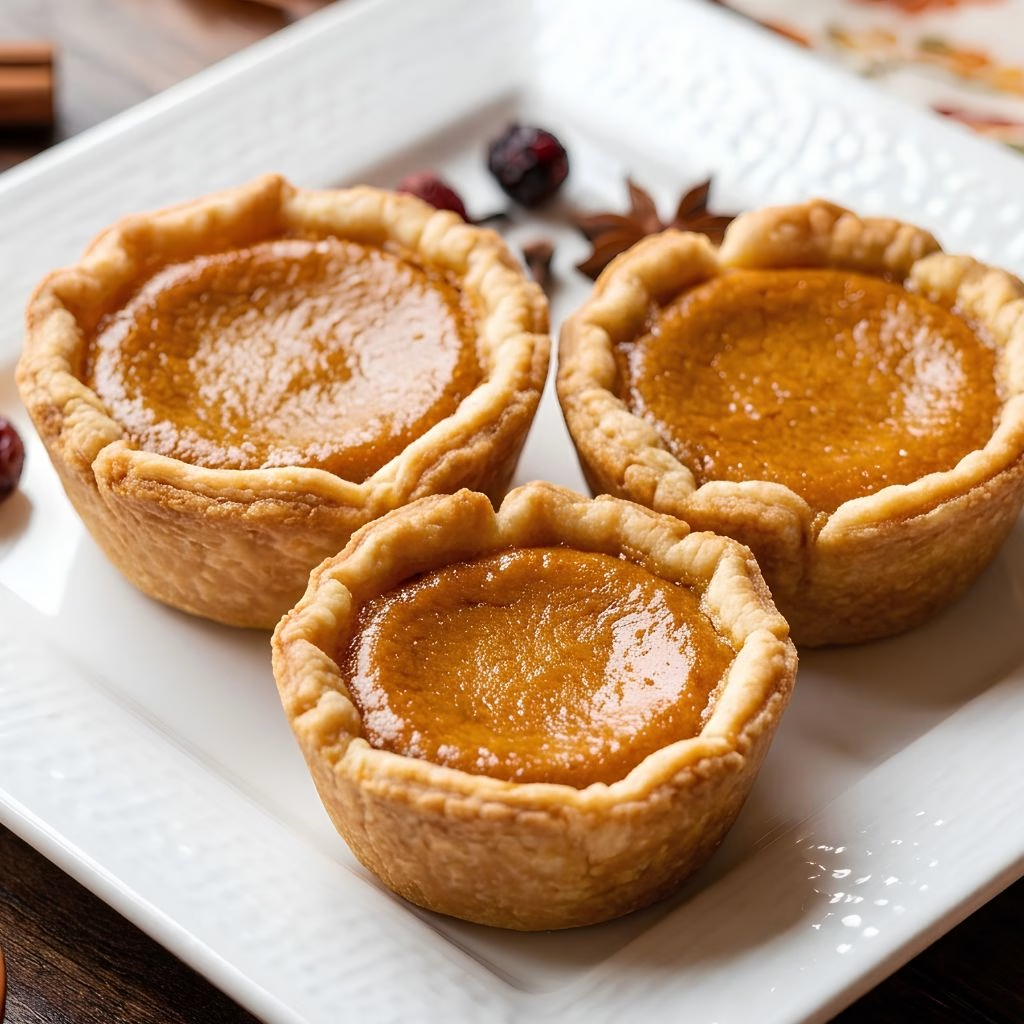
How to Make an Easy Mini Pumpkin Pie Recipe?
These pies come together in six easy steps. You only need one bowl and one muffin tin. Follow along and you will have a tray of golden mini pies in under an hour.
Preheat the Oven
Set your oven to 350°F and let it fully heat up. A hot oven helps the crust bake evenly from the start. I also slide the rack to the middle so the pies cook gently.
Cut the Pie Crust Rounds
Unroll the pie crust on a clean, lightly floured surface. Use a 4-inch cutter or a jar lid to cut 8 to 9 circles. Gather the scraps, re-roll them, and cut again until the dough is used up.
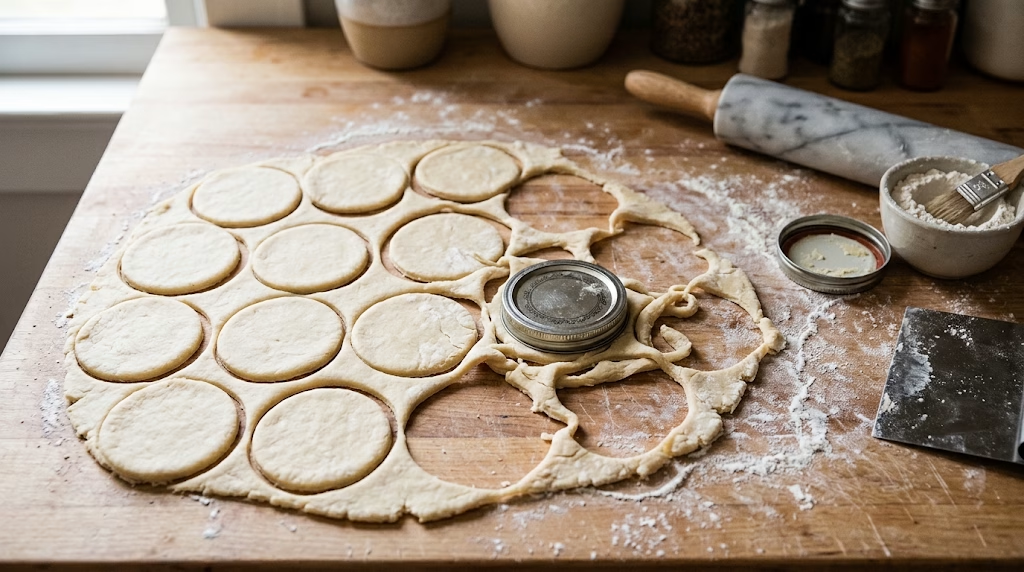
Prepare the Muffin Tin
Spray each muffin cup with nonstick spray. Press one dough circle gently into each cup, so it hugs the bottom and sides. Tuck the edges up neatly, and a mini muffin tin works too if you cut smaller circles.
Mix the Filling
In a mixing bowl, add the pumpkin puree, sweetened condensed milk, egg, salt, and pumpkin pie spice. Whisk until the mixture looks smooth and glossy. Take your time here because no streaks should remain.
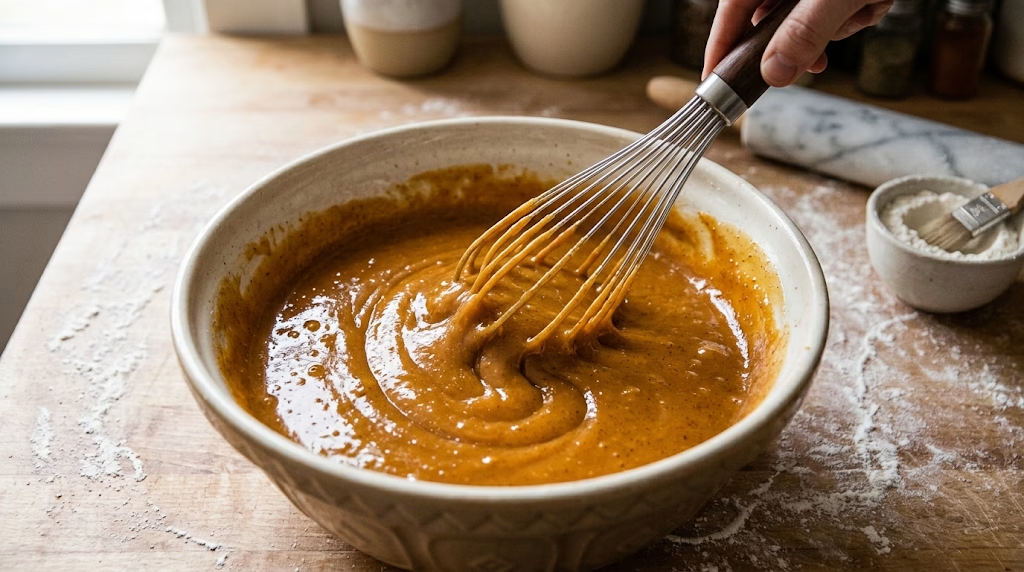
Fill and Bake
Spoon the filling evenly into the crust-lined cups. Fill them close to the top, since this filling barely puffs. Bake for 25 to 35 minutes until the centers are set and the crust edges turn golden.
Cool and Remove
Let the pies cool completely in the pan. Cooling lets the filling firm up so it does not crumble. Run a butter knife around each pie, then lift it out gently.
Additional Tips for Making This Recipe Better
After a few batches, I picked up some small tricks that make a big difference.
- I always use plain pumpkin puree, because pie filling already has sugar and spices and throws off the balance.
- I check my pies at the 25-minute mark, since every oven runs a little different.
- I gently shake the pan to test doneness. The center should jiggle slightly but never roll like liquid.
- I mix my own spice blend when I run out: ½ teaspoon cinnamon, ¼ teaspoon nutmeg, and ⅛ teaspoon each of allspice and ginger.
- I re-roll the dough scraps right away, while they are still soft and easy to work with.
- I let the pies cool in the pan, because lifting them out warm makes them fall apart.
- I fill each cup evenly, using a small cookie scoop, so every pie bakes at the same speed.
- I chill the dough circles for a few minutes if they get sticky, which makes pressing them into the tin far easier.
- I bake the tin on a sheet pan, which catches any drips and makes moving it in and out of the oven simple.
Common Mistakes to Avoid
Here are the slip-ups I made early on, so you can skip them.
- Using pumpkin pie filling instead of puree: I did this once, and the pies turned out overly sweet and oddly spiced. Always read the can label.
- Swapping in evaporated milk: I learned the hard way that it will not give the same sweet, thick texture. Stick with sweetened condensed milk here.
- Overbaking the pies: I left them too long once, and the tops cracked. Pull them out when the center only jiggles a little.
- Skipping the cooking spray: My first batch stuck badly to the tin. A quick spritz makes removal so much easier.
- Taking the pies out too soon: I rushed this step and the filling slumped. Let them cool fully before you loosen them.
How to Serve an Easy Mini Pumpkin Pie Recipe?
These little pies look adorable on any dessert table. A few simple finishing touches make them feel extra special.
- Top each pie with a swirl of whipped cream just before serving. It is the classic finish, and I never skip it.
- Add a light dusting of cinnamon or pumpkin pie spice for color and aroma.
- Arrange the pies on a wooden board or a tiered stand for a pretty party display.
- Place a tiny pecan half or a sprinkle of crushed graham cracker on top for crunch.
- Serve them after a cozy dinner. They are the perfect sweet ending to a meal with my favorite fall side, this easy acorn squash recipe
Variations
Once you master the basic version, play around with these easy twists.
- Dairy-free: Use a dairy-free pie crust and swap in sweetened condensed coconut milk. Whip coconut cream for the topping.
- Sugar-free: Choose a sugar-free condensed milk and top with sugar-free whipped topping.
- Extra spicy: Add a pinch of ground ginger or cloves for a warmer, bolder flavor.
- Homemade crust: Skip the store-bought dough and use your favorite homemade pie crust.
- Graham cracker base: Press a graham cracker crumb mix into the tin for a no-roll crust.
- Mini muffin tin version: Cut smaller 2-inch rounds and bake bite-size pies for a party tray.
- Crunchy topping: Sprinkle chopped pecans or a bit of streusel over the filling before baking.
- Maple twist: Stir a teaspoon of maple syrup into the filling for a deeper, caramel-like sweetness.
- Pie-shaped crust edge: Use a small fork to press a pretty pattern around the rim before filling.
Nutritional Information
Here are the approximate values for one mini pie. They are estimates and can change based on the crust and brands you use.
- Calories: 154 kcal
- Protein: 3 g
- Carbohydrates: 20 g
- Fat: 7 g
Make Ahead and Storage
These pies keep well, which makes them great for busy holiday weeks. You can bake them a day or two ahead and simply save the whipped cream for the last minute. That way, party day feels calm and stress-free.
Storage
Store the cooled pies in an airtight container in the refrigerator. They stay fresh for up to 3 days. Keep them covered so the crust does not pick up fridge smells.
Reheating
These pies taste great cold or at room temperature, so reheating is optional. If you want them a little warmer, let them sit out for about 20 minutes. Add the whipped cream only after they are ready to serve.
Freezing
Let the pies cool completely, then place them in a freezer-safe container. For the best flavor and texture, I use them within a month. To thaw, leave them out at room temperature and lay paper towels over the tops to catch extra moisture.
Why You’ll Love This Recipe?
This recipe is easy, quick, and full of cozy flavor. Here are my favorite reasons to bake it again and again.
- Super simple prep: You only need six ingredients and one bowl. A pre made crust cuts your effort in half, so even beginners get great results.
- Perfect portions: Each pie is its own little serving, which means no slicing and no mess. They are ideal for parties and lunchboxes.
- Great for holidays: These pies fit right into Thanksgiving and fall gatherings. Serve them next to savory sides like these maple glazed carrots
- Easy to customize: You can make them dairy-free, sugar-free, or extra spiced. A few small swaps let you suit every guest.
- Make-ahead friendly: You can bake them days early and chill or freeze them. That frees up your oven on the big day.
FAQs
Can I use homemade pie crust for these mini pies?
Yes, absolutely. A homemade crust works just as well as a refrigerated one. Roll it out and cut it the same way.
How long do I bake mini pumpkin pies?
Bake them at 350°F for 25 to 35 minutes. They are done when the centers are set and only jiggle slightly. Start checking at 25 minutes.
Can I make mini pumpkin pies without evaporated milk?
Yes, and this recipe does exactly that. It uses sweetened condensed milk instead, which gives a thick, creamy, sweet filling. Do not mix the two up, since they are very different products.
Can I use a mini muffin tin?
Yes, a mini muffin tin works well. Cut smaller 2-inch crust rounds and bake the pies for less time. Watch them closely so they do not overbake.
Can I buy mini pumpkin pies instead of baking them?
You can find mini pumpkin pies to buy at many bakeries and grocery stores in fall. Still, homemade pies taste fresher and cost less. This recipe only takes 50 minutes.

Easy Mini Pumpkin Pie Recipe
Ingredients
Method
- Set your oven to 350°F and let it fully heat up. A hot oven helps the crust bake evenly from the start. I also slide the rack to the middle so the pies cook gently.
- Unroll the pie crust on a clean, lightly floured surface. Use a 4-inch cutter or a jar lid to cut 8 to 9 circles. Gather the scraps, re-roll them, and cut again until the dough is used up.
- Spray each muffin cup with nonstick spray. Press one dough circle gently into each cup, so it hugs the bottom and sides. Tuck the edges up neatly, and a mini muffin tin works too if you cut smaller circles.
- In a mixing bowl, add the pumpkin puree, sweetened condensed milk, egg, salt, and pumpkin pie spice. Whisk until the mixture looks smooth and glossy. Take your time here because no streaks should remain.
- Spoon the filling evenly into the crust-lined cups. Fill them close to the top, since this filling barely puffs. Bake for 25 to 35 minutes until the centers are set and the crust edges turn golden.
- Let the pies cool completely in the pan. Cooling lets the filling firm up so it does not crumble. Run a butter knife around each pie, then lift it out gently.
Notes
- I always use plain pumpkin puree, because pie filling already has sugar and spices and throws off the balance.
- I check my pies at the 25-minute mark, since every oven runs a little different.
- I gently shake the pan to test doneness. The center should jiggle slightly but never roll like liquid.
- I mix my own spice blend when I run out: ½ teaspoon cinnamon, ¼ teaspoon nutmeg, and ⅛ teaspoon each of allspice and ginger.
- I re-roll the dough scraps right away, while they are still soft and easy to work with.
- I let the pies cool in the pan, because lifting them out warm makes them fall apart.
- I fill each cup evenly, using a small cookie scoop, so every pie bakes at the same speed.
- I chill the dough circles for a few minutes if they get sticky, which makes pressing them into the tin far easier.
- I bake the tin on a sheet pan, which catches any drips and makes moving it in and out of the oven simple.