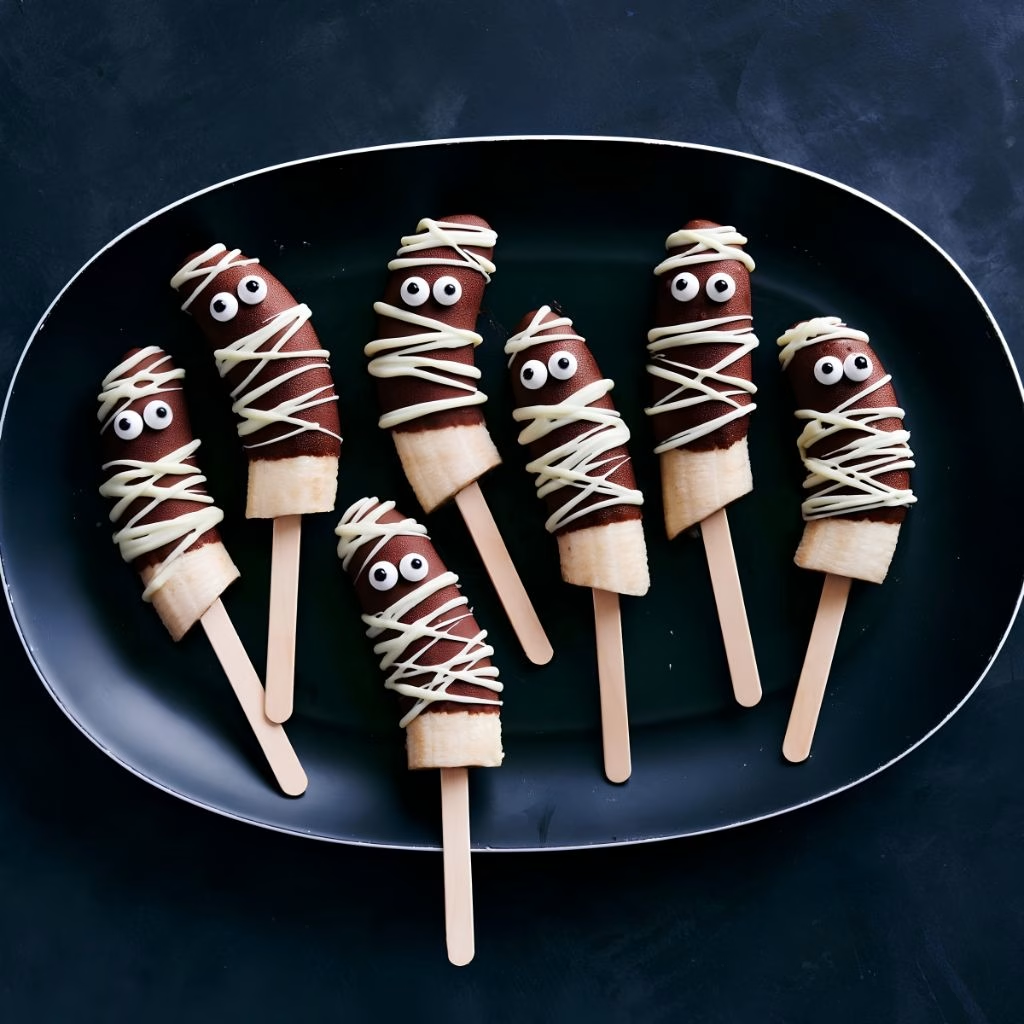
I made this Halloween Banana Mummy Recipe for the first time last Halloween when I had zero energy for real baking but still wanted something fun for my kids. It took me under an hour, from start to finish, and honestly, I couldn’t believe how “wow” they looked for so little effort.
If you’re after a quick, healthier-ish Halloween treat that doesn’t involve turning on the oven, this is it. I’ve made a batch every October since, and I’m sharing exactly how I do it, tips and all. If you love easy no-bake Halloween treats like this one, my Easy Halloween Candy Bark Recipe is another favorite in my house.
Cooking Time
- Prep Time: 15 minutes
- Cooking Time: 1 hour (freezing time)
- Total Time: 1 hour 15 minutes
Ingredients
- 2 large ripe bananas – the base of your mummies, and bigger ones are easier to slice and dip
- ¾ cup dark or semi-sweet chocolate chips – melts into the mummy’s “body” coating, don’t use chocolate bark, it hardens differently
- ⅓ cup white chocolate chips – this is what creates the classic mummy bandage drizzle
- 1½ teaspoons coconut oil (divided) – thins the chocolate so it drizzles smoothly instead of clumping
- 1 package candy eyeballs – gives each mummy its spooky little face, find these near the baking aisle in October
- Sprinkles (optional) – purely for fun color, skip them if you want a cleaner look
Note: this recipe serves 8, since each banana gets cut into 8 mummy pops.
Equipment You Need
- Large baking sheet – gives the banana pieces room to freeze without sticking together
- Parchment paper – keeps the bananas from sticking to the pan
- Popsicle sticks – turns each banana piece into an easy-to-hold pop
- Two microwave-safe bowls – one for melting dark chocolate, one for white chocolate
How to Make Halloween Banana Mummy Recipe?
This recipe comes together in four quick stages: cutting, freezing, dipping, and decorating. None of it is difficult, it’s just a little bit of waiting while the freezer does its job. Here’s exactly how I break it down in my own kitchen.
Step 1: Cut and Skewer the Bananas
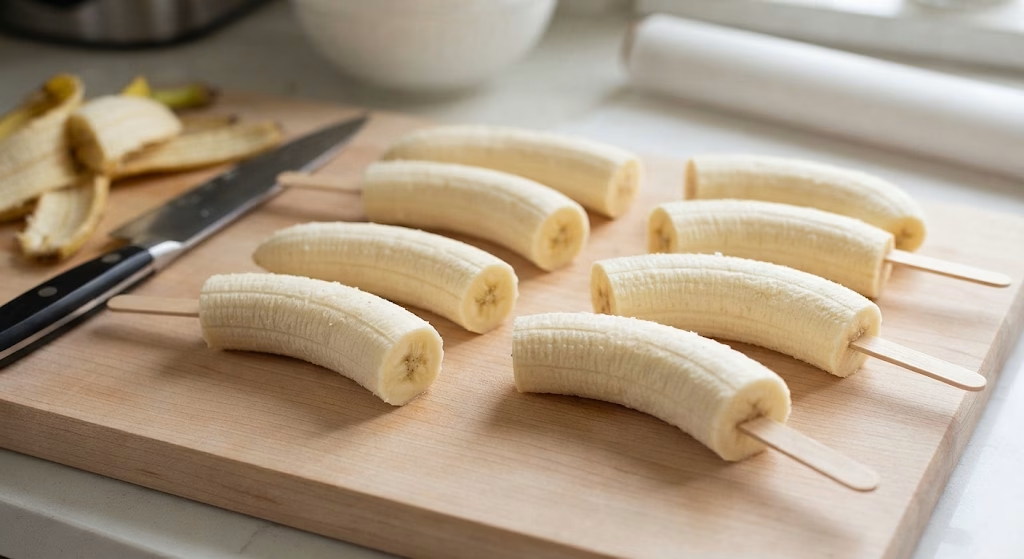
I start by peeling my bananas and slicing each one in half horizontally, then slicing those halves lengthwise so I end up with 8 pieces total. I push a popsicle stick into the cut end of each piece so they’re easy to hold later. Working with big, ripe (but not mushy) bananas makes this part much smoother.
Step 2: Flash Freeze Until Solid
I arrange all 8 banana pieces on a parchment-lined baking sheet, making sure they aren’t touching. Then I pop the tray into the freezer for about an hour, until the bananas are completely solid. This step matters because frozen bananas hold their shape and are so much easier to dip without falling apart.
Step 3: Melt and Temper the Chocolate
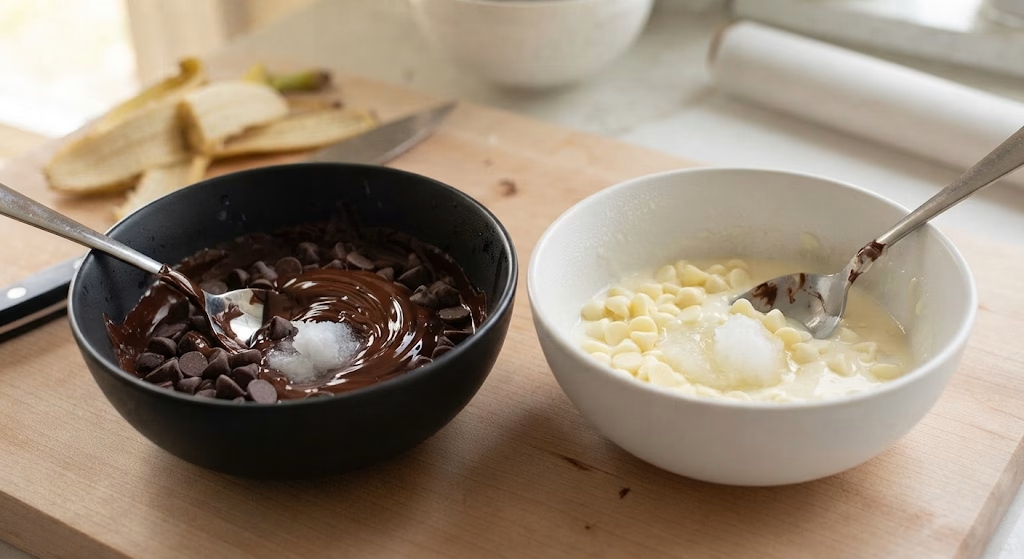
While the bananas freeze, I melt my dark chocolate chips with a teaspoon of coconut oil in one bowl, and my white chocolate chips with half a teaspoon of coconut oil in another. I microwave both in 30-second bursts, stirring after every round instead of rushing it. Going slowly like this keeps the chocolate smooth instead of seizing up or burning.
Step 4: Dip and Add the Eyes
Once the bananas are frozen solid, I dip each one into the dark chocolate until it’s fully coated, working quickly since the chocolate sets fast against the cold banana. Right after dipping, I press two candy eyeballs near the top of each pop before the chocolate hardens. I set each finished piece back on the parchment paper to firm up.
Step 5: Add the Mummy Wrap
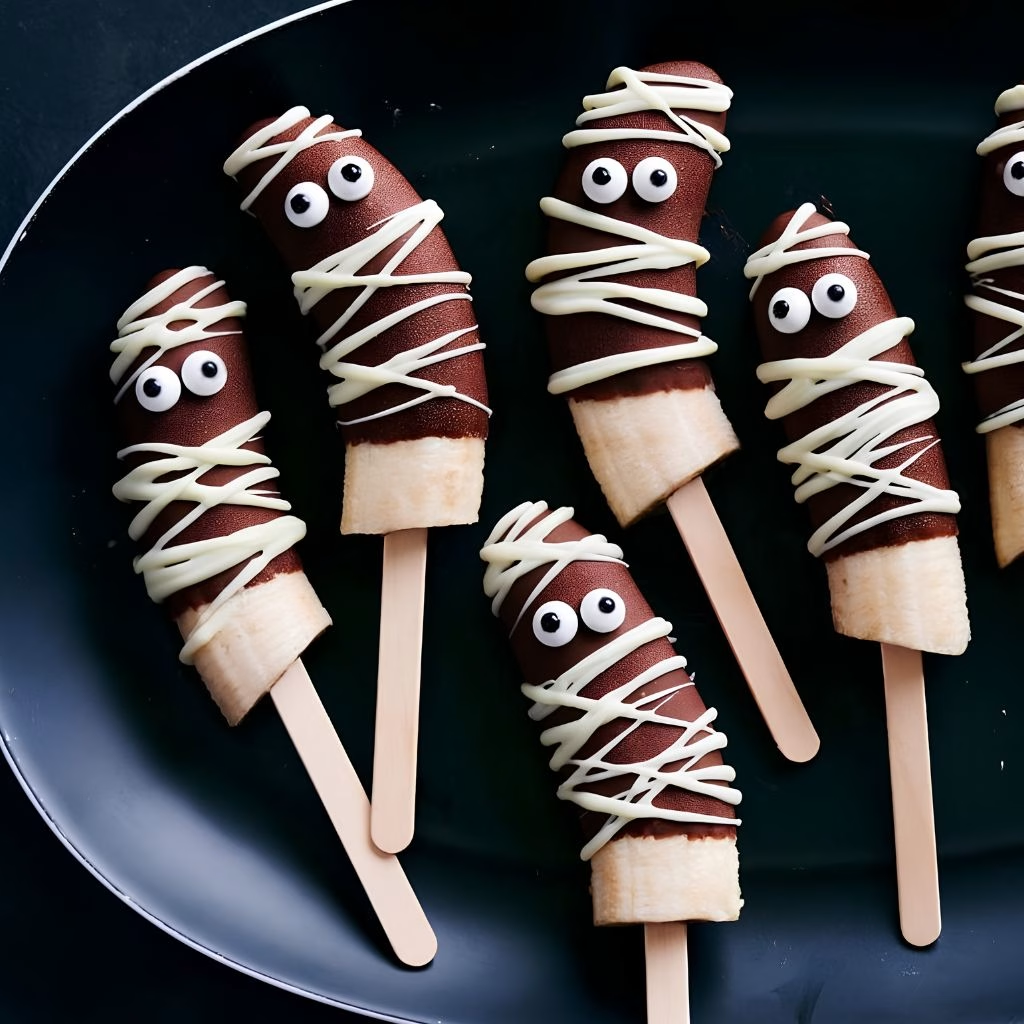
Once all the pops are dipped, I grab a spoon and drizzle white chocolate diagonally over and under the candy eyes, switching the angle each time to mimic wrapped bandages. I like mixing thick and thin lines here, it genuinely makes the mummy look more convincing. Let the drizzle set for a couple of minutes before moving the tray.
Step 6: Serve or Refreeze
At this point, my banana mummies are ready to eat right away, or I slide the tray back into the freezer if I’m not serving them immediately. I never put these in the fridge instead of the freezer, since the banana turns watery and mushy that way. Frozen is really the only way to keep that firm, popsicle-like bite.
Additional Tips for Making This Recipe Better
I’ve made this recipe more times than I can count now, and here’s what actually makes a difference in my kitchen:
- I always keep half my bananas in the freezer while I decorate the other half, so nothing gets soft and slides off the stick.
- I never microwave chocolate in long bursts anymore. Stirring every 30 seconds is what keeps it glossy instead of grainy.
- I add the candy eyes the second the chocolate is dipped, because if I wait even a minute, they won’t stick properly.
- I use a spoon instead of a piping bag for the drizzle. It’s messier looking, which honestly makes the “bandages” look more realistic.
- I pick the biggest, ripest (but still firm) bananas I can find. Overripe, mushy ones are a nightmare to skewer and dip cleanly.
Common Mistakes to Avoid
- I skipped freezing the bananas fully once, and the chocolate just slid right off. Don’t rush this step, give it the full hour.
- I microwaved my chocolate for a full minute straight early on, and it seized up into a clumpy mess. Stick to 30-second bursts.
- I tried refrigerating leftovers instead of freezing them, and the bananas turned watery and sad by morning. Freezer only.
- I left too little space between bananas on the tray, and a few stuck together while freezing. Give each one its own space.
- I forgot the coconut oil once thinking it wasn’t necessary, and the chocolate was way too thick to drizzle smoothly. It’s a small step that makes a real difference.
How to Serve Halloween Banana Mummy Recipe?
I like arranging my banana mummies standing upright in a foam block or a shallow dish filled with black or orange sprinkles, so they look like they’re “standing” at a spooky little graveyard scene. A platter lined with black parchment paper also makes the white and dark chocolate really pop visually.
For parties, I’ll set them out alongside my Halloween Chocolate Pretzel Spider Web Recipe so guests get a mix of textures on the dessert table. A light dusting of orange or purple sanding sugar on the serving tray adds a nice festive touch too.
Variations
- Invert the colors: coat the banana in white chocolate first, then drizzle a dark chocolate wrap on top for a different look.
- Peanut butter mummies: microwave peanut butter with a touch of coconut oil and use it as the base coating instead of chocolate.
- Ghost version: cover the banana in all white chocolate, add the eyes, then draw a small mouth with a toothpick dipped in dark chocolate.
- Bite-sized mummies: slice bananas into rounds instead of spears, freeze, then dip and wrap each one individually.
- Lower-sugar option: skip the full chocolate coating and just add a light drizzle plus eyes directly onto the plain frozen banana.
- Dairy-free swap: use a dairy-free dark chocolate chip brand, since most semi-sweet chips are naturally dairy-light or dairy-free already.
Nutritional Information
Here’s roughly what you’re looking at per mummy pop, based on the ingredients above:
- Calories: about 185 kcal
- Protein: about 2.5g
- Carbohydrates: about 25.5g
- Fat: about 10.7g
Make Ahead and Storage
I always make these a day or two ahead of when I actually need them, since they store beautifully in the freezer. Once the chocolate has fully set, I transfer the pops into an airtight container or a freezer bag, separating layers with parchment paper so they don’t stick together.
They’ll stay good in the freezer for up to 2 months, so this is genuinely a great make-ahead Halloween treat. I don’t recommend thawing them at room temperature for more than a few minutes, since the banana softens fast once it’s out of the cold. Just pull them out right before serving and they’re ready to go.
Why You’ll Love This Recipe?
This recipe has become a Halloween staple in my house for a handful of reasons:
- It’s genuinely fast: between the short prep and the fact that the freezer does most of the “work,” I’m never stuck in the kitchen for hours.
- It’s kid-friendly: my kids love dipping and drizzling the bananas themselves, it’s a mess but a fun one.
- It’s easy to customize: whether it’s swapping colors, adding peanut butter, or going lower-sugar, I can tweak this recipe depending on who I’m serving.
- It travels well: since these stay frozen, I can make them ahead for school parties or potlucks without worrying about them melting on the counter.
- It feels a little healthier: compared to candy-heavy Halloween treats, these are still mostly fruit, which makes me feel a bit better about handing them out.
FAQs
Can I use frozen bananas instead of fresh ones?
I always start with fresh bananas and freeze them myself during the recipe, since pre-frozen bananas can get mushy and are harder to skewer cleanly.
Why did my chocolate coating crack instead of staying smooth?
This usually happens if the chocolate is too thick or the banana isn’t fully frozen. Adding coconut oil and freezing bananas solid fixes both issues.
Can I make these ahead of time for a party?
Yes, I make mine up to two days ahead and store them in the freezer in an airtight container until I’m ready to serve.
What can I use instead of candy eyeballs?
I’ve used mini chocolate chips or small white candy-coated pieces with a dot of dark chocolate in the center when I couldn’t find candy eyes.
Do these banana mummies work for a school Halloween party?
Absolutely, I’ve brought these to my kid’s class before. Just keep them in a cooler with ice packs on the way, since they need to stay cold to hold their shape.

Halloween Banana Mummy Recipe
Ingredients
Method
- I start by peeling my bananas and slicing each one in half horizontally, then slicing those halves lengthwise so I end up with 8 pieces total. I push a popsicle stick into the cut end of each piece so they’re easy to hold later. Working with big, ripe (but not mushy) bananas makes this part much smoother.
- I arrange all 8 banana pieces on a parchment-lined baking sheet, making sure they aren’t touching. Then I pop the tray into the freezer for about an hour, until the bananas are completely solid. This step matters because frozen bananas hold their shape and are so much easier to dip without falling apart.
- While the bananas freeze, I melt my dark chocolate chips with a teaspoon of coconut oil in one bowl, and my white chocolate chips with half a teaspoon of coconut oil in another. I microwave both in 30-second bursts, stirring after every round instead of rushing it. Going slowly like this keeps the chocolate smooth instead of seizing up or burning.
- Once the bananas are frozen solid, I dip each one into the dark chocolate until it’s fully coated, working quickly since the chocolate sets fast against the cold banana. Right after dipping, I press two candy eyeballs near the top of each pop before the chocolate hardens. I set each finished piece back on the parchment paper to firm up.
- Once all the pops are dipped, I grab a spoon and drizzle white chocolate diagonally over and under the candy eyes, switching the angle each time to mimic wrapped bandages. I like mixing thick and thin lines here, it genuinely makes the mummy look more convincing. Let the drizzle set for a couple of minutes before moving the tray.
- At this point, my banana mummies are ready to eat right away, or I slide the tray back into the freezer if I’m not serving them immediately. I never put these in the fridge instead of the freezer, since the banana turns watery and mushy that way. Frozen is really the only way to keep that firm, popsicle-like bite.
Notes
- I always keep half my bananas in the freezer while I decorate the other half, so nothing gets soft and slides off the stick.
- I never microwave chocolate in long bursts anymore. Stirring every 30 seconds is what keeps it glossy instead of grainy.
- I add the candy eyes the second the chocolate is dipped, because if I wait even a minute, they won’t stick properly.
- I use a spoon instead of a piping bag for the drizzle. It’s messier looking, which honestly makes the “bandages” look more realistic.
- I pick the biggest, ripest (but still firm) bananas I can find. Overripe, mushy ones are a nightmare to skewer and dip cleanly.