I first made Watermelon Star Bites Recipe for a backyard cookout, and they disappeared before the burgers even hit the grill. I love how something so simple, just watermelon and a cookie cutter, can turn heads at any summer party. My kids beg me to make these every single week once the weather warms up.
There’s zero cooking involved, which makes this my go-to when I’m short on time but still want something that feels special. Once you try this recipe, I promise it’ll become a summer staple in your house too.
Ingredients
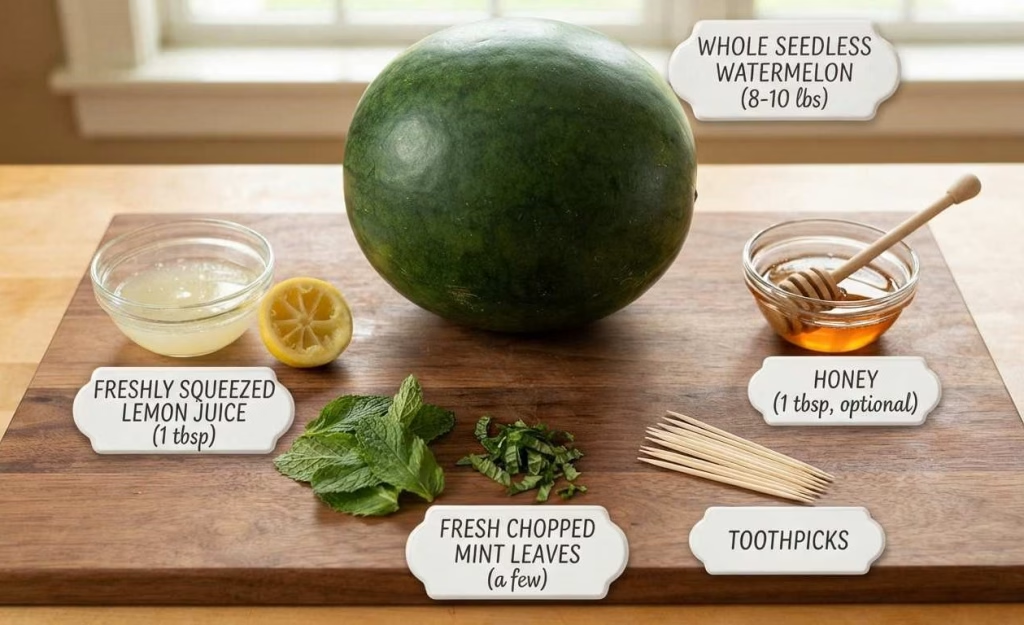
- 1 whole seedless watermelon (about 8-10 lbs) – Pick one that feels heavy for its size; that usually means it’s juicy and ripe.
- 1 tablespoon lemon juice, freshly squeezed – Fresh juice brightens the flavor far better than the bottled kind, which can taste flat.
- 1 tablespoon honey (optional) – A light drizzle boosts sweetness if your melon isn’t quite peak-season sweet.
- A few fresh mint leaves, chopped – Skip dried mint here; fresh leaves give a much cleaner, more fragrant finish.
- Toothpicks or small skewers – Handy if you want to serve these as easy grab-and-go bites.
Note: These measurements make roughly 20-25 star bites, depending on the size of your cookie cutter and how thick you slice your watermelon.
Variations
- Dairy-free and vegan friendly: This recipe is naturally free of dairy and animal products, so no swaps needed.
- Sugar-free option: Skip the honey entirely and let the watermelon’s natural sweetness shine on its own.
- Flavor boost: Sprinkle a pinch of tajin or chili-lime seasoning over the stars for a sweet-and-spicy twist.
- Herb swap: Try fresh basil instead of mint for a slightly peppery, unexpected note.
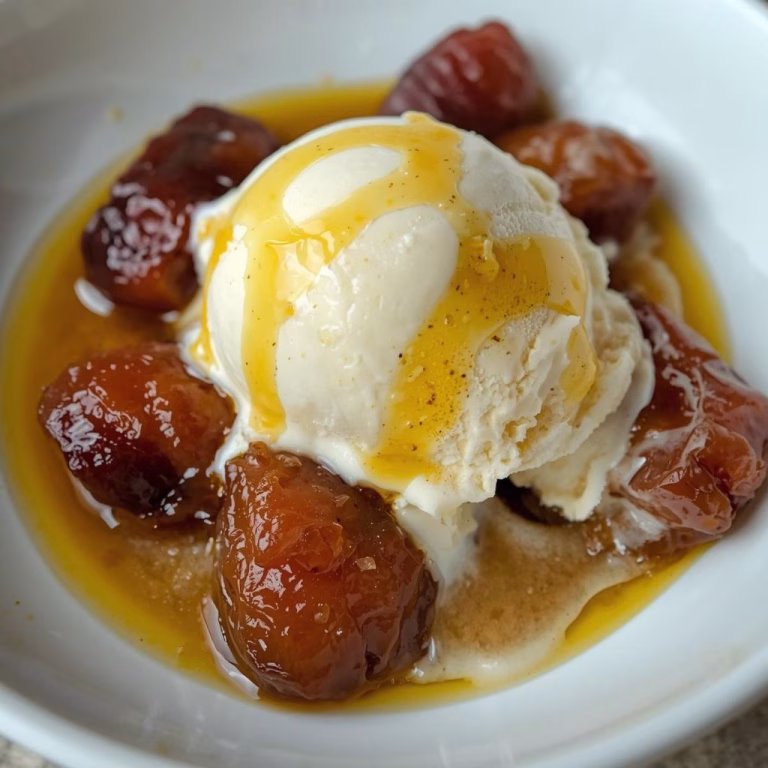
- Extra festive: Pair with star-shaped blueberry or feta cheese cutouts for a red, white, and blue platter, or serve them alongside Hot Honey Peaches and Cream Dump Cake Recipe for a colorful summer dessert spread.
Cooking Time
- Prep Time: 15 minutes
- Cooking Time: 0 minutes (no cooking required)
- Total Time: 15 minutes
Equipment You Need
- Star-shaped cookie cutter – Cuts clean, uniform star shapes out of your watermelon slices.
- Sharp chef’s knife – Helps you slice the watermelon into flat, even slabs before cutting shapes.
- Cutting board – Gives you a stable, clean surface to work on.
- Paper towels – Useful for patting down excess juice so the stars aren’t overly wet.
- Serving platter – Displays your finished stars in an appealing, party-ready way.
How to Make Watermelon Star Bites Recipe?
Making watermelon star bites is refreshingly simple and takes only a few basic steps. You don’t need any special culinary skill, just a sharp knife and a cookie cutter. Here’s exactly how I put mine together every time.
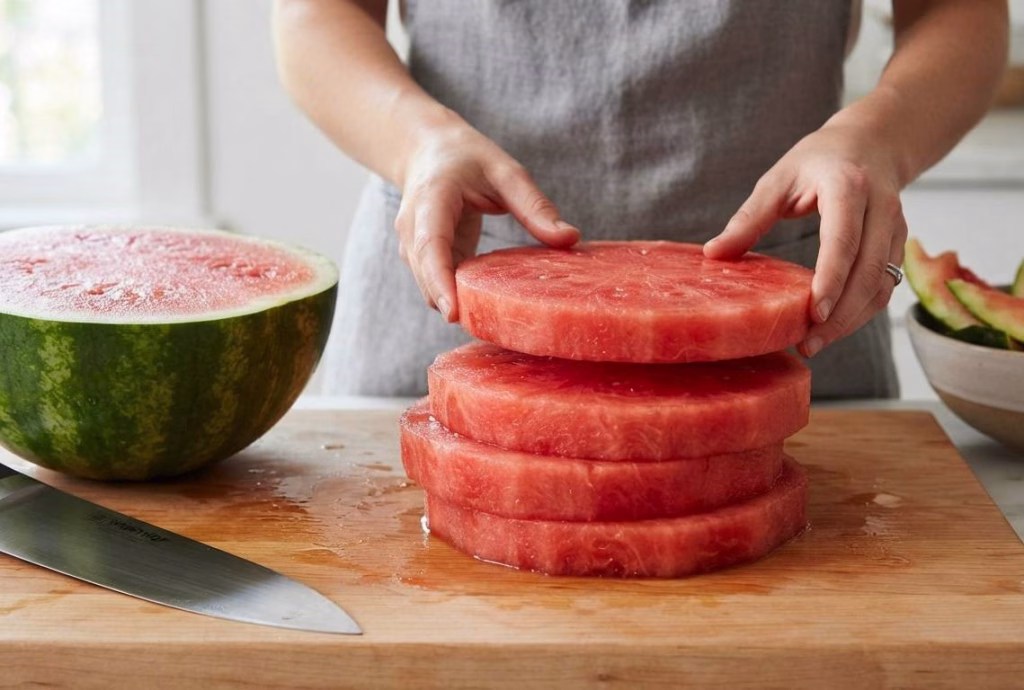
Step 1: Slice the Watermelon
Start by cutting your watermelon into thick, flat slabs, about one inch thick. Remove the rind from each slab so you’re left with a clean, flat surface of fruit. This makes it much easier to press your cookie cutter through cleanly.
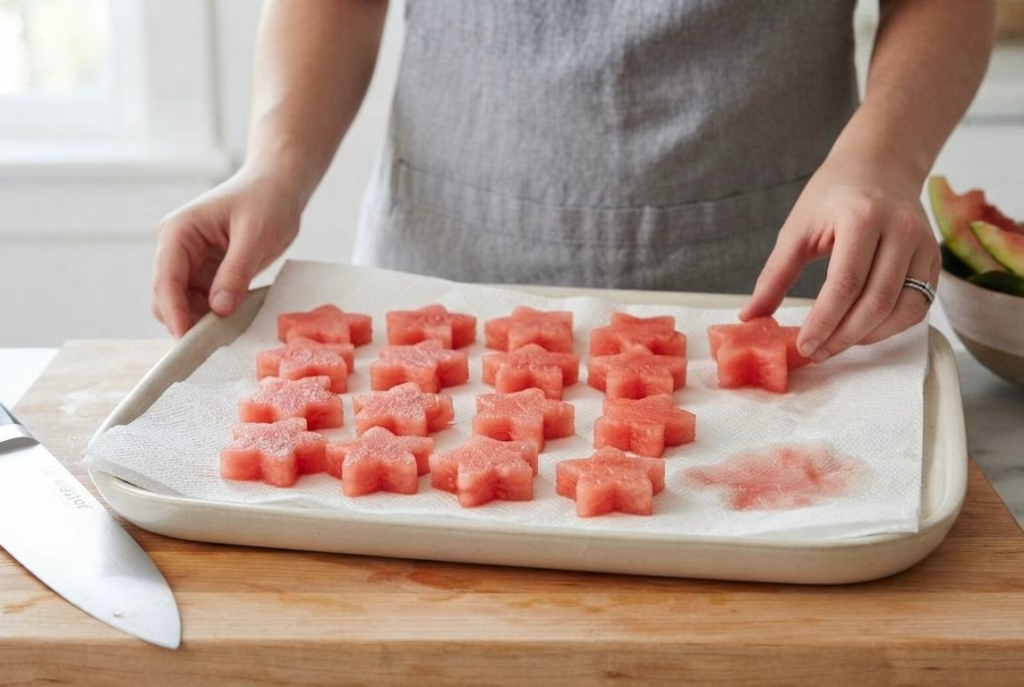
Step 2: Cut Out the Stars
Press your star-shaped cookie cutter firmly into each watermelon slab. Wiggle it gently to release the star shape without tearing the fruit. Repeat this across all your slabs until you’ve used up most of the watermelon.

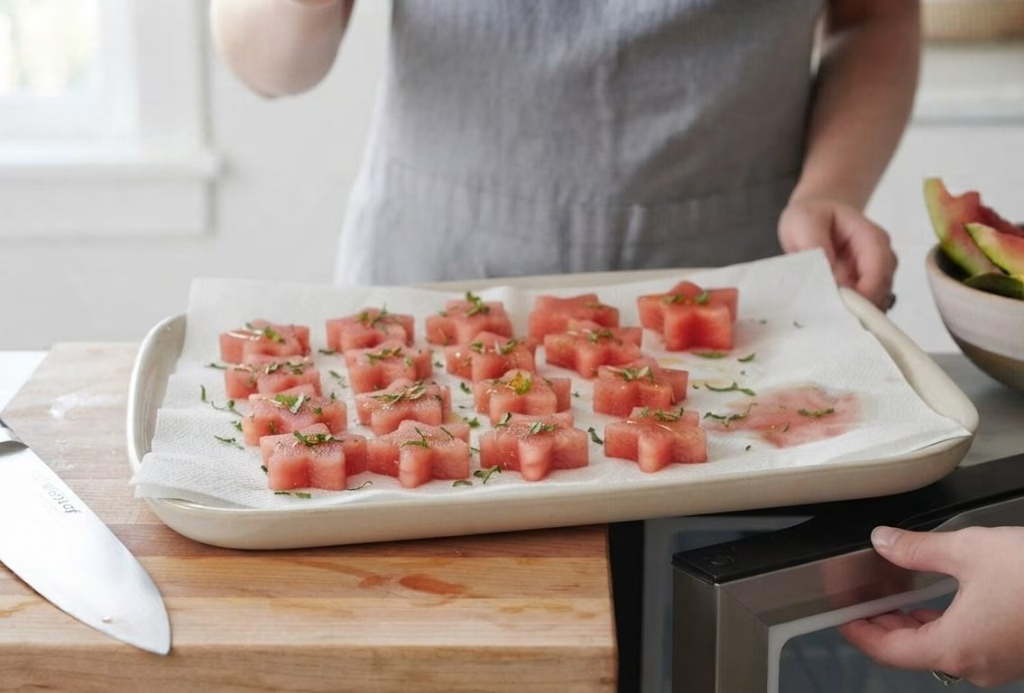
Step 3: Blot Excess Juice
Lay your watermelon stars on a paper towel-lined tray for a few minutes. This step pulls away extra juice so the stars hold their shape better. It also keeps your serving platter from turning into a puddle.
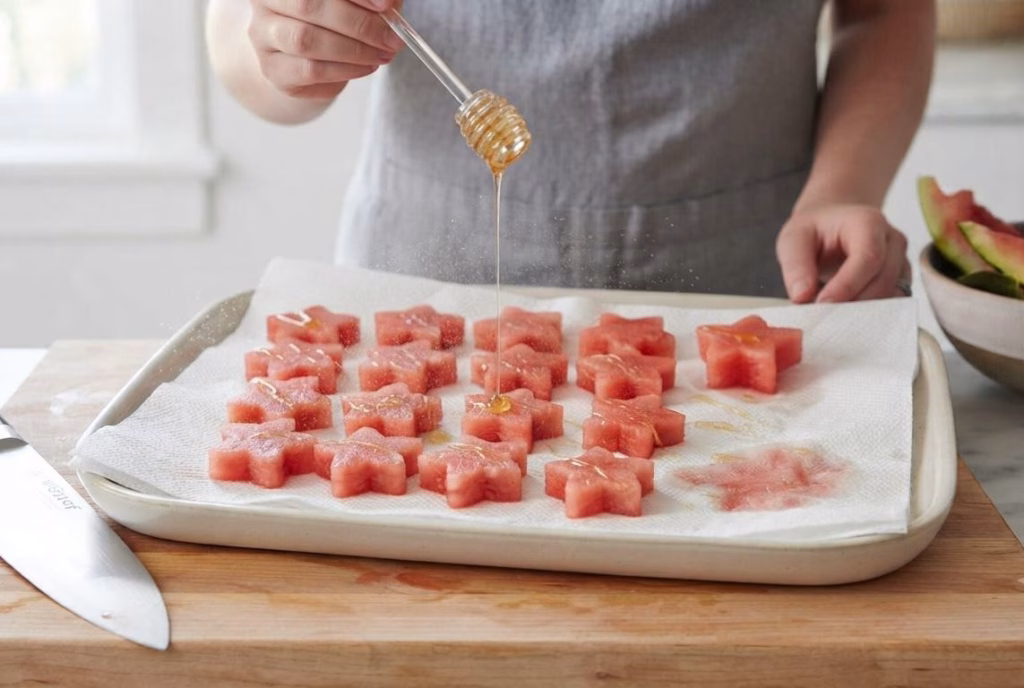
Step 4: Add Lemon and Honey
Drizzle the fresh lemon juice lightly over the watermelon stars. If you’re using honey, drizzle that on now too. This adds a subtle flavor lift without overpowering the watermelon’s natural sweetness.
Step 5: Garnish and Chill
Scatter chopped fresh mint over the top for a pop of color and fragrance. Place the tray in the refrigerator for at least 10 minutes before serving. Chilling makes the bites extra refreshing on a hot day.
Step 6: Serve and Enjoy
Arrange the chilled stars on your serving platter however you like. Add toothpicks if you want an easy, mess-free way for kids to grab them. Serve immediately for the best texture and flavor.
Additional Tips for Making This Recipe Better
I’ve made these more times than I can count, and I’ve picked up a few tricks along the way that really make a difference.
- I always chill my watermelon before cutting; it holds its shape far better than room-temperature fruit.
- I pick seedless watermelon every time, since picking out seeds while cutting stars gets tedious fast.
- I save the leftover watermelon scraps for smoothies instead of tossing them, so nothing goes to waste.
- I keep my cookie cutter slightly wet, which helps it glide through the fruit without sticking.
- I never skip the paper towel step; it genuinely keeps the platter from getting soggy.
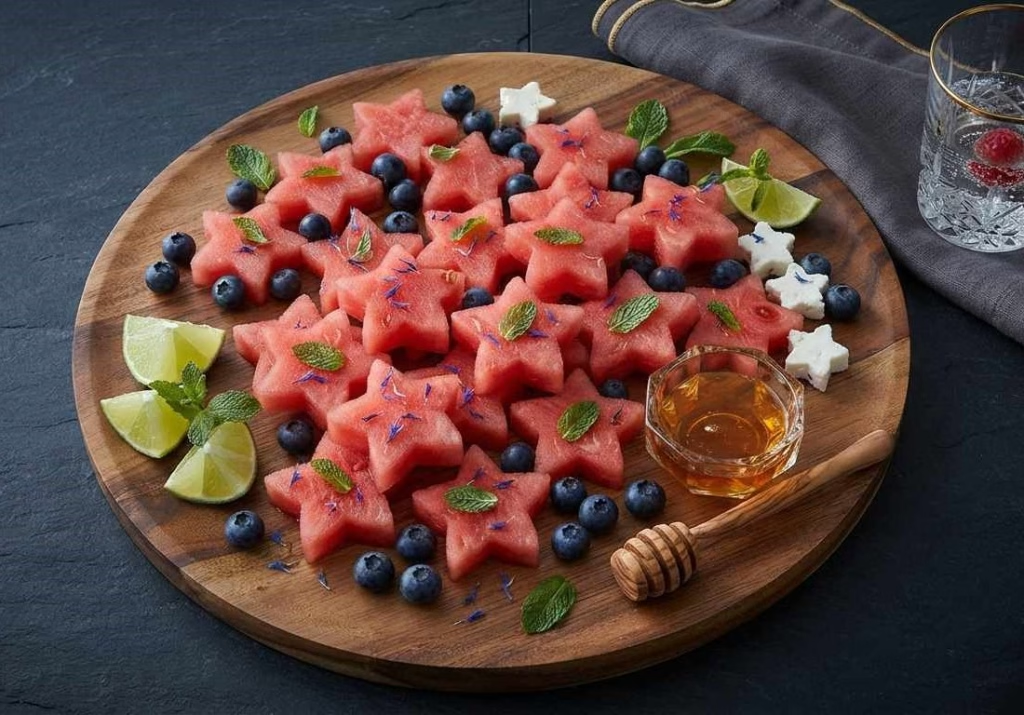
How to Serve Watermelon Star Bites?
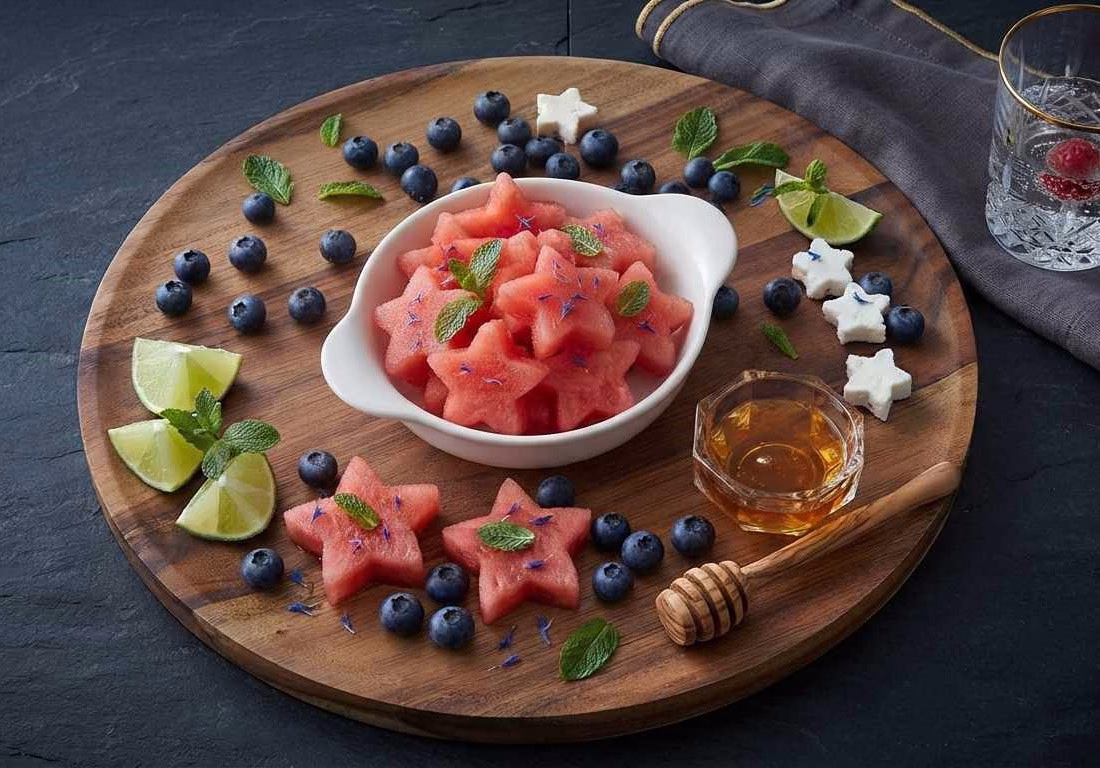
I love serving these on a white or wooden platter, since the bright red pops beautifully against a plain background. Layering the stars slightly overlapping, like fallen leaves, creates a fuller, more generous look. For parties, I like scattering a few extra mint leaves and lime wedges around the edges for color.
If I’m hosting a themed party, I’ll pair the watermelon stars with blueberries and star-shaped feta or mozzarella for a red-white-and-blue effect. Skewering a few stars onto toothpicks alongside a berry also makes for an easy, elegant finger food.
A small bowl of extra honey on the side gives guests the option to dip if they want more sweetness, and a creamy Butterscotch Pudding Recipe makes another crowd-pleasing dessert for the table.

Nutritional Information
Watermelon star bites are naturally light, hydrating, and low in calories, making them a guilt-free treat for kids and adults alike. Here’s a rough breakdown per serving (about 5-6 star bites):
- Calories: 45-55 kcal
- Protein: 1g
- Carbohydrates: 12g
- Fat: 0g
Make Ahead and Storage
Make Ahead: You can cut the watermelon stars up to a day in advance and store them in the fridge before adding the lemon, honey, and mint. This saves time on busy party days while keeping the fruit fresh.
Storage: Keep leftover watermelon stars in an airtight container lined with paper towels in the refrigerator. They stay fresh and flavorful for up to 3 days, though the texture is best within the first 24 hours.
Freezing: I don’t recommend freezing these, since watermelon turns mushy and watery once thawed. If you do freeze extra scraps, they work best blended into a slushy or smoothie rather than eaten as bites.
Why You’ll Love This Recipe
This watermelon star bites recipe checks every box for an easy, crowd-pleasing summer snack. Here’s why it keeps earning a spot on my table.
- It takes only 15 minutes, so I can whip up a party-ready snack even when I’m short on time.
- It requires zero cooking, which makes it perfect for hot days when I don’t want to touch the stove.
- It’s naturally dairy-free, vegan, and easy to make sugar-free, so it fits almost any dietary need.
- It’s endlessly customizable, whether I’m adding tajin for spice or pairing it with berries for a patriotic theme.
- It’s a guaranteed hit with kids, since the fun star shape makes fruit feel like a treat instead of a chore.
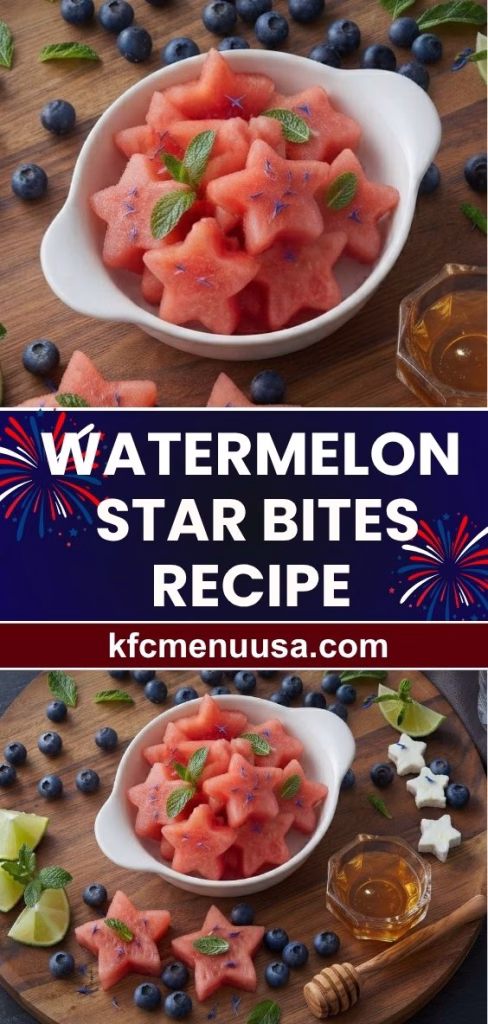
Watermelon Star Bites Recipe
Ingredients
Method
- Start by cutting your watermelon into thick, flat slabs, about one inch thick. Remove the rind from each slab so you’re left with a clean, flat surface of fruit. This makes it much easier to press your cookie cutter through cleanly.
- Press your star-shaped cookie cutter firmly into each watermelon slab. Wiggle it gently to release the star shape without tearing the fruit. Repeat this across all your slabs until you’ve used up most of the watermelon.
- Lay your watermelon stars on a paper towel-lined tray for a few minutes. This step pulls away extra juice so the stars hold their shape better. It also keeps your serving platter from turning into a puddle.
- Drizzle the fresh lemon juice lightly over the watermelon stars. If you’re using honey, drizzle that on now too. This adds a subtle flavor lift without overpowering the watermelon’s natural sweetness.
- Scatter chopped fresh mint over the top for a pop of color and fragrance. Place the tray in the refrigerator for at least 10 minutes before serving. Chilling makes the bites extra refreshing on a hot day.
- Arrange the chilled stars on your serving platter however you like. Add toothpicks if you want an easy, mess-free way for kids to grab them. Serve immediately for the best texture and flavor.
Notes
- I always chill my watermelon before cutting; it holds its shape far better than room-temperature fruit.
- I pick seedless watermelon every time, since picking out seeds while cutting stars gets tedious fast.
- I save the leftover watermelon scraps for smoothies instead of tossing them, so nothing goes to waste.
- I keep my cookie cutter slightly wet, which helps it glide through the fruit without sticking.
- I never skip the paper towel step; it genuinely keeps the platter from getting soggy.