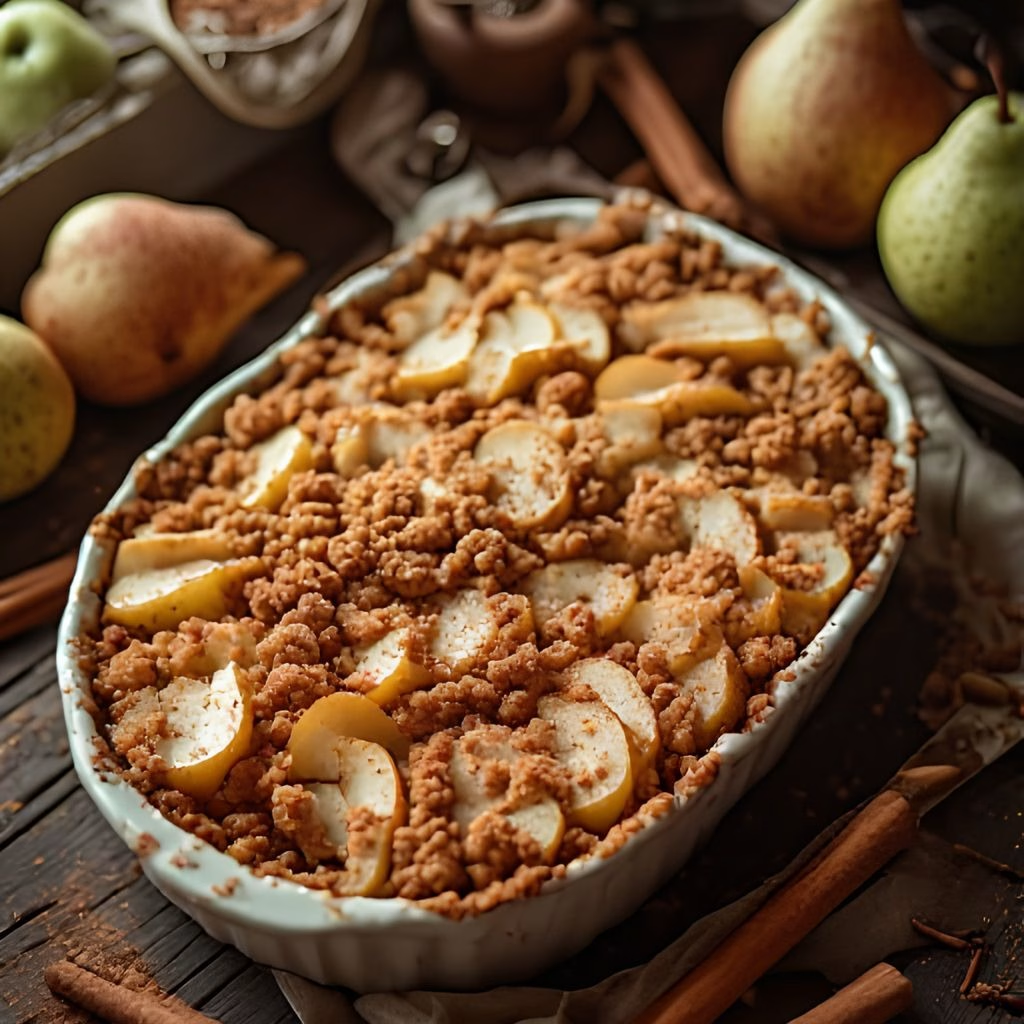
I made this Cinnamon Pear Crumble Recipe on a chilly Sunday afternoon, and my whole kitchen smelled like a bakery within minutes. I’ve made a lot of fruit crumbles over the years, but something about the juicy pears mixed with warm cinnamon and ginger just hits differently.
It’s simple enough for a weeknight treat, yet it feels special enough for a holiday table. For a cozy fall menu, Turkey Meatballs in Pumpkin Sage Sauce Recipe also brings those same warm seasonal flavors to the table. I promise once you try this one, apple crumble is going to have some real competition. Let me walk you through exactly how I make it at home.
Cooking Time
- Prep Time: 20 minutes
- Cooking Time: 45-50 minutes
- Total Time: 1 hour 10 minutes
Ingredients
For the Pear Filling
- 5 large pears, peeled and sliced – I like Bartlett pears, but firm, slightly under-ripe ones hold their shape best
- 1 tablespoon lemon juice – keeps the sliced pears from browning while you prep everything else
- ¼ cup maple syrup – adds natural sweetness and a subtle caramel-like depth
- ¼ cup brown sugar – helps the pears release their juices and turn syrupy as they bake
- 1 teaspoon cinnamon – the star spice that makes this crumble taste like fall
- ½ teaspoon ground ginger – adds a gentle warmth that pairs beautifully with pear
- ¼ teaspoon salt – balances the sweetness so the filling doesn’t taste flat
- 1 teaspoon vanilla extract – rounds out the flavor with a cozy background note
- 1 tablespoon cornstarch – thickens the juices so your filling isn’t watery
For the Crumble Topping
- ½ cup butter, softened – the base of a rich, tender crumble; don’t melt it, just soften it
- ½ cup white sugar – gives the topping its light sweetness and helps it crisp up
- 1 to 1¼ cups all-purpose flour – start with the smaller amount and add more only if needed
- 1 teaspoon cinnamon – ties the topping’s flavor back to the filling
- ½ teaspoon salt – keeps the buttery topping from tasting too sweet
Note: This recipe serves about 8-10 people, depending on portion size.
Equipment You Need
- 9-inch pie dish – holds the pear filling and crumble topping as it bakes
- Large mixing bowl – for tossing the sliced pears with the filling ingredients
- Medium mixing bowl – for combining the butter, sugar, and flour into a crumble
- Fork or pastry cutter – helps work the butter into the flour without overmixing
- Vegetable peeler – makes peeling the pears quick and even
- Cutting board and sharp knife – for coring and slicing the pears
- Baking sheet – place under the pie dish to catch any bubbling juices in the oven
How to Make Cinnamon Pear Crumble Recipe?
This pear crumble comes together in three simple stages: prepping the fruit, mixing the topping, and baking everything until golden. None of the steps are complicated, and most of the work is just slicing and stirring. Here’s exactly how I do it every time.
Step 1: Preheat the Oven
Start by preheating your oven to 350°F and setting out a 9-inch pie dish. I don’t bother greasing mine since the butter in the topping keeps things from sticking. Getting the oven ready first means you’re not waiting around once your filling and topping are done.
Step 2: Prep the Pears
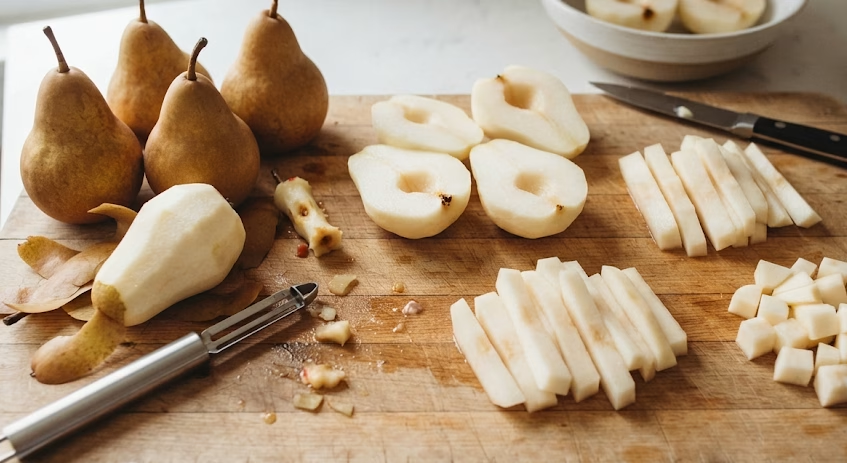
Peel and core all five pears, then slice them into strips or cubes, whichever you prefer. I usually slice mine into strips and cut each one in half so they cook evenly. Firm pears actually work better here since they hold their shape instead of turning mushy in the oven.
Step 3: Mix the Filling
Toss the sliced pears into a large mixing bowl with the lemon juice, maple syrup, brown sugar, cinnamon, ginger, salt, vanilla, and cornstarch. Stir everything together until the pears are evenly coated. Set this bowl aside while you make the crumble topping.
Step 4: Make the Crumble Topping
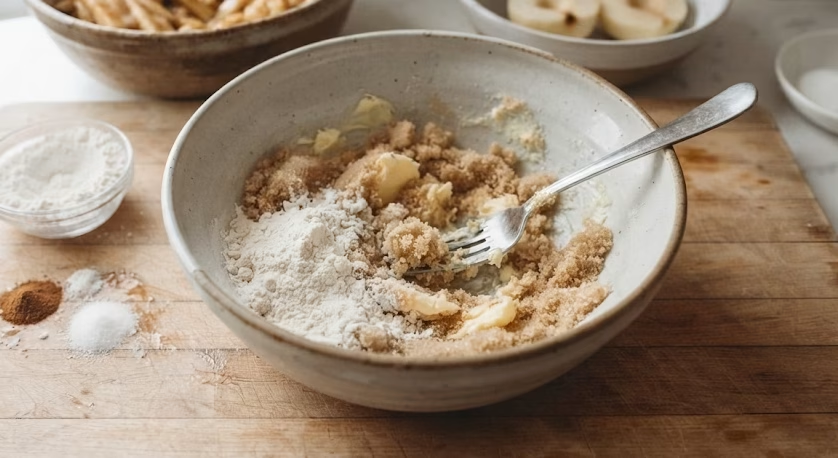
In a separate bowl, mash the softened butter and sugar together with a fork until well combined. Add in 1 cup of flour first, along with the cinnamon and salt, mixing until it looks crumbly. If it still feels too wet, sprinkle in a bit more flour, up to a ¼ cup extra.
Step 5: Assemble and Bake
Pour the coated pears into your pie dish, spreading them out evenly. Scatter the crumble topping over the top in an even layer. Bake, uncovered, for 45 to 50 minutes, until the topping turns golden brown and the filling bubbles at the edges.
Step 6: Cool and Serve
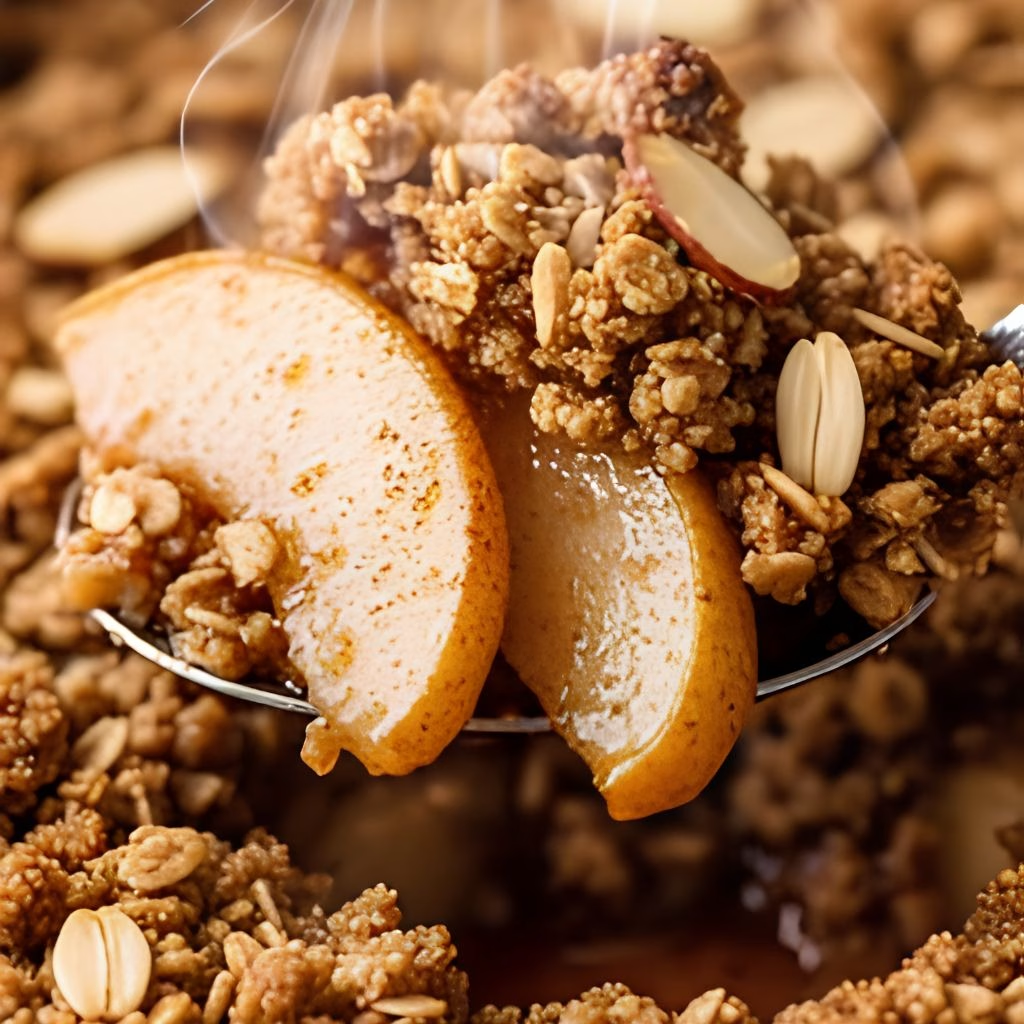
Let the crumble rest for about 10 minutes once it’s out of the oven so the juices have time to settle. This makes it easier to scoop without everything running together. Serve warm with a scoop of vanilla ice cream or a dollop of whipped cream on top.
Additional Tips for Making This Recipe Better
I’ve made this crumble more times than I can count, and here’s what I’ve learned along the way:
- I always use firmer pears instead of very ripe ones since they hold their shape better and don’t turn to mush while baking.
- I peel my pears every time because the texture is so much smoother without the skin, just like I do with apple desserts.
- I set my pie dish on top of a baking sheet before it goes in the oven since the filling tends to bubble over and drip.
- I start with the smaller amount of flour in the topping and only add more if it feels too sticky to work with.
- I let the crumble cool for a few minutes before serving so the filling has time to thicken up a bit.
Common Mistakes to Avoid
Here are a few slip-ups I’ve made myself, so you can skip them:
- I once used overripe pears and ended up with a mushy, watery filling, so now I always reach for firmer ones.
- I forgot the cornstarch one time and the filling turned out really runny, so don’t skip that step.
- I overmixed my crumble topping once and it turned into a paste instead of staying crumbly, so mix just until combined.
- I didn’t peel my pears the first time I made this and the texture felt tough and stringy in every bite.
- I skipped the baking sheet underneath once and had a sticky oven mess to clean up afterward.
How to Serve Cinnamon Pear Crumble?
I love serving this crumble warm, straight out of the oven, with a generous scoop of vanilla ice cream melting right on top. A dusting of cinnamon or a drizzle of caramel sauce makes it look extra inviting if you’re serving guests. For a lighter option, a spoonful of whipped cream or a splash of cold heavy cream poured over each portion works beautifully too.
I like to serve it in individual bowls so everyone gets a good mix of crispy topping and juicy pear filling in every bite. If you’re putting together a larger fall meal, Orange Cumin Roast Chicken Recipe can make a flavorful savory centerpiece before this warm dessert.
Variations
- Swap the butter for a plant-based butter alternative to make this crumble dairy-free.
- Use a gluten-free all-purpose flour blend in the topping if you need this recipe to be gluten-free.
- Add a handful of chopped pecans or walnuts to the crumble topping for extra crunch.
- Mix in a few dried cranberries or raisins with the pears for a chewy, tart contrast.
- Reduce the brown sugar and maple syrup by about half if you prefer a less sweet dessert.
- Stir in a pinch of nutmeg or cardamom along with the cinnamon for a deeper spice flavor.
Nutritional Information
Here’s roughly what you can expect per serving of this cinnamon pear crumble:
- Calories: about 284 kcal
- Protein: about 2g
- Carbohydrates: about 50g
- Fat: about 10g
Make Ahead and Storage
You can prep the pear filling and crumble topping separately up to a day in advance, storing each in the fridge in airtight containers until you’re ready to bake. Once baked, this crumble keeps well in the fridge for about 3 days, though the topping will lose some of its crispiness the longer it sits. For freezing, let the baked crumble cool completely, then store it in a freezer-safe container for up to 2 months, thawing it in the fridge overnight before reheating. To reheat, pop it in the microwave for a quick warm-up, or place it under the broiler for a couple of minutes to bring some crispness back to the topping.
Why You’ll Love This Recipe?
This cinnamon pear crumble has quickly become one of my go-to fall desserts, and here’s why I think you’ll love it just as much:
- It comes together with simple pantry staples, so there’s no need for a special grocery trip before you can bake it.
- The flavors feel cozy and seasonal without being overly complicated, making it perfect for both casual nights and holiday gatherings.
- It’s easy to customize with different spices, mix-ins, or toppings depending on what you’re craving that day.
- The crumble topping gives you that satisfying contrast between a crisp top layer and a soft, juicy pear filling underneath.
- It reheats well, so you can enjoy the leftovers just as much as the first warm serving.
FAQs
How is this different from Jamie Oliver’s pear crumble?
Jamie Oliver’s version often leans on a more rustic, less-sweetened topping with simple pantry staples. My version adds maple syrup, cinnamon, and ginger for a warmer, more spiced flavor profile.
What makes this the best pear crumble recipe?
It balances a buttery, crisp topping with a naturally sweet, spiced pear filling that isn’t overly sugary. The combination of maple syrup and warm spices makes it stand out from a basic version.
How does this compare to an old fashioned pear crumble recipe?
Old fashioned versions usually keep things simple with just butter, flour, sugar, and pears. This recipe builds on that base with cinnamon, ginger, and maple syrup for extra depth.
Is this similar to Mary Berry’s pear crumble?
Mary Berry’s crumble tends to use a classic English-style topping, often with less spice. This recipe adds a warmer, more autumnal flavor with cinnamon and ginger mixed into both the filling and topping.
Can I make a simple pear crumble recipe from this one?
Yes, you can simplify it by skipping the ginger and vanilla and just using pears, sugar, cinnamon, and the basic crumble topping for a quicker, more minimal version.
Can I turn this into a simple pear crumble with oats?
Definitely. Just replace part of the flour in the topping with rolled oats for a heartier, crisp-style texture instead of the classic buttery crumble.
Can I use canned pears for a canned pear crumble?
Yes, drained canned pears work in a pinch, though you may want to reduce the added sugar slightly since canned pears are often packed in syrup.
Can this recipe be turned into a pear crumble cake?
You can turn the crumble topping into more of a cake-like layer by adding an egg and a splash of milk to the topping mixture, giving it a denser, cake-style texture over the pears.

Cinnamon Pear Crumble Recipe
Ingredients
Method
- Start by preheating your oven to 350°F and setting out a 9-inch pie dish. I don’t bother greasing mine since the butter in the topping keeps things from sticking. Getting the oven ready first means you’re not waiting around once your filling and topping are done.
- Peel and core all five pears, then slice them into strips or cubes, whichever you prefer. I usually slice mine into strips and cut each one in half so they cook evenly. Firm pears actually work better here since they hold their shape instead of turning mushy in the oven.
- Toss the sliced pears into a large mixing bowl with the lemon juice, maple syrup, brown sugar, cinnamon, ginger, salt, vanilla, and cornstarch. Stir everything together until the pears are evenly coated. Set this bowl aside while you make the crumble topping.
- In a separate bowl, mash the softened butter and sugar together with a fork until well combined. Add in 1 cup of flour first, along with the cinnamon and salt, mixing until it looks crumbly. If it still feels too wet, sprinkle in a bit more flour, up to a ¼ cup extra.
- Pour the coated pears into your pie dish, spreading them out evenly. Scatter the crumble topping over the top in an even layer. Bake, uncovered, for 45 to 50 minutes, until the topping turns golden brown and the filling bubbles at the edges.
- Let the crumble rest for about 10 minutes once it’s out of the oven so the juices have time to settle. This makes it easier to scoop without everything running together. Serve warm with a scoop of vanilla ice cream or a dollop of whipped cream on top.
Notes
- I always use firmer pears instead of very ripe ones since they hold their shape better and don’t turn to mush while baking.
- I peel my pears every time because the texture is so much smoother without the skin, just like I do with apple desserts.
- I set my pie dish on top of a baking sheet before it goes in the oven since the filling tends to bubble over and drip.
- I start with the smaller amount of flour in the topping and only add more if it feels too sticky to work with.
- I let the crumble cool for a few minutes before serving so the filling has time to thicken up a bit.